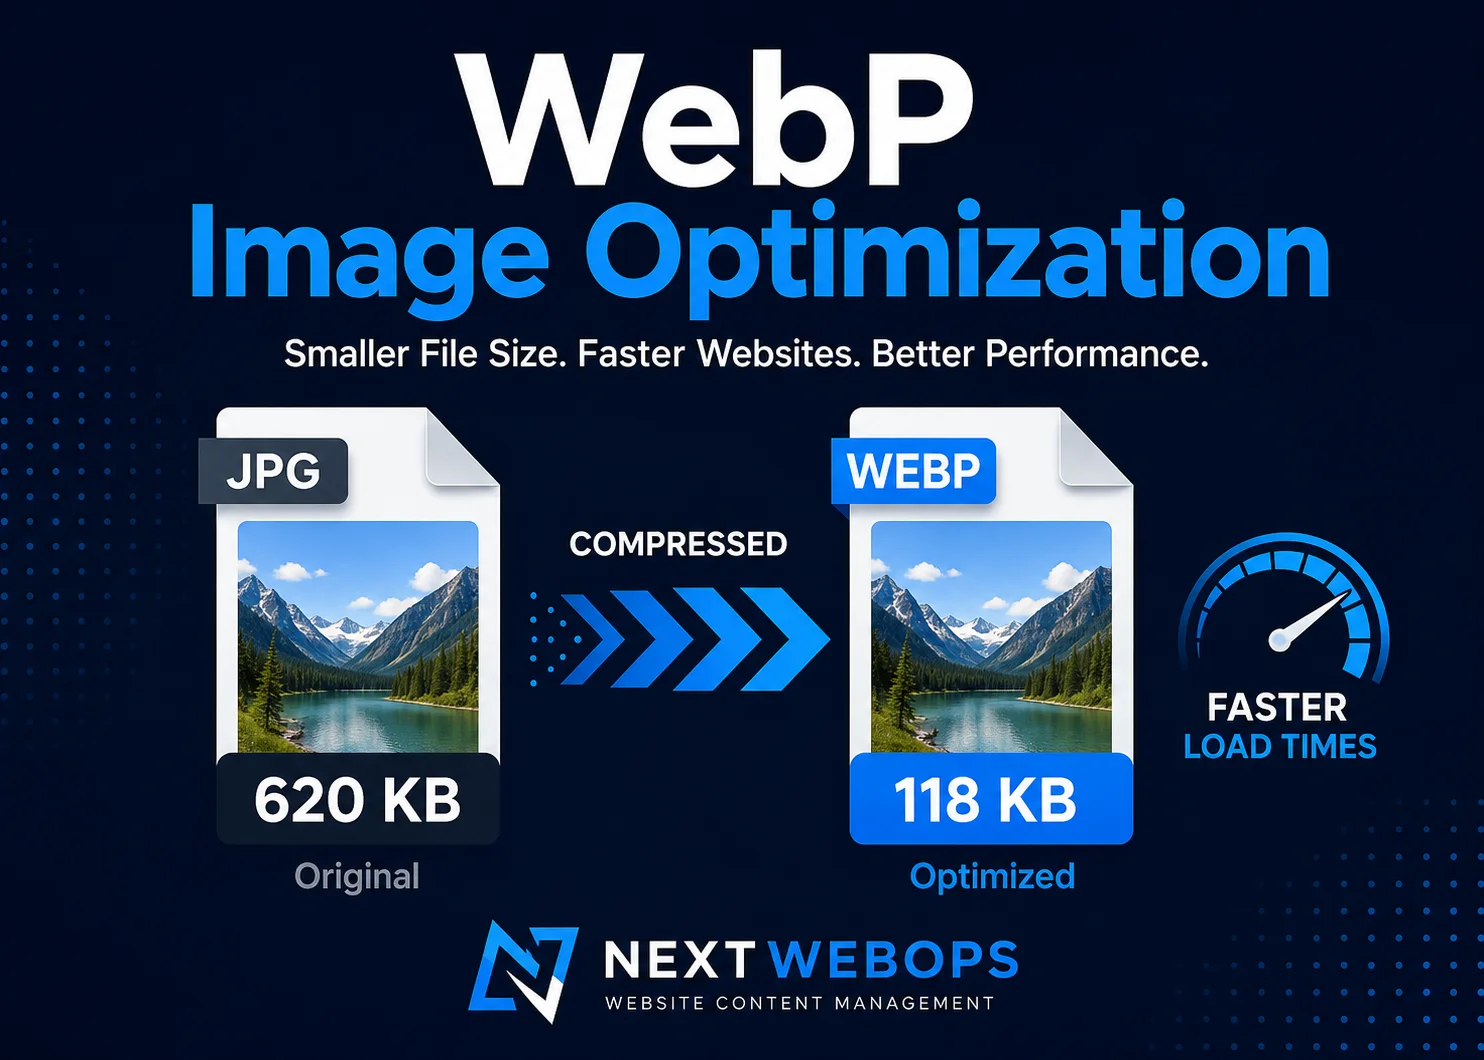
WebP image optimization is more than converting a JPEG or PNG file to the WebP format. A properly optimized WebP image should also have appropriate dimensions, sensible compression, good visual quality, descriptive image information, and correct implementation on the page.
That distinction matters because an oversized or poorly compressed WebP file can still slow down a website. Changing the file extension does not automatically solve image performance problems.
For businesses, agencies, and website managers publishing content regularly, the best approach is to treat image optimization as part of the complete publishing workflow. This guide explains how to optimize WebP images while balancing file size, visual quality, page performance, and SEO.
What Is WebP Image Optimization?
WebP image optimization is the process of preparing a WebP image so that it delivers the required visual quality without transferring unnecessary data to the visitor’s browser.
WebP supports both lossy and lossless compression. That makes it suitable for many photographs, graphics, screenshots, and images requiring transparency.
However, the image format is only one part of optimization. A complete workflow also considers:
- Image dimensions
- Compression level
- Visual quality
- File size
- Filename
- Alt text
- Responsive image delivery
- Lazy loading
- Published-page testing
For example, converting a 3500-pixel-wide JPEG into a 3500-pixel-wide WebP does not make sense if the website displays the image at only 800 pixels wide. Resizing the image before or during optimization can remove a large amount of unnecessary data.
Why Optimize WebP Images?
Images often account for a significant portion of the content a browser must download. Reducing unnecessary image bytes can therefore improve the overall loading experience, especially for visitors on slower connections or mobile devices.
Reduce Page Weight
Smaller image files reduce the amount of data transferred when someone opens a page. The benefit becomes more noticeable on pages containing multiple photographs, product images, screenshots, or large visual elements.
Improve Loading Performance
Properly sized and compressed images can load faster than unnecessarily large alternatives. Image optimization can therefore support broader website performance work and Core Web Vitals improvements.
Maintain Useful Visual Quality
Optimization should not mean making every image as small as technically possible. A heavily compressed image that looks blurry, creates artifacts, or makes text difficult to read has gone too far.
The objective is to find a useful balance between appearance and file size.
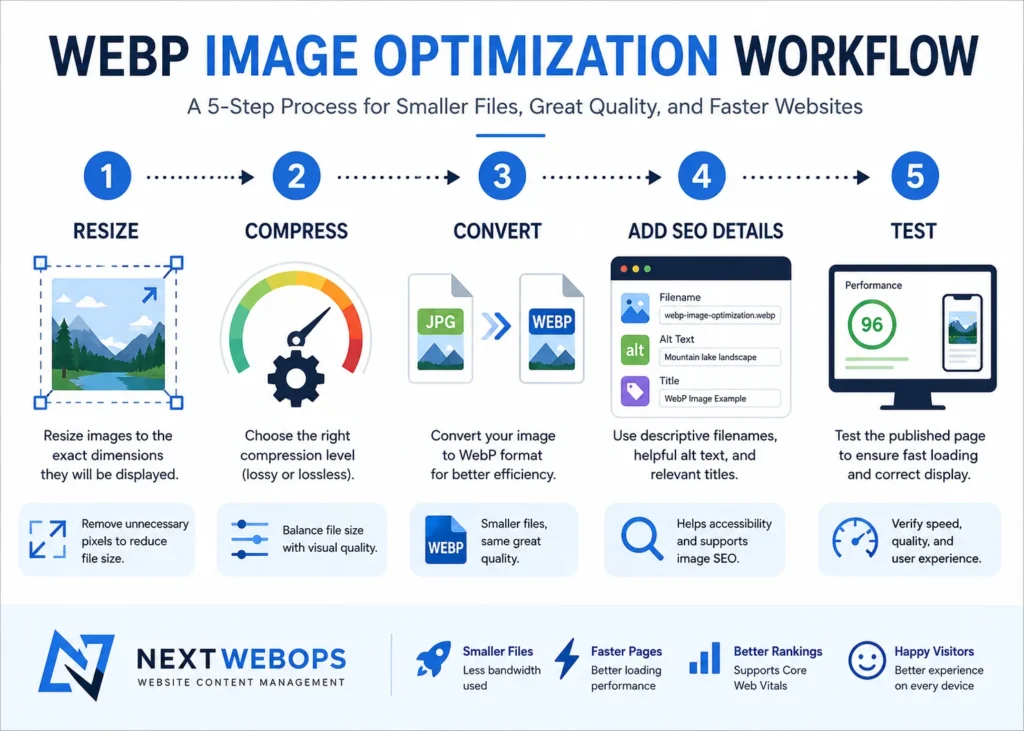
How to Optimize WebP Images Step by Step
1. Resize Images Before Converting Them
Start with image dimensions.
If a blog content area displays an image at roughly 700 pixels wide, uploading a 3000-pixel-wide source file is usually unnecessary unless the website has a specific high-resolution requirement.
Determine how large the image actually needs to appear in the layout, then prepare an appropriately sized source.
Resizing before compression also gives the encoder fewer pixels to process, which can dramatically reduce the final file size.
2. Choose Lossy or Lossless Compression
WebP supports both lossy and lossless compression, but they serve different purposes.
Lossy WebP is usually a good starting point for photographs and visually complex images. Some image information is discarded to achieve a smaller file.
Lossless WebP preserves the image data without lossy degradation. It may be useful for certain graphics, interface elements, screenshots, or images where precise detail matters.
Do not automatically select lossless because it sounds better. The resulting file may be larger than necessary for the image’s actual purpose.
3. Start With a Sensible WebP Quality Setting
There is no single WebP quality percentage that is correct for every image.
For photographs, a quality range around 75 to 85 can be a useful starting point. Thumbnails and less prominent images may tolerate stronger compression, while screenshots or graphics containing small text may require a higher quality setting.
Instead of treating the quality number as a rule, export the image and inspect it at the size users will actually see it.
Compare:
- Fine details
- Faces
- Gradients
- Edges
- Small text
- Brand colors
If you cannot notice a meaningful improvement at a much higher quality setting, the extra bytes may not be providing much value.
4. Remove Unnecessary Metadata
Images can contain metadata such as camera information and other embedded details. Some metadata is useful in specific workflows, but much of it may be unnecessary for ordinary website publishing.
A good image optimization workflow removes unnecessary information while preserving anything required for the website or organization.
5. Use Descriptive WebP Filenames
Do not upload images using filenames such as:
IMG_8427.webp
A descriptive filename gives the file useful context and keeps the media library easier to manage.
For an image demonstrating this article’s workflow, a better filename might be:
webp-image-optimization-workflow.webp
Keep filenames concise, descriptive, lowercase, and separated with hyphens.
Filename optimization is only one part of broader image SEO best practices. Avoid stuffing keywords into filenames simply because you want an image to rank.
6. Write Useful Alt Text
Alt text should describe the meaningful content or function of an image when a text alternative is appropriate.
For example, if an illustration shows an image being resized, compressed, and converted to WebP, useful alt text could be:
WebP image optimization workflow showing resizing, compression, and website testing.
That description is more useful than repeating the target keyword several times.
Decorative images may not need descriptive alt text. The correct approach depends on the role of the image on the page.
7. Use Responsive Image Sizes
Optimizing the original file is useful, but the browser should also receive an image appropriate for the visitor’s screen and layout.
Responsive image functionality allows a website to provide multiple image sizes so the browser can choose an appropriate version.
Content management systems such as WordPress often generate several sizes automatically. The important publishing check is making sure the page uses suitable generated sizes instead of unnecessarily serving the largest uploaded file everywhere.
8. Be Careful With Lazy Loading Above the Fold
Lazy loading can reduce unnecessary image downloads by delaying off-screen images until they are needed.
But the main image visible immediately when a page opens may need different treatment. Delaying a critical above-the-fold image can work against loading performance rather than improving it.
Use lazy loading strategically instead of applying it blindly to every image.
9. Test the Published Page
Optimization should not stop when the image is uploaded.
Open the finished page and confirm:
- The correct image displays
- The image is not blurry or overcompressed
- The displayed dimensions make sense
- The browser is not downloading an unnecessarily huge version
- Alt text is correct where required
- The image does not create layout problems
- Lazy loading behaves correctly
- The page performs well on mobile
Tools such as PageSpeed Insights and browser developer tools can help identify large image transfers and other performance issues.
Image checks can also be incorporated into a broader on-page SEO audit when reviewing existing pages.
WebP Quality vs. File Size: What Setting Should You Use?
The correct WebP setting depends on what the image contains and how prominently it appears.
| Image Type | Recommended Starting Approach |
|---|---|
| Photographs | Lossy WebP with moderate compression |
| Blog graphics | Moderate to higher quality depending on text and detail |
| Screenshots with small text | Higher quality or test lossless WebP |
| Thumbnails | More aggressive compression may be acceptable |
| Logos and icons | Consider SVG when the artwork is suitable for vector delivery |
The best workflow is simple: test the image rather than relying only on a quality slider.
Two WebP images exported at the same quality setting can have very different file sizes because their visual complexity is different.
WebP Image Optimization for WordPress
WordPress can work with WebP images, making the format practical for many blogs, service websites, and content-heavy sites.
A good WordPress workflow starts before the image reaches the Media Library.
Prepare the image by:
- Choosing appropriate dimensions
- Compressing it
- Checking visual quality
- Using a descriptive filename
- Uploading the optimized file
- Adding appropriate alt text
- Selecting a suitable image size in the page or post
Image optimization plugins and CDN-based tools can automate parts of this process, but automation does not eliminate the need for quality control.
For example, a plugin can compress an image but cannot always determine whether the original source was unnecessarily large, whether the image belongs in that position, whether its alt text is appropriate, or whether the wrong generated size was inserted into a post.
That is why image preparation should be part of a complete WordPress publishing checklist.
Need help with website content publishing and image optimization? NextWebOps can help prepare, format, optimize, publish, and QA website content so image handling is consistent across your pages.
WebP Optimization for Shopify and Other CMS Platforms
The same principles apply to Shopify, Webflow, and other content management systems even when the platform handles some image transformation automatically.
Platform-level optimization should not be an excuse to upload unnecessarily large source images.
Before publishing, consider:
- What dimensions the image requires
- Whether the source is already compressed
- How the platform creates responsive variants
- Whether the image contains unnecessary transparent areas
- Whether text remains readable after compression
- Whether the published page loads the expected image version
For teams publishing content across many pages, standardizing these decisions can save time and reduce inconsistent media libraries.
Common WebP Image Optimization Mistakes
Converting Oversized Images Without Resizing
This is one of the easiest mistakes to avoid. A smaller format does not compensate for millions of unnecessary pixels.
Using Maximum Quality for Every Image
Maximum quality often creates larger files without providing a noticeable visual benefit at normal viewing sizes.
Overcompressing Screenshots and Graphics
Strong compression can make small text, interface elements, and sharp edges difficult to read. Review these images carefully.
Assuming WebP Automatically Fixes Page Speed
Image format is only one performance factor. Dimensions, delivery size, caching, server performance, scripts, fonts, CSS, and other page elements also influence loading performance.
Ignoring Width and Height
Images should be implemented so the page can reserve appropriate space for them. Consistent dimensions also help prevent visual layout problems during loading.
Forgetting Image SEO Basics
WebP is a file format, not an SEO strategy. Continue using relevant filenames, useful alt text, appropriate surrounding content, and proper page optimization.
Use the broader on-page SEO checklist to review the rest of the page instead of optimizing images in isolation.
WebP vs. JPEG vs. PNG: Which Should You Use?
WebP is useful for many website images, but you do not need to force every asset into the same format.
WebP: A strong general-purpose option for photographs, graphics, transparency, and efficient web delivery.
JPEG: Still widely used for photography and older publishing workflows, although newer formats can often provide better compression.
PNG: Useful when lossless image data or specific transparency requirements matter, although files can become large.
SVG: Often ideal for scalable logos, icons, and simple vector graphics.
AVIF: Another modern image format worth evaluating when it fits your browser, CMS, editing, and publishing workflow.
The best format is the one that provides the required appearance and functionality at an efficient file size while fitting your publishing process.
WebP Image Optimization Checklist
Before publishing a WebP image, check the following:
- Resize the image to appropriate dimensions
- Choose lossy or lossless compression intentionally
- Use a sensible quality setting
- Inspect the exported image visually
- Remove unnecessary metadata where appropriate
- Use a descriptive filename
- Add useful alt text when needed
- Use an appropriate responsive image size
- Review lazy-loading behavior
- Test the final published page
A repeatable checklist is especially valuable when multiple writers, editors, designers, or virtual assistants publish content on the same website.
When WebP Optimization Should Be Part of Your Publishing Workflow
Optimizing one image manually is straightforward. The challenge appears when a website publishes dozens or hundreds of images across blog posts, landing pages, products, and older content.
Without a consistent process, media libraries can quickly accumulate:
- Oversized originals
- Inconsistent filenames
- Missing alt text
- Duplicate files
- Poorly compressed graphics
- Images inserted at inappropriate sizes
WebP image optimization works best when it becomes part of content implementation rather than a separate task someone remembers occasionally.
Contact NextWebOps for content implementation support if your team needs help with image resizing, WebP preparation, metadata, formatting, WordPress publishing, and publishing QA.
Frequently Asked Questions About WebP Image Optimization
What is WebP image optimization?
WebP image optimization is the process of reducing unnecessary image data while maintaining suitable visual quality and implementing the image correctly on a website. It includes more than simply converting an image to WebP.
What is the best quality setting for WebP images?
There is no universal setting. Around 75 to 85 can be a useful starting range for many photographs, but the best setting depends on the image. Always compare visual quality with the resulting file size.
Does WebP reduce image quality?
Lossy WebP compression can remove image information, so aggressive compression can reduce visible quality. Lossless WebP preserves image data. With lossy compression, the goal is to choose a level where the visual difference is acceptable for the intended use.
Is WebP better than JPEG?
WebP can often deliver photographic images efficiently and also supports capabilities such as transparency. However, the best choice depends on the image, publishing environment, and workflow rather than the file extension alone.
Is WebP better than PNG?
WebP can be a useful alternative to PNG for many website images, including images requiring transparency. PNG may still be appropriate when a particular lossless workflow or compatibility requirement calls for it.
Does WebP improve SEO?
Using WebP does not automatically improve rankings. Properly optimized images can support faster pages and a better user experience, while filenames, alt text, relevant page content, and other technical factors contribute to broader image and on-page SEO.
How do I reduce a WebP image’s file size?
Start by reducing unnecessary dimensions. Then test a lower lossy quality setting, remove unnecessary metadata, and compare the result visually. Do not compress the file more than necessary simply to reach an arbitrary file-size target.
Should every website image be WebP?
No. WebP is appropriate for many website images, but SVG, PNG, JPEG, AVIF, or another format may be more appropriate depending on the asset and technical requirements.
Build Image Optimization Into Your Content Process
WebP is an efficient image format, but the extension alone does not make an image optimized.
The strongest workflow combines appropriate dimensions, compression, visual QA, descriptive image information, responsive delivery, and final page testing.
When those steps become part of normal website publishing, image optimization becomes more consistent and easier to maintain as the site grows.
If your business or agency publishes content regularly and needs a reliable process for image preparation, formatting, SEO implementation, and publishing QA, talk to NextWebOps about website content management and publishing support.
Leave a Reply