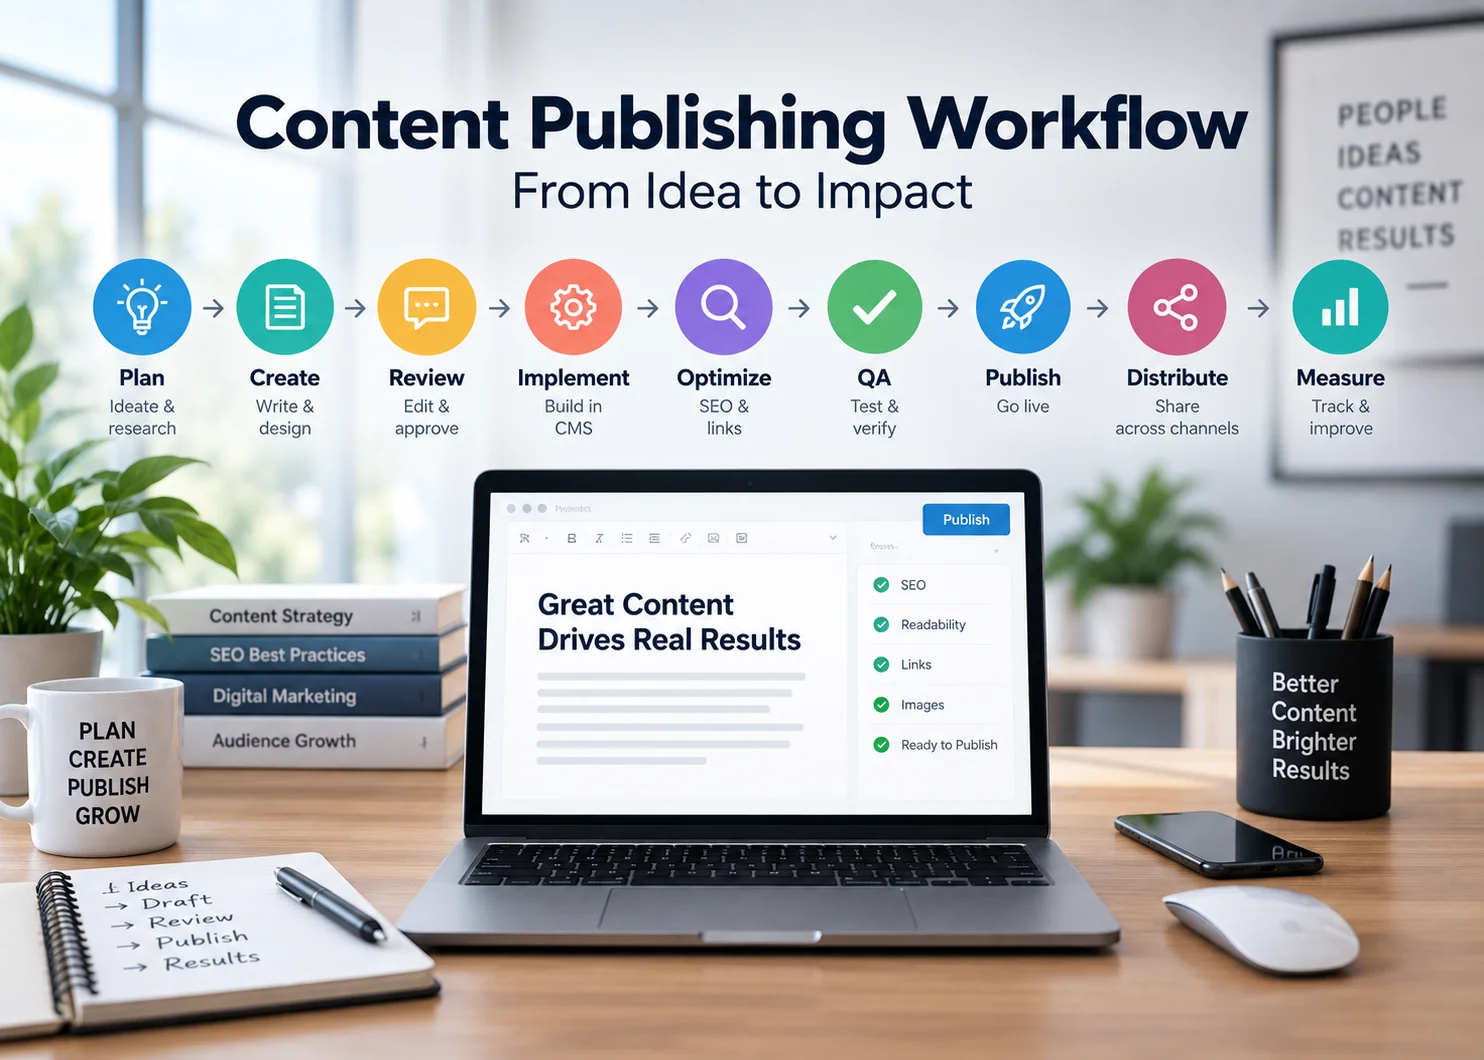
A strong content publishing workflow turns finished ideas into accurate, optimized, and properly published web pages without relying on last-minute fixes.
Creating the content is only part of the job. A good article can still go live with the wrong draft, missing metadata, broken links, oversized images, inconsistent headings, no internal links, or a CTA that leads nowhere.
The solution is a repeatable process that covers more than writing and approval.
For website content, an effective workflow should move through planning, creation, review, CMS implementation, on-page SEO, image optimization, quality assurance, publication, live-page verification, indexing, and distribution.
This guide breaks that process into 10 practical steps that can be used for WordPress, Shopify, Webflow, and other content management systems.
What Is a Content Publishing Workflow?
A content publishing workflow is a defined sequence of steps, responsibilities, approvals, and handoffs that moves a piece of content from planning to publication and beyond.
Shopify describes a content workflow as a template that represents the steps, roles, and responsibilities involved in producing content. Its current content workflow guidance also distinguishes between task-based and status-based approaches.
A workflow might include:
- topic selection
- keyword research
- content briefing
- writing
- editing
- approval
- CMS implementation
- SEO
- quality assurance
- publishing
- post-publish checks
- distribution
The exact structure depends on the team, but the principle is the same: each stage should have a clear owner, expected output, and definition of completion.
Why a Content Publishing Workflow Matters
It Reduces Publishing Errors
A documented workflow makes it harder to forget recurring tasks such as:
- adding metadata
- checking image alt text
- testing internal links
- assigning a category
- reviewing the mobile layout
- checking the final live URL
Without a process, these tasks often depend on whoever happens to remember them.
It Creates Clear Ownership
A publishing workflow should make it obvious who is responsible for each stage.
Depending on the organization, that may include:
- SEO strategist
- writer
- editor
- designer
- content manager
- CMS publisher
- QA reviewer
- marketing manager
Clear ownership reduces the familiar problem of a piece of content sitting in a shared folder because everyone assumes someone else is handling the next step.
It Makes Publishing Faster
Structure does not have to create bureaucracy.
A well-designed process can reduce unnecessary questions because every person knows what information they should receive and what they need to deliver next.
Contentful’s content workflow guidance highlights faster publishing, clearer collaboration, and quality control as important benefits of a defined process.
It Improves Consistency
Without a standard workflow, one article may receive careful SEO implementation while the next goes live without optimized images or internal links.
A repeatable process helps teams apply the same baseline standards across every page.
It Makes Content Operations Easier to Scale
Publishing ten pages is different from publishing hundreds across multiple websites, products, regions, or clients.
As volume increases, informal processes become harder to manage.
Adobe’s content lifecycle guidance notes that growing teams can face fragmented workflows, disconnected tools, and inconsistent brand execution when planning and publishing are not treated as one connected operation.
The 10-Step Content Publishing Workflow
1. Define the Content Goal and Search Intent
The publishing process should begin before anyone starts writing.
Document:
- target audience
- primary keyword
- search intent
- content purpose
- page type
- CTA
- publication destination
For SEO content, this information should normally be captured in a structured SEO content brief.
A useful brief prevents the writer from producing a strong article for the wrong query or audience.
2. Create the Draft and Supporting Assets
Once the direction is approved, create the primary content and identify the assets needed to publish it.
That may include:
- article copy
- featured image
- supporting images
- charts
- screenshots
- downloadable files
- source references
Use a clear versioning system.
A publisher should never have to guess whether final-v2-revised-new.docx or final-v3-use-this.docx is the approved version.
Where possible, store the final approved content in one source of truth.
3. Complete Editorial and Factual Review
Before implementation, review the draft for both writing quality and factual accuracy.
Check:
- spelling
- grammar
- brand voice
- names
- dates
- statistics
- technical claims
- source quality
Use a clear approval status such as:
Draft → In Review → Approved
This is important because publishing from a half-reviewed version creates expensive rework later.
4. Prepare a Complete Publishing Package
This is the stage many teams skip.
Do not hand a publisher only a Word document and expect them to figure out everything else.
A complete publishing package should include:
- final post or page title
- approved body copy
- primary keyword
- SEO title
- meta description
- URL slug
- featured image
- supporting images
- filenames
- image alt text
- internal-link targets
- external references
- CTA destinations
- category
- tags where relevant
- schema type where applicable
This package removes ambiguity and separates content decisions from mechanical implementation.
5. Implement the Content in the CMS
CMS implementation is more than copy and paste.
The publisher should recreate the intended content structure accurately inside WordPress, Shopify, Webflow, or another platform.
Review:
- heading hierarchy
- paragraph breaks
- bullet lists
- numbered lists
- tables
- buttons
- callout boxes
- internal links
- external links
- images
- embeds
- spacing
The draft and the live page are different environments. A nicely formatted document can become difficult to scan once pasted into a CMS.
If your team has approved content but spends too much time formatting, linking, and staging pages manually, get help with content publishing implementation.
6. Complete On-Page SEO During Implementation
On-page SEO should be built into publishing rather than treated as a separate task after the page goes live.
During implementation, confirm:
- SEO title
- meta description
- URL slug
- heading structure
- primary keyword placement
- internal links
- image alt text
- schema type where appropriate
Internal links should connect the new page to relevant existing resources using descriptive anchor text. Follow established internal linking best practices rather than adding links only to satisfy an arbitrary count.
This stage should also identify older content that can link into the new page after publication.
7. Optimize Images and Media
Images should be prepared before they are uploaded.
Check:
- dimensions
- compression
- file format
- filename
- alt text
- visual quality
- placement
- mobile rendering
Use formats such as WebP where appropriate and avoid uploading unnecessarily large original files directly from a designer or camera.
The broader image SEO workflow should support both page performance and search visibility without sacrificing visual quality.
8. Run Pre-Publish Content QA
Once the page has been implemented, stop editing and review it as a nearly finished page.
Use a repeatable content QA checklist to review:
- copy
- facts
- headings
- metadata
- internal links
- external links
- CTA destinations
- images
- alt text
- formatting
- accessibility
- mobile layout
- placeholder text
- indexing settings
QA should have a clear result:
Pass / Fixes Required
Do not let “reviewed” become an undefined status where nobody knows whether the page is actually ready.
9. Publish and Verify the Live Page
Clicking Publish is not the final step.
Open the public URL immediately and inspect what users actually see.
Verify:
- page title
- headings
- paragraph spacing
- images
- internal links
- external links
- CTA buttons
- forms
- desktop layout
- mobile layout
- SEO metadata
- canonical URL
- indexability
This catches problems that a preview may not reveal.
Examples include:
- theme styles overriding formatting
- images appearing too large
- tables overflowing on mobile
- buttons inheriting the wrong style
- links pointing to staging URLs
- unexpected noindex settings
10. Add Incoming Links, Index, Distribute, and Monitor
A content workflow should continue after publication.
Add Incoming Internal Links
Find older relevant pages and add contextual links to the newly published URL.
This is one of the easiest publishing steps to forget.
A new article may contain five outgoing internal links but still have no existing page linking back to it.
That weakens the site’s internal content relationships and can leave useful resources isolated.
Request Indexing
For important new URLs:
- open Google Search Console
- use URL Inspection
- paste the new URL
- request indexing
- confirm the page is included in the appropriate sitemap
Distribute the Content
Share the new asset through relevant channels such as:
- email newsletters
- internal sales or support channels
Distribution should match the audience rather than automatically posting everywhere.
Monitor Performance
Over time, review:
- search impressions
- organic clicks
- rankings
- engagement
- conversions
- new internal-link opportunities
The workflow should feed useful performance information back into future planning.
Content Publishing Workflow Example
Imagine a company is publishing an article targeting the keyword Shopify internal linking.
A complete workflow might look like this:
- Research the keyword and SERP.
- Create and approve an SEO content brief.
- Write the article.
- Complete editorial and factual review.
- Create the featured and supporting images.
- Prepare metadata, slug, links, and image information.
- Implement the article in WordPress.
- Add SEO metadata and contextual internal links.
- Run pre-publish QA.
- Publish and inspect the live page.
- Update relevant older Shopify articles with links into the new page.
- Request indexing in Google Search Console.
- Publish the social post.
- Monitor search performance and update the page when needed.
The key difference is that the process does not stop when the article is written—or even when Publish is clicked.
Content Publishing Workflow Template
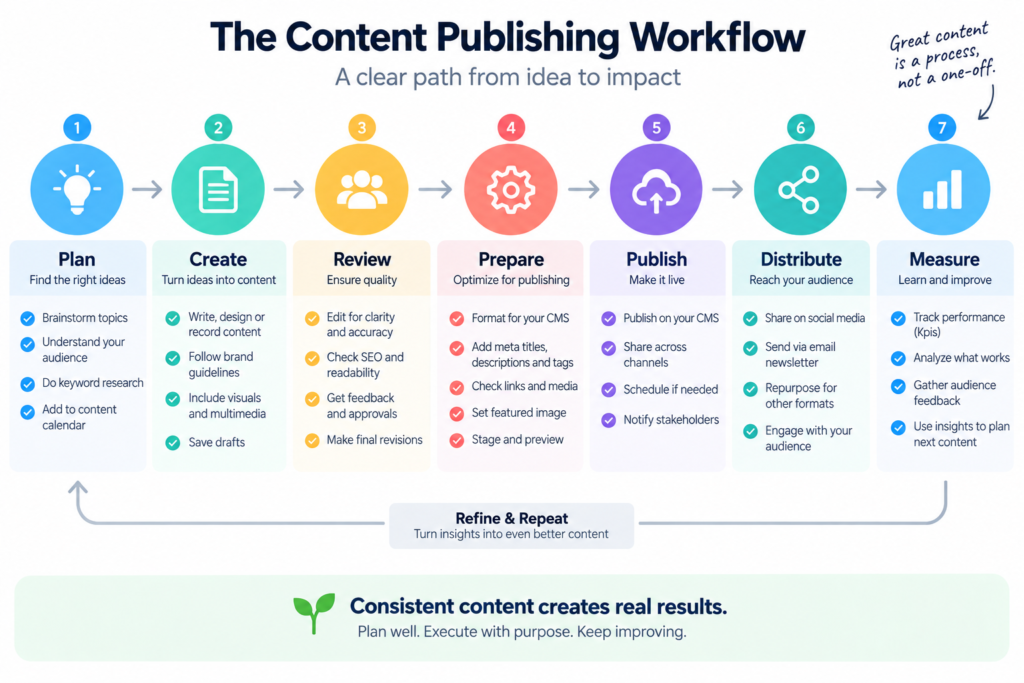
The following framework can be adapted for a small team, agency, or in-house content operation.
| Stage | Owner | Status | Required Output |
|---|---|---|---|
| Brief | SEO / Strategist | Approved | Keyword, intent, outline, CTA |
| Draft | Writer | Complete | Finished copy |
| Editorial Review | Editor | Approved | Fact-checked final copy |
| Publishing Package | Content Manager | Ready | Metadata, images, links, category |
| CMS Implementation | Publisher | Complete | Staged page |
| SEO Implementation | SEO / Publisher | Complete | Metadata, links, schema |
| QA | QA Reviewer | Approved | Passed checklist |
| Publish | Publisher | Live | Live URL |
| Post-Publish | SEO / Publisher | Complete | Incoming links, indexing, sitemap check |
| Distribution | Marketing | Complete | Social/email promotion |
The exact job titles are less important than clear ownership.
For a small team, one person may handle several rows. For a larger organization, each stage may involve a different specialist.
Need a repeatable publishing process across WordPress, Shopify, or Webflow? Discuss your content publishing workflow with NextWebOps.
Task-Based vs. Status-Based Content Workflows
Shopify’s workflow guidance describes two common approaches: task-based and status-based workflows.
Task-Based Workflow
A task-based workflow tracks individual actions.
For example:
- add meta description
- compress featured image
- insert internal links
- check mobile layout
- request indexing
This approach works well when:
- the publishing process is detailed
- multiple people are involved
- team members are still learning the process
- QA consistency is important
Status-Based Workflow
A status-based workflow tracks broader stages.
For example:
Planned → Writing → Review → Ready to Publish → Published
This can work well for smaller or experienced teams that do not need every individual action visible at the project level.
A Hybrid Approach Usually Works Well
A practical system is to use broad statuses for project management and detailed checklists inside each stage.
For example:
Status: Ready for QA
Checklist:
- metadata added
- images compressed
- links tested
- mobile reviewed
- CTA tested
This keeps the workflow easy to scan without losing important implementation details.
Content Publishing Workflow for WordPress, Shopify, and Webflow
WordPress Publishing Workflow
WordPress implementation may include:
- post title
- body formatting
- heading hierarchy
- category
- tags
- featured image
- supporting images
- SEO plugin fields
- internal links
- preview
- live-page QA
When using Rank Math, confirm the focus keyword, SEO title, meta description, slug, schema, and category before publication.
Shopify Publishing Workflow
Shopify publishing may involve:
- product descriptions
- collection content
- blog posts
- media
- image alt text
- search engine listing fields
- internal links
- product variants
- live storefront QA
The workflow should reflect the page type rather than using exactly the same checklist for products, collections, and articles.
Webflow Publishing Workflow
Webflow CMS publishing may require checks for:
- CMS fields
- collection templates
- page titles
- meta descriptions
- image alt text
- links
- responsive behavior
- published-domain rendering
Template-based systems deserve careful QA because a content or template error may affect many URLs.
Where Automation Helps—and Where It Should Not Replace QA
Automation can make a publishing workflow faster when it handles predictable, repetitive tasks.
Useful examples include:
- task assignment
- status updates
- approval reminders
- scheduled publishing
- broken-link scans
- image compression
- workflow notifications
- metadata validation
Automation becomes risky when teams assume it removes the need for human review.
Keep human QA for areas such as:
- factual accuracy
- brand voice
- visual presentation
- contextual internal linking
- CTA relevance
- accessibility judgment
- live-page review
The goal is not to automate everything. It is to automate repetitive work while preserving judgment where context matters.
Common Content Publishing Workflow Mistakes
- Unclear ownership: Nobody knows who should move the content forward.
- Publishing the wrong version: Multiple drafts create confusion.
- No publishing package: Publishers have to chase metadata, images, and links.
- SEO added after publication: Important optimization becomes an afterthought.
- Images arrive too late: Pages are delayed or launched with temporary assets.
- No internal-link plan: Content is published in isolation.
- No incoming links: Older content is never updated to support new pages.
- Skipping QA: Deadline pressure replaces final review.
- Ignoring mobile: Desktop-only checks miss common presentation problems.
- No live-page verification: Teams assume the CMS preview matches production.
- Forgetting indexing: Important new URLs are published without a post-publish search check.
- No distribution: Useful content is published but never promoted.
- Too many approvals: Unnecessary handoffs create bottlenecks.
- Blind automation: Rules execute without checking whether the outcome makes sense.
How to Improve a Slow Content Publishing Workflow
If content regularly waits days or weeks between approval and publication, map the workflow from beginning to end.
Look for unnecessary friction.
Start by:
- assigning one owner per stage
- defining what “approved” means
- creating a standard publishing package
- using reusable QA checklists
- creating CMS templates where practical
- removing duplicate approval steps
- automating repetitive notifications
- tracking where content waits the longest
Do not assume every delay requires another tool.
Sometimes the real problem is simply that nobody knows whether the editor, SEO specialist, or publisher is responsible for the next action.
Final Thoughts on Content Publishing Workflows
A good content publishing workflow does not stop at writing, approval, or even publication.
It should connect strategy and execution all the way through:
Plan → Create → Review → Prepare → Implement → Optimize → QA → Publish → Verify → Distribute and Monitor
The most effective workflows also include two frequently missed post-publish actions: adding incoming internal links from older relevant pages and checking that important new URLs are available for indexing.
NextWebOps helps businesses and agencies handle the execution side of this process, including WordPress publishing, Shopify publishing, Webflow publishing, formatting, metadata, image optimization, internal linking, content migration, and publishing QA.
Contact NextWebOps about your content publishing workflow.
Frequently Asked Questions
What is a content publishing workflow?
A content publishing workflow is a structured process that moves content through planning, creation, review, CMS implementation, optimization, QA, publication, and post-publish activities.
What are the stages of a content publishing workflow?
A practical workflow can include planning, drafting, editorial review, publishing preparation, CMS implementation, SEO, media optimization, QA, publication, live verification, indexing, distribution, and monitoring.
How do you create a content workflow?
Document your existing process, identify every recurring task and handoff, assign owners, establish approval criteria, choose useful statuses, and create checklists for detailed implementation and QA.
What is the difference between a content workflow and an editorial calendar?
An editorial calendar mainly shows what content is planned and when it should be published. A workflow defines how each piece moves through the tasks, owners, approvals, implementation, and publishing process required to reach that date.
Who should own content publishing?
Ownership depends on the organization. A content manager or publisher often owns the final implementation stage, while writers, editors, SEO specialists, designers, and QA reviewers may own earlier or supporting tasks.
What should happen before publishing content?
The content should be editorially approved, implemented correctly in the CMS, optimized for search, checked for links and images, reviewed for accessibility, tested on mobile, and passed through a pre-publish QA checklist.
What should happen after content is published?
Review the live page, test links and CTAs, verify indexability, add relevant incoming internal links, confirm sitemap inclusion, request indexing where appropriate, distribute the content, and monitor performance.
How can content publishing be automated?
Automation can handle task assignment, reminders, status updates, scheduled publication, image compression, and some technical checks. Human review is still important for accuracy, context, visual quality, accessibility, and final live-page QA.
What is a CMS publishing workflow?
A CMS publishing workflow is the part of the overall process that controls how approved content is entered, formatted, reviewed, approved, and published through a content management system such as WordPress, Shopify, or Webflow.
How do you improve a slow publishing process?
Identify where content waits the longest, clarify ownership, standardize publishing packages, reduce unnecessary approvals, create reusable checklists, and automate repetitive tasks where doing so does not compromise quality.
Leave a Reply