Category: Content Implementation

Content implementation services focused on publishing, formatting, and optimizing website content across WordPress, Shopify, Webflow, and other CMS platforms. This includes page and blog post setup, heading structure, images, internal links, metadata, mobile formatting, and final quality checks to ensure content is accurate, readable, SEO-friendly, and ready to perform.

  • WordPress Content Migration: How to Move Content Without Losing SEO

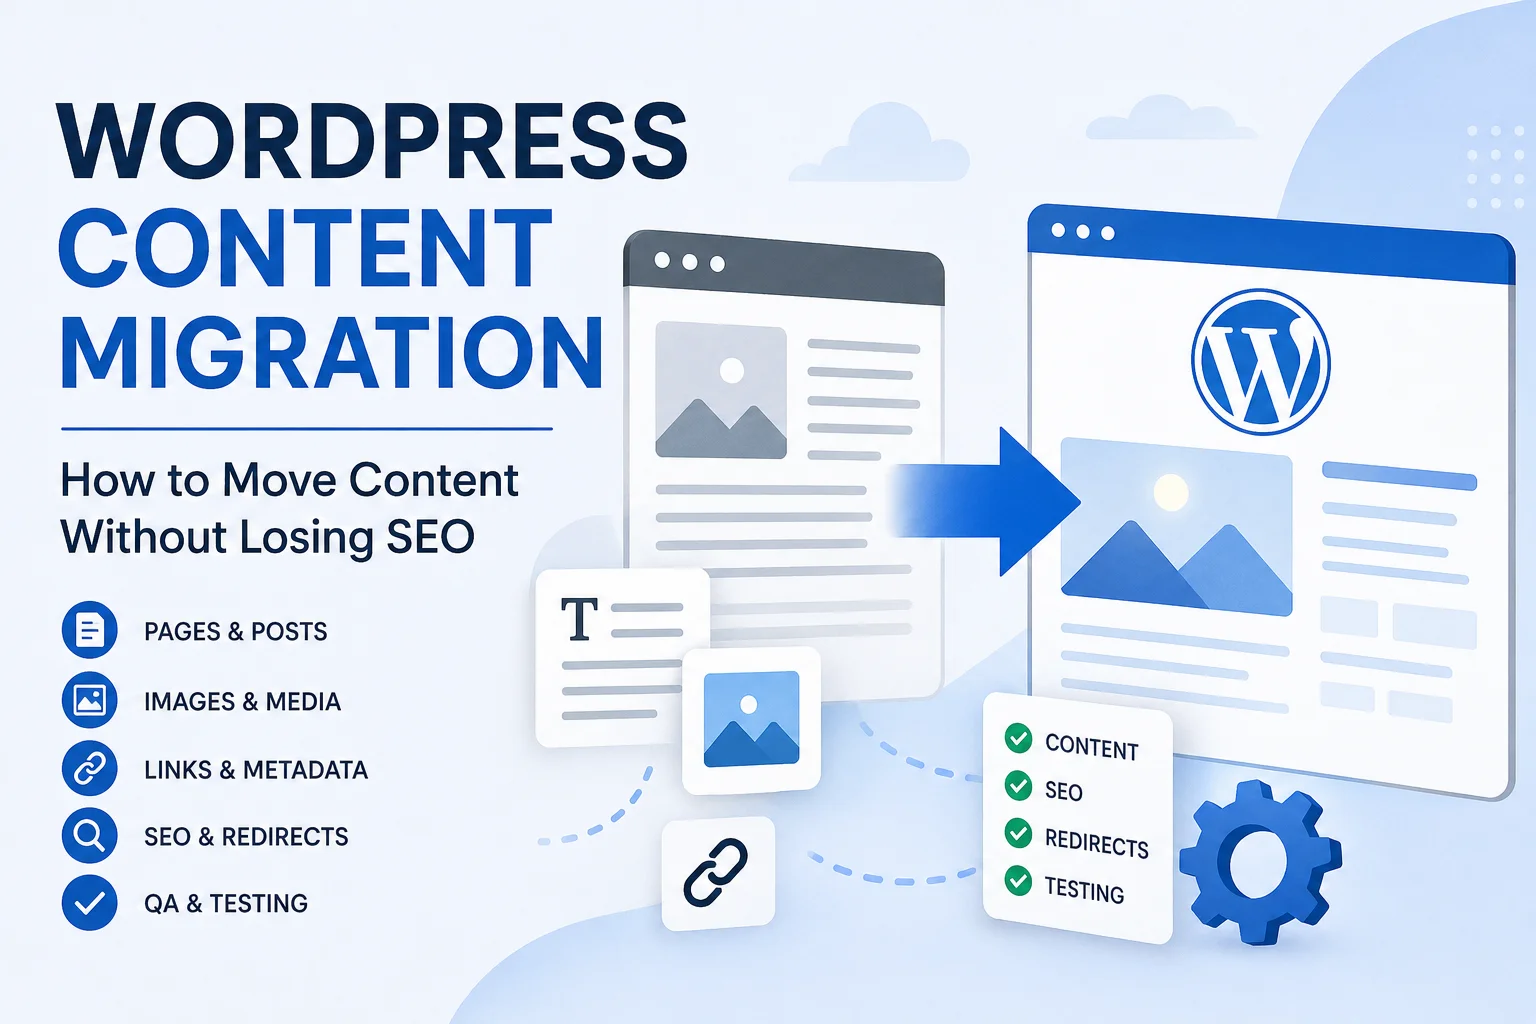
    WordPress Content Migration: How to Move Content Without Losing SEO

    WordPress content migration is the process of moving website content into WordPress while preserving the elements that make that content useful to visitors and search engines. That can include pages, blog posts, images, headings, internal links, metadata, downloads, calls to action, categories, and URL structure.

    It is different from simply moving a WordPress installation from one hosting provider to another. A technical site migration may transfer databases, themes, plugins, and server files. Content migration focuses on making sure the information inside the website arrives in the right place, uses the right structure, and works correctly after the move.

    That distinction matters when you are rebuilding a website, moving from another CMS, consolidating multiple websites, or replacing an outdated WordPress setup. A successful migration is not complete when the content appears on the new site. It is complete when that content has been reviewed, formatted, linked, optimized, and tested.

    What Is WordPress Content Migration?

    WordPress content migration involves transferring or rebuilding website content in WordPress while retaining the structure, assets, links, SEO information, and functionality that should survive the move.

    Depending on the project, the migration may include:

    • Pages and blog posts
    • Page titles and heading structure
    • Images and media files
    • Image alt text
    • Internal and external links
    • Buttons and calls to action
    • SEO titles and meta descriptions
    • URL slugs
    • Categories and tags
    • Tables, lists, quotes, and embeds
    • PDFs and downloadable resources
    • Author and publication information

    Some of this information can be transferred automatically. Other elements usually need manual review because the old site’s structure may not match the new WordPress templates.

    Content Migration vs. Full WordPress Site Migration

    A full WordPress migration often refers to moving an existing WordPress installation between servers, hosts, domains, or environments. That can involve transferring the database, themes, plugins, uploads, configuration files, and other technical components.

    Content migration is more focused. For example, a company redesigning its website may keep WordPress but rebuild every page using a new design system. The hosting may stay exactly the same, yet the project still requires substantial content migration.

    Similarly, a business moving from Webflow, Drupal, Joomla, a proprietary CMS, or a static website may need its content rebuilt inside WordPress even though there is no existing WordPress database to transfer.

    This is why migration plugins solve only part of many real-world projects. Moving data is not the same as implementing the content correctly.

    When Do You Need WordPress Content Migration?

    Content migration is common whenever the structure, platform, or presentation of a website changes.

    Moving From Another CMS to WordPress

    A CMS-to-WordPress migration may involve importing structured data, manually recreating pages, or combining automated and manual methods.

    The challenge is rarely just getting the text into WordPress. Different platforms use different content fields, page builders, templates, taxonomies, image systems, and URL structures. Content that looked correct in the old CMS may need to be reformatted for WordPress.

    Redesigning an Existing Website

    A redesign often introduces new page templates, content blocks, navigation, image dimensions, and calls to action. Existing copy may need to be moved into those new layouts page by page.

    This is also a good opportunity to clean up outdated formatting, oversized images, weak internal links, and inconsistent metadata instead of carrying every old problem into the new website.

    Consolidating Multiple Websites

    Businesses sometimes merge multiple domains, microsites, blogs, or resource libraries into one WordPress installation.

    These projects require careful decisions about which pages should be retained, combined, redirected, updated, or removed. Without a clear content map, it is easy to create duplicate pages or lose important URLs.

    Reorganizing an Existing WordPress Site

    Not every migration involves changing platforms. A WordPress website may need a content migration when moving from an old page builder to a new one, changing themes, creating custom post types, reorganizing categories, or replacing inconsistent page templates.

    What Should Be Included in a WordPress Content Migration?

    Before moving anything, define exactly what counts as content for the project. Focusing only on visible body copy is a common mistake.

    A complete inventory may include:

    • Page and post titles
    • Body copy
    • H2 and H3 headings
    • Images
    • Image captions and alt text
    • Videos and embeds
    • Tables
    • Lists
    • Quotes
    • Buttons and calls to action
    • Internal links
    • External links
    • Downloadable documents
    • Author information
    • Publication and updated dates
    • Categories and tags
    • SEO titles
    • Meta descriptions
    • URL slugs
    • Canonical settings where applicable

    The exact list depends on the website, but documenting these elements before migration reduces the chance of discovering missing pieces after launch.

    WordPress Content Migration Process

    A reliable migration should follow a repeatable workflow rather than moving pages in whatever order is convenient.
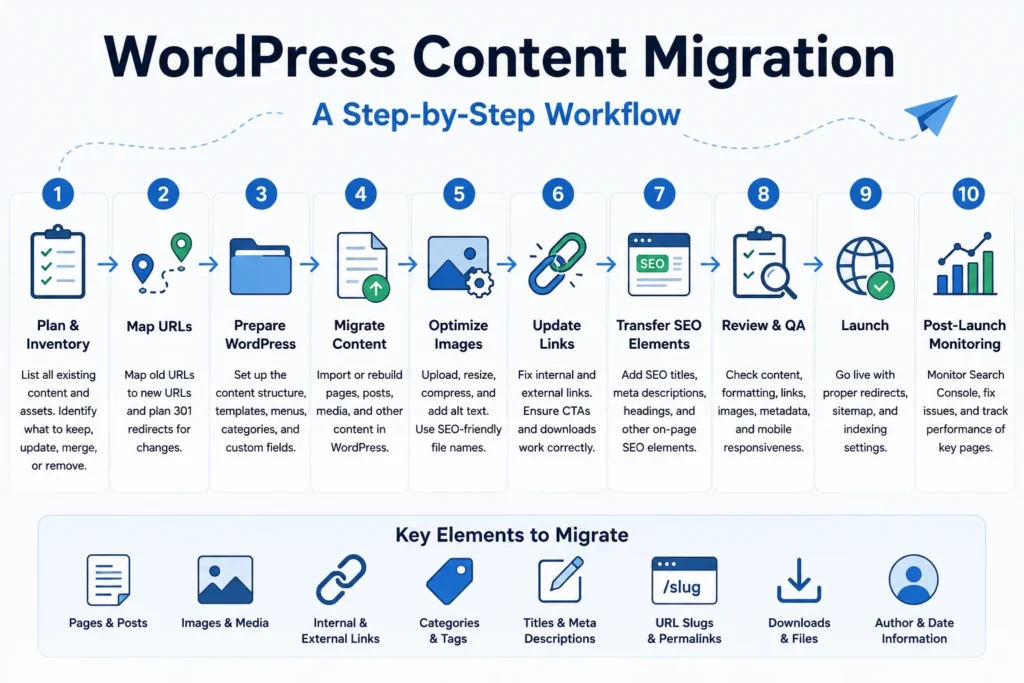
    WordPress content migration workflow showing planning, URL mapping, content transfer, image optimization, SEO, QA, and post-launch monitoring

    1. Create a Complete Content Inventory

    Start by recording every URL that may need to move. A spreadsheet is usually the simplest way to manage this.

    Useful columns include:

    Old URL | New URL | Content Type | Migration Status | SEO Metadata | Images | Redirect | QA Status

    The inventory gives the team one source of truth for what exists, what is moving, and what still needs review.

    If analytics or Search Console data is available, identify pages that already receive organic traffic, earn backlinks, generate leads, or rank for important queries. These deserve extra attention during migration.

    2. Decide What to Keep, Update, Merge, or Remove

    A migration does not have to preserve every page simply because it exists.

    Review the inventory and classify content into groups such as:

    • Keep: still useful and accurate
    • Update: valuable but outdated
    • Merge: overlaps significantly with another page
    • Redirect: should point to a better destination
    • Remove: no longer useful and has no replacement

    This prevents old, duplicate, thin, or irrelevant content from automatically becoming part of the new website.

    3. Map Old URLs to New WordPress URLs

    URL mapping is one of the most important SEO tasks in a migration.

    For each old URL, decide whether the new website will use:

    • The same URL
    • A changed URL
    • A consolidated destination
    • No replacement

    When an important URL changes, a suitable 301 redirect should generally point the old address to the closest relevant new page.

    Avoid redirecting large numbers of unrelated old pages to the homepage simply because it is easy. The destination should make sense for someone who expected the original page.

    4. Prepare the WordPress Content Structure

    Set up the destination before migrating large volumes of content.

    Confirm:

    • Page hierarchy
    • Blog structure
    • Categories
    • Tags
    • Custom post types
    • Templates
    • Navigation structure
    • Custom fields
    • URL conventions

    Without this preparation, teams often make inconsistent decisions during migration and then have to reorganize the website afterward.

    For larger sites, clear ongoing WordPress content management standards can also help keep publishing consistent after the migration is finished.

    5. Migrate and Format the Content

    Now the content can be transferred or rebuilt inside WordPress.

    Depending on the source platform and project size, migration may be performed with an importer, API, migration tool, spreadsheet-based workflow, manual publishing, or a combination of methods.

    Whatever method is used, review the WordPress output for:

    • Correct H2 and H3 hierarchy
    • Consistent paragraphs and spacing
    • Proper lists
    • Clean tables
    • Working buttons
    • Correct quotes
    • Accurate embeds
    • Readable formatting
    • Removal of unnecessary source-CMS markup

    Copying content directly from another CMS can bring hidden spans, inline styles, outdated classes, or unnecessary markup into WordPress. The page may look acceptable initially but become difficult to maintain later.

    Content implementation should therefore be treated as a structured publishing task, not simply copy and paste.

    If you have a large batch of pages that needs to be rebuilt, formatted, linked, and reviewed, get help with your WordPress content migration.

    6. Migrate and Optimize Images

    Images deserve their own migration workflow.

    Common migration problems include missing files, images still loading from the old domain, oversized uploads, duplicated media, poor filenames, and lost alt text.

    For each important image:

    • Confirm that the correct file was transferred
    • Use an appropriate file size
    • Resize unnecessarily large images
    • Compress the file
    • Use WebP where appropriate
    • Retain or improve descriptive alt text
    • Check that the image displays correctly on desktop and mobile

    Migrations are a useful opportunity to improve old media libraries rather than simply copying every inefficient asset. See the NextWebOps guide to optimizing images for SEO for additional image optimization considerations.

    7. Restore Internal and External Links

    Internal links frequently break during migration because domains, URL structures, page names, or content locations change.

    Review links inside the migrated content and check for:

    • Old-domain URLs
    • Old staging URLs
    • Pages whose slugs changed
    • Links to removed content
    • Broken PDF or download URLs
    • Incorrect CTA destinations

    Migration is also a good time to improve weak linking between related pages. A stronger internal structure helps users discover relevant content and gives search engines clearer context about how pages relate to each other.

    For more guidance, see these internal linking best practices.

    8. Transfer Important On-Page SEO Elements

    Installing an SEO plugin does not automatically preserve the optimization of the old website.

    Review important SEO elements individually, including:

    • SEO titles
    • Meta descriptions
    • URL slugs
    • Heading hierarchy
    • Image alt text
    • Internal links
    • Canonical URLs where applicable
    • Indexing settings

    If the page is being rewritten or significantly redesigned, do not assume the old metadata should be copied unchanged. It may be better to improve it while retaining the page’s search intent.

    Before launch, it is also useful to run an on-page SEO audit across priority pages.

    9. Review Every Migrated Page

    A page should not be marked complete immediately after its content appears in WordPress.

    Use a repeatable QA checklist for each migrated URL:

    • All expected content is present
    • Headings follow the correct hierarchy
    • Formatting matches the intended template
    • Images load correctly
    • Alt text has been added where appropriate
    • Internal links work
    • External links work
    • Buttons and forms work
    • SEO metadata is present
    • The correct URL is being used
    • The page works on mobile
    • No old-domain or staging links remain

    For WordPress-specific publishing checks, use a consistent WordPress publishing checklist instead of relying on memory.

    10. Perform Post-Launch Checks

    Migration QA should continue after the new website goes live.

    Check the live site for:

    • Broken links
    • Unexpected 404 errors
    • Incorrect redirects
    • Missing images
    • Indexing problems
    • Sitemap errors
    • Canonical mistakes
    • Pages accidentally blocked from search engines

    Google Search Console can help identify indexing issues, crawl errors, and unexpected changes after launch. Priority organic landing pages should receive additional monitoring because problems on those pages can have a larger impact on traffic.

    Manual vs. Automated WordPress Content Migration

    Automation can make migration significantly faster, especially when a website contains hundreds or thousands of similarly structured records.

    Automated migration works well when:

    • The source system has a reliable export method
    • WordPress has a compatible importer
    • Fields can be mapped cleanly
    • Content types are consistent
    • Layouts require minimal transformation

    Manual or assisted migration is often more appropriate when:

    • The website is being redesigned
    • The source markup is messy
    • Pages use different layouts
    • Content needs editing
    • Images need optimization
    • Internal links require rebuilding
    • SEO metadata needs review
    • The source and destination CMS structures differ substantially

    The most efficient approach is often a combination: automate repetitive transfers and use human review for structure, formatting, SEO, and QA.

    Automation can transfer data. It does not guarantee correctly implemented content.

    Common WordPress Content Migration Mistakes

    Migrating Everything Without a Content Audit

    Moving outdated, duplicated, or irrelevant pages creates unnecessary work and carries old problems into the new site.

    Changing URLs Without Mapping Redirects

    Important pages can lose traffic and backlinks when old URLs disappear without appropriate redirects.

    Copying Messy HTML Into WordPress

    Source-CMS formatting can introduce unnecessary code, inline styling, and inconsistent page layouts.

    Forgetting SEO Titles and Meta Descriptions

    Visible content may survive while valuable SEO fields are lost during an import.

    Losing Images or Alt Text

    Images can remain hosted on the old domain, disappear after launch, or lose descriptive attributes during migration.

    Leaving Internal Links Pointing to Old URLs

    Old-domain links create avoidable redirects and may eventually become broken links.

    Recreating the Wrong Heading Structure

    Visual styling should not replace semantic structure. A section that looks like a heading should use the appropriate heading element rather than bold paragraph text.

    Depending Entirely on Migration Plugins

    Plugins are useful for moving files or structured data, but they cannot judge whether a page has the correct CTA, image, heading hierarchy, link destination, or editorial formatting.

    Skipping Live-Site QA

    A staging site can behave differently after launch. Redirects, caching, CDN settings, forms, links, and indexing controls should all be checked on the live domain.

    WordPress Content Migration Checklist

    Before Migration

    • Create a complete content inventory
    • Record existing URLs
    • Identify important organic landing pages
    • Decide what to keep, update, merge, or remove
    • Create the new URL map
    • Prepare redirects
    • Collect media and downloadable files
    • Export or record important metadata
    • Confirm the new WordPress content structure

    During Migration

    • Move or rebuild pages and posts
    • Apply the correct heading hierarchy
    • Clean formatting
    • Optimize images
    • Add alt text
    • Update internal links
    • Restore external links
    • Rebuild buttons and CTAs
    • Add SEO titles and meta descriptions
    • Track completion in the migration spreadsheet

    After Migration

    • Review every important page
    • Test redirects
    • Check for broken links
    • Check images and downloadable files
    • Review mobile layouts
    • Confirm indexing settings
    • Verify the XML sitemap
    • Review Google Search Console
    • Monitor priority pages after launch

    When Should You Outsource WordPress Content Migration?

    Small migrations may be manageable internally. The workload increases quickly, however, when a project involves dozens or hundreds of URLs.

    Outsourcing can make sense when:

    • An agency needs help publishing a large client website
    • Hundreds of pages need to be moved
    • Content is coming from another CMS
    • New WordPress templates require manual formatting
    • SEO metadata needs to be retained or improved
    • Images need resizing and optimization
    • Internal links must be updated across the site
    • A strict launch deadline is approaching
    • The internal marketing team needs to focus on strategy rather than repetitive implementation
    • A separate QA pass is required before launch

    NextWebOps supports WordPress content migration through practical implementation work such as page publishing, formatting, image optimization, metadata, internal linking, content cleanup, and publishing QA.

    If the content is ready but your team needs help getting it correctly implemented in WordPress, discuss your WordPress migration project.

    Final Takeaway

    A successful WordPress content migration is not measured by whether the words made it into WordPress.

    The migrated content should arrive complete, correctly structured, properly formatted, optimized, connected to the rest of the website, and tested on the live site.

    Creating a content inventory, mapping URLs, cleaning formatting, optimizing images, rebuilding internal links, preserving important SEO elements, and completing page-by-page QA can prevent many of the problems that appear after a rushed migration.

    Whether you are moving from another CMS, rebuilding an existing WordPress website, or migrating a large content library into new templates, treating migration as a controlled publishing workflow will produce a more reliable result.

    Need extra implementation capacity for an upcoming migration? contact NextWebOps for WordPress content migration support.

    Frequently Asked Questions

    What is WordPress content migration?

    WordPress content migration is the process of moving or rebuilding website content in WordPress. It can include pages, posts, images, links, metadata, headings, downloads, categories, CTAs, and other content elements that need to be preserved or recreated.

    How do I migrate content to WordPress?

    Start with a content inventory, decide which content should be retained, map old URLs to new destinations, prepare the WordPress structure, transfer or rebuild the content, update links and SEO elements, and perform page-by-page QA before and after launch.

    Can I migrate content from another CMS to WordPress?

    Yes. Content can be moved from platforms such as Webflow, Drupal, Joomla, proprietary CMSs, or static websites. Some data may be imported automatically, while layouts, formatting, links, images, and metadata often require manual review.

    Does migrating a WordPress website affect SEO?

    It can. SEO problems may occur when important URLs change without redirects, content is removed, metadata is lost, internal links break, pages become non-indexable, or important on-page elements are changed incorrectly. Careful planning and post-launch monitoring can reduce these risks.

    Can WordPress content migration be automated?

    Parts of the process can be automated when content is structured consistently and the source and destination systems support reliable import and export methods. Manual review is still important for formatting, images, SEO elements, links, calls to action, and quality assurance.

    How do I migrate WordPress content without losing SEO?

    Preserve important content, map old and new URLs, use appropriate redirects when URLs change, retain or improve relevant metadata, update internal links, verify indexability, submit an accurate sitemap, and monitor priority pages through Google Search Console after launch.
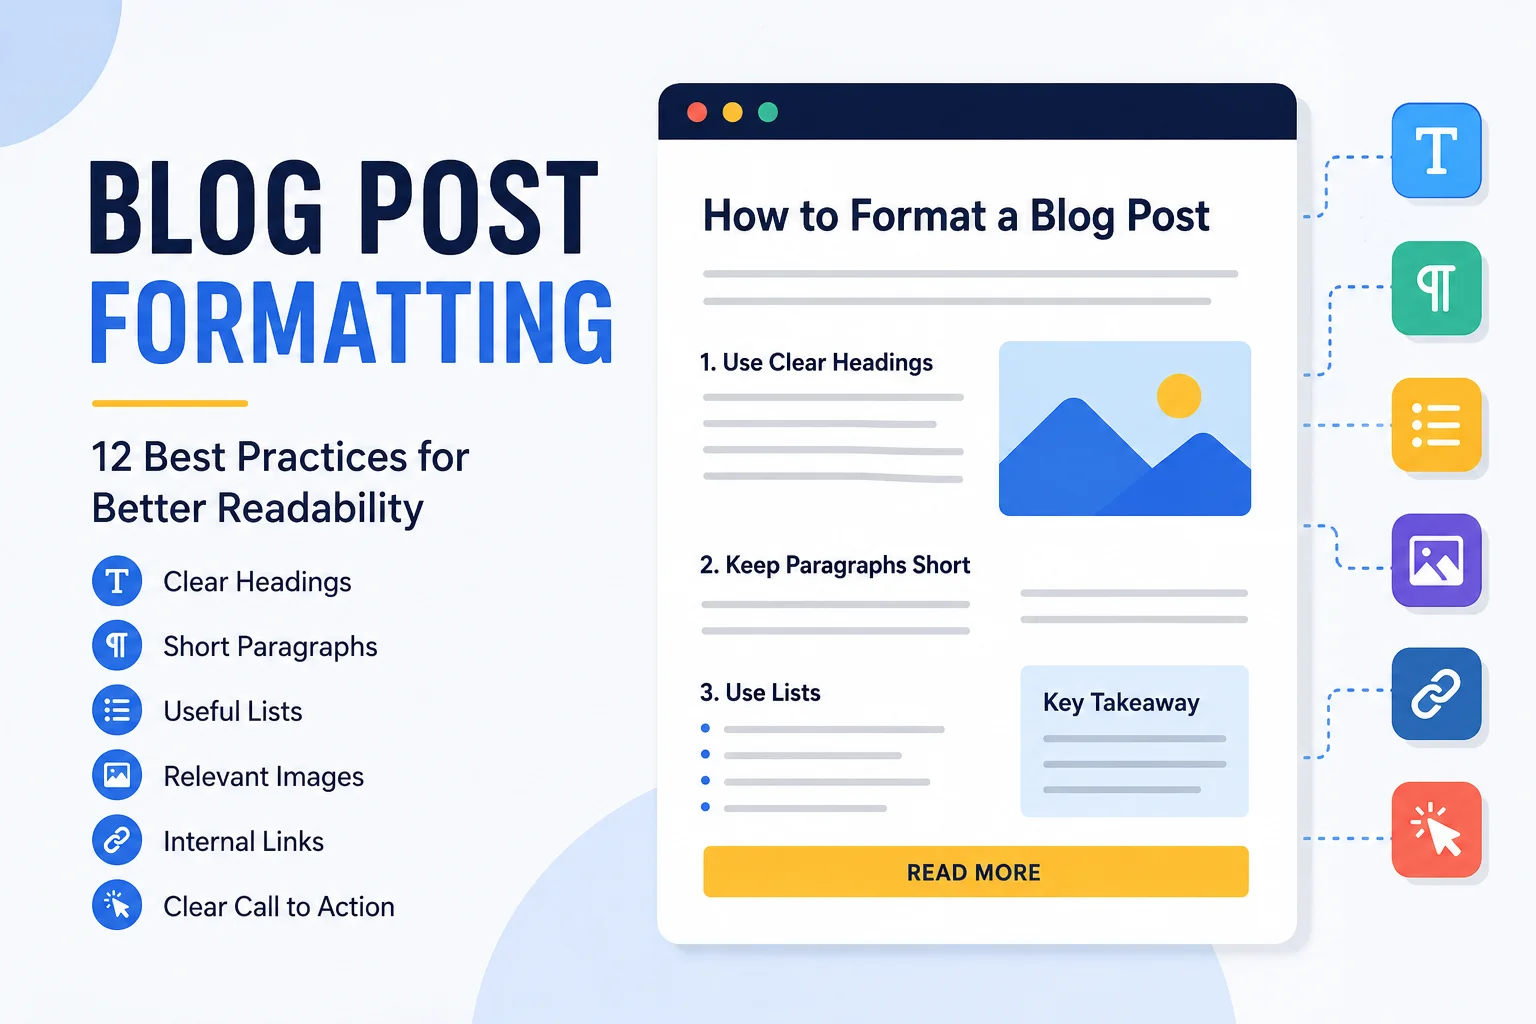
  • Blog Post Formatting: 12 Best Practices for Better Readability

    Blog Post Formatting: 12 Best Practices for Better Readability

    Blog post formatting is the process of structuring and presenting an article so readers can quickly understand it, scan important sections, and move through the content without unnecessary friction.

    A strong draft can still perform poorly if it is published as a wall of text. Clear headings, short paragraphs, useful lists, relevant visuals, internal links, and consistent spacing all make a blog post easier to read and easier to navigate.

    Good formatting also makes content publishing more consistent. Instead of treating each article differently, your team can follow a repeatable structure that works across WordPress, Shopify, Webflow, or another CMS.

    This guide explains 12 blog post formatting best practices you can use to turn a written draft into a clean, readable, publish-ready article.

    What Is Blog Post Formatting?

    Blog post formatting is the way written content is organized and displayed on a webpage.

    It includes elements such as:

    • Post title
    • Introduction
    • Heading hierarchy
    • Paragraph length
    • Bullet and numbered lists
    • Bold text
    • Images
    • Internal and external links
    • Tables
    • Calls to action
    • Spacing and visual flow

    Formatting is different from writing. Writing focuses on what the article says. Formatting focuses on how that information is presented after the draft exists.

    That distinction matters because many content teams finish the writing but still need someone to handle the implementation before the post is ready to publish.

    Why Blog Post Formatting Matters

    Blog post formatting matters because online readers rarely consume long articles exactly the same way they would read a printed document.

    They scan headings, jump between sections, look for examples, and use visual cues to decide what deserves attention.

    It Improves Readability

    Shorter paragraphs, clear headings, and logical spacing reduce the effort required to understand the content.

    It Makes Content Easier to Scan

    Headings, lists, bold text, and visuals help readers find the information they need without reading every sentence from beginning to end.

    It Helps Organize Information

    A proper heading structure shows which ideas are major sections and which are supporting details.

    It Supports Better Publishing Consistency

    If every article follows a repeatable structure, your website feels more professional and your publishing team spends less time fixing inconsistent layouts.

    It Supports On-Page SEO Implementation

    Formatting alone is not an SEO shortcut, but it supports elements that matter during implementation, including heading structure, internal links, images, and page organization.

    That is why formatting should work alongside a broader on-page SEO checklist.

    Blog Post Formatting: 12 Best Practices

    1. Start With a Clear Blog Post Title

    The title should tell readers what the article is about before they start reading.

    A vague title creates unnecessary uncertainty.

    Weak:

    Some Thoughts About Better Content

    Better:

    Blog Post Formatting: 12 Best Practices for Better Readability

    The second title is specific, relevant, and immediately communicates the topic.

    In WordPress, the post title usually serves as the H1, so there is normally no need to place another H1 inside the article body.

    2. Write a Short, Useful Introduction

    The introduction should explain what the article covers and why the reader should continue.

    Avoid long generic openings that delay the answer.

    A practical introduction usually does three things:

    • Introduces the problem
    • Explains what the article will cover
    • Shows the reader what they will gain

    For example, a blog post formatting article should quickly explain that formatting improves readability, scanning, and publishing consistency.

    3. Use a Logical Heading Hierarchy

    A logical heading structure is one of the most important parts of blog post formatting.

    A simple hierarchy looks like this:

    • H1: Post title
    • H2: Main section
    • H3: Supporting subsection

    For example:

    <h2>Blog Post Formatting Best Practices</h2>

    <h3>Keep Paragraphs Short</h3>

    Do not use bold text as a substitute for headings.

    A heading is structural. Bold text is only visual emphasis.

    W3C guidance also recommends organizing headings logically so page structure is easier to understand. You can review the official W3C guidance on page headings.

    4. Keep Paragraphs Short and Readable

    Long blocks of text are harder to scan on a screen.

    For many blog posts, paragraphs of around two to four sentences create useful white space. However, this should not become a rigid rule.

    Some ideas need one sentence. Others need a few more.

    The goal is readability.

    If a paragraph becomes visually heavy, ask whether it contains more than one idea and whether it should be split.

    5. Use Bullet and Numbered Lists When They Help

    Lists are useful when several items belong together.

    Use bullet lists for:

    • Features
    • Benefits
    • Checks
    • Examples
    • Options

    Use numbered lists when order matters, such as:

    1. Prepare the draft
    2. Add headings
    3. Format paragraphs
    4. Add images
    5. Insert links
    6. Preview the page
    7. Publish

    Do not convert every section into a list simply because lists are easy to scan. Use them when they genuinely improve the presentation.

    6. Use Bold Text Selectively

    Bold text can help draw attention to an important phrase, warning, definition, or takeaway.

    But if every second sentence is bold, nothing feels important anymore.

    Use <strong> for meaningful emphasis, not decoration.

    Avoid bolding every keyword or entire paragraphs.

    7. Add Relevant Images

    Images can improve understanding when they explain something the text alone does not communicate as efficiently.

    Useful blog visuals include:

    • Screenshots
    • Before-and-after examples
    • Diagrams
    • Charts
    • Process illustrations
    • Annotated examples

    Do not add images only to create visual breaks.

    An unrelated stock photo may make the page look busier without helping the reader.

    When adding images, also consider filenames, alt text, dimensions, compression, and placement. The NextWebOps image SEO guide covers those implementation details in more depth.

    8. Place Images Near the Content They Support

    Image placement is part of blog post formatting.

    If an image explains a specific process, place it close to the paragraph or heading where that process is discussed.

    For example, a visual comparing poorly formatted and well-formatted blog posts should appear inside the section explaining formatting examples rather than at the very end of the article.

    This helps readers connect the visual with the explanation immediately.

    9. Add Internal Links Naturally

    Internal links help readers move from one useful resource to another.

    For example, an article about blog formatting can naturally link to:

    • Image optimization guidance
    • Internal linking guidance
    • Publishing checklists
    • On-page SEO resources

    The anchor text should clearly describe the destination.

    Instead of:

    click here

    use something descriptive such as:

    internal linking best practices

    For a more detailed explanation, see the NextWebOps guide to internal linking best practices.

    10. Use Tables When They Make Comparison Easier

    Tables work well when readers need to compare information across several categories.

    For example:

    Formatting Element Poor Use Better Use
    Headings Random bold text Logical H2 and H3 structure
    Paragraphs Large walls of text Short focused paragraphs
    Images Unrelated stock photos Relevant screenshots or diagrams
    Lists Used everywhere Used when grouping information helps

    Do not force information into a table if normal paragraphs are easier to understand, especially on mobile screens.

    11. Use a Clear Call to Action

    A blog post should usually give the reader a logical next step.

    That next step depends on the page.

    Examples include:

    • Read a related guide
    • Download a resource
    • Review a checklist
    • Contact the business
    • Compare services

    A CTA should feel like a natural continuation of the article, not an unrelated advertisement inserted at the end.

    12. Review the Published Page Before You Finish

    The final formatting check should happen on the actual published or previewed page.

    Review:

    • Heading hierarchy
    • Paragraph spacing
    • List indentation
    • Image alignment
    • Image size
    • Internal links
    • External links
    • Tables
    • CTA placement
    • Mobile display

    This is an important part of publishing QA.

    A draft can look perfect in a document editor but still have spacing, image, or link problems once it is implemented in WordPress.

    Recommended Blog Post Formatting Structure

    A consistent blog post structure makes content easier to publish and easier for readers to follow.

    A useful template is:

    1. Post title
    2. Short introduction
    3. Main H2 sections
    4. H3 subsections where needed
    5. Lists for grouped information
    6. Supporting visuals
    7. Internal links
    8. Optional tables
    9. Call to action
    10. FAQs if useful
    11. Final publishing QA

    This structure can be adjusted according to search intent and article type.

    A short opinion post may not need every element. A detailed SEO guide may need most of them.

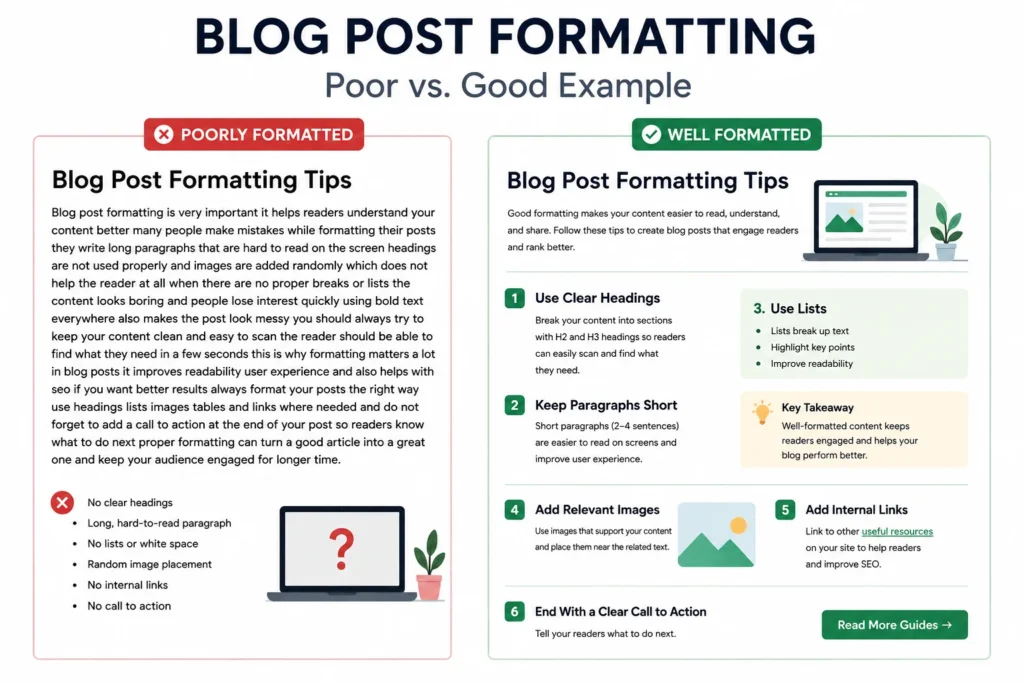
    Blog Post Formatting Example: Poor vs. Improved

    A simple before-and-after comparison shows how much presentation can affect readability.

    Poor and well-formatted blog post examples showing headings, short paragraphs, lists, images, internal links, and a clear call to action

    Poor Formatting

    A poorly formatted article may include:

    • A long introduction
    • No useful headings
    • Large blocks of text
    • Random bold sentences
    • No internal links
    • Unrelated images
    • No CTA

    Improved Formatting

    The same article can become much easier to use when it includes:

    • A clear title
    • A short introduction
    • Logical H2 and H3 headings
    • Short focused paragraphs
    • Relevant lists
    • Useful images
    • Contextual internal links
    • A clear next step

    The information itself may not change much, but the reading experience improves significantly.

    Blog Post Formatting in WordPress Classic Editor

    WordPress Classic Editor gives you both a Visual view and a Text view.

    For clean implementation, the Text view can be especially useful when you want direct control over HTML structure.

    Useful tags include:

    <p> for paragraphs

    <h2> for main sections

    <h3> for supporting subsections

    <ul> and <ol> for lists

    <strong> for emphasis

    <a> for links

    For example:

    <h2>Blog Post Formatting Best Practices</h2>

    <p>Keep paragraphs focused and easy to scan.</p>

    <h3>Use Lists Where Helpful</h3>

    <ul><li>Point one</li><li>Point two</li></ul>

    Do not manually style normal paragraph text to look like a heading. Use the correct HTML element instead.

    Before publishing, use a full WordPress publishing checklist to verify formatting, metadata, links, images, and other implementation details.

    Common Blog Post Formatting Mistakes

    Publishing Large Walls of Text

    Long uninterrupted sections are difficult to scan. Break content into logical paragraphs and sections.

    Using Bold Text Instead of Headings

    Bold text does not create document structure. Use proper heading tags.

    Skipping Heading Levels Randomly

    Keep the hierarchy logical. Do not jump between heading levels simply because one looks visually better.

    Adding Too Many Images

    Images should support the content. More images do not automatically create a better article.

    Using Irrelevant Stock Photos

    Prefer visuals that explain, demonstrate, or support the topic.

    Overusing Lists

    Lists are useful, but an article made almost entirely of bullet points can feel fragmented.

    Adding Links Without Context

    Links should be relevant to the surrounding paragraph and use clear anchor text.

    Using Inconsistent Spacing

    Random blank lines, inconsistent image gaps, and uneven paragraph spacing make the page look unfinished.

    Ignoring Mobile Formatting

    A table, image, or long heading may look fine on desktop and become awkward on a smaller screen.

    Publishing Without Previewing

    Always review the actual page before considering the formatting complete.

    Blog Post Formatting Checklist

    Use this checklist before publishing:

    • Is the post title clear?
    • Is the introduction concise?
    • Does the article use a logical H2/H3 hierarchy?
    • Are paragraphs easy to scan?
    • Are lists used only where helpful?
    • Is bold text used selectively?
    • Are images relevant?
    • Do images include appropriate alt text?
    • Are images placed near relevant content?
    • Are internal links descriptive and useful?
    • Are external references appropriate?
    • Are tables readable?
    • Is there a clear CTA?
    • Does the page display correctly on mobile?
    • Has the final published page been reviewed?

    Make Blog Post Formatting Part of Your Publishing Workflow

    A finished draft is not the same thing as a finished webpage.

    Before publication, content may still need:

    • Heading implementation
    • Paragraph formatting
    • Image optimization
    • Alt text
    • Internal links
    • External sources
    • Metadata
    • CTA placement
    • Mobile checks
    • Final publishing QA

    This is why blog post formatting should be built into the publishing process rather than handled as an afterthought.

    If an article was developed from a content plan, the final formatting should also reflect the structure and intent established in the original SEO content brief.

    NextWebOps provides hands-on content implementation and website publishing support, including formatting, metadata, image optimization, internal linking, content migration, and publishing QA across WordPress, Shopify, and Webflow.

    If your content is written but still needs professional implementation, contact NextWebOps to discuss your website publishing workflow.

    Frequently Asked Questions About Blog Post Formatting

    What is the best format for a blog post?

    A practical format usually includes a clear title, short introduction, logical H2 and H3 headings, readable paragraphs, useful lists, relevant images, internal links, and a clear CTA.

    How should a blog post be structured?

    Start with the title and introduction, divide the content into main H2 sections, use H3 subsections where needed, add visuals and links in relevant places, and finish with a useful next step or FAQ section.

    How long should blog paragraphs be?

    There is no fixed rule, but short paragraphs are usually easier to read online. Two to four sentences is a useful guideline for many sections, as long as the paragraph still communicates one clear idea.

    How many headings should a blog post have?

    Use as many headings as needed to organize the content clearly. Do not add headings only to increase their number.

    Should blog posts include images?

    Use images when they help explain, demonstrate, compare, or support the content. Avoid adding irrelevant visuals simply to break up text.

    Should every blog post have a table of contents?

    No. A table of contents can be helpful for long or complex guides, but shorter articles may not need one.

    What is the difference between H1, H2, and H3?

    H1 is typically the main page or post title. H2 headings divide the article into major sections, while H3 headings organize supporting points within those sections.

    How do I format a blog post in WordPress?

    Use the WordPress editor to apply proper headings, paragraphs, lists, links, and images. In Classic Editor, Text view can help you control the underlying HTML before previewing and publishing the final page.

  • On Page SEO Checklist: 18 Essential Checks Before Publishing

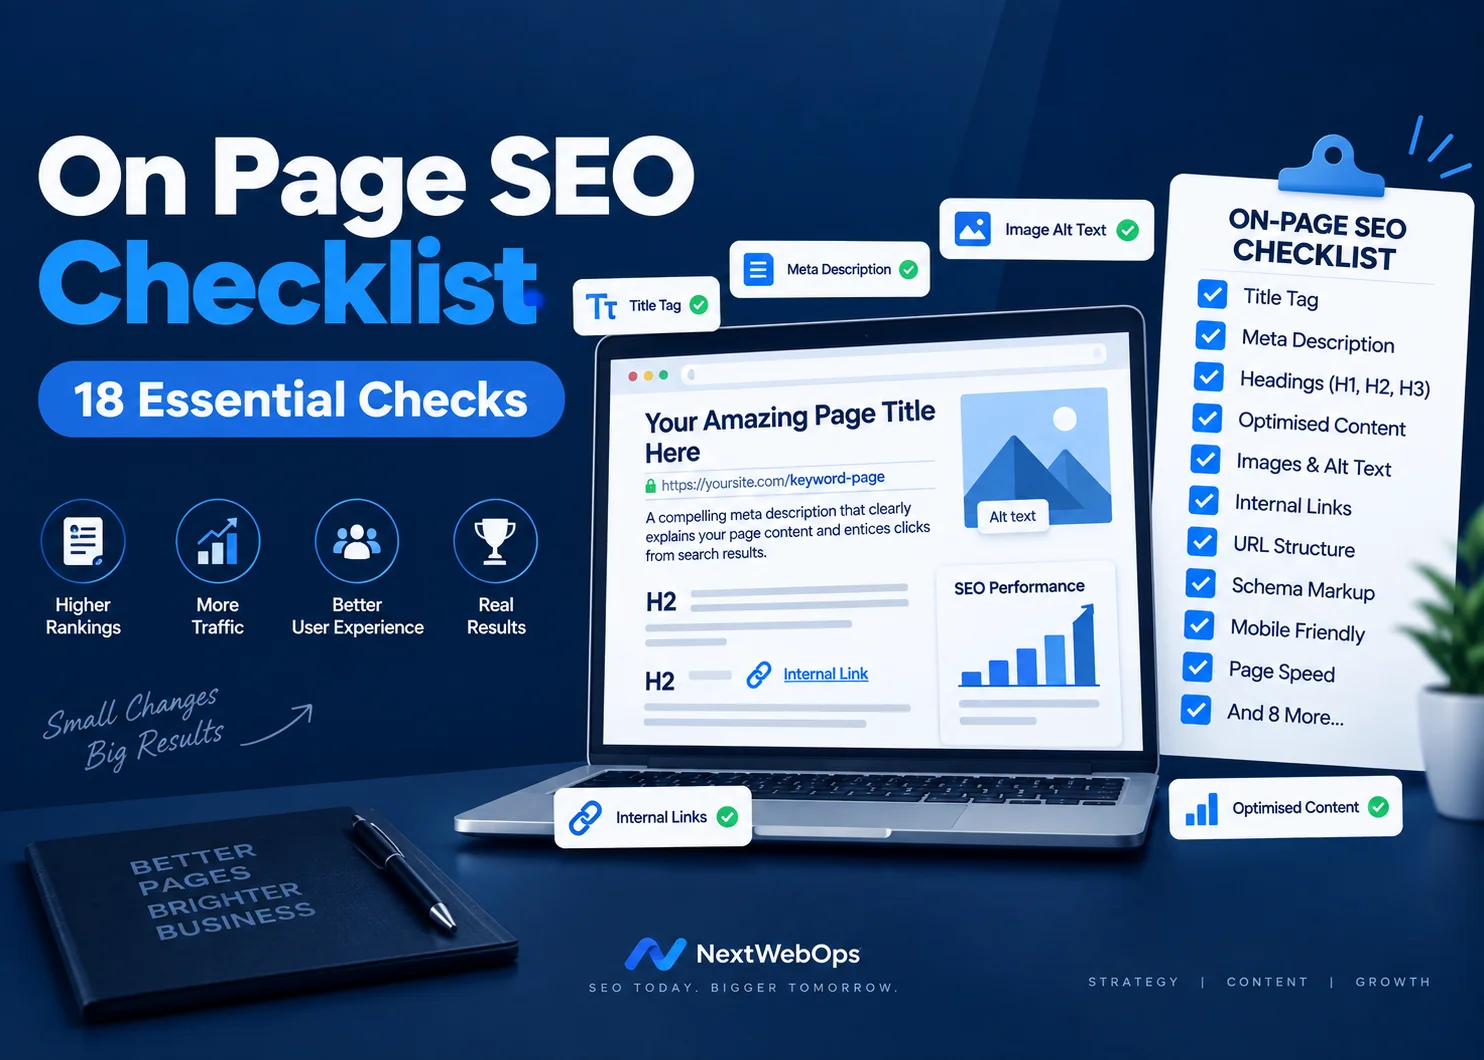
    On Page SEO Checklist: 18 Essential Checks Before Publishing

    On page SEO checklist tasks are easy to overlook when you are preparing a new article or webpage for publication. A page may contain useful information, but missing SEO titles, poor headings, unoptimized images, weak internal links, or incomplete metadata can reduce its chances of performing well in search results.

    Following a consistent on page SEO checklist helps you review these elements before publishing. Instead of relying on memory, you can work through the same process for every page and make sure the content is properly structured for both search engines and visitors.

    This guide covers 18 important checks you can complete before publishing or updating a page.

    What Is On-Page SEO?

    On-page SEO is the process of optimizing elements directly within a webpage to improve its search visibility, relevance, usability, and overall quality.

    These elements include:

    • SEO titles
    • Meta descriptions
    • URLs
    • Headings
    • Page content
    • Keyword usage
    • Internal links
    • External links
    • Images
    • Alt text
    • Page structure

    Unlike off-page SEO, which includes factors such as backlinks from other websites, on-page optimization focuses largely on elements you can control directly.

    If you are optimizing an existing page rather than preparing a new one, performing an on-page SEO audit can help identify missing or poorly optimized elements.

    1. Choose a Primary Focus Keyword

    Every page should have a clearly defined primary topic.

    Before writing or optimizing the content, decide which search term best represents what the page is about.

    For example, the primary keyword for this guide is on page seo checklist.

    You can also use related phrases naturally, including:

    • On-page SEO optimization
    • SEO checklist
    • On-page SEO factors
    • SEO publishing checklist
    • Page optimization checklist

    Your primary keyword gives the page a clear focus, while related terms allow you to explain the topic naturally without repeating exactly the same phrase in every paragraph.

    2. Understand Search Intent

    A well-optimized page still needs to provide what the searcher actually wants.

    Before publishing, ask:

    What is someone searching this keyword expecting to find?

    Search intent normally falls into several broad categories:

    • Informational: The user wants to learn something.
    • Commercial: The user is comparing products, services, or solutions.
    • Transactional: The user is ready to take an action such as purchasing or signing up.
    • Navigational: The user is looking for a particular website or page.

    A person searching for an on page SEO checklist is most likely looking for practical steps they can follow. That makes a detailed checklist more useful than a general discussion of what SEO means.

    You can also review the pages already ranking for your target keyword to understand the content format and questions Google currently associates with that search.

    3. Use a Clear H1

    The H1 is normally the main heading of the page.

    It should clearly communicate the topic to both readers and search engines.

    A strong H1 should:

    • Describe the main topic
    • Include the focus keyword naturally where appropriate
    • Be easy to understand
    • Match the content of the page

    On most WordPress themes, the post title automatically becomes the H1. If that is how your website is configured, you should not manually add another H1 inside the article body.

    Use H2 and H3 headings to organize the remaining sections.

    4. Create a Logical Heading Structure

    Headings make long content easier to scan and help establish relationships between different parts of the article.

    A typical structure is:

    H1: Main page title
    H2: Main sections
    H3: Supporting sections within an H2

    Do not select heading levels simply because you prefer their visual size.

    For example, if a section discusses image optimization and you need subsections for compression and alt text, the structure could be:

    H2: Optimize Images
    H3: Compress Images
    H3: Write Alt Text

    This gives both visitors and search engines a predictable content hierarchy.

    5. Optimize Your SEO Title

    The SEO title is one of the most important elements of your search result.

    It should accurately describe the page and encourage relevant users to click.

    For an on page SEO checklist, placing the primary keyword near the beginning of the SEO title makes the topic immediately clear.

    A good SEO title should:

    • Include the primary keyword
    • Communicate a clear benefit
    • Be relevant to the content
    • Avoid unnecessary words
    • Stay within a reasonable display length

    Rank Math allows you to control the SEO title separately from the visible post title. Always review the search preview before publishing.

    6. Write an Optimized Meta Description

    A meta description summarizes the page for users viewing it in search results.

    While Google can sometimes choose its own description from the page, providing a relevant meta description remains an important publishing step.

    Your meta description should:

    • Describe what the page contains
    • Include the primary keyword naturally
    • Give the searcher a reason to visit
    • Avoid excessive keyword repetition

    For this article, the meta description should clearly communicate that the reader will receive a practical on page SEO checklist covering content, headings, images, links, and metadata.

    7. Create a Short, Descriptive URL

    A page URL should be simple enough for users and search engines to understand.

    For this article, a clean URL is:

    nextwebops.com/on-page-seo-checklist/

    Avoid URLs that contain unnecessary information such as:

    • Random numbers
    • Long strings of words
    • Publication dates that are not required
    • Unrelated category names
    • Unnecessary stop words

    Once a page is published and starts receiving traffic or backlinks, avoid changing its URL without a good reason. If a URL must change, use the appropriate redirect.

    8. Include the Focus Keyword Early

    Your page should establish its subject quickly.

    Including the primary topic in the opening paragraph helps readers confirm that they have reached the right page.

    It also prevents long introductions that discuss several unrelated ideas before addressing the actual search query.

    Your focus keyword does not need to appear in every sentence. The goal is to use the on page SEO checklist phrase where it sounds natural while also using related language throughout the article.

    9. Cover the Topic Thoroughly

    SEO settings cannot compensate for content that does not answer the user’s question.

    Before publishing, review the article from the reader’s perspective.

    Ask whether there are:

    • Important questions left unanswered
    • Sections that need more explanation
    • Repeated sections that add little value
    • Claims that need supporting information
    • Topics included only to increase word count

    There is no universal word count required for SEO.

    A page should contain enough information to satisfy the user’s search intent. Some topics need only a short explanation, while comprehensive guides may require several thousand words.

    Google’s own guidance on creating helpful content emphasizes producing content primarily for people rather than creating pages simply to manipulate search rankings.

    10. Make the Content Easy to Read

    Good readability helps visitors find information quickly, particularly on mobile devices.

    Use formatting elements such as:

    • Short paragraphs
    • Clear headings
    • Bullet lists
    • Numbered steps
    • Bold text where useful
    • Enough white space

    Avoid long blocks of uninterrupted text.

    Many visitors scan an article before reading it closely, so headings and short sections can help them locate the information they need.

    11. Add Relevant Internal Links

    Internal links connect related pages within your website.

    They are useful for visitors because they provide a path to additional information. They can also help search engines discover pages and understand relationships between different topics on your site.

    For example, your on page SEO checklist is only one part of the publishing process. A complete WordPress publishing checklist can help you review categories, formatting, images, links, metadata, and other publishing tasks.

    When adding internal links:

    • Choose pages that are genuinely relevant
    • Use descriptive anchor text
    • Place links where they provide additional value
    • Avoid adding excessive links
    • Review older pages for new linking opportunities

    Internal links should make navigating your website easier rather than distracting readers.

    12. Optimize Anchor Text

    Anchor text is the clickable wording used within a link.

    Whenever possible, it should indicate what the linked page is about.

    Generic anchors such as these provide little context:

    • Click here
    • Read more
    • Learn more
    • Go here

    Instead, use descriptive wording that fits naturally into the sentence.

    For example, our guide to internal linking best practices provides more detail about choosing relevant pages and creating useful anchor text.

    Do not force the same keyword-rich anchor text into every link. Variation is natural and often better for readers.

    13. Optimize Images Before Uploading

    Images improve visual presentation, but unnecessarily large images can increase page size and slow loading.

    Before uploading an image, check:

    • Image dimensions
    • File size
    • File format
    • Filename
    • Alt text

    Use descriptive filenames rather than camera-generated or random filenames.

    For example:

    on-page-seo-checklist.webp

    is much clearer than:

    IMG_736291.jpg

    You can learn more about filenames, compression, image formats, and alternative text in our complete guide to image SEO.

    14. Add Descriptive Image Alt Text

    Alt text describes an image for users who cannot see it and is an important accessibility element.

    It can also provide search engines with additional context about an image.

    When an image genuinely represents the topic, the focus keyword can sometimes fit naturally into the alt text.

    For example:

    On page SEO checklist showing 18 optimization checks

    This is much better than stuffing several unrelated keywords into the alt attribute.

    Describe what the image actually shows. If the image is purely decorative, it may not need descriptive alt text.

    15. Include Useful External Links

    External links can provide readers with supporting information from authoritative sources.

    You should not add an outbound link simply to satisfy an SEO tool, but linking to a relevant primary source can improve the usefulness of an article.

    For example, Google’s SEO Starter Guide provides additional information about how Google recommends organizing and optimizing website content.

    Before publishing, check that outbound links:

    • Go to the intended page
    • Are still active
    • Support the surrounding information
    • Come from an appropriate source
    • Use appropriate link attributes

    Ordinary editorial links to useful resources generally do not need to be marked nofollow. Sponsored or paid links should be handled differently.

    16. Review Keyword Usage

    Once the content is complete, review how often and where your primary keyword appears.

    A strong on page SEO checklist article should make its topic obvious without repeating the same phrase unnaturally.

    Your primary keyword can appear naturally in areas such as:

    • Post title
    • SEO title
    • Meta description
    • URL
    • Opening paragraph
    • Selected headings
    • Body content
    • Relevant image alt text

    Do not attempt to reach an arbitrary keyword density by inserting the phrase into sentences where it does not belong.

    Use closely related terms throughout the content so the article remains natural and comprehensive.

    17. Review Your Rank Math SEO Settings

    After completing the content, open the Rank Math SEO panel and review its recommendations.

    Check:

    • Focus keyword
    • SEO title
    • Meta description
    • URL
    • Keyword placement
    • Internal links
    • External links
    • Image alt text
    • Content length
    • Content readability
    • Title readability
    • Schema settings

    A good on page SEO checklist should include this final plugin review because small issues are easy to miss during content production.

    However, Rank Math’s score is a recommendation system rather than a direct Google ranking score.

    Do not make content awkward simply to turn every recommendation green. The page should remain useful and natural for readers.

    18. Perform a Final Front-End Quality Check

    Do not rely only on what you see inside the WordPress editor.

    Preview the finished page on the front end before publishing.

    Check both desktop and mobile versions for:

    • Correct heading sizes
    • Paragraph spacing
    • Image alignment
    • Broken images
    • Broken links
    • Mobile readability
    • Buttons and calls to action
    • Author information
    • Categories
    • Metadata
    • Unexpected formatting

    This step is particularly important when content has been copied from Google Docs, Microsoft Word, or another CMS because unwanted formatting can sometimes carry over.

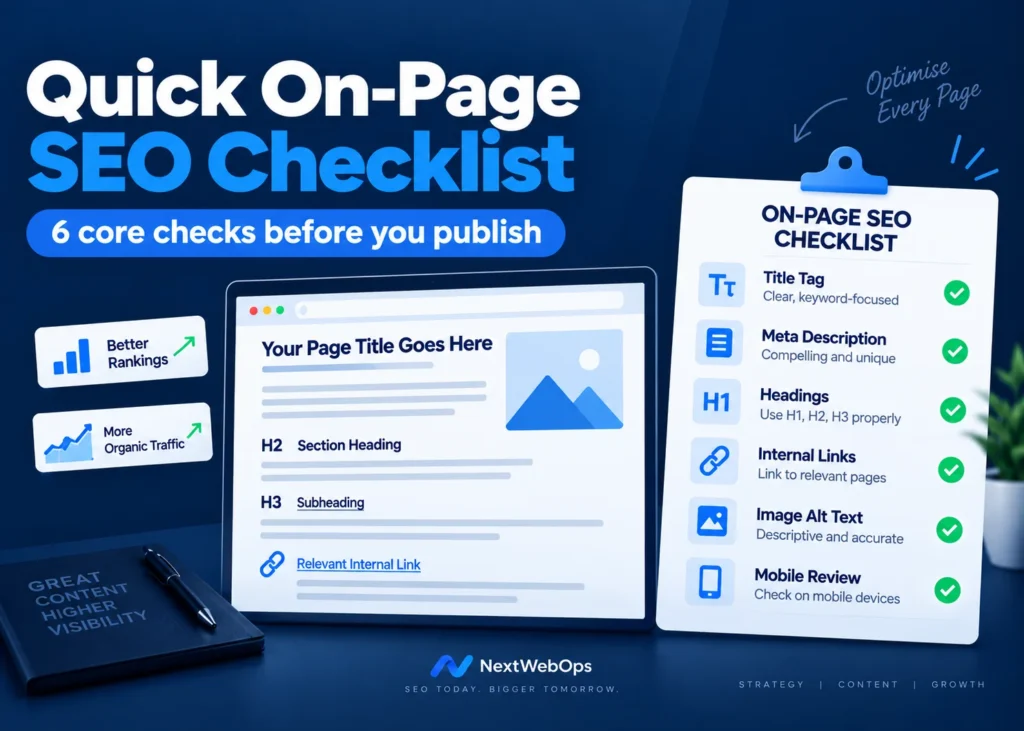
    Quick on page SEO checklist with six core checks before publishing


    Quick On Page SEO Checklist Before Publishing

    Use this final on page SEO checklist before clicking Publish:

    • ✓ Primary focus keyword selected
    • ✓ Search intent confirmed
    • ✓ One clear H1 used
    • ✓ H2 and H3 structure reviewed
    • ✓ Focus keyword included in the SEO title
    • ✓ Meta description added
    • ✓ Short descriptive URL created
    • ✓ Focus keyword appears early in the content
    • ✓ Topic is covered thoroughly
    • ✓ Content is easy to read
    • ✓ Internal links added
    • ✓ Anchor text reviewed
    • ✓ Images resized and compressed
    • ✓ Image filenames optimized
    • ✓ Alt text added where appropriate
    • ✓ Useful outbound links checked
    • ✓ Keyword usage reviewed
    • ✓ Rank Math recommendations checked
    • ✓ Desktop and mobile page reviewed

    A Consistent SEO Process Produces Better Pages

    Good on-page SEO does not depend on one setting, one keyword, or one plugin score.

    It comes from consistently optimizing the small elements that contribute to a complete page.

    Your title needs to communicate the topic. Your headings need to organize the content. Images should be properly prepared. Internal links should connect relevant information. Metadata should accurately represent the page, and the finished article should be easy to use on both desktop and mobile.

    Using the same on page SEO checklist every time you publish can make that process faster and more reliable.

    It also creates greater consistency across your website because each article goes through the same quality-control process before publication.

    Frequently Asked Questions About an On Page SEO Checklist

    What should an on page SEO checklist include?

    An on page SEO checklist should include keyword research, search intent, SEO titles, meta descriptions, URLs, heading structure, content optimization, internal linking, external links, image optimization, alt text, and final quality checks.

    How often should I perform on-page SEO checks?

    Perform the main checks before publishing every new page. You should also periodically review older pages because links, search intent, information, and competing search results can change over time.

    How many times should I use my focus keyword?

    There is no fixed number that works for every article. The primary keyword should appear naturally in important areas of the page without making the writing repetitive or difficult to read.

    Should the focus keyword appear in every heading?

    No. Use the keyword in headings when it naturally describes the section. You do not need to place it in every H2 or H3.

    Does Rank Math automatically optimize a page?

    No. Rank Math can identify possible optimization issues and help manage SEO settings, but you still need to create useful content, optimize headings and images, add relevant links, and review the finished page.

    Is a high Rank Math score enough to rank on Google?

    No. A high Rank Math score means the page meets many of the plugin’s recommended checks. Rankings can also depend on content quality, competition, backlinks, website authority, technical SEO, user intent, and other factors.

  • WordPress Publishing Checklist: From Draft to Live

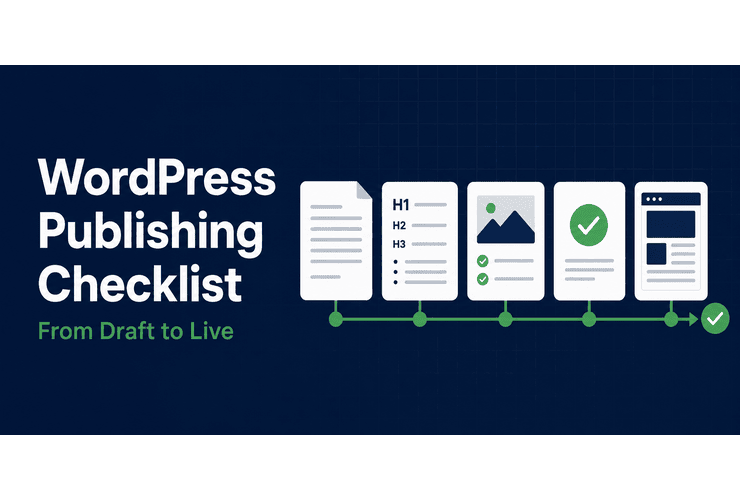
    WordPress Publishing Checklist: From Draft to Live

    A practical workflow for formatting, reviewing, approving, publishing, and checking WordPress posts.

    Publishing a WordPress post involves more than pasting a draft into the editor and clicking Publish. The words may be finished, but the page still needs structure, clean formatting, optimized images, accurate links, metadata, approval, and a final check on the live site.

    That work is content implementation: turning an approved draft into a reliable webpage. A repeatable WordPress publishing checklist makes the process easier to manage and much less dependent on memory. It also prevents the small mistakes that make an otherwise strong article feel unfinished.

    This guide covers the full workflow, from receiving the draft to checking the published page.

    What WordPress Content Implementation Covers

    Content writing and content implementation are related, but they are not the same job. Writing determines what the article says. Implementation determines how the article functions on the website.

    A content implementer typically:

    • Cleans text imported from Word or Google Docs
    • Creates a logical heading structure
    • Formats paragraphs, lists, quotes, tables, and buttons
    • Prepares featured and in-content images
    • Adds and tests internal and external links
    • Completes the slug, excerpt, category, author, and SEO fields
    • Checks the post against brand and website standards
    • Shares a preview for approval
    • Reviews the page on desktop and mobile
    • Schedules or publishes the approved version
    • Checks the live page after publication

    These details matter. A well-written article can still create a poor experience if it contains two H1 headings, an oversized image, a broken button, or a call to action that leads to the wrong page.

    Before You Open WordPress

    A quick handoff check prevents most avoidable rework. Before building the post, confirm that you have the latest draft and the information needed to finish it.

    At minimum, establish:

    • The final article title and approved draft
    • The correct website and post type
    • The author or byline
    • The primary category and any approved tags
    • The featured image and any in-content images
    • The intended call to action and destination URL
    • The publication date, time, and timezone
    • The person responsible for final approval

    Review any claims that represent the business, including services, locations, prices, guarantees, availability, processes, and timelines. If a required asset or decision is missing, flag it now. It is faster to resolve a gap before implementation than to rebuild the post later.

    The WordPress Publishing Checklist

    1. Create the Post and Clean the Draft

    Create a new post in the correct website, language, and post type. Put the approved title in the WordPress title field rather than repeating it inside the body.

    Text copied from Word, Google Docs, an AI tool, or another website can bring unwanted formatting with it. The editor may look acceptable while the markup contains inconsistent fonts, inline styles, empty paragraphs, or broken lists.

    Review the imported draft from top to bottom. Remove:

    • A duplicate title or H1 inside the article body
    • Empty paragraphs and unnecessary spacer blocks
    • Double spaces and accidental line breaks
    • Drafting notes, prompts, or unresolved comments
    • Bold or italic formatting applied to the wrong text
    • Strange font sizes, colors, or pasted styles

    Use the correct WordPress block for each element. Lists should be List blocks, quotations should be Quote blocks, and buttons should be Button blocks. Let the theme control the general typography instead of manually styling every paragraph.

    2. Build a Clear Heading Structure

    The post title normally serves as the page’s H1. Use H2 headings for the main sections and H3 headings for useful subdivisions within those sections.

    Do not choose heading levels because of their visual size. Headings describe the relationship between sections for readers, search engines, screen readers, and future editors.

    Read the headings by themselves. They should form a clear outline of the article. Replace vague labels such as “More Information” with headings that tell the reader what the section contains. If two headings make essentially the same promise, combine them or make the difference clearer.

    3. Format for Comfortable Reading

    Break dense text into focused paragraphs, but do not turn every sentence into its own paragraph. Use formatting to support meaning rather than decorate the page.

    • Use bullets for related points that do not need an order.
    • Use numbered lists for steps that should be followed in sequence.
    • Use tables only when readers need to compare structured information.
    • Use bold text sparingly to highlight a term or key instruction.
    • Use buttons for actions, not ordinary informational links.

    Check the rhythm of the page in Preview. Headings should not sit too close to the previous paragraph, images should stay near the text they support, and empty blocks should not create oversized gaps.

    4. Prepare and Optimize Images

    Images influence page speed, accessibility, blog archives, and social sharing. Prepare them before upload whenever possible. For filenames, formats, compression, and alt text in more depth, use the full image SEO guide.

    For each image:

    • Crop it to the required aspect ratio.
    • Resize it close to its displayed dimensions.
    • Compress it without obvious quality loss.
    • Use WebP, JPEG, or PNG according to the image type.
    • Give the file a short, descriptive name.
    • Confirm that the website has permission to use it.

    A 1200 x 630 px featured image is a practical choice for many articles and social previews, although the site’s own template should decide the final dimensions.

    Google’s image SEO best practices cover descriptive filenames, useful alt text, and placing images near relevant content. For a workflow graphic, for example: “WordPress publishing workflow showing draft cleanup, formatting, review, publishing, and live-page checks.” Do not use the article title as the alt text for every image. Decorative images that convey no information may use an empty alt attribute.

    After upload, verify the image’s placement, displayed size, caption, credit, and link. Check screenshots and diagrams on mobile, where small text can become unreadable even when the image technically scales.

    5. Add and Test the Links

    Internal links help readers find related articles, services, and useful next steps. Add them where the destination naturally supports the current section. For cluster structure, orphan pages, and anchor-text choices, follow internal linking best practices. For crawlable links and clear anchors, see Google’s link best practices.

    External links should support a claim or provide a genuinely useful source. When possible, link to the original organization, official documentation, or primary source.

    Test every link in Preview. Confirm that it:

    • Opens the intended page
    • Uses the correct and secure URL
    • Does not point to a staging site or draft
    • Does not lead through an unnecessary redirect
    • Follows the site’s policy for new tabs and link attributes

    If a destination is not ready, record it as pending rather than publishing a broken link.

    6. Complete the SEO and Post Settings

    Finish the URL before publication. A clean slug is readable, descriptive, and stable. For this article, a suitable option is:

    /wordpress-publishing-checklist/

    Avoid changing the slug after the post is live unless you also create an appropriate redirect.

    Complete the SEO title and meta description. They should accurately summarize the page, not repeat keywords mechanically. SEO plugins such as Yoast and Rank Math are useful for finding missing fields, but their colored scores are not editorial goals. Natural writing and a useful page matter more than turning every indicator green. That approach matches Google’s guidance in the SEO Starter Guide: optimize for people first, with clear titles, structure, and useful content.

    Pair this publishing workflow with the on-page SEO checklist so titles, headings, keyword use, and indexing settings get a dedicated pass. When you write the snippet, how to write meta descriptions covers search intent, length, and uniqueness.

    Then review the WordPress post details:

    • Excerpt: Write a short summary rather than relying on an awkward automatic cut-off.
    • Category: Choose one primary category that reflects the article’s main purpose.
    • Tags: Add only established, useful tags; do not create near-duplicates for every post.
    • Author: Confirm the correct byline and author profile.
    • Date and timezone: Check the site’s timezone before scheduling.
    • Comments: Follow the site’s policy rather than relying on the default setting.
    • Canonical and indexing: Leave these at the approved site defaults unless the post has a specific SEO requirement.
    • Social preview and schema: Verify the title, description, image, and article type when the SEO setup provides these controls.

    7. Check the Call to Action

    Every call to action should give the reader a sensible next step. It may lead to a related guide, a service page, a contact form, or a consultation page.

    Check the CTA’s wording, destination, and placement. It should match the article’s subject and the reader’s likely intent. Avoid adding several competing CTAs simply because there is space for them. One clear action is usually stronger than a row of unrelated buttons.

    8. Share the Draft for Approval

    Do not ask a client or stakeholder to approve the source document if the final page contains layout, links, images, and website-specific settings they have not seen. Share a working preview of the WordPress post.

    Send the reviewer:

    • The preview link
    • A short note explaining what has been implemented
    • A list of any unresolved items
    • A clear deadline for feedback
    • The planned publication date and timezone

    Keep feedback in one place and record the final approval. Once the post is approved, avoid making untracked editorial changes. If a significant change is still required, return it for confirmation.

    9. Review the Front End on Desktop and Mobile

    The WordPress editor is not the finished page. Open the preview on the front end and review it as a visitor would.

    Start with the first screen. Confirm that the title, author, date, category, and featured image appear correctly and that the introduction is easy to read. Then review the entire desktop layout for:

    • Consistent heading sizes and spacing
    • Readable paragraph width and line length
    • Correct list indentation
    • Images that are sharp and properly aligned
    • Tables, quotes, embeds, and buttons that fit the layout
    • Links and CTAs that work
    • No leftover notes, placeholders, or empty blocks

    Repeat the review at tablet and mobile widths. Watch for horizontal scrolling, clipped buttons, oversized headings, broken columns, crowded metadata, and graphics whose text is too small to read.

    Complete a basic accessibility pass as well. Check meaningful alt text, descriptive links, logical headings, sufficient color contrast, visible keyboard focus, and captions or transcripts for media when required.

    Finally, read the article once more on the front end. This often reveals duplicated words, missing punctuation, and awkward breaks that are easy to overlook in the editor.

    10. Schedule or Publish Carefully

    Before changing the post’s status, confirm that approval has been recorded and that no required field remains incomplete.

    For a scheduled post, check the date, time, timezone, and whether WordPress shows the expected status. For an immediate publication, verify that Publish immediately is intentional. Also confirm that the correct post—not a duplicate or earlier draft—is being released.

    When several people work on the site, note who is responsible for the live-page check. Publishing should have a clear owner rather than ending with the assumption that someone else will review it.

    11. Check the Live Page

    Open the public URL immediately after publication. Do not treat the preview as the final check; caching, sharing tools, templates, and production settings can behave differently on the live site.

    Confirm that:

    • The URL is correct and the page loads normally
    • The title, author, date, category, and featured image are correct
    • The post appears on the intended blog and category pages
    • Images load and links work
    • The CTA reaches the right destination
    • The mobile layout remains usable
    • No draft notes, admin-only links, or placeholders are visible
    • The SEO title, description, canonical URL, and social image are correct

    Update the team’s tracker with the live URL, publication date, approver, and any follow-up task. That small record makes future audits and updates much easier.

    Quick WordPress Publishing Checklist

    Content and Structure

    Publishing check
    Latest approved draft used
    Title added once in the WordPress title field
    Pasted formatting, notes, and empty blocks removed
    H2 and H3 hierarchy checked
    Paragraphs, lists, quotes, and buttons formatted consistently


    Images, Links, and SEO

    Publishing check
    Featured and in-content images resized and compressed
    Filenames, alt text, captions, and credits reviewed
    Internal, external, and CTA links tested
    Slug, SEO title, and meta description completed
    Excerpt, category, tags, author, and publication details confirmed
    Social preview, canonical URL, and indexing settings reviewed


    Approval and Publication

    Publishing check
    Front-end preview shared with the approver
    Final approval recorded
    Desktop, tablet, and mobile layouts checked
    Accessibility and final proofreading passes completed
    Date, time, and timezone confirmed
    Live page, archives, links, images, CTA, and metadata checked
    Live URL and completion details recorded


    Common Mistakes to Avoid

    • Repeating the title as an H1. The WordPress title already handles the page’s main heading on most themes.
    • Trusting pasted formatting. Clean markup is easier to maintain and less likely to fight the theme.
    • Publishing without a featured image or excerpt. Both may affect blog archives, category pages, and social previews.
    • Creating a new category or tag for every post. A smaller, intentional taxonomy is more useful to readers.
    • Writing alt text for search engines instead of people. Describe the image’s useful meaning in context.
    • Testing only inside the editor. The front-end page is the experience readers will actually receive.
    • Publishing before approval is recorded. A clear record protects both the client and the implementer.
    • Skipping the live-page check. Preview mode cannot reveal every production issue.

    For important posts, use Google Search Console’s URL Inspection tool to confirm the live URL is crawlable and request indexing when needed. If an older post is underperforming after launch, run an on-page SEO audit to prioritize fixes.

    Frequently Asked Questions

    What should I check before publishing a WordPress post?

    Check the approved content, title, headings, formatting, images, links, CTA, slug, excerpt, category, author, SEO fields, social preview, and responsive layout. Confirm approval and scheduling details, then inspect the public page after it goes live.

    What is the difference between Draft and Pending Review?

    Draft usually means the post is still being prepared. Pending Review signals that implementation is complete enough for an editor or approver to review it. Teams may adapt these statuses, but everyone should use them consistently.

    How can a client preview a draft without a WordPress login?

    Use the site’s approved private-preview method, such as a secure preview-link plugin or a staging environment. Do not make an unfinished post public simply to collect feedback.

    How many categories should a post have?

    One primary category is usually enough. Add another only when it genuinely helps readers navigate the site and matches the established taxonomy.

    What should I check immediately after publishing?

    Open the live URL and verify the page layout, images, links, CTA, metadata, blog archive, category archive, and mobile view. Record the live URL and any follow-up action.

    Need Reliable WordPress Content Implementation?

    NextWebOps helps businesses and agencies turn approved drafts into accurate, organized, SEO-ready WordPress posts. From formatting and media preparation to approval support and live-page checks, the process is handled from draft to publication.