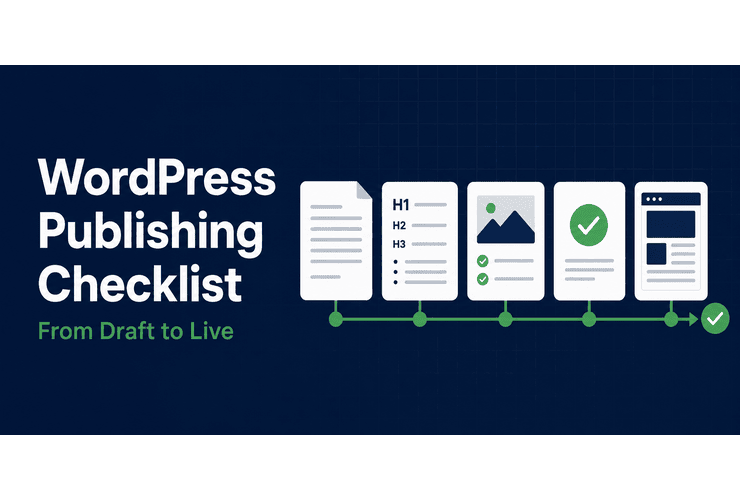
A practical workflow for formatting, reviewing, approving, publishing, and checking WordPress posts.
Publishing a WordPress post involves more than pasting a draft into the editor and clicking Publish. The words may be finished, but the page still needs structure, clean formatting, optimized images, accurate links, metadata, approval, and a final check on the live site.
That work is content implementation: turning an approved draft into a reliable webpage. A repeatable WordPress publishing checklist makes the process easier to manage and much less dependent on memory. It also prevents the small mistakes that make an otherwise strong article feel unfinished.
This guide covers the full workflow, from receiving the draft to checking the published page.
What WordPress Content Implementation Covers
Content writing and content implementation are related, but they are not the same job. Writing determines what the article says. Implementation determines how the article functions on the website.
A content implementer typically:
- Cleans text imported from Word or Google Docs
- Creates a logical heading structure
- Formats paragraphs, lists, quotes, tables, and buttons
- Prepares featured and in-content images
- Adds and tests internal and external links
- Completes the slug, excerpt, category, author, and SEO fields
- Checks the post against brand and website standards
- Shares a preview for approval
- Reviews the page on desktop and mobile
- Schedules or publishes the approved version
- Checks the live page after publication
These details matter. A well-written article can still create a poor experience if it contains two H1 headings, an oversized image, a broken button, or a call to action that leads to the wrong page.
Before You Open WordPress
A quick handoff check prevents most avoidable rework. Before building the post, confirm that you have the latest draft and the information needed to finish it.
At minimum, establish:
- The final article title and approved draft
- The correct website and post type
- The author or byline
- The primary category and any approved tags
- The featured image and any in-content images
- The intended call to action and destination URL
- The publication date, time, and timezone
- The person responsible for final approval
Review any claims that represent the business, including services, locations, prices, guarantees, availability, processes, and timelines. If a required asset or decision is missing, flag it now. It is faster to resolve a gap before implementation than to rebuild the post later.
The WordPress Publishing Checklist
1. Create the Post and Clean the Draft
Create a new post in the correct website, language, and post type. Put the approved title in the WordPress title field rather than repeating it inside the body.
Text copied from Word, Google Docs, an AI tool, or another website can bring unwanted formatting with it. The editor may look acceptable while the markup contains inconsistent fonts, inline styles, empty paragraphs, or broken lists.
Review the imported draft from top to bottom. Remove:
- A duplicate title or H1 inside the article body
- Empty paragraphs and unnecessary spacer blocks
- Double spaces and accidental line breaks
- Drafting notes, prompts, or unresolved comments
- Bold or italic formatting applied to the wrong text
- Strange font sizes, colors, or pasted styles
Use the correct WordPress block for each element. Lists should be List blocks, quotations should be Quote blocks, and buttons should be Button blocks. Let the theme control the general typography instead of manually styling every paragraph.
2. Build a Clear Heading Structure
The post title normally serves as the page’s H1. Use H2 headings for the main sections and H3 headings for useful subdivisions within those sections.
Do not choose heading levels because of their visual size. Headings describe the relationship between sections for readers, search engines, screen readers, and future editors.
Read the headings by themselves. They should form a clear outline of the article. Replace vague labels such as “More Information” with headings that tell the reader what the section contains. If two headings make essentially the same promise, combine them or make the difference clearer.
3. Format for Comfortable Reading
Break dense text into focused paragraphs, but do not turn every sentence into its own paragraph. Use formatting to support meaning rather than decorate the page.
- Use bullets for related points that do not need an order.
- Use numbered lists for steps that should be followed in sequence.
- Use tables only when readers need to compare structured information.
- Use bold text sparingly to highlight a term or key instruction.
- Use buttons for actions, not ordinary informational links.
Check the rhythm of the page in Preview. Headings should not sit too close to the previous paragraph, images should stay near the text they support, and empty blocks should not create oversized gaps.
4. Prepare and Optimize Images
Images influence page speed, accessibility, blog archives, and social sharing. Prepare them before upload whenever possible. For filenames, formats, compression, and alt text in more depth, use the full image SEO guide.
For each image:
- Crop it to the required aspect ratio.
- Resize it close to its displayed dimensions.
- Compress it without obvious quality loss.
- Use WebP, JPEG, or PNG according to the image type.
- Give the file a short, descriptive name.
- Confirm that the website has permission to use it.
A 1200 x 630 px featured image is a practical choice for many articles and social previews, although the site’s own template should decide the final dimensions.
Google’s image SEO best practices cover descriptive filenames, useful alt text, and placing images near relevant content. For a workflow graphic, for example: “WordPress publishing workflow showing draft cleanup, formatting, review, publishing, and live-page checks.” Do not use the article title as the alt text for every image. Decorative images that convey no information may use an empty alt attribute.
After upload, verify the image’s placement, displayed size, caption, credit, and link. Check screenshots and diagrams on mobile, where small text can become unreadable even when the image technically scales.
5. Add and Test the Links
Internal links help readers find related articles, services, and useful next steps. Add them where the destination naturally supports the current section. For cluster structure, orphan pages, and anchor-text choices, follow internal linking best practices. For crawlable links and clear anchors, see Google’s link best practices.
External links should support a claim or provide a genuinely useful source. When possible, link to the original organization, official documentation, or primary source.
Test every link in Preview. Confirm that it:
- Opens the intended page
- Uses the correct and secure URL
- Does not point to a staging site or draft
- Does not lead through an unnecessary redirect
- Follows the site’s policy for new tabs and link attributes
If a destination is not ready, record it as pending rather than publishing a broken link.
6. Complete the SEO and Post Settings
Finish the URL before publication. A clean slug is readable, descriptive, and stable. For this article, a suitable option is:
/wordpress-publishing-checklist/
Avoid changing the slug after the post is live unless you also create an appropriate redirect.
Complete the SEO title and meta description. They should accurately summarize the page, not repeat keywords mechanically. SEO plugins such as Yoast and Rank Math are useful for finding missing fields, but their colored scores are not editorial goals. Natural writing and a useful page matter more than turning every indicator green. That approach matches Google’s guidance in the SEO Starter Guide: optimize for people first, with clear titles, structure, and useful content.
Pair this publishing workflow with the on-page SEO checklist so titles, headings, keyword use, and indexing settings get a dedicated pass. When you write the snippet, how to write meta descriptions covers search intent, length, and uniqueness.
Then review the WordPress post details:
- Excerpt: Write a short summary rather than relying on an awkward automatic cut-off.
- Category: Choose one primary category that reflects the article’s main purpose.
- Tags: Add only established, useful tags; do not create near-duplicates for every post.
- Author: Confirm the correct byline and author profile.
- Date and timezone: Check the site’s timezone before scheduling.
- Comments: Follow the site’s policy rather than relying on the default setting.
- Canonical and indexing: Leave these at the approved site defaults unless the post has a specific SEO requirement.
- Social preview and schema: Verify the title, description, image, and article type when the SEO setup provides these controls.
7. Check the Call to Action
Every call to action should give the reader a sensible next step. It may lead to a related guide, a service page, a contact form, or a consultation page.
Check the CTA’s wording, destination, and placement. It should match the article’s subject and the reader’s likely intent. Avoid adding several competing CTAs simply because there is space for them. One clear action is usually stronger than a row of unrelated buttons.
8. Share the Draft for Approval
Do not ask a client or stakeholder to approve the source document if the final page contains layout, links, images, and website-specific settings they have not seen. Share a working preview of the WordPress post.
Send the reviewer:
- The preview link
- A short note explaining what has been implemented
- A list of any unresolved items
- A clear deadline for feedback
- The planned publication date and timezone
Keep feedback in one place and record the final approval. Once the post is approved, avoid making untracked editorial changes. If a significant change is still required, return it for confirmation.
9. Review the Front End on Desktop and Mobile
The WordPress editor is not the finished page. Open the preview on the front end and review it as a visitor would.
Start with the first screen. Confirm that the title, author, date, category, and featured image appear correctly and that the introduction is easy to read. Then review the entire desktop layout for:
- Consistent heading sizes and spacing
- Readable paragraph width and line length
- Correct list indentation
- Images that are sharp and properly aligned
- Tables, quotes, embeds, and buttons that fit the layout
- Links and CTAs that work
- No leftover notes, placeholders, or empty blocks
Repeat the review at tablet and mobile widths. Watch for horizontal scrolling, clipped buttons, oversized headings, broken columns, crowded metadata, and graphics whose text is too small to read.
Complete a basic accessibility pass as well. Check meaningful alt text, descriptive links, logical headings, sufficient color contrast, visible keyboard focus, and captions or transcripts for media when required.
Finally, read the article once more on the front end. This often reveals duplicated words, missing punctuation, and awkward breaks that are easy to overlook in the editor.
10. Schedule or Publish Carefully
Before changing the post’s status, confirm that approval has been recorded and that no required field remains incomplete.
For a scheduled post, check the date, time, timezone, and whether WordPress shows the expected status. For an immediate publication, verify that Publish immediately is intentional. Also confirm that the correct post—not a duplicate or earlier draft—is being released.
When several people work on the site, note who is responsible for the live-page check. Publishing should have a clear owner rather than ending with the assumption that someone else will review it.
11. Check the Live Page
Open the public URL immediately after publication. Do not treat the preview as the final check; caching, sharing tools, templates, and production settings can behave differently on the live site.
Confirm that:
- The URL is correct and the page loads normally
- The title, author, date, category, and featured image are correct
- The post appears on the intended blog and category pages
- Images load and links work
- The CTA reaches the right destination
- The mobile layout remains usable
- No draft notes, admin-only links, or placeholders are visible
- The SEO title, description, canonical URL, and social image are correct
Update the team’s tracker with the live URL, publication date, approver, and any follow-up task. That small record makes future audits and updates much easier.
Quick WordPress Publishing Checklist
Content and Structure
| ✓ | Publishing check |
| ☐ | Latest approved draft used |
| ☐ | Title added once in the WordPress title field |
| ☐ | Pasted formatting, notes, and empty blocks removed |
| ☐ | H2 and H3 hierarchy checked |
| ☐ | Paragraphs, lists, quotes, and buttons formatted consistently |
Images, Links, and SEO
| ✓ | Publishing check |
| ☐ | Featured and in-content images resized and compressed |
| ☐ | Filenames, alt text, captions, and credits reviewed |
| ☐ | Internal, external, and CTA links tested |
| ☐ | Slug, SEO title, and meta description completed |
| ☐ | Excerpt, category, tags, author, and publication details confirmed |
| ☐ | Social preview, canonical URL, and indexing settings reviewed |
Approval and Publication
| ✓ | Publishing check |
| ☐ | Front-end preview shared with the approver |
| ☐ | Final approval recorded |
| ☐ | Desktop, tablet, and mobile layouts checked |
| ☐ | Accessibility and final proofreading passes completed |
| ☐ | Date, time, and timezone confirmed |
| ☐ | Live page, archives, links, images, CTA, and metadata checked |
| ☐ | Live URL and completion details recorded |
Common Mistakes to Avoid
- Repeating the title as an H1. The WordPress title already handles the page’s main heading on most themes.
- Trusting pasted formatting. Clean markup is easier to maintain and less likely to fight the theme.
- Publishing without a featured image or excerpt. Both may affect blog archives, category pages, and social previews.
- Creating a new category or tag for every post. A smaller, intentional taxonomy is more useful to readers.
- Writing alt text for search engines instead of people. Describe the image’s useful meaning in context.
- Testing only inside the editor. The front-end page is the experience readers will actually receive.
- Publishing before approval is recorded. A clear record protects both the client and the implementer.
- Skipping the live-page check. Preview mode cannot reveal every production issue.
For important posts, use Google Search Console’s URL Inspection tool to confirm the live URL is crawlable and request indexing when needed. If an older post is underperforming after launch, run an on-page SEO audit to prioritize fixes.
Frequently Asked Questions
What should I check before publishing a WordPress post?
Check the approved content, title, headings, formatting, images, links, CTA, slug, excerpt, category, author, SEO fields, social preview, and responsive layout. Confirm approval and scheduling details, then inspect the public page after it goes live.
What is the difference between Draft and Pending Review?
Draft usually means the post is still being prepared. Pending Review signals that implementation is complete enough for an editor or approver to review it. Teams may adapt these statuses, but everyone should use them consistently.
How can a client preview a draft without a WordPress login?
Use the site’s approved private-preview method, such as a secure preview-link plugin or a staging environment. Do not make an unfinished post public simply to collect feedback.
How many categories should a post have?
One primary category is usually enough. Add another only when it genuinely helps readers navigate the site and matches the established taxonomy.
What should I check immediately after publishing?
Open the live URL and verify the page layout, images, links, CTA, metadata, blog archive, category archive, and mobile view. Record the live URL and any follow-up action.
Need Reliable WordPress Content Implementation?
NextWebOps helps businesses and agencies turn approved drafts into accurate, organized, SEO-ready WordPress posts. From formatting and media preparation to approval support and live-page checks, the process is handled from draft to publication.
Leave a Reply