Author: Muhammad Ansar

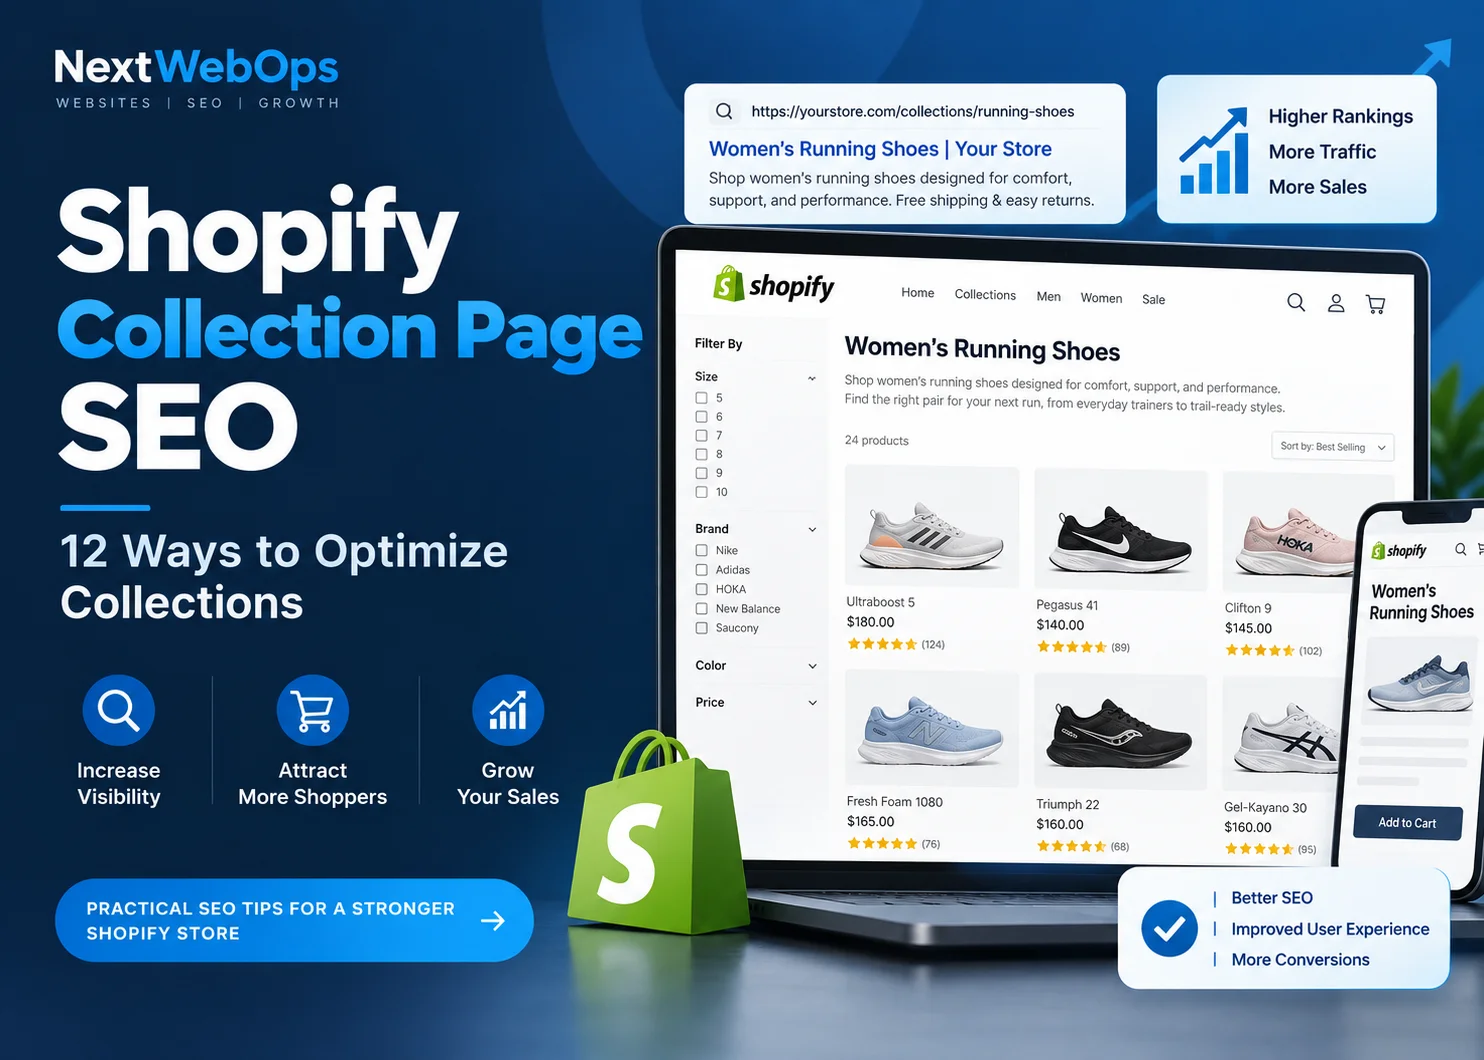
  • Shopify Collection Page SEO: 12 Ways to Optimize Collections

    Shopify Collection Page SEO: 12 Ways to Optimize Collections

    Shopify collection page SEO can help ecommerce stores attract shoppers who are searching for an entire product category rather than one specific item. An optimized collection page can target valuable commercial searches, organize related products, strengthen your site structure, and give shoppers a direct path from Google to products they are interested in buying.

    But simply creating a collection and assigning products to it does not make the page search-engine optimized. The page still needs the right keyword targeting, title, description, metadata, internal links, images, technical setup, user experience, and final publishing checks.

    In this guide, we’ll walk through 12 practical ways to optimize Shopify collection pages while keeping them useful for real shoppers.

    What Is Shopify Collection Page SEO?

    Shopify collection page SEO is the process of optimizing pages that group related products so they are easier for shoppers and search engines to understand.

    Shopify calls these pages collections. On other ecommerce platforms, they are often called category pages.

    For example, a shoe store might have individual product pages for specific running shoes while maintaining a collection page for women’s running shoes. Someone searching Google for “women’s running shoes” will often want to compare several options instead of landing on one specific shoe.

    That makes a collection page a logical destination for many category-level commercial searches.

    Shopify’s own ecommerce category page SEO guide explains that collection pages can group products around shared characteristics while creating opportunities to target searches potential customers use to find those products.

    The goal is therefore not simply to make a collection “SEO friendly.” A strong collection page should simultaneously help search engines understand the category and help customers find the right products.

    How to Optimize Shopify Collection Pages for SEO

    1. Assign One Primary Keyword to Each Collection

    Start by defining the main search topic each important collection should target.

    If your collection contains women’s trail running shoes, for example, the primary keyword might be:

    women’s trail running shoes

    Related phrases could include:

    • trail shoes for women
    • women’s off-road running shoes
    • lightweight women’s trail shoes

    The purpose is not to force every variation into the description. Instead, build the page around one clear topic and use related terminology naturally where it helps describe the products.

    Keyword mapping also helps prevent multiple collections from targeting virtually identical search intent.

    Before creating a new collection, ask whether an existing page already answers the same search. If two collections contain similar products and target almost identical keywords, you may create unnecessary overlap between your own pages.

    2. Create Collections Around Genuine Search and Shopping Intent

    Creating more collection pages does not automatically produce more organic traffic.

    A new collection should normally represent a category or subcategory that customers would genuinely find useful.

    Before creating one, consider:

    • Do customers actually look for this type of product?
    • Is the intent different from an existing collection?
    • Are there enough relevant products to make the page useful?
    • Would the collection improve browsing and navigation?

    For example, a large footwear store may reasonably maintain separate collections for road running shoes and trail running shoes because shoppers looking for those products have different needs.

    Creating separate collection pages for every tiny variation of a product attribute, however, can leave you with thin and overlapping pages that are difficult to maintain.

    Shopify’s current SEO guidance similarly recommends matching pages with search intent and building collection pages around broader product searches rather than treating every keyword variation as a reason to create another URL.

    3. Write a Clear, Keyword-Relevant Collection Title

    Your collection title should immediately tell visitors what products they will find.

    Compare these examples:

    Unclear: Performance Series

    Clearer: Women’s Trail Running Shoes

    The second title gives both customers and search engines much stronger context.

    When the primary keyword naturally describes the category, using it in the title makes sense. What you should avoid is turning the heading into a list of keyword variations.

    For example:

    Poor: Women’s Trail Running Shoes | Best Women’s Trail Shoes | Cheap Trail Shoes for Women

    That type of heading is difficult to read and provides little additional value.

    Use a clear title that accurately represents the products on the page.

    4. Add a Useful Shopify Collection Description

    One of the most common missed opportunities on Shopify collection pages is leaving the description empty or filling it with generic text written only for search engines.

    A useful description should establish what the collection contains and help shoppers determine whether they are in the right place.

    For many stores, a short introduction above the product grid works well.

    For example:

    Shop women’s trail running shoes designed for grip, stability, and comfort across dirt paths, rocky routes, and technical terrain. Compare lightweight everyday trail shoes and rugged options built for longer adventures.

    This introduces the category without forcing customers to scroll through a large block of content before seeing products.

    If more explanation would genuinely help shoppers, you can provide additional content farther down the page. That content might discuss:

    • materials
    • sizing
    • product differences
    • common use cases
    • buying considerations
    • care instructions
    • related product categories

    There is no universal collection-description word count that every Shopify store needs to follow.

    Write enough to make the category understandable and useful. Do not add 500 words simply because you believe search engines require a certain length.

    5. Optimize the SEO Title and Meta Description

    The visible collection title and the page’s search metadata serve related but different purposes.

    Your SEO title should clearly represent the collection and encourage the right searcher to click. When it reads naturally, place the main keyword toward the beginning.

    For example:

    Women’s Trail Running Shoes | Brand Name

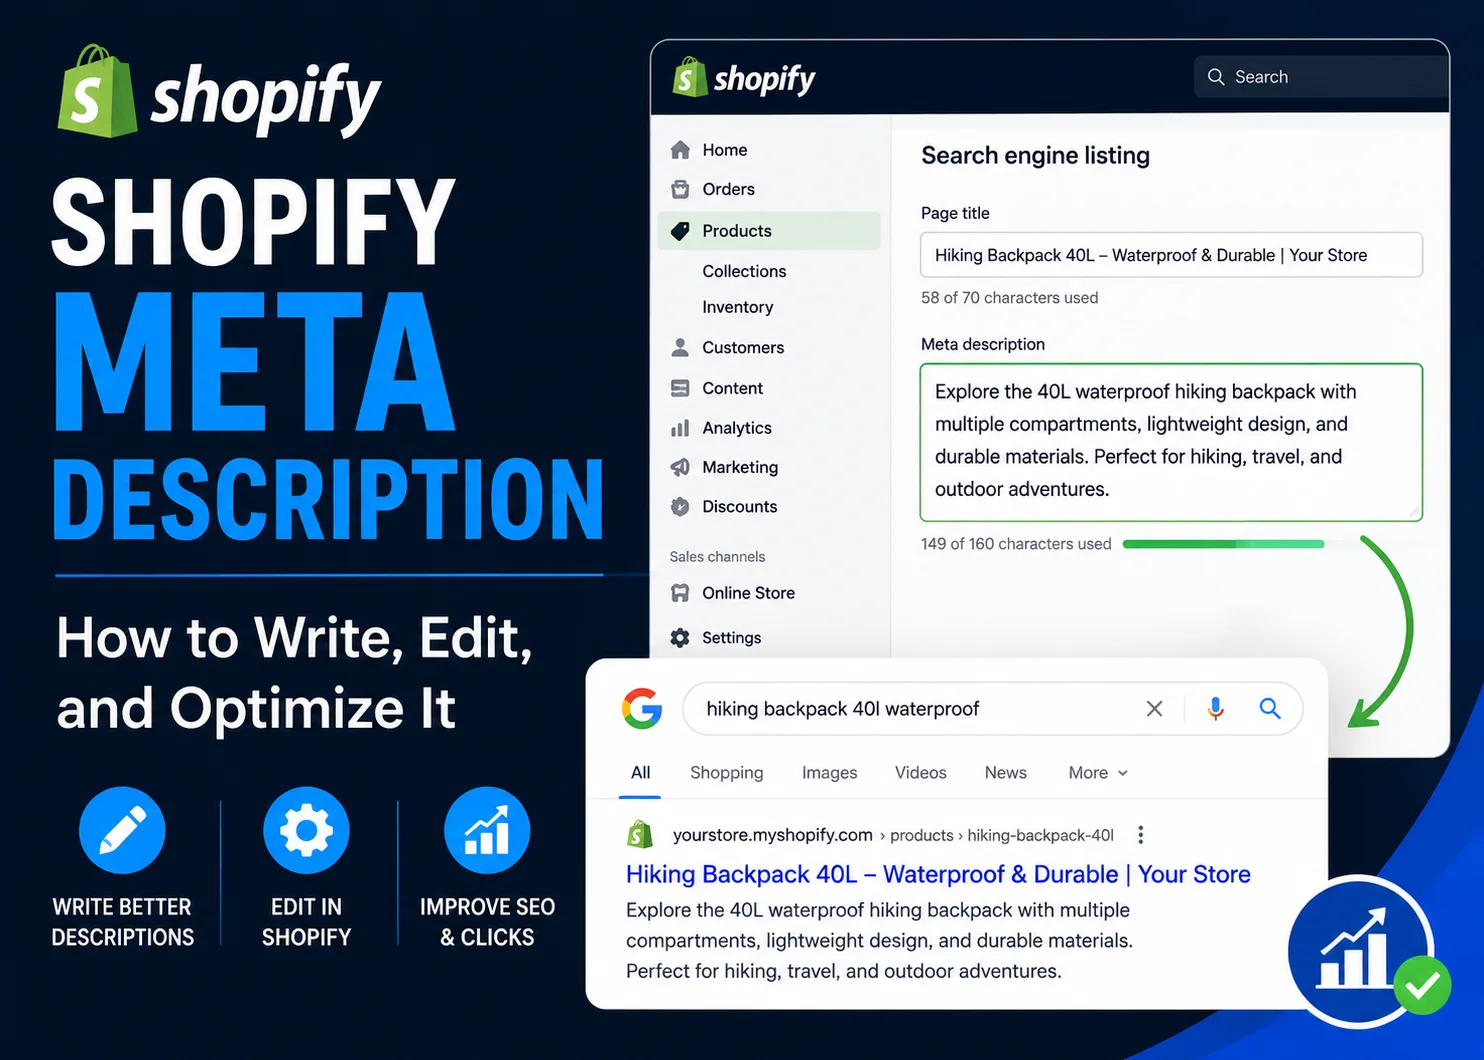
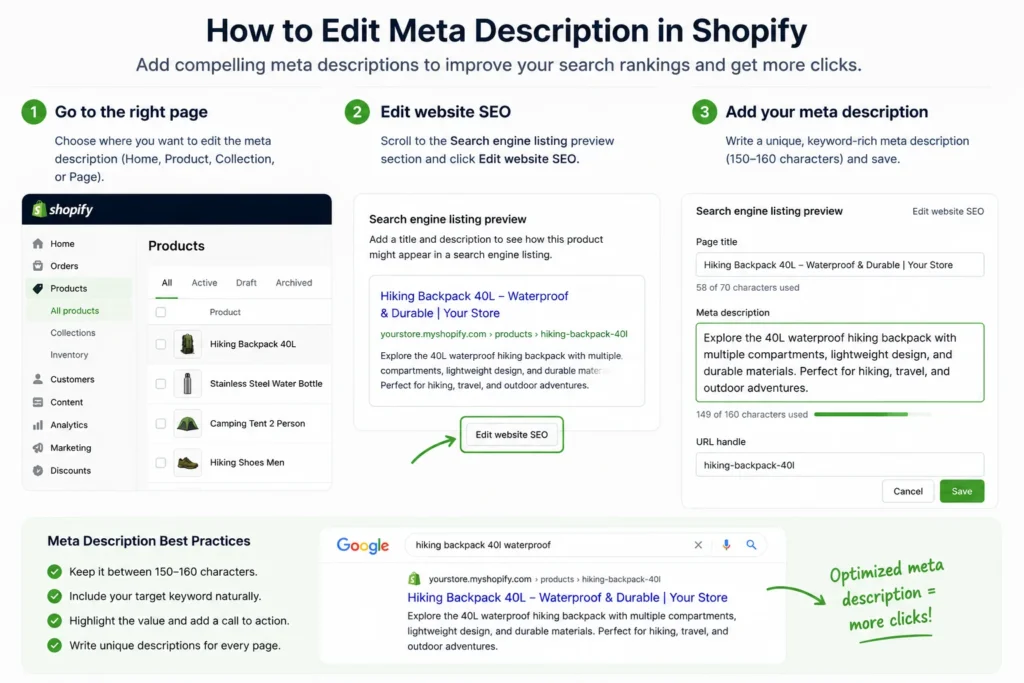
    The meta description should provide a concise reason for a potential customer to visit the page. Depending on your store, that could mention relevant product types, materials, selection, shipping, sizing, or another genuine benefit.

    Avoid copying identical metadata across many important collections. Each major collection should reflect its own products and search intent.

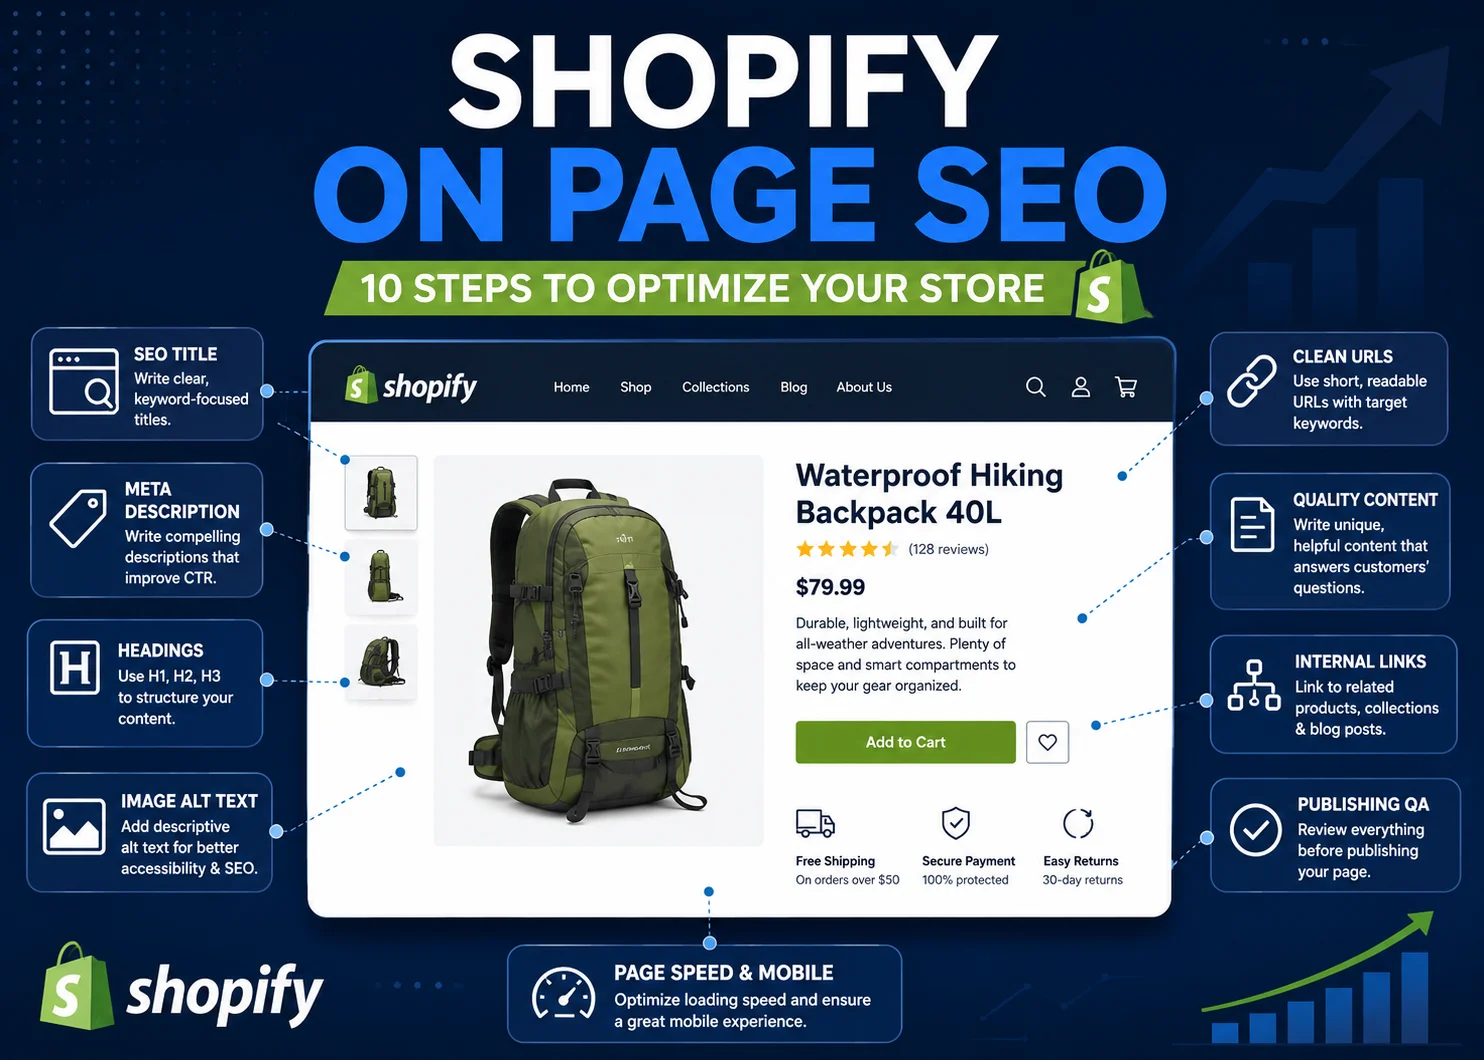
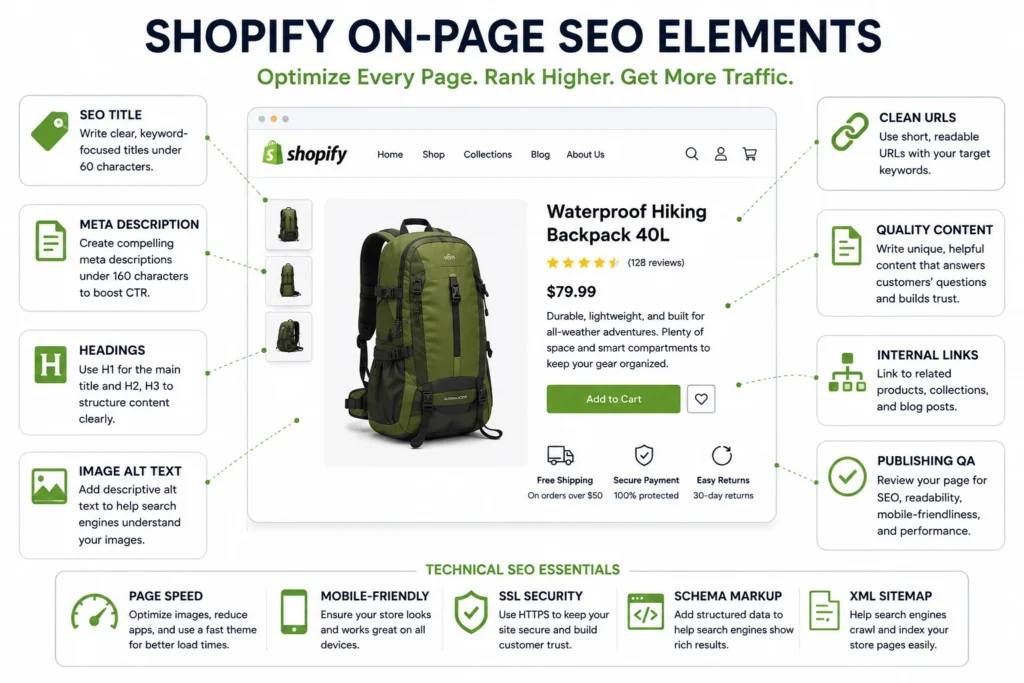
    Before publishing, use this on-page SEO checklist to review titles, descriptions, headings, images, internal links, and other essential page elements.

    6. Keep Collection URLs Short and Descriptive

    A collection URL should be simple enough for a person to understand at a glance.

    A clean example is:

    /collections/womens-running-shoes

    There is rarely a good reason to load the URL with promotional language, dates, or repeated keywords.

    For example, avoid something like:

    /collections/best-womens-running-shoes-cheap-running-shoes-sale-2026

    However, do not change an established collection URL purely because you have found a slightly cleaner version.

    If the existing page already receives traffic, has backlinks, appears in search results, or is extensively linked throughout your site, changing the URL creates additional work and risk. When a URL genuinely needs to change, make sure the old location redirects to the appropriate new page.

    7. Strengthen Internal Links to Important Collections

    A commercially important collection should not be buried deep inside the store with few links pointing to it.

    Relevant internal links can come from:

    • main navigation
    • homepage category sections
    • related collections
    • buying guides
    • blog articles
    • appropriate product pages
    • other relevant informational pages

    Use anchor text that helps visitors understand where the link goes.

    For example, a guide about choosing trail footwear could naturally link to a women’s trail running shoes collection instead of using generic anchor text such as “click here.”

    Good internal linking also creates logical paths between informational and commercial pages.

    A blog post may introduce a customer to a problem, a buying guide may help them compare solutions, and a collection page can then let them browse suitable products.

    For a more detailed process, see these internal linking best practices.

    8. Optimize Collection Images

    Collection pages frequently contain banners, category graphics, product thumbnails, promotional images, and other visual assets.

    Before publishing them:

    • resize images to appropriate dimensions
    • compress unnecessary file size
    • use efficient formats such as WebP when appropriate
    • choose short, descriptive filenames
    • write useful alt text when alternative text is needed
    • check how images display on mobile

    For example:

    womens-trail-running-shoes.webp

    is more descriptive than:

    IMG_5834.webp

    Google’s official image SEO best practices recommend using short, descriptive filenames and useful alt text that describes the image in context.

    Alt text should not become another place to stuff your target keyword repeatedly. Its primary job is to communicate what the image contains, including for visitors who cannot see the image.

    For a practical implementation process, read the NextWebOps guide to image SEO.

    9. Review Filters and Faceted Navigation

    Filters make large Shopify collections easier to browse.

    Customers may want to narrow products by:

    • size
    • color
    • brand
    • price
    • material
    • availability
    • product features

    The SEO challenge appears when combinations of filters, sorting options, or parameters generate many different URLs containing substantially similar products.

    One collection could potentially generate URLs representing:

    • black products
    • black products in size medium
    • black products in size medium below a certain price
    • the same selection sorted from highest to lowest price

    Google’s canonicalization guidance discusses duplicate and similar URLs, including situations where sorting and filtering can produce multiple URLs for substantially similar content.

    That does not mean filters themselves are bad for SEO. They are often extremely useful to shoppers.

    The goal is to understand which filtered URLs your store creates and decide which versions should be treated as important search destinations.

    This is especially important on stores with large catalogs and extensive faceted navigation.

    Shopify themes and filtering apps may generate URLs differently, so inspect the actual behavior of your own store rather than applying one technical rule to every Shopify website.

    10. Review Structured Data

    Structured data provides search engines with machine-readable information about the content of a page.

    Depending on your Shopify theme and implementation, your store may already output structured data relating to:

    • products
    • breadcrumbs
    • organization information
    • other supported content types

    More schema markup is not automatically better.

    Google’s structured data guidelines require markup to accurately represent the page content and follow the requirements of the relevant structured-data feature.

    Before installing another app or adding custom schema, inspect what your theme already generates. Multiple tools attempting to output the same information can make implementation more difficult to maintain.

    After publishing, test important templates and investigate structured-data errors rather than assuming the markup is correct simply because it exists.

    11. Improve the Shopping Experience on Mobile and Desktop

    A collection page ultimately exists to help people find products.

    SEO improvements should therefore support the shopping experience rather than interfere with it.

    Review the page as a customer would.

    Ask:

    • Can shoppers quickly understand the category?
    • Are products visible without excessive scrolling?
    • Are filters genuinely useful?
    • Is sorting easy to understand?
    • Are product names and prices clearly displayed?
    • Do product images help customers compare options?
    • Does the page work comfortably on a phone?

    Shopify’s category-page optimization guidance highlights factors such as useful descriptions, clear product information, sorting, product thumbnails, site speed, and mobile experience when assessing category pages.

    Mobile presentation deserves particular attention.

    A large desktop banner or long description may appear reasonable on a wide screen but consume most of the initial viewport on a phone. Similarly, a poorly designed filter interface can make browsing hundreds of products unnecessarily difficult.

    Search visibility can bring someone to the collection page. The page itself still needs to help that visitor shop.

    12. Complete a Final Shopify Collection Page SEO QA Check

    SEO recommendations only create value when they are implemented correctly.

    Before publishing a new collection or after making substantial changes, inspect the actual live page instead of assuming that everything entered in Shopify appears correctly on the storefront.

    Review:

    • collection title
    • correct product assignments
    • description formatting
    • heading structure
    • SEO title
    • meta description
    • collection URL
    • internal links
    • image filenames
    • image alt text
    • filter behavior
    • structured data where relevant
    • mobile display
    • broken links
    • canonical and indexability settings where relevant
    • final live-page presentation

    The difference between an SEO recommendation and a successfully optimized page is often implementation.

    A structured on-page SEO audit can help identify problems that may be difficult to spot while working only inside the Shopify admin.

    If your SEO strategy is ready but your team needs help implementing collection content, metadata, images, links, formatting, and final checks, get help with Shopify content implementation.

    Shopify Collection Page SEO Example

    Consider an ecommerce brand selling sustainable clothing.

    The store wants to target people searching for organic cotton T-shirts.

    A basic collection optimization plan might look like this:

    • Primary keyword: organic cotton t shirts
    • Collection title: Organic Cotton T-Shirts
    • URL: /collections/organic-cotton-t-shirts
    • Intro copy: a short explanation of the available organic cotton styles, fits, and colors
    • Supporting content: useful information about fabric, fit, sizing, and care
    • Internal links: links from sustainable clothing guides and related collections
    • Images: appropriately sized and compressed files with descriptive filenames and useful alt text
    • Metadata: a unique SEO title and description that accurately represent the collection

    The page is not optimized simply because the phrase “organic cotton T-shirts” appears several times.

    It becomes a stronger collection page when the keyword, products, content, metadata, images, internal links, navigation, and shopping experience all support the same intent.

    Shopify Collection Page SEO Checklist
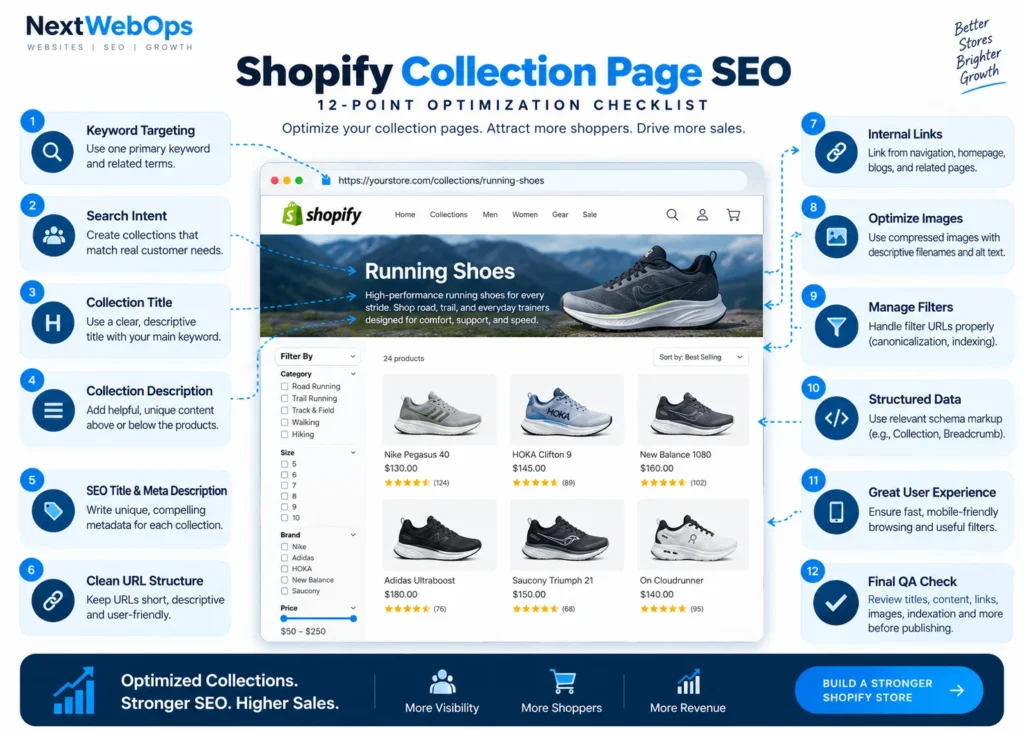
    shopify collection seo checklist

    Use this checklist before publishing an important collection:

    • Choose one clear primary keyword.
    • Confirm that the collection matches genuine search and shopping intent.
    • Use a descriptive collection title.
    • Add useful and original collection copy.
    • Write unique search metadata for important collections.
    • Keep the collection URL simple where possible.
    • Add relevant internal links.
    • Optimize collection images.
    • Review URLs generated by filters and sorting.
    • Check structured data where appropriate.
    • Test desktop and mobile usability.
    • Complete final live-page publishing QA.

    If managing these checks across dozens or hundreds of Shopify collections is taking time away from your core ecommerce work, discuss your Shopify publishing project with NextWebOps.

    When Should You Create a New Shopify Collection?

    A new collection makes sense when it represents a useful category that deserves its own browsing experience.

    Consider creating one when:

    • there is distinct customer or search demand
    • the products form a meaningful group
    • the collection improves site navigation
    • you have enough relevant products to make the page useful
    • the intent is not already adequately served by another collection

    For example, separating men’s hiking shoes from men’s road running shoes makes sense because the products and customer needs are substantially different.

    Creating five nearly identical pages purely to target small keyword variations is much harder to justify.

    Before creating another collection, compare its proposed keyword, products, purpose, and content against your existing pages.

    If you cannot clearly explain why a shopper needs the new page, reconsider whether it should exist.

    Common Shopify Collection Page SEO Mistakes

    Even well-designed Shopify stores can leave organic search opportunities on the table because small implementation problems accumulate across many collection pages.

    Common mistakes include:

    • using vague collection names that do not describe the products
    • creating several collections around virtually identical search intent
    • leaving important collection descriptions empty
    • publishing large blocks of keyword-heavy text before the products
    • reusing identical SEO titles and meta descriptions
    • uploading oversized or poorly named images
    • using weak internal-link structures
    • ignoring filter-generated URLs
    • adding unnecessary structured data without checking existing markup
    • testing the Shopify admin but not the live storefront

    Most of these problems are not solved by installing another SEO app. They require consistent page-level implementation and QA.

    Final Thoughts on Shopify Collection Page SEO

    Effective Shopify collection page SEO goes far beyond putting a target keyword into a description.

    A strong collection page combines search intent, sensible product grouping, useful content, descriptive metadata, optimized images, internal links, manageable filtering, good mobile usability, and careful publishing QA.

    That combination gives search engines clearer context while making it easier for shoppers to browse relevant products.

    For stores managing dozens or hundreds of collections, consistency becomes especially important.

    One missing meta description may not cause a major problem. Repeated issues involving metadata, images, internal links, formatting, duplicate URLs, or publishing errors across a large catalog can become much more significant.

    NextWebOps helps businesses and agencies with Shopify content publishing, on-page SEO implementation, metadata, image optimization, internal linking, content formatting, and publishing QA.

    Contact NextWebOps about your Shopify project.

    Frequently Asked Questions

    Are Shopify collection pages good for SEO?

    They can be particularly useful for category-level searches where a shopper wants to compare multiple products instead of viewing one specific item. Their organic performance still depends on factors such as search demand, relevance, competition, content quality, site authority, internal linking, and technical implementation.

    How much content should a Shopify collection page have?

    There is no universal word count that every Shopify collection page needs. Use enough content to explain the category and help customers. A straightforward collection may only need a concise introduction, while a more complicated product category may benefit from additional buying information farther down the page.

    Should a Shopify collection description go above or below the products?

    A practical approach is to place a concise introduction above the product grid so customers immediately understand the category. If additional information is useful, longer supporting content can appear below the products. The goal is to provide context without unnecessarily delaying access to the items shoppers came to browse.

    Should every Shopify collection target a different keyword?

    Important collections should generally serve a distinct purpose and search intent. Closely related vocabulary will naturally overlap, but creating multiple near-identical collections solely to target minor variations of the same keyword can create unnecessary competition between your own pages.

    Can Shopify filters cause SEO problems?

    Filters can generate multiple URLs containing very similar product selections. Stores with extensive filtering should review how these URLs are crawled, indexed, internally linked, and canonicalized. The appropriate setup depends on the store’s catalog, theme, apps, and filtering system.

    Does Shopify have built-in SEO features?

    Shopify includes useful SEO functionality such as editable search listing information and ecommerce-friendly site architecture. However, the platform cannot determine your complete keyword strategy, write useful collection content, create a thoughtful internal-link structure, optimize every visual asset, or perform detailed publishing QA for you. Those tasks still require planning and implementation.

    What is the difference between a Shopify collection page and a product page?

    A product page focuses on one specific product, while a collection page groups several related products together. Product pages often target searches for specific items, models, or product names, while collection pages are commonly better suited to broader category searches where customers want to compare multiple options.
  • Shopify Homepage SEO: A Complete Optimization Checklist

    Shopify Homepage SEO: A Complete Optimization Checklist

    Your Shopify homepage is often the strongest and most visited page on your store. It introduces your brand, directs shoppers to important collections, and helps search engines understand what your business sells.

    However, an attractive homepage is not automatically an SEO-friendly homepage. Large banners, vague headings, limited written content, and weak internal links can make it difficult for Google to understand the page—even when it looks impressive to visitors.

    This Shopify homepage SEO guide explains how to optimize every important element, from your target keyword and metadata to homepage copy, images, internal links, loading speed, and indexing.

    What Is Shopify Homepage SEO?

    Shopify homepage SEO is the process of improving your store’s homepage so that search engines can understand, crawl, index, and rank it for relevant searches.

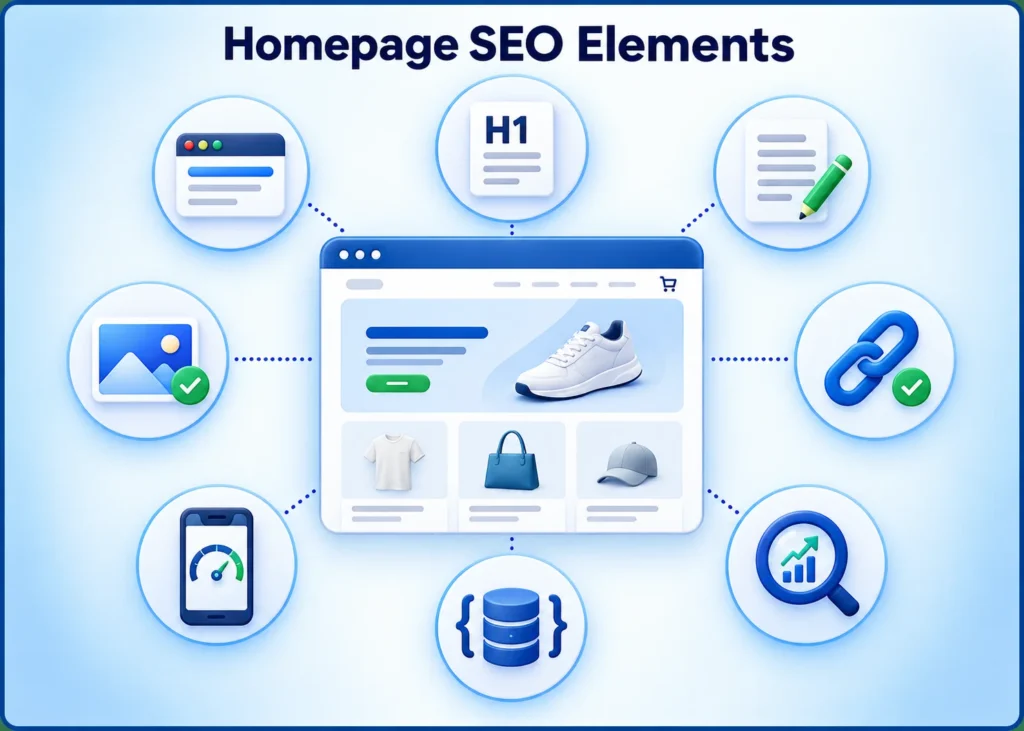
    It includes optimizing:

    • The SEO title and meta description
    • The main heading and visible page content
    • Images and alt text
    • Navigation and internal links
    • Page speed and mobile usability
    • Structured data and technical settings

    Your homepage normally targets the broad topic that represents your entire store. Individual product and collection keywords should usually be assigned to the relevant product or collection pages.

    For example, a store selling handmade leather products might target “handmade leather goods” on its homepage. More specific terms such as “handmade leather wallets” and “leather laptop bags” would be better suited to dedicated collection pages.

    Why Your Shopify Homepage Matters for SEO

    The homepage is commonly the central point of a Shopify store. It usually earns more backlinks than other pages and passes authority to collections, products, blog posts, and important information pages through internal links.

    An optimized homepage can help you:

    • Rank for your brand name and main product category
    • Explain your core offer to search engines
    • Direct visitors to priority collections and products
    • Build trust with new shoppers
    • Improve engagement and conversions
    • Distribute SEO value across your store

    Homepage SEO is not only about rankings. A clear page also helps visitors immediately understand what you sell, why they should trust you, and where they should go next.

    1. Choose the Right Primary Keyword

    Before changing headings or metadata, decide what your homepage should rank for. Choose one main keyword theme that accurately describes the overall store.

    You can use Google Keyword Planner to discover related search terms, then compare them with the language customers use when describing your products.

    The keyword should be:

    • Relevant to most of your product range
    • Closely connected to what customers want to buy
    • Broad enough to represent the business
    • Specific enough to attract suitable shoppers
    • Realistic for your store’s current authority

    Avoid targeting a very broad term simply because it has high search volume. A small specialty store is unlikely to compete for a keyword such as “shoes,” but it may have a better opportunity with “handmade women’s leather shoes.”

    Shopify Homepage Keyword Example

    Imagine that you operate a sustainable skincare store:

    • Too broad: Skincare
    • Better homepage keyword: Natural skincare products
    • Supporting terms: Vegan skincare, organic face care, clean beauty products
    • Collection keywords: Natural face cleansers, vegan moisturizers, organic face serums

    The homepage introduces the broader topic, while each collection page targets a more focused search.

    Use your main keyword naturally. Repeating it in every paragraph, heading, and image description will not improve the page and may make your content look unnatural.

    2. Optimize the Shopify Homepage SEO Title

    The SEO title appears in search results and browser tabs. It is one of the clearest signals describing the topic of your homepage.

    To edit it in Shopify, go to:

    Shopify Admin → Online Store → Preferences

    Look for the homepage title and meta description section. The exact wording of the menu can vary as Shopify updates its interface.

    A good homepage title should:

    • Include the main product category or primary keyword
    • Describe what the store offers
    • Include the brand name
    • Sound natural and encourage clicks
    • Remain concise enough to display clearly in search results

    A useful formula is:

    Primary Product Category or Benefit | Brand Name

    Shopify Homepage Title Examples

    Weak: Home | Green Glow

    Improved: Natural Skincare Products | Green Glow

    Weak: Welcome to Our Store

    Improved: Handmade Leather Bags and Accessories | Oak & Hide

    Weak: Best Products at Great Prices

    Improved: Eco-Friendly Kitchen Products | Earthwise Home

    Do not fill the title with several versions of the same keyword. One clear phrase and your brand name are usually enough.

    3. Write a Compelling Meta Description

    The meta description is the short summary that may appear under your title in search results. It is not a direct ranking factor, but a clear and persuasive description can improve clicks from suitable searchers.

    Your Shopify homepage meta description should include:

    • The main type of product you sell
    • A meaningful customer benefit
    • An important selling point
    • A natural call to action

    Aim for approximately 150–160 characters, but focus on clarity rather than forcing an exact length. Google may rewrite the description depending on the search.

    Shopify Homepage Meta Description Template

    Shop [main product category] from [brand name]. Discover [main benefit or selling point] with [shipping, guarantee, quality, or other incentive].

    Examples:

    • Shop natural skincare products from Green Glow. Discover vegan formulas made with carefully selected ingredients and enjoy free US shipping over $50.
    • Explore handmade leather bags from Oak & Hide. Find durable, timeless designs crafted for everyday use and backed by easy returns.
    • Shop eco-friendly kitchen products from Earthwise Home. Reduce everyday waste with practical reusable essentials delivered to your door.

    Write for potential customers first. A description that reads like a list of keywords is unlikely to earn clicks.

    4. Use One Clear Homepage H1

    The H1 is the main visible heading on the page. It should clearly explain the store’s primary offer.

    Many Shopify themes use the logo, store name, or hero-banner text in a way that makes the H1 unclear. Check your theme to confirm which element is actually marked as the H1.

    In most cases, use one clear H1 on the homepage. It can include your main keyword or a close variation, but it should also make sense to visitors.

    Weak H1: Welcome to Our Store

    Better H1: Natural Skincare for a Simpler Daily Routine

    Weak H1: Discover the Difference

    Better H1: Handmade Leather Bags Built for Everyday Use

    Your SEO title and H1 do not need to be identical. The title is written mainly for search results, while the H1 introduces the page to visitors.

    5. Add Useful SEO Copy to the Homepage

    Some Shopify homepages depend almost entirely on images, product cards, and buttons. Although this can create a clean design, it may give search engines very little information about the store.

    Add concise, useful text explaining:

    • What your business sells
    • Who the products are for
    • What makes the brand different
    • Which major product categories are available
    • Why customers should choose your store

    This does not mean adding a thousand-word essay beneath your products. A few focused sections can provide context without making the page feel crowded.

    Where to Place Homepage SEO Content

    You can naturally include useful copy in:

    • The hero section
    • A short introduction below the hero
    • Featured collection sections
    • Benefit or unique-selling-point sections
    • A short brand story
    • A homepage FAQ section

    Avoid hiding a large block of keyword-heavy content at the bottom of the page merely for search engines. Every section should provide genuine value to shoppers.

    6. Optimize Homepage Images

    Homepage images strongly affect appearance and loading speed. Large hero banners and sliders are among the most common reasons Shopify homepages load slowly.

    For better image SEO and performance:

    • Resize images to the dimensions actually needed by your theme
    • Compress files before uploading them
    • Use WebP or another suitable modern format
    • Give files clear, descriptive names
    • Add helpful alt text when an image provides meaningful information
    • Leave alt text empty for purely decorative images when appropriate
    • Check how banners crop on desktop and mobile

    For example, replace a filename such as IMG_4582.jpg with handmade-brown-leather-tote.webp.

    Alt text should describe what is visible and relevant:

    Good: Woman carrying a handmade brown leather tote bag

    Poor: Leather bag best leather bag handmade bag buy leather bag

    Do not insert the same keyword into every image description. For a deeper walkthrough, see our guide to image SEO.

    7. Build a Clear Homepage Structure

    A logical layout helps visitors find products and helps search engines understand the relationship between different sections.

    Essential elements of an optimized Shopify homepage

    A practical Shopify homepage structure may include:

    1. Announcement bar, when necessary
    2. Header and main navigation
    3. Hero section with a clear H1 and primary call to action
    4. Featured collections or best-selling products
    5. Main customer benefits or unique selling points
    6. Reviews, ratings, or other trust signals
    7. Short brand introduction
    8. Helpful content or frequently asked questions
    9. Footer navigation

    Place the most important information and shopping paths early on the page. Visitors should not need to scroll through several promotional banners before discovering what the store sells.

    8. Improve Shopify Homepage Internal Linking

    Internal links help visitors navigate your store and show search engines which pages are important. Your homepage should link to priority collections and other useful pages without becoming overcrowded.

    Consider linking to:

    • Main product collections
    • Best-selling or featured products
    • Buying guides and helpful blog posts
    • About, contact, shipping, and return pages
    • Current promotions when relevant

    Use descriptive anchor text. “Shop women’s leather bags” provides more context than “Click here.”

    Avoid placing links to every product on the homepage. Focus on your major categories and strongest customer journeys. You can learn more in our guide to internal linking best practices.

    9. Add Relevant Structured Data

    Structured data gives search engines standardized information about your business and website. Depending on your theme and setup, your homepage may use Organization and Website schema.

    Shopify themes often generate some structured data automatically. Before installing an SEO app or adding custom code, check what your theme already provides. Duplicate or conflicting markup can create unnecessary errors.

    Do not add Product schema to the homepage simply because products appear there. Product markup should represent a specific product on the appropriate product page. After making changes, test the page with Google’s Rich Results Test and review any warnings carefully.

    10. Improve Homepage Speed and Core Web Vitals

    A visually impressive homepage can still frustrate shoppers if it loads slowly. Speed also affects mobile usability, engagement, and conversions.

    Common causes of a slow Shopify homepage include:

    • Oversized hero images
    • Autoplay background videos
    • Multiple sliders or carousels
    • Too many Shopify apps
    • Scripts left behind by removed apps
    • Excessive tracking tools
    • Too many font styles and weights
    • Large pop-ups or promotional widgets

    Start with the elements that have the greatest impact. Compress the hero image, remove unnecessary sliders, review installed apps, and limit scripts that do not support an important business goal.

    Test the homepage with Google PageSpeed Insights. Pay particular attention to mobile results because many ecommerce visitors browse and buy using phones.

    11. Make the Homepage Mobile-Friendly

    A homepage that looks good on a desktop can still be difficult to use on a smaller screen. Review the real mobile experience rather than relying only on the theme editor preview.

    Check that:

    • Text is readable without zooming
    • Buttons are large enough to tap
    • Menus are easy to open and use
    • Hero text remains visible over the image
    • Important calls to action appear early
    • Images crop correctly
    • Pop-ups do not cover the screen
    • Sections do not create excessive scrolling
    • The page loads quickly on mobile data

    Mobile optimization is not a separate SEO task. It should be part of every decision involving design, images, content, and navigation.

    12. Check Indexing and Technical SEO

    Even excellent homepage content cannot rank if technical settings prevent search engines from accessing or indexing it.

    Confirm that:

    • The homepage returns a successful 200 status
    • It does not contain a noindex directive
    • Its canonical tag points to the correct homepage URL
    • HTTPS works without certificate or redirect errors
    • The preferred domain version is used consistently
    • The store is no longer protected by a storefront password
    • Important resources load correctly for search engines
    • The site is usable on mobile devices

    Shopify automatically creates and updates a sitemap, normally available at:

    https://yourstore.com/sitemap.xml

    Submit this sitemap through Google Search Console. Shopify manages it automatically as eligible products, collections, pages, and blog posts change.

    For a broader review of page-level issues, follow our on-page SEO audit guide.

    13. Submit and Monitor the Homepage in Google Search Console

    Google Search Console helps you confirm whether Google can access the homepage and shows how it performs in organic search.

    After verifying your store:

    1. Submit the Shopify sitemap.
    2. Use URL Inspection to check the homepage.
    3. Review the declared and selected canonical URLs.
    4. Request indexing after important homepage changes.
    5. Monitor impressions, clicks, click-through rate, and average position.
    6. Review the search queries generating homepage visibility.

    Requesting indexing does not guarantee immediate indexing or higher rankings. Google still evaluates page quality, relevance, site authority, competition, and technical accessibility.

    Use performance data to improve the page over time. For example, strong impressions with a low click-through rate may indicate that your title or description needs improvement. Irrelevant queries may suggest that the page’s topic is not clear enough.

    Shopify Homepage SEO Mistakes to Avoid

    Watch for these common problems:

    • Targeting several unrelated primary keywords
    • Using the logo or store name as the only meaningful H1
    • Publishing almost no visible text
    • Copying descriptions directly from suppliers
    • Stuffing keywords into headings and image alt text
    • Linking every product from the homepage
    • Installing multiple apps that perform the same SEO task
    • Ignoring mobile speed and usability
    • Optimizing metadata but neglecting visible content
    • Using the same title across several pages
    • Adding schema without checking existing theme markup

    SEO should improve the clarity and usefulness of your homepage. If an optimization makes the page harder to read, navigate, or trust, reconsider it.

    Shopify Homepage SEO Checklist

    Use this checklist when reviewing your homepage:

    • Select one relevant primary keyword theme

    • Assign more specific keywords to collections and products

    • Write a clear, unique SEO title

    • Create a persuasive meta description

    • Use one descriptive H1

    • Add helpful visible homepage copy

    • Link to priority collections and products

    • Use descriptive internal-link anchor text

    • Resize and compress large images

    • Review filenames and image alt text

    • Test the layout on real mobile devices

    • Remove unnecessary apps, sliders, and scripts

    • Test loading speed and Core Web Vitals

    • Check structured data for duplication or errors

    • Confirm the canonical homepage URL

    • Make sure the homepage is indexable

    • Submit the sitemap to Google Search Console

    • Inspect the homepage after major updates

    • Monitor search queries, clicks, and conversions

    Frequently Asked Questions

    Does Shopify have built-in SEO?

    Yes. Shopify automatically handles several technical elements, including sitemap generation, canonical tags, and editable homepage metadata. However, store owners still need to choose keywords, write useful content, optimize images, improve internal links, review theme output, and monitor performance.

    How do I change my Shopify homepage SEO title?

    Go to Shopify Admin → Online Store → Preferences, find the homepage title and meta description section, update the title, and save your changes. Shopify’s menu wording may change over time, so use the admin search if you cannot find the setting.

    What keyword should my Shopify homepage target?

    Choose a keyword that describes your store’s overall product range and matches what your ideal customers search for. Use more specific terms for individual product and collection pages.

    How long should a Shopify homepage title be?

    Keep it concise enough to communicate the main offer clearly in search results. A length of around 50–60 characters often works well, but clarity and relevance are more important than following an exact character limit.

    How much text should a Shopify homepage contain?

    There is no universal word count. Include enough original text to explain what you sell, who it is for, what makes the store different, and where shoppers should go next. Several short, useful sections are generally better than one large block written only for SEO.

    Should my Shopify store name be the H1?

    Usually, the H1 should explain the store’s primary offer rather than showing only the brand name. The logo and other branding already communicate the store name. A descriptive H1 gives visitors and search engines more useful context.

    How long does Shopify SEO take to work?

    Search engines may discover changes within days or weeks, but meaningful ranking improvements often take longer. Competition, website authority, content quality, backlinks, technical health, and the age of the store all influence the timeline.

    Do I need a Shopify SEO app?

    Not always. Shopify and many themes already handle several basic SEO elements. An app may help with specific tasks, but it cannot replace keyword research, useful content, logical site structure, quality links, and regular performance monitoring. Review what your theme already does before installing another app.

    Build a Homepage for Search Engines and Shoppers

    Effective Shopify homepage SEO is not a single setting. It combines keyword targeting, useful content, clear headings, optimized images, internal links, mobile usability, page speed, and sound technical setup.

    Begin by making the page immediately understandable. Visitors should know what you sell, why your products are worth considering, and which collection or product they should explore next. When that information is presented clearly, search engines also receive stronger signals about the page’s purpose.

    Review the homepage regularly as your products, customer needs, and store strategy change. Small improvements to titles, content, images, links, and performance can create a stronger foundation for the rest of your Shopify SEO. Our website maintenance checklist can help you plan these ongoing reviews.

    Need help improving your Shopify content and on-page SEO? Discuss your project.

  • How to Write Alt Text for SEO: Examples and Best Practices

    How to Write Alt Text for SEO: Examples and Best Practices

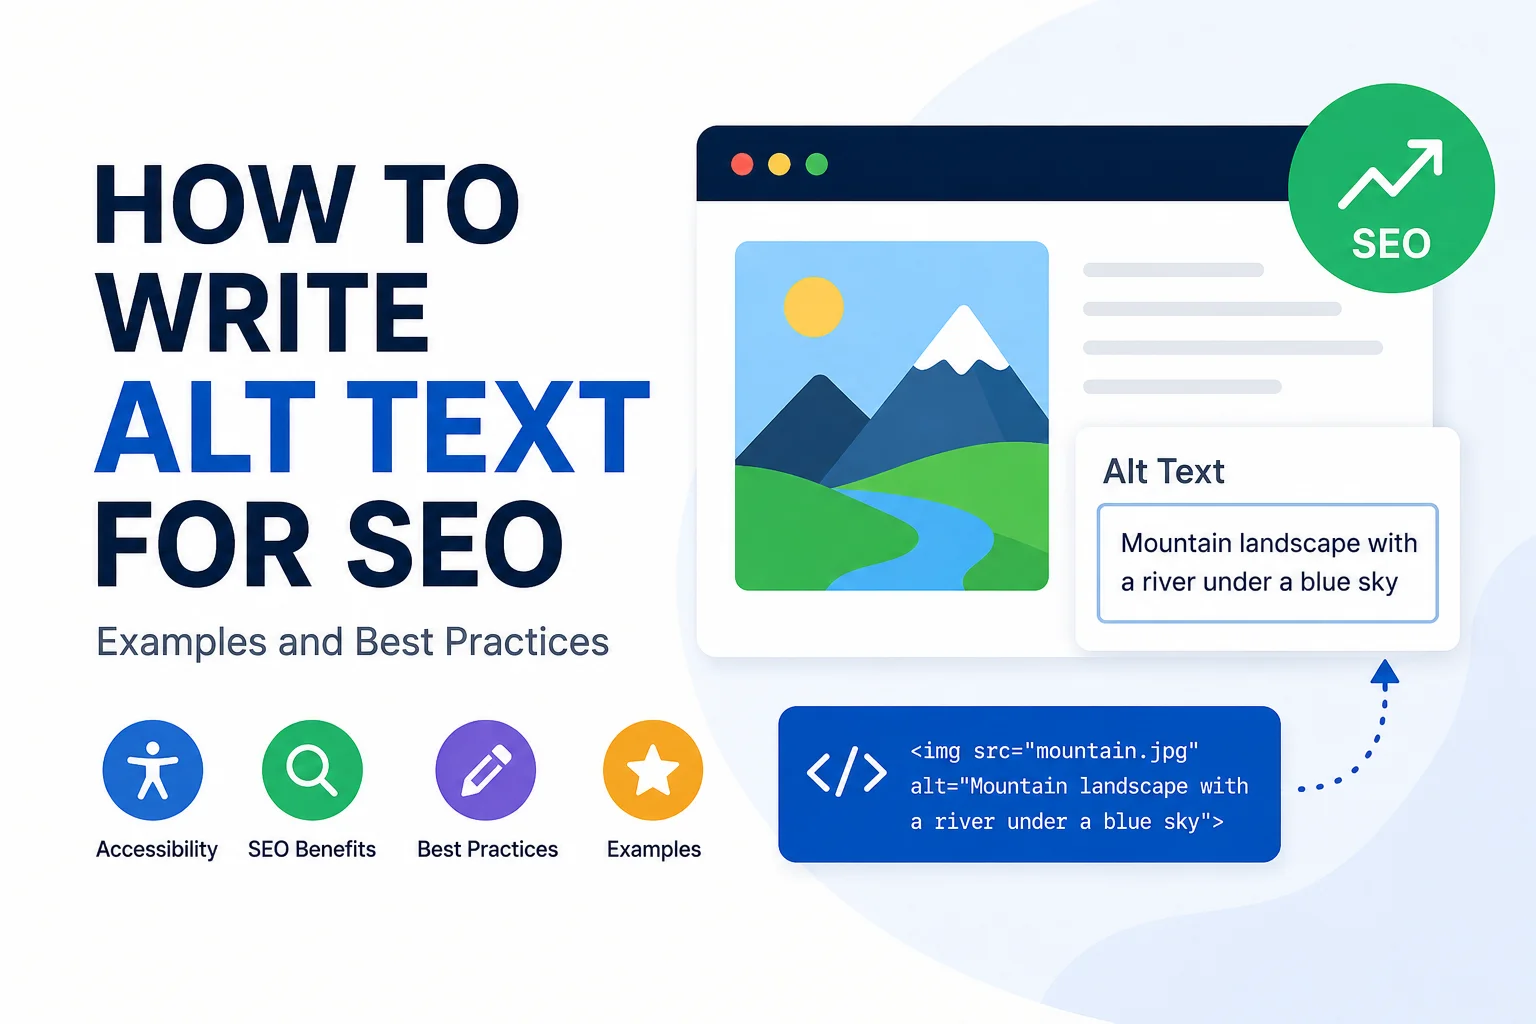
    Learning how to write alt text for SEO starts with one simple rule: describe the image accurately for people first, then use relevant keywords only when they fit naturally.

    Alt text helps users who rely on screen readers understand meaningful images, and it can also give search engines more context about what an image represents. But alt text is not a hidden keyword field. Stuffing keywords into every image description can make the text less useful and less accessible.

    The best alt text is clear, specific, concise, and relevant to the image’s purpose on the page.

    What Is Alt Text?

    Alt text, short for alternative text, is the description attached to an image through the HTML alt attribute.

    For example:

    <img src="blue-running-shoes.webp" alt="Blue men's running shoes with white soles">

    This text can be used by assistive technologies such as screen readers when a user cannot see the image. It can also provide context when an image fails to load and help search engines understand the image in relation to the surrounding page content.

    Good alt text does not need to describe every visible detail. It should communicate the information that matters.

    Does Alt Text Help SEO?

    Yes, alt text can support SEO, especially image SEO, because it helps search engines understand what an image is about and how it relates to the page.

    That does not mean you should force a target keyword into every image.

    Search engines benefit most from useful, descriptive text that matches the image and the page context. If a relevant keyword fits naturally, it can be included. If it does not accurately describe the image, leave it out.

    For example, suppose you have an article about WordPress image optimization.

    Good alt text:
    WordPress image optimization settings for compressed WebP images

    Poor alt text:
    WordPress image SEO WordPress optimization SEO image optimization images

    The first example describes the image. The second is written mainly for keywords and provides a poor user experience.

    For a broader view of image optimization beyond alt text, see this complete image SEO strategy.

    How to Write Alt Text for SEO

    A reliable approach is to focus on what the image communicates, why it appears on the page, and whether a keyword belongs naturally in that description.

    1. Describe What Actually Matters in the Image

    Start with the important subject or action.

    Avoid vague descriptions such as:

    • business image
    • SEO graphic
    • website photo
    • product image

    Instead, describe the meaningful visual content.

    Poor:
    business image

    Better:
    Marketing team reviewing website analytics on a laptop

    The better version gives useful information without adding unnecessary details.

    2. Consider the Image in Its Page Context

    Alt text should reflect the reason the image appears on the page.

    The same photo can require different alt text depending on the article or page where it appears.

    Imagine a photo showing a laptop beside a cup of coffee.

    On a remote-work article, the alt text might be:

    Remote employee working from a laptop at a coffee shop

    On an article reviewing laptops, the important detail may instead be:

    Silver laptop open on a cafe table beside a coffee cup

    Neither description is automatically better. The right choice depends on what the image contributes to that specific page.

    3. Use Keywords Only When They Fit Naturally

    Keywords can appear in alt text when they genuinely describe the image.

    If a screenshot shows the WordPress Media Library and your page discusses WordPress alt text, this description is natural:

    WordPress Media Library showing the Alt Text field

    You do not need to turn it into:

    WordPress SEO alt text image SEO WordPress image optimization

    That kind of repetition is unnecessary.

    A useful rule is simple: if you would still use the phrase when explaining the image to a person, it probably belongs. If you are adding it only because it is your target keyword, reconsider it.

    4. Keep Alt Text Concise

    Good alt text is usually short because it focuses on the meaningful information rather than every visual detail.

    For many normal website images, one short phrase or sentence is enough.

    You may see advice that every alt description should stay below a specific character count. Treat that as a practical guideline rather than an absolute SEO rule. The goal is to communicate the image efficiently.

    Do not stretch a simple description just to make it longer, and do not remove essential information merely to hit an arbitrary character limit.

    5. Skip “Image of” and “Picture of” When Unnecessary

    In most cases, you do not need to start alt text with phrases such as:

    • image of
    • picture of
    • photo of

    The image element already communicates that it is an image.

    Less useful:
    Image of a content editor using WordPress

    Better:
    Content editor publishing an article in WordPress

    There are cases where the type of visual matters. Words such as screenshot, chart, diagram, or illustration can be useful if that information helps someone understand the content.

    6. Do Not Repeat Nearby Text Unnecessarily

    If a caption or nearby sentence already provides the exact same information, copying that text word for word into the alt attribute may add little value.

    Instead, ask what information the image contributes that the surrounding text does not.

    For example, if a paragraph already says, “Our team reviews every page before publishing,” and the image shows that review process, the alt text could describe the visible action:

    Content specialist checking links and headings before publication

    7. Use Empty Alt Text for Decorative Images

    Not every image needs a written description.

    If an image is purely decorative and does not communicate meaningful information, it should generally use an empty alt attribute:

    alt=""

    Examples may include:

    • decorative dividers
    • background flourishes
    • non-informative shapes
    • visual icons that duplicate nearby text without adding meaning

    This allows assistive technologies to skip elements that do not contribute useful information.

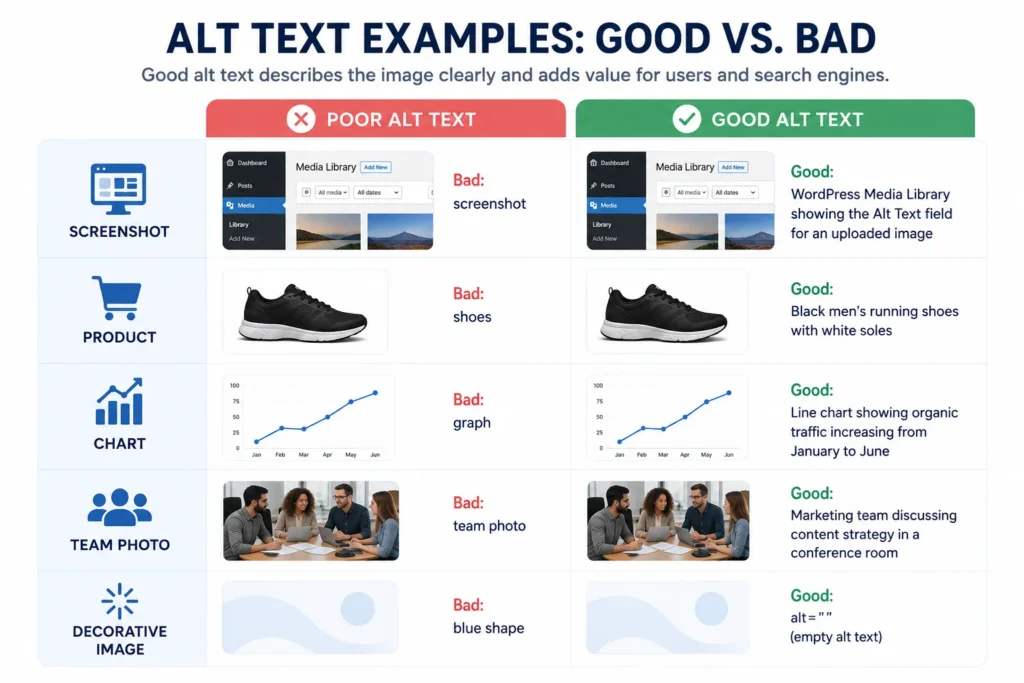
    Alt Text Examples: Good vs. Bad

    Examples make the difference between useful alt text and weak alt text much easier to understand.

    Good and bad alt text examples for screenshots, products, charts, team photos, and decorative images

    Blog Featured Image

    Imagine a featured image showing a website editor adding image details inside WordPress.

    Poor:
    SEO image

    Better:
    Website editor adding descriptive alt text to a WordPress image

    The improved version explains what is actually happening rather than using a broad topic label.

    Product Image

    For ecommerce images, focus on useful visible product characteristics.

    Poor:
    shoes

    Better:
    Black leather men’s Oxford shoes with brown soles

    Details such as color, product type, material, shape, style, or visible features may be useful when they help a shopper understand the product.

    Do not describe information that is not visible in the image just because it appears elsewhere in the product listing.

    WordPress Screenshot

    For screenshots, describe what the interface is showing and why it matters.

    Poor:
    WordPress SEO

    Better:
    WordPress Media Library showing the Alt Text field for an uploaded image

    This description is useful because it tells the reader what part of WordPress the screenshot demonstrates.

    Team or Business Photo

    Poor:
    business team

    Better:
    Four-person marketing team reviewing website content around a conference table

    The better description identifies the people, activity, and context without trying to describe every object in the room.

    Chart or Graph

    Charts often require a different approach because the important information is usually the trend or conclusion rather than the appearance of the visual.

    For example:

    Line chart showing organic traffic increasing from January through June

    If a chart contains important detailed data, provide that information in the surrounding page content, a table, or another accessible format instead of trying to place every data point into the alt text.

    Decorative Graphic

    If a small abstract shape is used only to make a section look more attractive and communicates no useful content, use:

    alt=""

    That is better than inventing a description for an image that does not need one.

    How Long Should Alt Text Be?

    There is no universal SEO character count that every alt attribute must meet.

    The better goal is to make alt text as short as possible while still communicating the important information.

    For a simple photo, that may be one concise phrase. A chart, diagram, or more complex image may require additional explanation.

    Avoid two common mistakes:

    • padding alt text with unnecessary words to make it seem more “optimized”
    • cutting out important information only to stay below a rigid character target

    Clarity matters more than hitting a specific number.

    Should Every Image Have Alt Text?

    Every image should be handled appropriately, but not every image needs descriptive text inside the alt attribute.

    Informative Images

    If an image communicates useful information, write alt text that describes that information.

    Examples include:

    • product photos
    • screenshots
    • illustrations
    • blog images
    • charts
    • photos supporting the content

    Functional Images

    Some images perform an action or act as links.

    In those cases, the accessible text should help communicate the function or destination where appropriate, rather than only describing what the image looks like.

    For example, a logo linked to the homepage may need text that communicates the site or destination rather than a visual description of the logo’s colors and shape.

    Decorative Images

    Decorative images generally should use an empty alt attribute:

    alt=""

    This is one reason the advice “add keywords to every image” is a poor alt-text strategy.

    Common Alt Text SEO Mistakes

    Keyword Stuffing

    Do not repeat target phrases in an unnatural way.

    Poor:
    SEO image optimization SEO services website SEO images

    One accurate description is far more useful than a string of keyword variations.

    Using the Same Alt Text on Every Image

    If multiple images show different things, they should not all receive the same keyword-based description.

    Describe each meaningful image based on its actual content and purpose.

    Writing Alt Text That Does Not Match the Image

    Do not add a keyword simply because the page is targeting it.

    If an image shows a team meeting, alt text such as “WordPress image optimization guide” is inaccurate even if that happens to be the page topic.

    Being Too Vague

    Descriptions such as “photo,” “website,” “graphic,” or “product” usually provide too little information.

    Add enough detail to communicate the meaningful subject or action.

    Describing Every Tiny Detail

    Alt text does not need to recreate the entire image in words.

    Focus on what matters for the page and leave out irrelevant background details.

    Starting Every Description With “Image of”

    This adds repetition without usually adding meaning.

    Adding Descriptions to Decorative Images

    Decorative elements can create unnecessary noise for screen-reader users if every one receives a written description.

    Confusing Alt Text With an Image Title or Caption

    These fields serve different purposes.

    • Alt text: provides an alternative description or function for the image
    • Caption: visible text displayed near the image
    • Image title: optional metadata or CMS field depending on the platform
    • Filename: identifies the uploaded image file

    Do not copy the exact same keyword phrase into all four fields just for SEO.

    How to Add Alt Text in WordPress

    WordPress makes alt text relatively easy to add during publishing.

    1. Open the page or post containing the image.
    2. Select the image or open it through the Media Library.
    3. Find the Alt Text field.
    4. Enter a concise description based on the image and page context.
    5. Save or update the content.
    6. Verify that the description was added to the correct image.

    For larger websites, the challenge is usually not finding the field. It is making sure every relevant image receives a useful description during publishing.

    That is why alt-text review should be part of a consistent WordPress publishing and QA process.

    For more image-specific publishing guidance, see how to optimize images in WordPress.

    If your team has a large content library that needs image cleanup, alt text, formatting, or publishing QA, get help with image optimization and content publishing.

    Alt Text Checklist

    Before publishing an image, ask:

    • Does this image communicate meaningful information?
    • Does the alt text describe what actually matters?
    • Does the description make sense in this page context?
    • Is it concise?
    • Is a keyword included only if it fits naturally?
    • Have unnecessary phrases such as “image of” been removed?
    • Is the description free from keyword stuffing?
    • Does a decorative image use empty alt text?
    • Does the description avoid unnecessary repetition of nearby text?
    • Has the published page been reviewed?

    Alt Text and the Rest of Image SEO

    Alt text is only one part of image optimization.

    A complete image SEO workflow may also include:

    • descriptive filenames
    • appropriate image dimensions
    • image compression
    • modern formats such as WebP
    • relevant surrounding content
    • responsive image delivery
    • proper image placement
    • page performance

    For example, excellent alt text does not make up for uploading a 5 MB image that slows down the page.

    Likewise, a well-compressed image with a vague filename and missing alternative text is not fully optimized.

    These elements should work together.

    If you are converting and compressing website assets, this guide to WebP image optimization explains another important part of the process.

    You can also use an on-page SEO checklist to make sure images, headings, metadata, internal links, and other page elements are reviewed together.

    Final Takeaway

    If you want to know how to write alt text for SEO, focus on meaning first.

    Describe what matters about the image, consider why it appears on the page, keep the wording concise, and include a relevant keyword only when it fits naturally.

    Use empty alt text for purely decorative images, avoid keyword stuffing, and do not treat alt text as interchangeable with filenames, captions, or image titles.

    When handled consistently, useful alt text improves the quality of your publishing process while also supporting accessibility and image SEO.

    If your website has hundreds of images that need optimization, alt-text review, formatting, or publishing QA, discuss your website content optimization project.

    Frequently Asked Questions

    Does alt text help SEO?

    Yes. Alt text can help search engines understand the subject and context of an image. It is most effective when it accurately describes the image rather than being written mainly to insert keywords.

    How do you write good alt text for SEO?

    Describe the meaningful content of the image, consider its context on the page, keep the wording concise, and include a relevant keyword only when it fits naturally.

    How long should alt text be?

    There is no single required SEO character limit for every alt attribute. Keep it as concise as possible while still communicating the important information in the image.

    Should every image have alt text?

    Informative images should generally have meaningful alternative text. Purely decorative images should usually use an empty alt attribute, written as alt="".

    Should alt text include keywords?

    It can include keywords when they genuinely describe the image. Do not force keywords into unrelated images or repeat multiple keyword variations.

    What is an example of good alt text?

    For a screenshot showing the WordPress Media Library, useful alt text could be: “WordPress Media Library showing the Alt Text field for an uploaded image.”

    What is the difference between alt text and an image title?

    Alt text provides an alternative description or function for an image. An image title is a separate optional field or metadata element and should not be treated as a replacement for alt text.

  • WordPress Content Migration: How to Move Content Without Losing SEO

    WordPress Content Migration: How to Move Content Without Losing SEO

    WordPress content migration is the process of moving website content into WordPress while preserving the elements that make that content useful to visitors and search engines. That can include pages, blog posts, images, headings, internal links, metadata, downloads, calls to action, categories, and URL structure.

    It is different from simply moving a WordPress installation from one hosting provider to another. A technical site migration may transfer databases, themes, plugins, and server files. Content migration focuses on making sure the information inside the website arrives in the right place, uses the right structure, and works correctly after the move.

    That distinction matters when you are rebuilding a website, moving from another CMS, consolidating multiple websites, or replacing an outdated WordPress setup. A successful migration is not complete when the content appears on the new site. It is complete when that content has been reviewed, formatted, linked, optimized, and tested.

    What Is WordPress Content Migration?

    WordPress content migration involves transferring or rebuilding website content in WordPress while retaining the structure, assets, links, SEO information, and functionality that should survive the move.

    Depending on the project, the migration may include:

    • Pages and blog posts
    • Page titles and heading structure
    • Images and media files
    • Image alt text
    • Internal and external links
    • Buttons and calls to action
    • SEO titles and meta descriptions
    • URL slugs
    • Categories and tags
    • Tables, lists, quotes, and embeds
    • PDFs and downloadable resources
    • Author and publication information

    Some of this information can be transferred automatically. Other elements usually need manual review because the old site’s structure may not match the new WordPress templates.

    Content Migration vs. Full WordPress Site Migration

    A full WordPress migration often refers to moving an existing WordPress installation between servers, hosts, domains, or environments. That can involve transferring the database, themes, plugins, uploads, configuration files, and other technical components.

    Content migration is more focused. For example, a company redesigning its website may keep WordPress but rebuild every page using a new design system. The hosting may stay exactly the same, yet the project still requires substantial content migration.

    Similarly, a business moving from Webflow, Drupal, Joomla, a proprietary CMS, or a static website may need its content rebuilt inside WordPress even though there is no existing WordPress database to transfer.

    This is why migration plugins solve only part of many real-world projects. Moving data is not the same as implementing the content correctly.

    When Do You Need WordPress Content Migration?

    Content migration is common whenever the structure, platform, or presentation of a website changes.

    Moving From Another CMS to WordPress

    A CMS-to-WordPress migration may involve importing structured data, manually recreating pages, or combining automated and manual methods.

    The challenge is rarely just getting the text into WordPress. Different platforms use different content fields, page builders, templates, taxonomies, image systems, and URL structures. Content that looked correct in the old CMS may need to be reformatted for WordPress.

    Redesigning an Existing Website

    A redesign often introduces new page templates, content blocks, navigation, image dimensions, and calls to action. Existing copy may need to be moved into those new layouts page by page.

    This is also a good opportunity to clean up outdated formatting, oversized images, weak internal links, and inconsistent metadata instead of carrying every old problem into the new website.

    Consolidating Multiple Websites

    Businesses sometimes merge multiple domains, microsites, blogs, or resource libraries into one WordPress installation.

    These projects require careful decisions about which pages should be retained, combined, redirected, updated, or removed. Without a clear content map, it is easy to create duplicate pages or lose important URLs.

    Reorganizing an Existing WordPress Site

    Not every migration involves changing platforms. A WordPress website may need a content migration when moving from an old page builder to a new one, changing themes, creating custom post types, reorganizing categories, or replacing inconsistent page templates.

    What Should Be Included in a WordPress Content Migration?

    Before moving anything, define exactly what counts as content for the project. Focusing only on visible body copy is a common mistake.

    A complete inventory may include:

    • Page and post titles
    • Body copy
    • H2 and H3 headings
    • Images
    • Image captions and alt text
    • Videos and embeds
    • Tables
    • Lists
    • Quotes
    • Buttons and calls to action
    • Internal links
    • External links
    • Downloadable documents
    • Author information
    • Publication and updated dates
    • Categories and tags
    • SEO titles
    • Meta descriptions
    • URL slugs
    • Canonical settings where applicable

    The exact list depends on the website, but documenting these elements before migration reduces the chance of discovering missing pieces after launch.

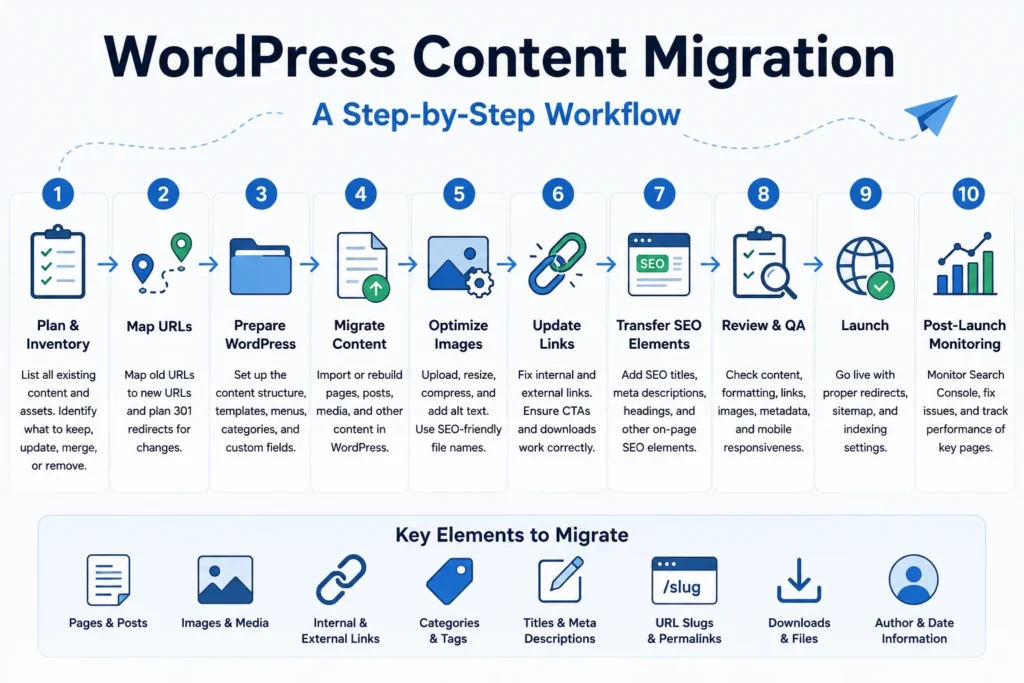
    WordPress Content Migration Process

    A reliable migration should follow a repeatable workflow rather than moving pages in whatever order is convenient.

    WordPress content migration workflow showing planning, URL mapping, content transfer, image optimization, SEO, QA, and post-launch monitoring

    1. Create a Complete Content Inventory

    Start by recording every URL that may need to move. A spreadsheet is usually the simplest way to manage this.

    Useful columns include:

    Old URL | New URL | Content Type | Migration Status | SEO Metadata | Images | Redirect | QA Status

    The inventory gives the team one source of truth for what exists, what is moving, and what still needs review.

    If analytics or Search Console data is available, identify pages that already receive organic traffic, earn backlinks, generate leads, or rank for important queries. These deserve extra attention during migration.

    2. Decide What to Keep, Update, Merge, or Remove

    A migration does not have to preserve every page simply because it exists.

    Review the inventory and classify content into groups such as:

    • Keep: still useful and accurate
    • Update: valuable but outdated
    • Merge: overlaps significantly with another page
    • Redirect: should point to a better destination
    • Remove: no longer useful and has no replacement

    This prevents old, duplicate, thin, or irrelevant content from automatically becoming part of the new website.

    3. Map Old URLs to New WordPress URLs

    URL mapping is one of the most important SEO tasks in a migration.

    For each old URL, decide whether the new website will use:

    • The same URL
    • A changed URL
    • A consolidated destination
    • No replacement

    When an important URL changes, a suitable 301 redirect should generally point the old address to the closest relevant new page.

    Avoid redirecting large numbers of unrelated old pages to the homepage simply because it is easy. The destination should make sense for someone who expected the original page.

    4. Prepare the WordPress Content Structure

    Set up the destination before migrating large volumes of content.

    Confirm:

    • Page hierarchy
    • Blog structure
    • Categories
    • Tags
    • Custom post types
    • Templates
    • Navigation structure
    • Custom fields
    • URL conventions

    Without this preparation, teams often make inconsistent decisions during migration and then have to reorganize the website afterward.

    For larger sites, clear ongoing WordPress content management standards can also help keep publishing consistent after the migration is finished.

    5. Migrate and Format the Content

    Now the content can be transferred or rebuilt inside WordPress.

    Depending on the source platform and project size, migration may be performed with an importer, API, migration tool, spreadsheet-based workflow, manual publishing, or a combination of methods.

    Whatever method is used, review the WordPress output for:

    • Correct H2 and H3 hierarchy
    • Consistent paragraphs and spacing
    • Proper lists
    • Clean tables
    • Working buttons
    • Correct quotes
    • Accurate embeds
    • Readable formatting
    • Removal of unnecessary source-CMS markup

    Copying content directly from another CMS can bring hidden spans, inline styles, outdated classes, or unnecessary markup into WordPress. The page may look acceptable initially but become difficult to maintain later.

    Content implementation should therefore be treated as a structured publishing task, not simply copy and paste.

    If you have a large batch of pages that needs to be rebuilt, formatted, linked, and reviewed, get help with your WordPress content migration.

    6. Migrate and Optimize Images

    Images deserve their own migration workflow.

    Common migration problems include missing files, images still loading from the old domain, oversized uploads, duplicated media, poor filenames, and lost alt text.

    For each important image:

    • Confirm that the correct file was transferred
    • Use an appropriate file size
    • Resize unnecessarily large images
    • Compress the file
    • Use WebP where appropriate
    • Retain or improve descriptive alt text
    • Check that the image displays correctly on desktop and mobile

    Migrations are a useful opportunity to improve old media libraries rather than simply copying every inefficient asset. See the NextWebOps guide to optimizing images for SEO for additional image optimization considerations.

    7. Restore Internal and External Links

    Internal links frequently break during migration because domains, URL structures, page names, or content locations change.

    Review links inside the migrated content and check for:

    • Old-domain URLs
    • Old staging URLs
    • Pages whose slugs changed
    • Links to removed content
    • Broken PDF or download URLs
    • Incorrect CTA destinations

    Migration is also a good time to improve weak linking between related pages. A stronger internal structure helps users discover relevant content and gives search engines clearer context about how pages relate to each other.

    For more guidance, see these internal linking best practices.

    8. Transfer Important On-Page SEO Elements

    Installing an SEO plugin does not automatically preserve the optimization of the old website.

    Review important SEO elements individually, including:

    • SEO titles
    • Meta descriptions
    • URL slugs
    • Heading hierarchy
    • Image alt text
    • Internal links
    • Canonical URLs where applicable
    • Indexing settings

    If the page is being rewritten or significantly redesigned, do not assume the old metadata should be copied unchanged. It may be better to improve it while retaining the page’s search intent.

    Before launch, it is also useful to run an on-page SEO audit across priority pages.

    9. Review Every Migrated Page

    A page should not be marked complete immediately after its content appears in WordPress.

    Use a repeatable QA checklist for each migrated URL:

    • All expected content is present
    • Headings follow the correct hierarchy
    • Formatting matches the intended template
    • Images load correctly
    • Alt text has been added where appropriate
    • Internal links work
    • External links work
    • Buttons and forms work
    • SEO metadata is present
    • The correct URL is being used
    • The page works on mobile
    • No old-domain or staging links remain

    For WordPress-specific publishing checks, use a consistent WordPress publishing checklist instead of relying on memory.

    10. Perform Post-Launch Checks

    Migration QA should continue after the new website goes live.

    Check the live site for:

    • Broken links
    • Unexpected 404 errors
    • Incorrect redirects
    • Missing images
    • Indexing problems
    • Sitemap errors
    • Canonical mistakes
    • Pages accidentally blocked from search engines

    Google Search Console can help identify indexing issues, crawl errors, and unexpected changes after launch. Priority organic landing pages should receive additional monitoring because problems on those pages can have a larger impact on traffic.

    Manual vs. Automated WordPress Content Migration

    Automation can make migration significantly faster, especially when a website contains hundreds or thousands of similarly structured records.

    Automated migration works well when:

    • The source system has a reliable export method
    • WordPress has a compatible importer
    • Fields can be mapped cleanly
    • Content types are consistent
    • Layouts require minimal transformation

    Manual or assisted migration is often more appropriate when:

    • The website is being redesigned
    • The source markup is messy
    • Pages use different layouts
    • Content needs editing
    • Images need optimization
    • Internal links require rebuilding
    • SEO metadata needs review
    • The source and destination CMS structures differ substantially

    The most efficient approach is often a combination: automate repetitive transfers and use human review for structure, formatting, SEO, and QA.

    Automation can transfer data. It does not guarantee correctly implemented content.

    Common WordPress Content Migration Mistakes

    Migrating Everything Without a Content Audit

    Moving outdated, duplicated, or irrelevant pages creates unnecessary work and carries old problems into the new site.

    Changing URLs Without Mapping Redirects

    Important pages can lose traffic and backlinks when old URLs disappear without appropriate redirects.

    Copying Messy HTML Into WordPress

    Source-CMS formatting can introduce unnecessary code, inline styling, and inconsistent page layouts.

    Forgetting SEO Titles and Meta Descriptions

    Visible content may survive while valuable SEO fields are lost during an import.

    Losing Images or Alt Text

    Images can remain hosted on the old domain, disappear after launch, or lose descriptive attributes during migration.

    Leaving Internal Links Pointing to Old URLs

    Old-domain links create avoidable redirects and may eventually become broken links.

    Recreating the Wrong Heading Structure

    Visual styling should not replace semantic structure. A section that looks like a heading should use the appropriate heading element rather than bold paragraph text.

    Depending Entirely on Migration Plugins

    Plugins are useful for moving files or structured data, but they cannot judge whether a page has the correct CTA, image, heading hierarchy, link destination, or editorial formatting.

    Skipping Live-Site QA

    A staging site can behave differently after launch. Redirects, caching, CDN settings, forms, links, and indexing controls should all be checked on the live domain.

    WordPress Content Migration Checklist

    Before Migration

    • Create a complete content inventory
    • Record existing URLs
    • Identify important organic landing pages
    • Decide what to keep, update, merge, or remove
    • Create the new URL map
    • Prepare redirects
    • Collect media and downloadable files
    • Export or record important metadata
    • Confirm the new WordPress content structure

    During Migration

    • Move or rebuild pages and posts
    • Apply the correct heading hierarchy
    • Clean formatting
    • Optimize images
    • Add alt text
    • Update internal links
    • Restore external links
    • Rebuild buttons and CTAs
    • Add SEO titles and meta descriptions
    • Track completion in the migration spreadsheet

    After Migration

    • Review every important page
    • Test redirects
    • Check for broken links
    • Check images and downloadable files
    • Review mobile layouts
    • Confirm indexing settings
    • Verify the XML sitemap
    • Review Google Search Console
    • Monitor priority pages after launch

    When Should You Outsource WordPress Content Migration?

    Small migrations may be manageable internally. The workload increases quickly, however, when a project involves dozens or hundreds of URLs.

    Outsourcing can make sense when:

    • An agency needs help publishing a large client website
    • Hundreds of pages need to be moved
    • Content is coming from another CMS
    • New WordPress templates require manual formatting
    • SEO metadata needs to be retained or improved
    • Images need resizing and optimization
    • Internal links must be updated across the site
    • A strict launch deadline is approaching
    • The internal marketing team needs to focus on strategy rather than repetitive implementation
    • A separate QA pass is required before launch

    NextWebOps supports WordPress content migration through practical implementation work such as page publishing, formatting, image optimization, metadata, internal linking, content cleanup, and publishing QA.

    If the content is ready but your team needs help getting it correctly implemented in WordPress, discuss your WordPress migration project.

    Final Takeaway

    A successful WordPress content migration is not measured by whether the words made it into WordPress.

    The migrated content should arrive complete, correctly structured, properly formatted, optimized, connected to the rest of the website, and tested on the live site.

    Creating a content inventory, mapping URLs, cleaning formatting, optimizing images, rebuilding internal links, preserving important SEO elements, and completing page-by-page QA can prevent many of the problems that appear after a rushed migration.

    Whether you are moving from another CMS, rebuilding an existing WordPress website, or migrating a large content library into new templates, treating migration as a controlled publishing workflow will produce a more reliable result.

    Need extra implementation capacity for an upcoming migration? contact NextWebOps for WordPress content migration support.

    Frequently Asked Questions

    What is WordPress content migration?

    WordPress content migration is the process of moving or rebuilding website content in WordPress. It can include pages, posts, images, links, metadata, headings, downloads, categories, CTAs, and other content elements that need to be preserved or recreated.

    How do I migrate content to WordPress?

    Start with a content inventory, decide which content should be retained, map old URLs to new destinations, prepare the WordPress structure, transfer or rebuild the content, update links and SEO elements, and perform page-by-page QA before and after launch.

    Can I migrate content from another CMS to WordPress?

    Yes. Content can be moved from platforms such as Webflow, Drupal, Joomla, proprietary CMSs, or static websites. Some data may be imported automatically, while layouts, formatting, links, images, and metadata often require manual review.

    Does migrating a WordPress website affect SEO?

    It can. SEO problems may occur when important URLs change without redirects, content is removed, metadata is lost, internal links break, pages become non-indexable, or important on-page elements are changed incorrectly. Careful planning and post-launch monitoring can reduce these risks.

    Can WordPress content migration be automated?

    Parts of the process can be automated when content is structured consistently and the source and destination systems support reliable import and export methods. Manual review is still important for formatting, images, SEO elements, links, calls to action, and quality assurance.

    How do I migrate WordPress content without losing SEO?

    Preserve important content, map old and new URLs, use appropriate redirects when URLs change, retain or improve relevant metadata, update internal links, verify indexability, submit an accurate sitemap, and monitor priority pages through Google Search Console after launch.

  • Webflow to WordPress Migration: A Step-by-Step Guide

    Webflow to WordPress Migration: A Step-by-Step Guide

    A Webflow to WordPress migration involves more than copying text from one platform to another. Depending on the website, you may need to move static pages, CMS collections, images, SEO metadata, URLs, internal links, forms, and other site elements while rebuilding the design and protecting existing search visibility.

    Some Webflow content can be exported and imported into WordPress, but the process is rarely completely automatic. CMS fields need to be mapped, images need to be verified, templates need to be recreated, and any changed URLs need proper redirects.

    A practical migration workflow looks like this:

    Inventory → Export → Map → Import → Rebuild → Preserve URLs → Restore SEO → QA → Launch.

    This guide explains each step and highlights the areas that deserve extra attention when organic traffic, content quality, and publishing consistency matter.

    Can You Migrate Webflow to WordPress?

    Yes. You can migrate a Webflow website to WordPress, but the method depends on the size and complexity of the site.

    There are three common approaches.

    Manual Migration

    With a manual migration, content is exported or copied from Webflow and then rebuilt or imported into WordPress.

    This approach can work well when:

    • The site is relatively small
    • You want close control over page structure
    • SEO preservation is important
    • The WordPress design will differ from the original Webflow site

    Migration or Conversion Tools

    Some tools can help convert Webflow designs or import exported content into WordPress.

    These can reduce repetitive work, but they do not remove the need for QA.

    You still need to check:

    • Formatting
    • Images
    • CMS fields
    • Metadata
    • URLs
    • Links
    • Responsive layouts

    Professional Migration

    Migration support becomes more valuable when the Webflow site contains hundreds of CMS items, important rankings, complex page templates, or a large number of URLs that must be mapped carefully.

    The more content and SEO value the site has, the more important the planning stage becomes.

    What Can Be Migrated From Webflow to WordPress?

    A Webflow website is made up of several different layers. Some transfer more easily than others.

    Static Page Content

    Static pages may include:

    • Homepage
    • About page
    • Service pages
    • Landing pages
    • Contact page

    The content can be recreated in WordPress, but the original Webflow layout generally needs to be rebuilt using your chosen WordPress theme, blocks, page builder, or custom templates.

    Webflow CMS Collections

    Webflow CMS collections can often be exported as CSV files.

    Examples include:

    • Blog posts
    • Case studies
    • Resources
    • Team members
    • Projects

    Those fields can then be mapped to WordPress posts, pages, custom post types, taxonomies, or custom fields.

    Images and Media

    Images usually need separate attention during the migration.

    Do not assume that every image referenced in exported content will automatically become a properly hosted WordPress media item.

    Review:

    • Featured images
    • Inline images
    • Background images
    • Image URLs
    • Alt text
    • File dimensions
    • File size

    SEO Metadata

    Important metadata should be documented before migration.

    This may include:

    • SEO titles
    • Meta descriptions
    • Page slugs
    • Canonical settings where relevant
    • Indexing controls
    • Open Graph information where needed

    Do not assume those fields will automatically transfer to the correct WordPress SEO fields.

    Design and Layout

    Exporting Webflow content does not automatically recreate the same editable WordPress website.

    The design may need to be:

    • Rebuilt with a WordPress theme
    • Recreated with blocks
    • Built with a page builder
    • Converted into a custom WordPress theme
    • Adapted into a new design system

    This is why content migration and design migration should be planned as related but separate tasks.

    What Does Not Automatically Transfer?

    Several Webflow-specific elements may require manual recreation or additional configuration in WordPress.

    Depending on the original site, this can include:

    • Interactions and animations
    • Dynamic CMS relationships
    • Forms
    • Custom scripts
    • Third-party integrations
    • Complex layout logic
    • SEO settings
    • 301 redirects
    • Collection templates
    • Some styling behavior

    The exact migration requirements depend heavily on how the Webflow site was originally built.

    This is why the first stage should be an audit rather than immediately exporting files.

    How to Migrate Webflow to WordPress Step by Step

    1. Audit the Existing Webflow Website

    Before migrating anything, create an inventory of the existing website.

    Document:

    • All indexable URLs
    • Static pages
    • CMS collections
    • Blog posts
    • Images
    • SEO titles
    • Meta descriptions
    • Internal links
    • Redirects
    • Forms
    • Integrations

    If the existing Webflow site receives organic search traffic, this inventory becomes particularly important.

    You should know which URLs exist before deciding which ones will remain, change, merge, or disappear.

    It can also be useful to review your existing Webflow SEO optimization before migration so important page-level SEO elements are not overlooked.

    2. Back Up Your Webflow Content

    Preserve copies of the site data before making major changes.

    At minimum, save:

    • CMS exports
    • Page content
    • Images
    • Current URL list
    • Metadata
    • Important settings

    The goal is to avoid discovering after launch that an important field, image, publication date, or piece of metadata was never captured.

    3. Set Up WordPress on a Staging Environment

    Build the new WordPress website on staging before replacing the live Webflow site.

    A staging environment lets your team:

    • Test content imports
    • Rebuild layouts
    • Configure templates
    • Review images
    • Set up SEO
    • Test redirects
    • Fix formatting
    • Perform mobile QA

    Make sure staging pages are not accidentally indexed by search engines while the site is still under development.

    4. Decide How WordPress Will Be Built

    Before importing a large amount of content, define the new WordPress structure.

    Possible approaches include:

    • A standard WordPress theme
    • A block theme
    • A custom theme
    • A page builder
    • A converted Webflow design

    The best option depends on:

    • Design complexity
    • Editing requirements
    • Performance goals
    • Internal team skills
    • Long-term maintenance

    Do not choose purely based on how closely the new site can copy the existing design. The WordPress editing and maintenance experience matters too.

    5. Export Webflow CMS Collections

    Export each Webflow CMS collection separately and document what each field represents.

    For example, a blog collection might contain:

    • Name
    • Slug
    • Publish date
    • Author
    • Category
    • Featured image
    • Body content
    • SEO title
    • Meta description

    A case study collection may have very different fields.

    Keeping these exports organized makes WordPress mapping much easier.

    6. Map Webflow Fields to WordPress

    Field mapping is one of the most important stages of a content-heavy migration.

    Webflow Field WordPress Destination
    Name Post title
    Slug Post slug
    Body Post content
    Featured image Featured image
    Publish date Post date
    Category Category or taxonomy
    SEO title SEO metadata field
    Meta description SEO metadata field

    A field that is mapped incorrectly can create hundreds of cleanup tasks after import.

    Test your mapping on a small group of records before importing an entire collection.

    Migrating CMS content is where formatting, metadata, images, categories, and field mapping can become time-consuming. Contact NextWebOps for hands-on Webflow to WordPress content migration support.

    7. Import Content Into WordPress

    Once the WordPress structure is ready, import your content.

    WordPress import tools and specialized plugins can help automate parts of this process, particularly for structured CSV data.

    After the import, review samples from every content type.

    Check:

    • Titles
    • Paragraphs
    • Headings
    • Lists
    • Links
    • Images
    • Categories
    • Dates
    • Authors
    • Special formatting

    Do not assume that a technically successful import means the published content is ready.

    8. Migrate and Optimize Images

    Images often create one of the largest cleanup workloads during a CMS migration.

    Make sure important images are hosted properly inside the new WordPress environment rather than unintentionally depending on old external URLs.

    Review:

    • Image filenames
    • Dimensions
    • Compression
    • Format
    • Alt text
    • Featured-image assignments
    • Inline image placement

    Where appropriate, optimize images using formats such as WebP and resize unnecessarily large files.

    For more guidance, see these image SEO best practices.

    9. Rebuild Static Pages and Templates

    Static Webflow pages commonly need to be recreated separately from CMS imports.

    These may include:

    • Homepage
    • Service pages
    • About page
    • Contact page
    • Campaign landing pages

    You will also need WordPress templates for repeatable content such as blog posts and case studies.

    Check that the new templates preserve logical:

    • Heading hierarchy
    • Content spacing
    • Image placement
    • Navigation
    • Calls to action

    10. Preserve URLs Wherever Possible

    URL preservation is one of the most important SEO decisions in a Webflow to WordPress migration.

    If an existing URL is:

    • Indexed
    • Receiving organic traffic
    • Linked internally
    • Linked from other websites
    • Still serving the same page purpose

    keep it unchanged where practical.

    Changing URLs simply because WordPress uses a different default structure can introduce unnecessary migration risk.

    11. Create 301 Redirects for Changed URLs

    When an old Webflow URL cannot be preserved, map it to the most relevant new WordPress URL.

    Create a redirect sheet using this format:

    Old Webflow URL → New WordPress URL

    For example:

    /webflow-old-service/ → /content-publishing-service/

    Avoid redirecting every old URL to the homepage.

    The replacement page should satisfy roughly the same intent whenever possible.

    Also avoid unnecessary redirect chains.

    Instead of:

    Page A → Page B → Page C

    configure:

    Page A → Page C

    12. Restore SEO Titles and Meta Descriptions

    SEO metadata should be restored or intentionally rewritten during migration.

    Review:

    • SEO titles
    • Meta descriptions
    • Canonical settings where applicable
    • Indexing settings
    • Schema where relevant

    If a page is performing well, avoid rewriting its SEO positioning without a clear reason.

    Migration already introduces technical change. Unnecessary content and metadata changes can make it harder to diagnose performance shifts after launch.

    13. Rebuild Internal Links

    Migrated content may still contain links pointing to old Webflow URLs.

    Although redirects can catch some of those requests, it is better to update important internal links directly.

    Review links between:

    • Blog posts
    • Service pages
    • Case studies
    • Resources
    • Landing pages

    Use descriptive anchors and preserve useful relationships between pages.

    See these internal linking best practices for a broader framework.

    14. Perform WordPress Publishing QA

    Before launch, review the site as a visitor and as a search engine would encounter it.

    Check:

    • Page content
    • Formatting
    • Heading hierarchy
    • Images
    • Alt text
    • SEO titles
    • Meta descriptions
    • Internal links
    • External links
    • Buttons
    • Forms
    • Categories
    • Authors
    • Publication dates
    • Mobile layouts
    • 301 redirects
    • Canonical URLs
    • Indexing settings

    Use the NextWebOps on-page SEO checklist as an additional page-level review before launch.

    How to Preserve SEO During a Webflow to WordPress Migration

    A platform migration can affect organic performance if important search signals are changed or lost.

    The following safeguards reduce unnecessary risk.

    Keep Important URLs the Same

    Preserve existing URLs where the same content will continue to exist in WordPress.

    Map Every Important Changed URL

    Any important Webflow URL that changes should have an appropriate redirect.

    Preserve Search Intent

    A migration is not automatically the best time to rewrite every page.

    If an existing page already satisfies its search intent and performs well, maintain its core purpose unless there is a separate optimization reason to change it.

    Transfer Metadata

    Restore page titles and meta descriptions instead of relying on generic WordPress defaults.

    Preserve Internal Links

    Update important internal links so they point directly to their new destinations.

    Check Images and Alt Text

    Verify that important images load from the new site and retain appropriate alt text.

    Avoid Accidental Noindex Settings

    Staging WordPress sites are often intentionally blocked from search engines.

    Before launch, confirm that your production pages are not accidentally carrying over settings that prevent indexing.

    Verify the Sitemap After Launch

    Check the WordPress XML sitemap and make sure important indexable pages are represented.

    Then review it through Google Search Console and inspect priority URLs after the new site launches.

    Have your migration plan ready but need help transferring pages, rebuilding internal links, adding redirects, restoring metadata, or QA-checking WordPress content? Talk to NextWebOps about Webflow to WordPress migration implementation.

    Webflow CMS to WordPress Migration

    Webflow CMS to WordPress content migration and field mapping process

    Webflow CMS content does not have to become standard WordPress blog posts.

    Different Webflow collections can map to different WordPress structures.

    For example:

    • Webflow Blog → WordPress Posts
    • Webflow Case Studies → Case Study custom post type
    • Webflow Team → Team custom post type
    • Webflow Resources → Resource custom post type

    Categories, tags, and reference fields may map to WordPress taxonomies or custom fields depending on the desired structure.

    A migration flow may look like:

    Webflow CMS → CSV Export → Field Mapping → WordPress Import → Formatting & SEO QA

    Relational fields deserve special attention.

    For example, if a Webflow case study references an industry, service, or team member, you need to decide how that relationship will work in WordPress.

    This may require custom taxonomies, custom fields, or manual cleanup after import.

    Should You Rebuild the Webflow Design or Convert It?

    There are two broad approaches to the visual side of the migration.

    Rebuild the Design in WordPress

    Rebuilding gives you the opportunity to create a WordPress-native structure designed around the new editing environment.

    Potential benefits include:

    • Cleaner WordPress templates
    • Better long-term maintainability
    • More intentional performance optimization
    • Easier editing for content teams

    The tradeoff is that rebuilding usually requires more design and development work.

    Convert the Existing Webflow Design

    Conversion tools may help retain more of the existing visual appearance or exported code.

    This can be useful in certain projects, but converted output should still be reviewed for:

    • Maintainability
    • Responsive behavior
    • WordPress editing experience
    • Performance
    • Code quality

    The best choice is not necessarily the one that reproduces Webflow most literally.

    Choose the method that creates a WordPress site your team can maintain comfortably after the migration is finished.

    Common Webflow to WordPress Migration Mistakes

    Migrating Without a URL Inventory

    If you do not know which URLs exist before migration, it becomes much harder to identify missing pages and redirects later.

    Changing URLs Unnecessarily

    Keep established URLs when possible.

    Forgetting 301 Redirects

    Changed URLs need relevant redirects rather than dead ends.

    Losing SEO Metadata

    Titles and descriptions should be preserved or intentionally replaced.

    Missing Images

    Verify featured and inline images after import.

    Leaving Broken Internal Links

    Do not rely on redirects to handle every outdated internal link.

    Importing Messy HTML

    Content may carry over unwanted formatting or structural markup that needs cleanup.

    Incorrect Category Mapping

    Make sure categories and taxonomies are planned before importing hundreds of posts.

    Losing Publication Dates or Authors

    These fields are easy to overlook during bulk migration.

    Forgetting Forms and Integrations

    Content migration does not automatically recreate functionality.

    Launching Without Mobile QA

    Check responsive layouts before switching the domain.

    Accidentally Blocking Indexing

    Confirm the live site is indexable after launch.

    Combining Migration, Redesign, and Content Rewrite Without a Plan

    Changing the CMS, design, URLs, and page copy simultaneously creates more variables and makes problems harder to diagnose.

    If content also needs optimization, consider using a separate content optimization strategy rather than rewriting every page automatically during migration.

    Webflow to WordPress Migration Checklist

    Before Migration

    • Crawl or export existing URLs
    • Inventory static pages
    • Inventory CMS collections
    • Export CMS content
    • Back up images
    • Document SEO metadata
    • Document internal links
    • Document forms and integrations
    • Plan the WordPress content structure

    During Migration

    • Configure WordPress staging
    • Create posts, pages, and custom post types
    • Map CMS fields
    • Test a small import first
    • Import content
    • Transfer images
    • Rebuild static pages
    • Preserve URLs where possible
    • Create redirect mapping
    • Restore metadata
    • Update internal links

    Before Launch

    • Test important redirects
    • Check SEO titles and descriptions
    • Check images and alt text
    • Test internal links
    • Test forms
    • Review mobile layouts
    • Check publication dates and authors
    • Verify canonical URLs
    • Confirm indexability
    • Verify XML sitemap
    • Complete live-site QA

    How Long Does a Webflow to WordPress Migration Take?

    There is no useful universal timeframe because migration scope varies significantly.

    A relatively small marketing website with 20 pages is very different from a site with:

    • Hundreds of blog posts
    • Multiple CMS collections
    • Complex reference fields
    • Custom integrations
    • Thousands of images
    • Large redirect maps
    • Important organic search traffic

    The main factors affecting migration complexity include:

    • Number of URLs
    • Number of CMS items
    • Custom fields
    • Design complexity
    • Image volume
    • Integrations
    • SEO requirements
    • Amount of manual content cleanup

    Planning the structure before importing content usually reduces cleanup later.

    When Should You Use Professional Migration Support?

    A DIY migration may be reasonable when the site is small, the design is simple, and there is little existing organic traffic to protect.

    Professional or implementation support becomes more useful when:

    • Hundreds of pages or posts need migration
    • Organic traffic is commercially important
    • Multiple Webflow CMS collections exist
    • WordPress custom post types are required
    • A large redirect map needs implementation
    • Images need migration and optimization
    • Imported formatting needs cleanup
    • Internal links need systematic updating
    • SEO metadata needs restoration
    • Your internal team has a publishing backlog

    Migration work can also be divided between specialists.

    A developer may handle hosting, templates, and technical configuration, while a content implementation team handles CMS mapping, WordPress publishing, formatting, images, metadata, internal links, redirects, and QA.

    Final Thoughts

    A successful Webflow to WordPress migration is not simply an export-and-import task.

    It requires careful handling of:

    Content + CMS structure + images + design + URLs + metadata + internal links + redirects + publishing QA.

    The most important rule is to understand the existing Webflow site before changing it.

    Inventory the URLs, preserve strong page structures, map CMS data carefully, keep important URLs wherever possible, redirect changed pages, restore metadata, rebuild internal links, and test the WordPress site thoroughly before launch.

    That process helps you move platforms without leaving valuable content or SEO details behind.

    Need help moving content from Webflow to WordPress without broken pages, missing images, outdated links, or lost metadata? Get in touch with NextWebOps for hands-on content migration, WordPress publishing, SEO implementation, and migration QA support.

    Frequently Asked Questions

    Can you migrate Webflow to WordPress?

    Yes. Webflow content can be migrated to WordPress using a combination of CMS exports, imports, manual page rebuilding, image migration, field mapping, and design recreation. The exact workflow depends on the size and complexity of the site.

    Can Webflow CMS content be exported to WordPress?

    Webflow CMS collections can be exported as CSV files and then mapped to WordPress posts, pages, custom post types, taxonomies, or custom fields. The exported fields should be reviewed carefully before importing them at scale.

    Will I lose SEO when moving from Webflow to WordPress?

    A migration can affect SEO if URLs, content, metadata, internal links, or indexing settings are changed incorrectly. Preserving important URLs, creating 301 redirects, restoring metadata, maintaining search intent, and completing post-migration QA can reduce unnecessary risk.

    Can I keep the same URLs after migrating?

    In many cases, yes. Keeping existing URLs is often the preferred approach when those pages remain relevant and already receive search traffic or backlinks. When a URL must change, create a 301 redirect to the most relevant new page.

    Can I transfer the Webflow design to WordPress?

    The design can be recreated or converted, but Webflow content export does not automatically produce a fully editable WordPress version of the same site. You may need to rebuild the design using a WordPress theme, blocks, a page builder, custom templates, or a conversion workflow.

    What happens to Webflow images during migration?

    Images need to be verified and often re-imported into the WordPress media library. Check featured images, inline images, file dimensions, filenames, compression, alt text, and any image URLs referenced in migrated content.

    Do I need 301 redirects when moving from Webflow to WordPress?

    You need 301 redirects when important URLs change. If a Webflow URL remains exactly the same in WordPress, a redirect is not required for that page.

    Can Webflow CMS collections become WordPress custom post types?

    Yes. A Webflow collection such as Case Studies, Resources, Projects, or Team Members can be mapped to a WordPress custom post type when that structure makes sense for the new site.

    Is there an automatic Webflow to WordPress converter?

    Tools can automate parts of design or content conversion, but a complete migration still requires review of formatting, CMS fields, images, URLs, metadata, redirects, integrations, and WordPress publishing quality.

  • Webflow SEO Optimization: A Practical Guide for Better Search Visibility

    Webflow SEO Optimization: A Practical Guide for Better Search Visibility

    Webflow SEO optimization is the process of improving the content, structure, metadata, links, images, CMS settings, and technical elements of a Webflow website so search engines can better crawl, understand, and index its pages.

    Webflow includes many useful SEO controls, but building a site in Webflow does not automatically mean every page is optimized.

    You still need to make strategic decisions about search intent, page topics, titles, meta descriptions, headings, internal links, image optimization, CMS fields, redirects, and performance. Those decisions then need to be implemented correctly inside Webflow and checked on the live site.

    A practical workflow looks like this:

    Research → Optimize Content → Configure Webflow SEO → Improve Performance → QA → Publish → Monitor.

    This guide explains how to work through that process on both static Webflow pages and CMS-driven content.

    Is Webflow Good for SEO?

    Yes, Webflow can be used effectively for SEO because it gives site owners control over many important optimization elements without requiring a traditional plugin-based SEO setup.

    Depending on the page and site configuration, Webflow provides controls for areas such as:

    • SEO titles
    • Meta descriptions
    • URLs and slugs
    • Image alt text
    • 301 redirects
    • Sitemaps
    • Open Graph settings
    • Custom code
    • Structured data implementation
    • Responsive layouts

    Webflow also gives designers and content teams substantial control over page structure and CMS templates.

    However, the platform cannot decide which keyword a page should target, whether two pages compete for the same intent, how much content a service page needs, or which internal links are most useful.

    Webflow provides the controls. SEO strategy and implementation determine how well those controls are used.

    What Is Webflow SEO Optimization?

    Webflow SEO optimization means improving a Webflow site’s pages and settings so they are easier for search engines to understand and more useful for visitors.

    That normally includes a combination of:

    • Search intent
    • Content quality
    • Keyword targeting
    • SEO titles and meta descriptions
    • Heading hierarchy
    • Internal links
    • Image optimization
    • URLs
    • CMS configuration
    • Redirects
    • Page performance
    • Indexing and sitemap settings
    • Publishing QA

    It is one platform-specific form of broader web page optimization, where individual pages are improved across search visibility, usefulness, performance, and conversion goals.

    12 Webflow SEO Optimization Steps

    The following workflow covers the most important areas to review when optimizing a Webflow site.

    1. Match Every Important Page to Search Intent

    Start with the purpose of the page.

    Ask what someone searching for the target topic actually wants.

    Common intent patterns include:

    • Service pages: Commercial intent
    • Blog posts: Informational intent
    • Case studies: Proof and commercial evaluation
    • Landing pages: Conversion-focused intent
    • Resource pages: Informational or educational intent

    A page can have excellent metadata and still underperform if it answers the wrong question.

    For example, a user searching for “Webflow content migration services” is likely looking for a provider or service information. A long beginner tutorial on exporting CMS items would not satisfy that intent well.

    Review the current search results for important keywords and compare the types of pages ranking.

    2. Choose a Clear Primary Keyword and Topic

    Each important page should have a distinct primary purpose.

    The page can naturally include many related terms, but those terms should support one main topic rather than create several unrelated directions.

    For example, a Webflow service page might target one specific service while related blog articles address supporting informational questions.

    This also helps reduce keyword cannibalization, where multiple pages from the same site compete for essentially the same search intent.

    When reviewing existing content at scale, a structured content optimization strategy can help identify which pages deserve updates first.

    3. Optimize Webflow SEO Titles

    The SEO title is one of the strongest page-level signals you can directly control.

    A useful SEO title should:

    • Clearly describe the page
    • Reflect the primary search intent
    • Use the main topic naturally
    • Be unique for important pages
    • Avoid unnecessary keyword repetition

    It is usually helpful to keep titles concise enough that the most important message appears clearly in search results.

    Compare:

    Weak: Services | Company Name

    Better: Webflow Content Publishing Services | Company Name

    The second version provides more useful context.

    For a broader review of page-level optimization elements, use the NextWebOps on-page SEO checklist.

    4. Write Useful Meta Descriptions

    A meta description summarizes the page and may appear beneath the title in search results.

    Strong descriptions should:

    • Accurately reflect the page
    • Match search intent
    • Include the main topic naturally
    • Highlight useful value
    • Remain concise

    Do not write the same generic description across dozens of pages.

    For example:

    Generic: Learn more about our company and the great services we provide.

    Specific: Get Webflow content publishing support for CMS updates, formatting, metadata, internal links, image optimization, and publishing QA.

    Search engines can generate different snippets for individual queries, so the entered description is not guaranteed to display word for word.

    5. Use a Logical H1, H2, and H3 Structure

    Heading hierarchy helps visitors scan a page and helps communicate content structure.

    A typical page might use:

    • H1 for the primary page title
    • H2 for major sections
    • H3 for subsections within those sections

    One common Webflow issue occurs when headings are selected primarily for their visual appearance rather than their semantic purpose.

    A designer might choose an H4 because it matches a preferred font size even though the content should logically be an H2.

    Style headings using classes and design settings, but keep the actual heading hierarchy logical.

    Also review reusable components carefully. If a component adds an unnecessary H1 to every page where it appears, one design decision can affect many URLs.

    6. Optimize Webflow CMS Content

    Webflow CMS is especially useful for sites publishing repeatable content types such as:

    • Blog posts
    • Case studies
    • Resources
    • Team profiles
    • Projects
    • Location pages
    • Industry pages

    CMS pages need a scalable SEO structure.

    Important areas include:

    • Dynamic SEO titles
    • Dynamic meta descriptions
    • CMS slugs
    • Heading structure
    • Unique body content
    • Images and alt text
    • Internal links

    For example, a case study collection might contain fields for:

    • Client or project name
    • Industry
    • Primary result
    • SEO title
    • Meta description
    • Featured image
    • Image alt text

    Those fields can then connect to the CMS template.

    The benefit is scalability. The risk is also scalability.

    If one dynamic title formula is poorly designed, the mistake can affect every item in the collection.

    This is why CMS implementation should always include template-level QA followed by checks on individual published items.

    Have SEO recommendations ready but need metadata, CMS content, images, links, and page updates implemented correctly? Contact NextWebOps for Webflow content publishing and SEO implementation support.

    7. Optimize Images and Alt Text

    Webflow sites often rely heavily on visual design, which makes image optimization especially important.

    Review:

    • Image dimensions
    • File size
    • Compression
    • File format
    • Filename
    • Alt text
    • Whether the image is decorative or informative

    A common mistake is uploading a very large image and simply displaying it at a smaller visual size.

    Resize images appropriately before uploading when possible, and use efficient formats such as WebP or AVIF when suitable for the asset and workflow.

    Alt text should accurately describe informative images rather than act as a field for keyword stuffing.

    Decorative images may not require the same descriptive treatment as images that communicate useful information.

    For more detail, see these image SEO best practices.

    8. Improve Internal Linking

    Internal links help search engines and users understand relationships across your website.

    Useful Webflow internal-linking patterns include:

    • Blog article → relevant service
    • Resource → supporting guide
    • Service page → relevant case study
    • Case study → related service
    • Article → related CMS article

    Use descriptive anchor text that tells readers what they will find at the destination.

    For example:

    Weak anchor: Click here

    Better anchor: internal linking best practices

    Also look for orphan pages: URLs that exist but receive few or no useful internal links.

    For a deeper framework, see the NextWebOps guide to internal linking best practices.

    9. Review URLs and Slugs

    Webflow gives you control over page slugs and CMS item URLs within the site’s structure.

    Good slugs are usually:

    • Readable
    • Concise
    • Descriptive
    • Relevant to the page topic

    For example:

    /webflow-content-publishing/

    is clearer than:

    /service-page-final-v2-new/

    Be cautious about changing URLs on established pages.

    If the existing page already receives traffic, backlinks, or internal links, changing the slug without proper redirect handling can create unnecessary SEO problems.

    10. Configure 301 Redirects Correctly

    Webflow includes redirect functionality that becomes important whenever URLs change.

    Common situations include:

    • Changing a page slug
    • Removing outdated content
    • Consolidating two pages
    • Restructuring the website
    • Migrating content from another CMS

    A 301 redirect sends visitors and search engines from an old URL to the most relevant replacement.

    For example:

    /old-webflow-service/

    might redirect to:

    /webflow-content-publishing/

    Do not automatically redirect every deleted page to the homepage. The destination should be relevant to the old page.

    Also try to avoid unnecessary redirect chains such as:

    Page A → Page B → Page C

    When practical, Page A should redirect directly to the final destination.

    11. Improve Page Performance and Mobile Experience

    Visual flexibility is one of Webflow’s strengths, but it can also make it easy to create heavy pages if performance is ignored.

    Common issues include:

    • Oversized images
    • Large background videos
    • Too many interactions or animations
    • Heavy third-party scripts
    • Unused elements
    • Complex page structures
    • Mobile layouts that were not fully tested

    Review pages on real mobile breakpoints, not only desktop.

    Check whether:

    • Text is readable
    • Buttons are usable
    • Images resize properly
    • Horizontal overflow appears
    • Navigation works correctly
    • Interactive elements remain understandable

    Performance should be treated as part of the user experience rather than a score-chasing exercise.

    12. Perform SEO and Publishing QA

    This is the step that turns optimization recommendations into correctly published work.

    Before publishing an important Webflow page, review:

    • SEO title
    • Meta description
    • Page slug
    • H1, H2, and H3 structure
    • Page content
    • Internal links
    • External links
    • Images
    • Alt text
    • Buttons and CTAs
    • CMS field connections
    • Responsive layout
    • Redirects
    • Indexing settings where applicable
    • Schema implementation where applicable

    Then check the published version rather than relying only on the Designer or CMS editor.

    A correct SEO brief can still turn into a weak page if the wrong heading tag is used, a dynamic meta field is not connected, an image remains oversized, or a redirect is missed.

    Publishing SEO updates across dozens of Webflow pages or CMS items can become time-consuming. Talk to NextWebOps about Webflow content updates, metadata, image optimization, internal links, redirects, formatting, and QA.

    Important Webflow SEO Settings to Review

    Beyond visible page content, Webflow includes several SEO-related settings worth reviewing.

    Page-Level SEO Settings

    Important static pages should have intentional:

    • SEO titles
    • Meta descriptions
    • Open Graph titles
    • Open Graph descriptions
    • Social-sharing images

    The Open Graph settings do not directly replace search metadata. They control how pages may appear when shared on supported social platforms.

    Sitemap Settings

    Webflow supports sitemap generation, which can help search engines discover your site’s indexable URLs.

    Review the sitemap setup after significant publishing changes, migrations, or site restructuring.

    A sitemap helps discovery, but inclusion in a sitemap does not guarantee indexing or rankings.

    Indexing Controls

    Not every page necessarily needs to appear in search results.

    Examples might include certain internal utility pages, campaign variants, or other pages intentionally excluded from search.

    However, do not apply noindex settings casually to important content.

    Always confirm the purpose of the page before changing indexing controls.

    301 Redirects

    Redirect settings should be reviewed during:

    • Site migrations
    • URL restructuring
    • Content consolidation
    • Page removal

    Keep a redirect map when working on larger migrations or content cleanup projects so changes can be QA-checked systematically.

    Schema and Custom Code

    Structured data can provide search engines with additional context about certain types of content.

    Depending on the page, appropriate schema might apply to:

    • Articles
    • Organizations
    • Breadcrumbs
    • Products
    • Other supported content types

    Schema should accurately reflect what the page actually contains. Adding irrelevant structured data simply because a markup type exists does not make a page more useful.

    Webflow Audit Tools

    Webflow provides site auditing and SEO-related tools that can help identify certain implementation issues.

    These can be useful for detecting problems such as missing fields or structural issues, but an automated audit cannot fully judge search intent, content quality, or whether an internal link genuinely helps the reader.

    Webflow SEO for Static Pages vs CMS Pages

    Static and CMS-driven pages require slightly different optimization workflows.

    Webflow static page SEO compared with CMS page SEO optimization

    SEO Area Static Pages CMS Pages
    SEO title Configured individually Can use dynamic CMS fields
    Meta description Written individually Can be mapped dynamically
    URL Manual page slug CMS item slug
    Content Edited directly on page Driven by CMS fields/template
    QA risk Usually affects one URL Template errors can affect many URLs

    Static Page SEO

    Static pages commonly include:

    • Homepage
    • About page
    • Service pages
    • Contact page
    • Landing pages

    Each can normally receive a custom SEO title, description, heading structure, content layout, and internal-link setup.

    This provides flexibility, but it also means every page needs individual attention.

    CMS Page SEO

    CMS-driven pages typically include repeatable content types such as:

    • Blog posts
    • Case studies
    • Resources
    • Projects
    • Team profiles

    Here the objective is to build a strong template and feed it high-quality CMS data.

    For example, a dynamic SEO title could pull from:

    • Article title
    • Category
    • Brand name

    But dynamic fields must be reviewed carefully.

    A missing CMS value can create incomplete metadata, and a poorly structured template can produce repetitive SEO titles across hundreds of pages.

    This is why Webflow CMS SEO requires both scalable structure and individual quality checks.

    Common Webflow SEO Mistakes

    Missing or Duplicate SEO Titles

    Important pages should have clear titles that match their purpose rather than generic or repeated metadata.

    Generic Meta Descriptions

    A description should summarize the actual page rather than repeat the same company slogan everywhere.

    Using Heading Tags for Styling

    Choose headings based on document structure, then style them visually using Webflow classes.

    Oversized Images

    Large image files can add unnecessary page weight across visually rich sites.

    Missing Alt Text

    Informative images should have appropriate text alternatives where useful.

    Weak CMS SEO Fields

    If a CMS collection lacks the fields needed for titles, descriptions, images, or other optimization elements, scaling consistent SEO becomes harder.

    Thin CMS Collection Items

    Creating hundreds of pages from a CMS does not make those pages useful automatically.

    Each indexable page should have a legitimate purpose and enough unique value to justify its existence.

    Poor Internal Linking

    Publishing blog posts without connecting them to relevant services, resources, or related articles can leave valuable pages isolated.

    Changing URLs Without Redirects

    Always consider existing traffic and links before changing established slugs.

    Overusing Animations and Scripts

    Visual effects should support the experience rather than unnecessarily increase page complexity.

    Ignoring Mobile Layouts

    A page that looks excellent on a large desktop screen can still contain broken spacing, unreadable text, or awkward interactions on mobile.

    Assuming Webflow Automatically Does SEO

    Webflow provides useful SEO functionality, but the platform does not replace research, content strategy, optimization, or QA.

    Webflow SEO Optimization Checklist

    Use this checklist before publishing or updating an important Webflow page:

    • Search intent confirmed
    • Primary page topic identified
    • SEO title optimized
    • Meta description written
    • H1, H2, and H3 hierarchy checked
    • Content is useful and unique
    • CMS SEO fields configured where applicable
    • URL or CMS slug reviewed
    • Images resized and compressed
    • Alt text reviewed
    • Internal links added
    • External links checked
    • Redirects configured when URLs changed
    • Mobile layout reviewed
    • Performance issues checked
    • Sitemap and indexing setup reviewed
    • Schema checked where relevant
    • Live-page publishing QA completed

    Do You Need Webflow SEO Tools or Plugins?

    Webflow does not depend on SEO plugins in the same way some other content management systems do.

    Many fundamental controls are available directly through the platform.

    Third-party SEO tools can still help with tasks such as:

    • Keyword research
    • Competitor analysis
    • Site crawling
    • Rank tracking
    • Performance testing
    • Content analysis
    • Backlink research

    But these tools generally identify opportunities or problems. Someone still needs to make the appropriate changes inside Webflow.

    For example, a crawler may tell you that 50 pages have missing meta descriptions. The actual work is determining which descriptions are needed, writing them, adding them to the right static or CMS fields, publishing the changes, and checking the results.

    When to Get Help With Webflow SEO Implementation

    A small Webflow website with a handful of static pages may be manageable for an internal marketing team.

    The workload becomes more substantial when:

    • Large CMS collections need updates
    • Dozens of pages need new metadata
    • Images need optimization
    • Internal links must be implemented across existing content
    • Redirect maps need to be published
    • SEO briefs are complete but implementation is backlogged
    • Content formatting is inconsistent
    • CMS fields need cleanup or population
    • Publishing QA is slowing launches

    SEO strategy and publishing implementation do not always need to be handled by the same team.

    An SEO strategist can determine what should change, while a Webflow implementation team handles content entry, metadata, links, images, formatting, redirects, and final QA.

    Final Thoughts

    Effective Webflow SEO optimization requires more than turning on a few settings.

    Webflow provides strong tools for managing important SEO elements, but search performance still depends on how those tools are used.

    A complete workflow should combine:

    Search intent + content + metadata + headings + CMS structure + images + internal links + URLs + redirects + performance + publishing QA.

    For small sites, these updates may be manageable page by page.

    For larger Webflow sites, especially those built around CMS collections, scalable field structures and careful template QA become increasingly important.

    The goal is not simply to make every SEO field complete. It is to make every important page useful, clearly structured, correctly implemented, and easy for both users and search engines to understand.

    Need help turning your Webflow SEO plan into correctly published site updates? Get in touch with NextWebOps for Webflow content publishing, SEO implementation, image optimization, internal linking, metadata, redirects, and QA support.

    Frequently Asked Questions

    Is Webflow good for SEO?

    Yes. Webflow provides built-in controls for important SEO elements such as titles, meta descriptions, URLs, image alt text, redirects, sitemaps, and responsive design. SEO performance still depends on the quality of the strategy, content, implementation, and site structure.

    Can Webflow rank well on Google?

    A Webflow website can rank in Google when its pages satisfy relevant search intent and are supported by strong content, on-page SEO, internal linking, technical accessibility, performance, and other ranking factors. Using Webflow itself does not prevent a site from competing in organic search.

    How do I optimize SEO in Webflow?

    Start by defining search intent and the primary topic for each page. Then optimize the SEO title, meta description, headings, content, images, internal links, URLs, CMS fields, redirects, performance, mobile presentation, and publishing settings.

    Does Webflow have built-in SEO tools?

    Yes. Webflow includes controls for several important SEO functions, including page metadata, redirects, sitemap functionality, image alt text, and other site settings. External tools can still help with research, crawling, monitoring, and performance analysis.

    How do I edit SEO titles and meta descriptions in Webflow?

    SEO titles and meta descriptions can be configured through Webflow’s page settings. CMS templates can also use dynamic fields so metadata is generated from collection-item data. Important dynamic outputs should be checked to ensure they remain specific and complete.

    Does Webflow automatically create a sitemap?

    Webflow supports automatic sitemap generation when configured appropriately. Review the sitemap after significant content changes, migrations, or restructuring to confirm important indexable pages are represented correctly.

    How do 301 redirects work in Webflow?

    301 redirects send visitors and search engines from an old URL to a new relevant destination. They are particularly important when page slugs change, content is consolidated, pages are removed, or a website is migrated.

    How do I optimize Webflow CMS pages for SEO?

    Configure useful CMS fields for titles, meta descriptions, slugs, page content, images, and other required SEO data. Connect those fields correctly to the CMS template, maintain unique content, add relevant internal links, and QA multiple published collection items to make sure the template works consistently.

  • Shopify Meta Description: How to Write, Edit, and Optimize It

    Shopify Meta Description: How to Write, Edit, and Optimize It

    A Shopify meta description is a short summary associated with a page in your Shopify store that may appear below the page title in search results. It helps searchers understand what the page offers before they click.

    For Shopify stores, meta descriptions can be used for product pages, collections, regular pages, blog posts, and the homepage. A good description should accurately summarize the page, reflect the searcher’s intent, and communicate a useful reason to visit.

    It is also important to understand what a meta description is not. It is not the same as the product description customers read on your storefront, and writing one does not guarantee that Google will display it exactly as entered.

    This guide explains where to edit Shopify meta descriptions, how long they should be, how to write them, and how to create useful descriptions for different types of ecommerce pages.

    What Is a Shopify Meta Description?

    A Shopify meta description is a piece of page metadata that summarizes the content or purpose of a Shopify URL.

    Search engines may use it as the descriptive text shown underneath your page title in search results.

    For example, a collection page for waterproof hiking boots might use a description such as:

    Explore men’s waterproof hiking boots for wet trails and outdoor adventures. Compare styles, features, and sizes to find the right pair.

    This gives a potential visitor useful context before they open the page.

    A Shopify meta description should generally tell searchers:

    • What the page contains
    • Who or what it is relevant to
    • What value the visitor can expect
    • What action may make sense next

    Meta descriptions are one part of broader Shopify on-page SEO. Titles, page copy, headings, URLs, images, internal links, and publishing quality also contribute to how well a page is optimized.

    Shopify Meta Description vs Product Description

    One common source of confusion is the difference between a Shopify product description and a meta description.

    They serve different purposes.

    Element Product Description Meta Description
    Visible on product page Yes Usually no
    Main purpose Explain and help sell the product Summarize the page for search results
    Typical length Depends on the product Usually concise
    Content Features, benefits, sizing, materials, use cases Main topic, value, and search relevance
    Primary audience Visitors already on the product page Potential visitors reviewing search results

    Your product description may contain several paragraphs explaining specifications, materials, benefits, sizing, or use cases.

    Your meta description should condense the most relevant information into a much shorter summary.

    You can reuse the same underlying messaging, but copying a long product-description sentence into the metadata field is not always the best approach.

    Does a Shopify Meta Description Affect SEO?

    A meta description should not be viewed as a direct shortcut to higher rankings.

    Its main value is communicating what a searcher can expect from the page.

    A clear description can help:

    • Make the relevance of the page obvious
    • Differentiate one result from another
    • Communicate an important product or category benefit
    • Encourage qualified searchers to consider the page

    That makes metadata worth optimizing even though it is only one part of the complete SEO picture.

    A strong meta description will not fix thin product content, weak search intent alignment, poor internal linking, or other page-level problems.

    Use metadata as part of a broader web page optimization process rather than treating it as an isolated ranking tactic.

    How Long Should a Shopify Meta Description Be?

    Shopify’s SEO guidance recommends using approximately 160 characters for meta descriptions.

    In practice, it is useful to aim for roughly 150–160 characters when the message fits naturally.

    However, 160 characters should not be treated as an absolute rule.

    Search-result snippets can vary, and Google may shorten or replace the text depending on the search query.

    A better approach is to:

    • Put the most important information early
    • Keep the description concise
    • Avoid unnecessary filler
    • Write a complete thought
    • Prioritize clarity over hitting an exact character count

    For example, this is more useful:

    Explore insulated stainless steel water bottles for commuting, hiking, and everyday use. Compare sizes, colors, and styles.

    than:

    Shop our amazing selection of high-quality products and discover the very best products we offer online today.

    The first description tells the searcher what the page actually contains.

    How to Edit a Meta Description in Shopify

    Shopify provides SEO fields for several types of store pages. The exact wording of interface labels can change over time, but the basic process is similar: open the relevant page in Shopify, find its search engine listing section, and edit the SEO description.

    Shopify’s official SEO documentation is the best reference when you need the latest interface instructions: Shopify Help Center SEO guidance.

    How to Edit the Shopify Homepage Meta Description

    For the homepage, the SEO settings are generally managed through your online store preferences.

    The workflow is typically:

    1. Open your Shopify admin.
    2. Go to Online Store.
    3. Open Preferences.
    4. Find the homepage SEO or search-engine-related fields.
    5. Update the homepage title and meta description.
    6. Save your changes.

    Your homepage description should summarize the overall store rather than focus on one individual product.

    How to Edit a Product Meta Description

    For a product page:

    1. Open Products in Shopify.
    2. Select the product you want to optimize.
    3. Scroll to the Search engine listing area.
    4. Choose the option to edit the website SEO or search listing.
    5. Update the meta description.
    6. Save the product.

    The description should reflect the specific product and its strongest relevant benefits rather than using the same generic description across the entire catalog.

    How to Edit a Collection Meta Description

    For a collection:

    1. Open your Shopify collections.
    2. Select the collection.
    3. Find the search engine listing section.
    4. Edit the website SEO information.
    5. Add or revise the meta description.
    6. Save the collection.

    Collection metadata should communicate the broader category and help searchers understand the types of products they will find.

    How to Edit a Regular Page Meta Description

    For informational pages such as About, sizing, care, or other custom pages:

    1. Open your Shopify pages.
    2. Select the page you want to edit.
    3. Find its search engine listing preview.
    4. Edit the SEO description.
    5. Save the page.

    How to Edit a Shopify Blog Post Meta Description

    Blog articles can also have search listing information.

    Open the relevant blog post, locate its search engine listing settings, and write a description that summarizes the question or topic the article answers.

    An informational article normally needs a different type of call to action than a product or collection page.

    How to Write a Good Shopify Meta Description

    There is no single sentence formula that works for every store. However, the following principles make descriptions more useful and easier to scale.

    1. Match the Search Intent

    Start by considering why someone would search for the page.

    A product-page description should help someone evaluating a particular product.

    A collection description should help someone browsing a category.

    A blog meta description should tell readers what they will learn.

    For example:

    Product intent: Highlight the specific product and useful differentiator.

    Collection intent: Explain the product category and available options.

    Informational intent: Explain what question the guide answers.

    2. Include the Main Topic Naturally

    The main keyword or topic can help make the result immediately relevant to searchers.

    Use it naturally rather than forcing several variations into one short description.

    For example:

    Natural: Explore men’s waterproof hiking boots designed for wet trails and everyday outdoor use.

    Stuffed: Shop waterproof hiking boots, best hiking boots, waterproof boots, men’s hiking boots and hiking shoes.

    The first is clearer and more useful.

    3. Highlight a Real Value or Differentiator

    Once the topic is clear, tell the searcher why the page may be worth visiting.

    Depending on the page, this could include:

    • Materials
    • Product use
    • Available sizes or styles
    • Category variety
    • A useful informational outcome
    • An accurate service or shipping benefit

    Only include claims that are actually supported by the store.

    4. Make Important Descriptions Specific

    Large stores often rely heavily on templates because manually writing hundreds or thousands of descriptions takes time.

    Templates can be useful, but priority pages should still be specific.

    For example, using this on every product:

    Shop quality products at great prices. Order online today.

    does little to distinguish one product from another.

    A more specific product description gives both searchers and internal teams clearer context.

    5. Put Important Information Early

    Do not hide the main message at the end of a long sentence.

    Search snippets may be shortened, and people scanning results make decisions quickly.

    Lead with the page topic or strongest relevant value.

    6. Use a Natural Call to Action When Appropriate

    A small call to action can help make the description more actionable.

    Examples include:

    • Explore the collection
    • Compare styles and sizes
    • View product details
    • Learn how to choose
    • Browse available options

    Match the action to the page.

    “Shop now” may make sense for a product collection but can sound awkward on an educational article.

    For a broader review of page-level elements beyond metadata, use the NextWebOps on-page SEO checklist.

    Shopify Meta Description Examples

    The best meta description depends on the page type. The following examples show how messaging can change between products, collections, the homepage, and blog content.

    Shopify meta description examples for products collections homepage and blog posts

    Shopify Product Meta Description Example

    Imagine a store selling a 40-liter waterproof hiking backpack.

    Example:

    Explore a 40L waterproof hiking backpack with organized storage and a lightweight design for day hikes, travel, and outdoor adventures.

    This description identifies:

    • The product
    • Its capacity
    • A useful feature
    • Common use cases

    Shopify Collection Meta Description Example

    For a men’s waterproof hiking boot collection:

    Example:

    Explore men’s waterproof hiking boots for wet trails and outdoor adventures. Compare styles, features, and sizes to find the right pair.

    This works differently from a product description because the visitor is choosing between multiple options.

    Shopify Homepage Meta Description Example

    For an outdoor equipment store:

    Example:

    Shop practical outdoor gear for hiking, camping, and travel. Explore durable backpacks, footwear, accessories, and everyday adventure essentials.

    The homepage description provides broader brand and inventory context.

    Shopify Blog Meta Description Example

    For an article about choosing hiking footwear:

    Example:

    Learn how to choose waterproof hiking boots based on fit, materials, traction, and trail conditions with this practical beginner-friendly guide.

    The goal here is not an immediate sale. It is to make the informational value clear.

    Shopify Meta Description Templates

    Templates can speed up metadata creation, especially for larger catalogs. They should be treated as starting points rather than text to copy unchanged across every page.

    Product Meta Description Template

    Template:

    Shop [product name/type] with [primary benefit]. [Secondary feature or differentiator]. Explore details, options, and availability from [brand].

    Example:

    Shop insulated stainless steel water bottles that keep drinks at the right temperature longer. Explore available sizes, colors, and styles.

    Collection Meta Description Template

    Template:

    Explore [product category] for [audience/use case]. Compare [important features/options] and find the right [product type] for your needs.

    Homepage Meta Description Template

    Template:

    Discover [brand/store category] offering [main product/value]. Shop [key categories] designed for [audience or use case].

    Blog Meta Description Template

    Template:

    Learn [topic or outcome] with practical guidance on [important subtopics]. Use this guide to [reader benefit or action].

    Templates work best when variable information makes every result genuinely specific.

    Changing only the product name while leaving the rest of the sentence generic can still produce hundreds of descriptions that sound almost identical.

    Common Shopify Meta Description Mistakes

    Meta descriptions are simple fields, but several common mistakes can reduce their usefulness.

    Leaving Important Pages Blank

    Not every URL needs manually crafted metadata, but important products, collections, and landing pages usually deserve a deliberate description.

    Duplicating the Same Description Across the Store

    If hundreds of pages use exactly the same description, the metadata provides little page-specific information.

    Prioritize unique descriptions for commercially important pages first.

    Copying the Full Product Description

    The product description and meta description serve different purposes.

    Summarize the strongest relevant information rather than trying to squeeze body copy into the SEO field.

    Keyword Stuffing

    A short description filled with repeated keyword variations becomes difficult to read and can look untrustworthy.

    Making Unsupported Claims

    Do not add phrases such as “best,” “lowest price,” “free shipping,” or “number one” unless the statement is accurate and defensible.

    Writing Vague Descriptions

    Descriptions such as “Welcome to our store. Browse our amazing products today” do not explain why the specific page is relevant.

    Using Only a Brand Slogan

    A slogan may strengthen branding, but it often does not provide enough information about the page itself.

    Ignoring Search Intent

    A collection, product, homepage, and blog article should not all use the same style of description.

    Treating 160 Characters as a Hard Rule

    Character guidance is helpful, but clarity matters more than forcing a description to reach or avoid one exact number.

    Skipping Publishing QA

    After entering metadata, confirm it is saved to the correct Shopify page and that the title, description, URL, and body content all align.

    What If Google Shows a Different Meta Description?

    You may write a carefully optimized Shopify meta description and later notice that Google displays different text in its search results.

    That does not automatically mean something is wrong with your Shopify setup.

    Search engines can generate a snippet from other text on the page when they determine that another passage better matches a particular search query.

    For example, your collection meta description might summarize the category broadly, while a searcher uses a very specific phrase that appears within the collection content. Google may decide that the on-page text is a more relevant snippet for that search.

    The best response is usually to keep your metadata:

    • Accurate
    • Relevant
    • Consistent with the page content
    • Specific to the page

    Do not repeatedly rewrite a good description simply because a search engine displays another snippet for some queries.

    Do You Need a Shopify Meta Description Generator?

    Meta description generators can be useful when a store contains a large catalog.

    They can help with:

    • Generating first drafts
    • Creating variations
    • Developing templates
    • Speeding up repetitive metadata work

    However, generated metadata should still be reviewed.

    Check for:

    • Incorrect product claims
    • Repeated wording
    • Missing differentiators
    • Awkward language
    • Keyword stuffing
    • Descriptions that do not match the actual page

    A generator can produce text quickly. It cannot guarantee that every description accurately represents the product, collection, brand, or current offer.

    How to Manage Meta Descriptions Across a Large Shopify Store

    Writing individual descriptions becomes a different operational challenge when a store contains hundreds or thousands of products.

    Instead of treating every URL as equally important, prioritize metadata based on business value and search opportunity.

    You might start with:

    • Best-selling products
    • High-value collections
    • Pages receiving significant search impressions
    • Products ranking near page one
    • Major evergreen landing pages
    • Pages with missing or clearly duplicated metadata

    For lower-priority pages, carefully designed templates or automated drafts can reduce repetitive work.

    For high-value pages, manual review is usually worth the additional effort.

    This approach follows the same principle as a broader content optimization strategy: prioritize pages with meaningful opportunity instead of trying to improve everything at once.

    Updating descriptions across dozens or hundreds of Shopify products and collections can become repetitive quickly. Contact NextWebOps for Shopify metadata implementation and publishing support.

    Shopify Meta Description Checklist

    Before finalizing an important Shopify meta description, check the following:

    • Does it accurately describe the page?
    • Does it match the page’s search intent?
    • Is the primary topic included naturally?
    • Is the most useful information near the beginning?
    • Is it concise enough for a search-result summary?
    • Is it roughly 150–160 characters when practical?
    • Is it distinct from other priority pages?
    • Does it avoid keyword stuffing?
    • Are all claims accurate?
    • Does the CTA fit the page type?
    • Was it entered into the correct Shopify SEO field?
    • Was the page saved and QA-checked?

    Have a spreadsheet or SEO brief with titles and meta descriptions ready to publish? Talk to NextWebOps about implementing and QA-checking Shopify metadata at scale.

    Final Thoughts

    A good Shopify meta description gives searchers a concise and accurate reason to consider your page.

    The strongest descriptions:

    • Match search intent
    • Describe the page accurately
    • Use the main topic naturally
    • Communicate real value
    • Stay concise
    • Remain specific to important products and collections

    But metadata should not be optimized in isolation.

    A strong description works best when the Shopify page also has useful content, clear titles and headings, optimized images, sensible internal links, and accurate publishing implementation.

    For the complete page-level workflow, see the NextWebOps guide to Shopify on-page SEO.

    Need help updating Shopify titles, meta descriptions, product content, images, or other on-page elements? Get in touch with NextWebOps for hands-on Shopify content implementation and publishing support.

    Frequently Asked Questions

    What is a Shopify meta description?

    A Shopify meta description is a short piece of metadata that summarizes a product, collection, page, blog post, or homepage. Search engines may display it underneath the page title in search results.

    How do I edit a meta description in Shopify?

    Open the relevant Shopify product, collection, page, or blog post and find its search engine listing section. Use the website SEO editing option to add or change the meta description, then save the page. Homepage metadata is generally managed through Online Store preferences.

    How long should a Shopify meta description be?

    A useful target is roughly 150–160 characters, with Shopify recommending around 160 characters. Treat this as practical guidance rather than a rigid limit, because search-result snippets can vary.

    Does a meta description affect Shopify SEO?

    A meta description is useful for communicating page relevance and encouraging qualified searchers to consider a result, but it should not be treated as a standalone ranking tactic. It works alongside content, titles, headings, links, images, and other SEO elements.

    What is the difference between a Shopify product description and meta description?

    A product description appears on the storefront and helps customers understand and evaluate the product. A meta description is a shorter page summary stored as metadata and may appear in search results.

    Does Shopify automatically generate meta descriptions?

    Shopify provides SEO fields and search engine listing functionality, but important pages benefit from manually reviewed metadata that accurately reflects the specific product, collection, or content.

    Why is Google showing a different meta description?

    Google can generate a search snippet from text on the page when it believes that content better matches a particular query. Seeing different snippet text does not necessarily mean the Shopify meta description is configured incorrectly.

    Should every Shopify product have a unique meta description?

    Unique, page-specific metadata is especially useful for important products and collections. For very large catalogs, prioritize high-value pages and use carefully reviewed templates or automation where manual writing for every URL is impractical.

  • Shopify On Page SEO: A Step-by-Step Guide for Store Owners

    Shopify On Page SEO: A Step-by-Step Guide for Store Owners

    Shopify on page SEO is the process of improving the individual pages of your Shopify store so search engines can better understand them and shoppers can find useful, relevant information.

    That includes more than adding keywords to product titles. Product descriptions, collection copy, page titles, meta descriptions, headings, URLs, images, internal links, and publishing quality all contribute to how well a page is optimized.

    Shopify handles some SEO foundations for you, but store owners still control many of the page-level elements that can influence search visibility and user experience.

    This guide explains how to optimize Shopify product pages, collection pages, blog content, and other important store pages using a practical on-page SEO workflow.

    What Is Shopify On Page SEO?

    Shopify on-page SEO is the process of optimizing the content and page elements you can directly control inside your Shopify store.

    Common on-page elements include:

    • Page titles
    • Meta descriptions
    • Product descriptions
    • Collection descriptions
    • Heading structure
    • URLs and handles
    • Image filenames and alt text
    • Internal links
    • Blog content

    The goal is to make each page easier for search engines to interpret while also giving shoppers the information they need.

    On-page SEO is only one part of broader web page optimization. A fully optimized Shopify page should also load efficiently, display properly on mobile devices, use appropriate images, and guide visitors toward a useful next step.

    Why On-Page SEO Matters for Shopify Stores

    A Shopify store may contain hundreds or even thousands of individual URLs. Each product, collection, article, and page creates another opportunity for people to discover the store through search.

    But creating those pages does not automatically make them competitive.

    For example, a product page with a generic manufacturer description, vague title, missing meta description, oversized images, and no internal links may provide search engines with limited useful context.

    Improving the page can help clarify:

    • What the product or collection is
    • Which search intent it serves
    • How it differs from similar pages
    • Which other pages on the store are related
    • What a shopper should do next

    On-page optimization can therefore support both organic visibility and the shopping experience.

    It should not be treated as a guarantee of rankings. Search visibility depends on many factors, but strong page-level implementation gives search engines and users a clearer, more useful page to work with.

    10 Shopify On Page SEO Steps

    The following process covers the main areas store owners and ecommerce teams can directly improve on Shopify pages.

    1. Match Each Page to the Right Search Intent

    Before changing titles or descriptions, decide what type of search the page should satisfy.

    Different Shopify page types usually serve different intents.

    For example:

    • Product page: Someone searching for a specific item, model, style, size, or variation.
    • Collection page: Someone browsing a broader product category.
    • Blog post: Someone researching a problem, question, or topic.
    • Informational page: Someone looking for shipping, sizing, returns, care instructions, or brand information.

    A search such as “women’s waterproof hiking boots” might be a good fit for a collection page containing several relevant products.

    A search such as “how to choose waterproof hiking boots” is more informational and may be better served by a blog article.

    Trying to make every page rank for every related keyword can create overlapping content and unclear intent.

    2. Choose One Primary Topic for Each Page

    Each important Shopify page should have a clear primary topic.

    That does not mean the page should contain only one keyword. It means its purpose should be specific enough that a visitor immediately understands what it offers.

    For product pages, the primary topic is usually the specific product or product type.

    For collection pages, it is normally the broader category.

    For example:

    • Product: “Men’s TrailPro Waterproof Hiking Boot”
    • Collection: “Men’s Waterproof Hiking Boots”
    • Blog: “How to Choose Hiking Boots for Wet Weather”

    These pages are related, but they serve different intents.

    Clear differentiation can also reduce unnecessary keyword cannibalization, where multiple pages from the same store compete for essentially the same search intent.

    3. Optimize Shopify Page Titles

    The page title is one of the clearest ways to communicate what a Shopify page is about.

    Good titles should be:

    • Specific
    • Readable
    • Relevant to search intent
    • Unique where practical
    • Written for humans rather than stuffed with keywords

    For an important collection page, compare:

    Weak: Products

    Better: Men’s Waterproof Hiking Boots

    The second version provides much more context to both shoppers and search engines.

    On product pages, avoid turning titles into long keyword lists. The product name, model, important attribute, or category is usually enough when written naturally.

    Shopify also provides a search engine listing area where merchants can review and edit how page titles and descriptions are presented for important store pages.

    4. Write Useful Meta Descriptions

    A meta description gives you an opportunity to summarize what a page offers.

    For Shopify pages, useful descriptions should be concise, specific, and relevant to the searcher’s intent.

    A product-page description might mention:

    • The product type
    • A useful differentiator
    • A major benefit
    • An important use case

    A collection meta description should explain what shoppers can expect from the category rather than simply repeat the collection title several times.

    Avoid using identical descriptions across a large number of high-value pages when those pages have meaningfully different purposes.

    Search engines can choose different snippets depending on the query, but useful metadata still helps define the intended summary of the page.

    5. Use Clear H1, H2, and H3 Headings

    Headings organize page content and help visitors scan information quickly.

    On many Shopify themes, the product or page title functions as the primary heading. Additional sections should then use H2 and H3 headings logically.

    For example, a detailed product page might use:

    • H1: Product name
    • H2: Product Features
    • H2: Materials and Care
    • H2: Sizing Guide
    • H2: Frequently Asked Questions

    Avoid selecting heading tags only because they look larger or smaller visually. Heading structure should represent the organization of the content.

    For more general page-level guidance, the NextWebOps on-page SEO checklist covers the core elements worth reviewing before publishing.

    6. Improve Product and Collection Content

    Product and collection content deserve different approaches because they serve different purposes.

    Product Descriptions

    A useful product description should help someone understand and evaluate the item.

    Depending on the product, that can include:

    • Key features
    • Benefits
    • Materials
    • Dimensions
    • Fit or sizing
    • Compatibility
    • Care instructions
    • Recommended use cases
    • Important limitations

    Avoid copying a manufacturer’s generic description across multiple stores whenever you have the opportunity to provide more useful original information.

    The purpose is not to hit an arbitrary word count. A simple product may need relatively little copy, while a complex or expensive product may require significantly more information to answer customer questions.

    Collection Descriptions

    Collection pages can be valuable SEO landing pages because they represent broader categories that people may search for before choosing an individual product.

    A useful collection introduction can explain:

    • What types of products are included
    • Who the collection is for
    • Important features or differences
    • How shoppers can choose between options

    Avoid placing a huge block of keyword-heavy copy above the product grid if it makes browsing difficult.

    The collection page still needs to function as an ecommerce page.

    If you are systematically improving existing store content rather than optimizing a single page, use a structured content optimization strategy to prioritize pages with the strongest opportunity first.

    7. Optimize Shopify URLs

    Shopify uses standard URL structures for different page types, such as product, collection, and blog paths.

    You usually have control over the editable handle within that structure.

    A good Shopify URL handle should be:

    • Short enough to understand easily
    • Descriptive
    • Relevant to the page
    • Free from unnecessary filler words

    For example:

    /products/waterproof-hiking-boots

    is easier to interpret than:

    /products/item-new-version-2026-x100-final

    Be careful when changing URLs on pages that are already live. Changing an established URL can affect existing links and search visibility if redirects and related details are not handled correctly.

    8. Optimize Product and Collection Images

    Ecommerce stores are image-heavy, which makes image optimization especially important.

    Large product photos can improve the shopping experience, but oversized files can also increase page weight unnecessarily.

    Review each image for:

    • Appropriate dimensions
    • File size
    • Compression
    • File format
    • Filename
    • Alt text

    Resize images before uploading them where practical. Modern formats such as WebP can often provide good visual quality with smaller file sizes.

    Use descriptive filenames rather than leaving meaningless camera or export filenames when possible.

    For example:

    mens-black-waterproof-hiking-boot.webp

    is more descriptive than:

    IMG_83929-final2.webp

    Alt text should accurately describe the image when a textual alternative is useful. Avoid inserting keywords that do not describe what is actually shown.

    For more detail, see the NextWebOps guide to image SEO best practices.

    9. Build Useful Internal Links

    Internal links help shoppers move between related products, categories, and information.

    They also help search engines understand relationships across your store.

    Useful Shopify internal-linking opportunities include:

    • Blog article → relevant collection
    • Blog article → relevant product
    • Collection → related collection
    • Guide → supporting product category
    • Informational page → useful shopping destination

    For example, an article explaining how to choose hiking boots might naturally link to your hiking boot collection when shoppers are ready to browse options.

    Use descriptive anchor text instead of generic phrases such as “click here.”

    At the same time, avoid turning every sentence into a link or repeatedly forcing exact-match keywords.

    See these internal linking best practices for a broader framework.

    10. Perform Shopify Publishing QA

    On-page SEO recommendations only create value when they are implemented correctly on the live store.

    Before considering an important product, collection, or content page complete, review:

    • Page title
    • Search listing title
    • Meta description
    • Heading hierarchy
    • Product or collection copy
    • Image display
    • Image alt text
    • Internal links
    • Buttons and CTAs
    • Mobile formatting
    • Spacing and visual consistency
    • Spelling and grammar

    Check the published page rather than assuming everything entered in the Shopify editor appears correctly on the storefront.

    If your SEO strategy is ready but product pages, collection content, metadata, images, and internal links still need to be implemented, contact NextWebOps for Shopify content publishing support.

    Shopify Product Page SEO vs Collection Page SEO

    Product and collection pages should support each other, but they usually target different stages of the buying process.

    Shopify product page SEO compared with collection page SEO

    Element Product Page Collection Page
    Primary intent Specific product Broader product category
    Main content Features, benefits, specifications, use cases Category context, product selection guidance
    Keyword focus Specific product or narrow product type Broader category terms
    Images Detailed product imagery Collection/category presentation
    Internal links Related products, collections, guides Products, subcategories, supporting content

    Product Page SEO

    A product page needs enough specific information to help someone decide whether the item fits their needs.

    Important areas include:

    • Specific product title
    • Original description
    • Features and specifications
    • High-quality optimized images
    • Relevant alt text
    • Useful metadata
    • Related products or supporting links
    • Clear purchase action

    Collection Page SEO

    A collection page should help shoppers understand and navigate a group of products.

    Important areas include:

    • Descriptive collection title
    • Useful introductory copy
    • Clear product organization
    • Relevant metadata
    • Links to related categories
    • Helpful filters or navigation where appropriate

    The mistake to avoid is treating a collection page as nothing more than a grid of products or, at the other extreme, turning it into a long SEO article that pushes the actual products too far down the page.

    The page still needs to serve shoppers first.

    Should You Use Shopify SEO Apps or Optimize Pages Manually?

    Shopify SEO apps can be useful, but they should not automatically replace manual page review.

    Automation is particularly useful for repetitive or technical tasks.

    Depending on the app, this might include:

    • Detecting missing metadata
    • Monitoring broken links
    • Assisting with structured data
    • Flagging image issues
    • Managing repetitive workflows

    However, software cannot reliably make every strategic content decision for your store.

    Human review remains especially valuable for:

    • Search intent
    • Product positioning
    • Content quality
    • Collection descriptions
    • Internal-link decisions
    • Brand voice
    • Conversion messaging

    A generated title may contain a keyword and still be poor for shoppers. An automatically written product description may be technically unique but provide little useful information.

    A practical approach is to use automation where it saves repetitive work while keeping human judgment for elements that affect relevance, usefulness, and brand communication.

    Common Shopify On-Page SEO Mistakes

    Many Shopify SEO problems are not advanced technical issues. They are repeatable page-level mistakes that accumulate across a catalog.

    Copying Manufacturer Descriptions

    Manufacturer copy may not answer the questions your customers care about and can appear across many other stores.

    Add original information where it provides meaningful value.

    Using the Same Metadata Everywhere

    Templates can save time, but important products and collections deserve metadata that accurately reflects their unique purpose.

    Publishing Thin Collection Pages

    A category with only a title and a grid may provide very little context. Add useful introductory information when it genuinely helps shoppers understand the collection.

    Keyword Stuffing

    Repeating a phrase excessively in headings, product descriptions, alt text, and metadata does not make the page more helpful.

    Use keywords naturally while keeping the text readable.

    Using Generic or Inaccurate Alt Text

    Alt text should describe the image rather than act as a hidden keyword field.

    Uploading Oversized Images

    Ecommerce pages often use multiple images. Unnecessarily large files can add substantial page weight across a product catalog.

    Ignoring Internal Links

    Blog content and informational guides can attract visitors but fail to support ecommerce pages if there is no logical path toward relevant products or collections.

    Creating Multiple Pages for the Same Intent

    Very similar products or collections can create unnecessary overlap when page purpose and targeting are not clearly differentiated.

    Poor Heading Structure

    Headings should organize information rather than simply create visual formatting.

    Skipping Publishing QA

    A well-written SEO recommendation can still result in a poor live page if images, links, metadata, or formatting are implemented incorrectly.

    Shopify On Page SEO Checklist

    Use this checklist when reviewing an important Shopify page:

    • Primary search intent is clear.
    • The page has a distinct primary topic.
    • The title accurately describes the product, collection, or content.
    • The SEO title is clear and relevant.
    • The meta description is useful and unique where appropriate.
    • Headings follow a logical structure.
    • Product or collection content is original and useful.
    • The editable Shopify URL handle is readable.
    • Images are appropriately sized and compressed.
    • Image filenames are descriptive where practical.
    • Alt text accurately describes relevant images.
    • Internal links connect related pages.
    • Buttons and CTAs work correctly.
    • Mobile presentation has been checked.
    • Publishing QA has been completed.

    When to Get Help With Shopify On-Page SEO Implementation

    A small Shopify store with a limited catalog may be able to handle most optimization internally.

    The workload becomes very different when a store has hundreds of products, dozens of collections, an active blog, and an ongoing stream of new content.

    Implementation support can become useful when:

    • SEO recommendations are ready but not published
    • Large numbers of product descriptions need updating
    • Collection content needs to be added or reformatted
    • Metadata needs systematic review
    • Images require resizing or optimization
    • Internal links need to be added across existing content
    • Publishing quality varies between team members
    • The internal marketing team needs to focus on strategy rather than repetitive CMS work

    The SEO strategy and implementation do not always have to be handled by the same person or team.

    An SEO specialist may identify what should change, while a content implementation team handles the actual updates inside Shopify and checks the live pages afterward.

    Managing on-page updates across a large catalog can become repetitive quickly. Talk to NextWebOps about Shopify publishing, content formatting, image optimization, metadata, internal linking, and QA.

    Final Thoughts

    Effective Shopify on page SEO is not about installing an app and assuming every product page is optimized.

    The strongest approach combines:

    Search intent + useful content + titles + metadata + headings + images + internal links + accurate implementation + publishing QA.

    Start with your most important products and collections rather than attempting to rewrite an entire store at once.

    Make sure each page has a clear purpose, gives shoppers enough useful information, uses sensible metadata and headings, contains optimized images, and connects logically to other relevant pages.

    Then check the live storefront after publishing.

    Need help turning Shopify SEO recommendations into properly published store updates? Get in touch with NextWebOps for hands-on Shopify content implementation support.

    Frequently Asked Questions

    What is on-page SEO in Shopify?

    Shopify on-page SEO is the process of optimizing individual store pages and the elements you can directly control, including page titles, meta descriptions, headings, product and collection content, URLs, images, and internal links.

    Can you do SEO on Shopify?

    Yes. Shopify provides built-in SEO functionality and technical foundations, while store owners can optimize important page-level elements such as titles, content, metadata, images, URLs, and internal linking.

    How do I optimize a Shopify product page for SEO?

    Start with the correct search intent and a clear product title. Add useful original product information, optimize the SEO title and meta description, use appropriate headings, optimize images and alt text, use a readable URL handle, add relevant internal links, and check the live page after publishing.

    How do I optimize Shopify collection pages?

    Use a descriptive collection title, write useful introductory content, optimize metadata, organize products clearly, include relevant internal links, and keep the collection easy for shoppers to browse. Avoid adding large blocks of keyword-heavy content simply for SEO.

    Do I need a Shopify SEO app?

    No SEO app is required for many basic on-page tasks. Apps can help automate repetitive work and identify issues, but important decisions about search intent, product content, metadata, internal linking, and user experience still benefit from manual review.

    Does Shopify automatically handle SEO?

    Shopify handles some SEO and technical elements automatically, but individual product, collection, blog, and page content still requires optimization. Store owners remain responsible for many page-specific elements, including content, titles, descriptions, images, and internal links.

    How long should Shopify product descriptions be for SEO?

    There is no ideal word count that applies to every product. A description should be long enough to explain the product clearly, answer important customer questions, and provide useful information without adding unnecessary filler.

  • What Is Web Page Optimization? A Beginner-Friendly Guide

    What Is Web Page Optimization? A Beginner-Friendly Guide

    What is web page optimization? It is the process of improving an individual webpage so it is easier for search engines to understand, more useful for visitors, faster and easier to use, and better able to achieve its intended goal.

    That goal might be ranking for relevant searches, generating a service inquiry, selling a product, encouraging a signup, or simply helping someone find the information they need.

    Web page optimization goes beyond adding keywords. A properly optimized page may require improvements to its content, title, headings, meta description, internal links, images, speed, mobile usability, formatting, and calls to action.

    In simple terms:

    Web page optimization = SEO + content + usability + performance + conversion improvements.

    This guide explains what that means, how web page optimization differs from broader website optimization and on-page SEO, and which elements you should review when improving a page.

    What Is Web Page Optimization?

    Web page optimization is the process of making strategic improvements to a specific webpage so it performs better for both visitors and search engines.

    For example, imagine a business has a service page that loads slowly, contains outdated information, uses vague headings, has oversized images, and does not clearly explain what visitors should do next.

    The page technically exists, but it is not fully optimized.

    Optimization might involve:

    • Rewriting unclear or outdated content
    • Improving the page title and headings
    • Matching the page more closely to search intent
    • Writing better metadata
    • Adding relevant internal links
    • Compressing and resizing images
    • Improving mobile formatting
    • Making the call to action more useful
    • Checking links, images, and formatting before publishing

    The important point is that optimization should improve the complete page experience rather than focus on one isolated SEO factor.

    Web Page Optimization vs Website Optimization

    The terms web page optimization and website optimization are closely related, but they refer to different scopes of work.

    Web Page Optimization

    Web page optimization focuses on one individual URL.

    You might optimize a:

    • Blog post
    • Service page
    • Product page
    • Category page
    • Landing page
    • About page

    The objective is to make that particular page more useful, discoverable, readable, efficient, and effective.

    Website Optimization

    Website optimization looks at the site more broadly.

    It can include:

    • Site architecture
    • Navigation
    • Sitewide speed
    • Technical SEO
    • Mobile usability
    • Internal linking structure
    • Conversion journeys
    • Accessibility
    • Sitewide content quality

    For example, compressing an oversized hero image on one service page is page optimization. Reviewing image sizes and performance across 300 URLs is part of broader website optimization.

    In practice, the two often overlap. Improving enough individual pages eventually improves the website as a whole.

    Web Page Optimization vs On-Page SEO

    Web page optimization and on-page SEO are also related, but they are not exactly the same thing.

    On-page SEO focuses primarily on elements that help search engines and users understand the meaning and relevance of a page.

    Typical on-page SEO elements include:

    • SEO titles
    • Page headings
    • Keyword targeting
    • Content relevance
    • Meta descriptions
    • URLs
    • Internal links
    • Image alt text

    Web page optimization can include all of those elements, but it can also address factors such as:

    • Page load performance
    • Image file size
    • Mobile presentation
    • Page layout
    • Accessibility
    • Calls to action
    • Conversion paths
    • Publishing quality assurance

    If you specifically want to review search-focused page elements, the NextWebOps on-page SEO checklist provides a more focused process.

    Why Is Web Page Optimization Important?

    A webpage can attract traffic and still perform poorly. It can also contain useful information but receive little search visibility because the content is poorly structured or inadequately implemented.

    Web page optimization helps address both sides of that problem.

    Improve Search Visibility

    Clear titles, relevant content, useful headings, contextual internal links, and descriptive page elements make it easier for search engines to understand what a page is about.

    Google’s SEO Starter Guide recommends creating useful, well-organized content and making it easy for users and search engines to understand a site’s pages.

    You can review Google’s guidance in the Google Search Central SEO Starter Guide.

    Improve User Experience

    Visitors should not have to fight through long blocks of text, confusing navigation, oversized graphics, or unclear headings to find an answer.

    Page optimization makes information easier to scan and understand.

    Improve Page Performance

    Large images, unnecessary scripts, and poorly implemented page elements can affect loading performance.

    Optimizing individual assets and reviewing how the page behaves on different devices can create a smoother experience.

    Increase Conversions

    Traffic is useful only when the page helps visitors achieve something meaningful.

    A commercial page might need visitors to:

    • Request a quote
    • Submit a contact form
    • Purchase a product
    • Book a consultation
    • Visit another important page

    If the page attracts relevant traffic but gives users no clear next step, there is still room for optimization.

    8 Key Elements of Web Page Optimization

    Although every page is different, the following eight areas provide a practical framework for evaluating most webpages.

    1. Search Intent

    Start by asking what someone expects when they search for the page’s primary topic.

    A user searching for a definition usually expects an educational answer. Someone searching for a service may want pricing information, examples, benefits, credentials, or a way to contact the provider.

    If your page answers the wrong intent, changing a title tag or inserting additional keywords is unlikely to solve the underlying problem.

    Review the current search results for your target query and look at:

    • The types of pages ranking
    • The questions they answer
    • The level of detail users appear to expect
    • Whether results are informational, commercial, transactional, or mixed

    Then make sure your page serves the same fundamental need while providing its own useful information and perspective.

    2. Content Quality and Relevance

    Once intent is clear, evaluate the content itself.

    Ask whether the page is:

    • Accurate
    • Current
    • Clear
    • Complete enough for the topic
    • Useful to the intended visitor
    • Free from unnecessary repetition

    More words do not automatically make a page better.

    If a 2,500-word article repeats the same point several times, reducing it to 1,800 useful words may improve the page. Likewise, an 800-word article may need expansion if it leaves important user questions unanswered.

    If you’re systematically improving older or underperforming content, a broader content optimization strategy can help you decide which pages should be updated first and what improvements deserve priority.

    3. Page Titles, Headings, and Metadata

    A visitor should be able to understand the page’s topic quickly from its title and headings.

    Review the following elements:

    • SEO title
    • H1 page title
    • H2 and H3 headings
    • Meta description
    • URL

    The SEO title should accurately describe the page and naturally reflect its primary topic.

    The H1 should tell visitors what the page covers, while H2 and H3 headings should organize related information into a logical hierarchy.

    Meta descriptions should provide a concise explanation of what users can expect from the page. Search engines may generate different snippets for individual queries, but a useful description still provides clear metadata associated with the page.

    If you suspect a page has multiple SEO problems rather than one isolated issue, conducting an on-page SEO audit can help identify what needs attention.

    4. Internal Linking

    Internal links connect one page on your website to another.

    They help visitors find related information and help search engines discover and understand relationships between pages.

    When optimizing a page, check whether it should:

    • Link to relevant supporting articles
    • Link to an appropriate service or product page
    • Receive links from older related content
    • Replace generic anchor text with descriptive wording
    • Remove or update broken links

    For example, an article about WordPress publishing might naturally link to a detailed WordPress publishing checklist rather than forcing visitors to find that resource through the site’s main navigation.

    Review the NextWebOps guide to internal linking best practices for a more detailed approach.

    5. Image Optimization

    Images can improve a page visually, explain complex topics, and break up long sections of content. Poorly optimized images can also create unnecessary page weight.

    For each important image, review:

    • Dimensions
    • File size
    • File format
    • Filename
    • Alt text
    • Visual relevance

    Resize images to appropriate dimensions rather than uploading extremely large files and relying on the browser to display them smaller.

    Formats such as WebP can often provide good visual quality at a lower file size than older formats.

    Alt text should describe an image where a textual alternative is useful. It should not be treated as a place to insert unrelated keywords.

    See the NextWebOps image SEO guide for a deeper look at filenames, alt text, compression, formats, and other image considerations.

    6. Page Speed and Mobile Experience

    Visitors increasingly expect webpages to work smoothly across phones, tablets, and desktop devices.

    Page optimization should therefore include checking the real published page rather than reviewing only the content inside a CMS editor.

    Common page-level performance issues include:

    • Oversized images
    • Heavy embeds
    • Unnecessary scripts
    • Layout shifts
    • Elements that overflow on mobile screens
    • Buttons or links that are difficult to use on smaller devices

    Not every performance problem can be solved at the content level. Some require development or sitewide technical work. However, content teams can prevent many avoidable issues by properly preparing images, embeds, and page elements before publishing.

    7. Readability and Page Formatting

    Formatting determines how easily visitors can consume otherwise useful content.

    Compare these two approaches:

    A page contains one large block of text with few headings, long paragraphs, random bold formatting, and several unrelated ideas mixed together.

    Another page covers the same information using clear headings, short paragraphs, logical lists, relevant images, and consistent spacing.

    The second page is usually easier to scan and understand.

    Useful formatting practices include:

    • Keeping paragraphs reasonably short
    • Using logical H2 and H3 headings
    • Grouping related ideas together
    • Using lists for genuinely list-based information
    • Adding tables when comparison is easier visually
    • Using bold text selectively
    • Checking spacing around headings, images, and lists

    This is also an area where good SEO recommendations can fail during implementation. A content brief might define the correct hierarchy, but the published page still needs headings, links, images, and formatting added correctly inside WordPress, Shopify, Webflow, or another CMS.

    Need help applying page-level SEO, formatting, image, metadata, and linking improvements across your website? Contact NextWebOps for hands-on content implementation support.

    8. Conversion Elements and Publishing QA

    Before calling a page optimized, ask what visitors are expected to do after reading it.

    An informational blog post might guide someone to another relevant resource. A service page may encourage a consultation request. A product page may need to move visitors toward a purchase.

    Review whether the page has an appropriate call to action and whether that next step makes sense for the user’s intent.

    Then perform publishing QA.

    Check:

    • Links
    • Buttons
    • Forms
    • Heading hierarchy
    • Image display
    • Image alt text
    • SEO metadata
    • Mobile presentation
    • Spacing and formatting
    • Grammar and spelling

    A strategy document can recommend perfect improvements, but those improvements only matter if they are implemented correctly on the live page.

    If your optimization recommendations are ready but your team needs help implementing and checking changes in WordPress, Shopify, or Webflow, talk to NextWebOps about content implementation and publishing QA.

    Web Page Optimization Example

    Consider a small business service page that has been online for several years.

    Web page optimization example showing a page before and after improvements

    Before optimization, the page has:

    • A vague title such as “Our Services”
    • One long block of text
    • No descriptive H2 headings
    • A 2 MB PNG image
    • No links to supporting resources
    • An outdated meta description
    • A generic “Learn More” button
    • No clear indication of what visitors should do next

    The underlying service may be excellent, but the page does a poor job of communicating it.

    After optimization, the page could include:

    • A specific page title aligned with the service
    • A clear explanation of who the service is for
    • Logical H2 and H3 sections
    • Shorter, easier-to-read paragraphs
    • A resized and compressed WebP image
    • Descriptive image alt text
    • Relevant links to supporting resources
    • A clearer SEO title and meta description
    • A specific CTA such as “Request a Consultation”
    • Final desktop and mobile QA

    Notice that only part of this process is traditional SEO. The rest improves usability, performance, implementation quality, and the page’s ability to support a business objective.

    How to Optimize a Web Page Step by Step

    You can use the following workflow for most existing pages:

    1. Define the page goal. Decide what the page should help visitors accomplish.
    2. Identify search intent. Confirm what people searching the target topic expect.
    3. Review current performance. Look at impressions, clicks, rankings, traffic, or conversions where data is available.
    4. Improve the content. Correct outdated information, fill important gaps, and remove unnecessary material.
    5. Optimize titles, headings, and metadata. Make page structure and relevance clear.
    6. Strengthen internal links. Connect the page to useful related resources.
    7. Optimize images. Review dimensions, size, format, filenames, and alt text.
    8. Check speed and mobile presentation. Look for obvious performance or layout problems.
    9. Improve the conversion path. Provide a relevant next step for visitors.
    10. Perform publishing QA. Check the page after implementation.
    11. Monitor results. Determine whether the changes improved performance.

    Not every page will require major changes in every category. The purpose of the process is to identify the improvements that matter for that specific URL.

    Web Page Optimization Checklist

    Use this checklist before considering an important page fully optimized:

    • The page has a clear purpose.
    • The content matches search intent.
    • Information is accurate and useful.
    • The page title clearly describes the topic.
    • H2 and H3 headings follow a logical hierarchy.
    • The SEO title is relevant and readable.
    • The meta description accurately summarizes the page.
    • The URL is clear and appropriate.
    • Relevant internal links are included.
    • Images are appropriately sized and compressed.
    • Important images have useful alt text where appropriate.
    • The page is easy to scan and read.
    • Mobile formatting has been checked.
    • Important buttons and links work correctly.
    • The page has a relevant CTA or next step.
    • Publishing QA has been completed.

    When Should You Re-Optimize a Web Page?

    Web page optimization is not necessarily a one-time project.

    A page may need another review when:

    • Organic traffic declines
    • Important rankings fall
    • Search impressions increase but clicks remain weak
    • Information becomes outdated
    • Your products or services change
    • A site redesign affects formatting
    • New supporting content becomes available
    • Internal links become outdated or broken
    • Conversions are weaker than expected
    • Competitors begin serving the search intent more effectively

    That does not mean every page needs an arbitrary rewrite every few months.

    A stable evergreen page that continues helping users and performing well may require little attention. A high-value service page with outdated information deserves much higher priority.

    Final Thoughts

    So, what is web page optimization? It is the process of improving an individual webpage across the areas that influence visibility, usefulness, performance, and results.

    SEO is an important part of that process, but effective page optimization goes further.

    A strong page brings together:

    Relevant content + on-page SEO + internal links + optimized images + usability + performance + clear conversion paths + publishing QA.

    You do not need to change every element every time. Start by understanding what the page is supposed to accomplish, identify what is preventing it from doing that effectively, and prioritize the improvements with the greatest potential impact.

    If your team knows which pages need improvement but needs help implementing content, metadata, internal links, images, formatting, or publishing updates, get in touch with NextWebOps.

    Frequently Asked Questions

    What does it mean to optimize a web page?

    Optimizing a web page means improving its content, SEO elements, usability, performance, links, images, and conversion path so the page better serves visitors and achieves its intended purpose.

    What is the difference between web page optimization and SEO?

    SEO focuses on improving visibility in search engines. Web page optimization can include SEO but also covers broader factors such as page speed, usability, accessibility, formatting, images, calls to action, and publishing quality.

    What are examples of web page optimization?

    Examples include improving a page title, reorganizing headings, updating outdated content, writing a better meta description, compressing images, adding internal links, improving mobile formatting, fixing broken links, and adding a clearer call to action.

    How do you optimize a web page for Google?

    Start by matching search intent and creating useful content. Then review the page title, headings, metadata, internal links, images, URL, readability, and technical presentation. After implementing changes, check the published page and monitor its search performance.

    Why is web page optimization important?

    Web page optimization can help make a page easier to discover, easier to use, more useful to visitors, and more effective at generating the action the page was created to support.

    How often should a web page be optimized?

    There is no fixed schedule that applies to every page. Review important pages when traffic or rankings decline, information becomes outdated, business details change, search intent shifts, or the page is no longer achieving its intended goal.

  • Content Optimization Strategy: A Practical Step-by-Step Guide

    Content Optimization Strategy: A Practical Step-by-Step Guide

    A strong content optimization strategy helps you get more value from the content you already have. Instead of continuously publishing new pages and hoping they perform, optimization focuses on improving existing content so it better matches search intent, answers user questions, earns organic visibility, and supports business goals.

    That can involve much more than adding keywords. Titles, headings, internal links, images, metadata, formatting, outdated information, calls to action, and even publishing quality can influence how useful a page is to visitors.

    The most effective approach is to treat content optimization as an ongoing process:

    Audit → Prioritize → Optimize → Implement → QA → Measure → Repeat.

    This guide explains how to build that process into a practical workflow for your website.

    What Is a Content Optimization Strategy?

    A content optimization strategy is a structured process for reviewing and improving website content so it performs better for users, search engines, and business goals.

    Content optimization can include improving:

    • Search intent alignment
    • Topic coverage
    • Titles and headings
    • Keyword targeting
    • Meta descriptions
    • Internal linking
    • Images and alt text
    • Page formatting
    • Calls to action
    • Content freshness
    • Publishing quality

    It is different from content creation. Content creation focuses on producing something new. Optimization asks whether an existing page is still useful, competitive, easy to understand, technically well implemented, and aligned with what searchers expect.

    It also differs from a traditional SEO audit. An audit identifies problems and opportunities. Content optimization includes the actual work required to improve the page after those opportunities are found.

    Why Content Optimization Matters

    A page that performed well two years ago may not perform equally well today. Search behavior changes, competing pages improve, information becomes outdated, and businesses add new services or resources that should be incorporated into older content.

    Optimization helps address those changes without starting from zero.

    For example, an established article may already have backlinks, impressions, search history, or rankings. Improving that page may create a faster opportunity than publishing a completely new article targeting a similar topic.

    Content optimization can also improve the experience after someone reaches your website. A page may rank but still have weak formatting, confusing headings, oversized images, outdated links, or no clear next step for the reader.

    The goal is therefore broader than rankings. A useful strategy considers visibility, usability, relevance, and conversions together.

    How to Build a Content Optimization Strategy

    You do not need to optimize every page at once. A better approach is to identify the pages with the strongest opportunities and work through them systematically.

    Content optimization process from audit through performance measurement

    1. Audit Your Existing Content

    Start by understanding what you already have.

    Create an inventory of important pages and review available performance data. Google Search Console can help identify pages receiving impressions, clicks, and search visibility. Analytics data can provide additional context about traffic and user behavior.

    Look for pages with characteristics such as:

    • Declining organic traffic
    • Falling keyword positions
    • High impressions but relatively few clicks
    • Outdated statistics, screenshots, instructions, or examples
    • Weak internal linking
    • Thin or incomplete coverage of the topic
    • Duplicate or overlapping content
    • Pages that no longer reflect current services or products

    A detailed on-page SEO audit can also help uncover page-level issues that should be addressed during optimization.

    2. Prioritize Pages With the Best Opportunity

    One of the biggest mistakes in content optimization is treating every page as equally important.

    A page generating no impressions for an irrelevant keyword may not deserve the same attention as a commercially valuable page ranking near the bottom of page one.

    Useful prioritization categories include:

    • Pages ranking around positions 5–20: Improvements may help them compete for stronger visibility.
    • Pages with high impressions and weak click-through rates: Titles and search-result messaging may need attention.
    • Previously successful pages losing traffic: These may be experiencing content decay or stronger competition.
    • Commercially important pages: Even modest ranking improvements can matter when the traffic has strong business intent.
    • Outdated content: Incorrect information can reduce usefulness and trust.

    This approach turns optimization into a business decision rather than a random content-cleanup project.

    3. Reconfirm Search Intent

    Before rewriting anything, check whether the page still matches what people searching the target query actually want.

    Search intent generally falls into several broad categories:

    • Informational: The user wants to learn something.
    • Commercial: The user is comparing solutions, products, or providers.
    • Transactional: The user is preparing to take an action such as purchasing or requesting a service.
    • Navigational: The user is trying to reach a specific website or page.

    A page can be well written and technically optimized but still struggle if it answers the wrong type of question.

    Review current search results for the primary keyword. Look at the types of pages ranking, the questions they answer, how detailed they are, and which formats Google appears to favor.

    Then determine whether your page needs a small update or a more substantial repositioning.

    4. Improve Content Quality and Completeness

    Once intent is clear, review the actual substance of the page.

    Ask whether it fully answers the reader’s main question and provides enough context for someone to take the next step.

    Look for:

    • Important questions that are not answered
    • Old recommendations that are no longer useful
    • Unclear definitions
    • Weak or generic examples
    • Repetitive sections
    • Unsupported claims
    • Sections that exist only to increase word count

    Optimization does not always mean making an article longer. Sometimes the better optimization is removing unnecessary paragraphs and making the useful information easier to find.

    For pages that are specifically aging or losing relevance, the process in how to update old blog posts for SEO can help you evaluate what should be refreshed, expanded, or removed.

    5. Optimize Keywords and On-Page SEO

    Keywords still help search engines and users understand page relevance, but they should be incorporated naturally.

    Review whether the primary keyword appears where it makes sense, including:

    • SEO title
    • Page title
    • Opening paragraphs
    • Relevant H2 or H3 headings
    • Main content
    • URL where appropriate
    • Meta description

    Also review related terms and subtopics that naturally belong in a complete explanation of the subject.

    Avoid forcing the same phrase into every paragraph. The purpose of optimization is clarity and relevance, not reaching an arbitrary keyword density.

    You should also check whether another page on your site is competing for the same intent. If two pages target nearly identical keywords and answer the same question, consolidation or clearer differentiation may be better than optimizing both independently.

    For a broader review of page-level elements, use an on-page SEO checklist before publishing the update.

    6. Improve Titles and Meta Descriptions

    The SEO title and meta description help communicate what a page offers before the visitor reaches your website.

    A good title should be specific, readable, and closely aligned with the searcher’s intent. Avoid making it longer or more dramatic simply to insert additional keywords.

    Meta descriptions should summarize the page clearly and give searchers a reason to consider the result.

    When reviewing metadata, check for:

    • Missing titles or descriptions
    • Duplicate metadata across multiple pages
    • Outdated messaging
    • Titles that no longer match the content
    • Important pages with vague descriptions

    Google may generate its own search-result snippets, but well-written metadata still gives you a clear, relevant description associated with the page.

    7. Strengthen Internal Linking

    Internal links help visitors discover related information and help search engines understand relationships between pages.

    Content optimization is an ideal time to review them.

    Look for opportunities to:

    • Add links from older articles to useful newer content
    • Link relevant informational posts to important service or commercial pages
    • Replace vague anchors such as “click here” with descriptive text
    • Remove or update broken links
    • Identify important pages receiving very few internal links

    A strong internal linking system should feel useful to the reader rather than artificial. Links should appear because the destination genuinely helps someone understand the topic or take the next logical step.

    See these internal linking best practices for a more detailed process.

    8. Improve Content Formatting and Readability

    Even excellent information can become difficult to use when it is poorly formatted.

    During optimization, review how the article appears on the actual website—not only inside a document or content management system.

    Useful formatting improvements can include:

    • Breaking long paragraphs into shorter sections
    • Using clear H2 and H3 headings
    • Turning dense instructions into lists
    • Using tables when comparisons are easier to understand visually
    • Removing unnecessary bold formatting
    • Checking spacing around images and headings
    • Making sure the page remains easy to scan on mobile devices

    Google’s SEO Starter Guide also emphasizes creating content that is well organized and easy for users to follow: Google Search Central SEO Starter Guide.

    For businesses managing many pages, this is where strategy often becomes an implementation problem. Recommendations may exist in an SEO document, but every heading, link, image, metadata field, and content block still has to be correctly updated in the CMS.

    Need help turning optimization recommendations into properly implemented website updates? Contact NextWebOps for content implementation and publishing support.

    9. Optimize Images

    Images should support the content without creating unnecessary page weight or accessibility problems.

    Review:

    • Image dimensions
    • File size
    • File format
    • Filename
    • Alt text
    • Visual relevance

    Resize images before uploading them when possible. Modern formats such as WebP can often reduce file size while maintaining good visual quality.

    Alt text should describe the image when a description is useful. Avoid inserting keywords that do not accurately represent what the image shows.

    For a deeper explanation, see the NextWebOps guide to image SEO.

    10. Publish, QA, and Monitor Results

    The optimization process is not complete when editing stops.

    Publishing quality matters because implementation mistakes can undermine otherwise good work.

    Before finalizing the updated page, check:

    • Heading hierarchy
    • Internal and external links
    • SEO title and meta description
    • Image dimensions and alt text
    • Spacing and formatting
    • Mobile presentation
    • Grammar and spelling
    • Calls to action
    • Schema settings when relevant

    After the updated page is live, monitor its performance rather than assuming the changes worked.

    Depending on the page and objective, useful metrics may include:

    • Search impressions
    • Organic clicks
    • Average search position
    • Click-through rate
    • Organic traffic
    • Leads or conversions

    Some pages may improve after a relatively small update, while others may require additional changes. Measurement is what turns one-time editing into an actual optimization strategy.

    If your team already knows what needs to change but lacks time to implement metadata, links, images, formatting, and CMS updates, talk to NextWebOps about hands-on content optimization support.

    How Often Should You Optimize Existing Content?

    There is no universal rule requiring every article to be updated every three, six, or twelve months.

    A better approach is to optimize based on meaningful triggers.

    Consider reviewing a page when:

    • Organic traffic declines noticeably
    • Important keyword rankings fall
    • Information becomes outdated
    • A competing page becomes significantly more useful
    • Search intent changes
    • Your business introduces a relevant new service or product
    • Internal links become outdated
    • The page receives impressions but attracts few clicks

    High-value and time-sensitive pages may deserve more frequent reviews than evergreen pages that continue performing well.

    Content Optimization Strategy Checklist

    Use this condensed checklist when reviewing an existing page:

    • Review current traffic, impressions, clicks, and rankings.
    • Confirm the page still matches search intent.
    • Update outdated or inaccurate information.
    • Fill meaningful content gaps.
    • Remove unnecessary or repetitive sections.
    • Review keyword targeting and heading structure.
    • Improve the SEO title and meta description where needed.
    • Add relevant internal links.
    • Check image size, format, filenames, and alt text.
    • Improve readability and mobile formatting.
    • Add an appropriate next step or CTA.
    • Perform publishing QA.
    • Monitor performance after the update.

    When Should You Handle Content Optimization In-House or Outsource It?

    Many businesses can handle optimization internally when the website is small and updates are occasional.

    For example, a team managing ten core pages and a modest blog may be able to review and update content during normal marketing work.

    The challenge changes when optimization needs to happen across dozens or hundreds of pages.

    External implementation support may become useful when:

    • A large backlog of content needs updating
    • SEO recommendations are ready but not implemented
    • Internal links need systematic updates
    • Images require resizing, compression, replacement, or alt text
    • Metadata needs to be added across many pages
    • Formatting is inconsistent
    • Content must be migrated or updated inside WordPress, Shopify, or Webflow
    • Publishing QA is consuming too much internal time

    The strategic decisions can remain with your SEO or marketing team while implementation is handled separately. This is especially useful for agencies and businesses that have strong content plans but limited publishing capacity.

    Final Thoughts

    A content optimization strategy should be more than occasionally adding keywords to old articles.

    The strongest process combines performance analysis, search intent, content quality, on-page SEO, internal linking, metadata, images, formatting, publishing QA, and ongoing measurement.

    Start with the pages that have the greatest opportunity instead of trying to refresh your entire site at once. Improve them systematically, measure what happens, and use those results to decide what to optimize next.

    When repeated consistently, the process becomes:

    Audit → Prioritize → Optimize → Implement → QA → Measure → Repeat.

    If you need help implementing that process across existing website content, get in touch with NextWebOps for practical content publishing and optimization support.

    Frequently Asked Questions

    What is a content optimization strategy?

    A content optimization strategy is a repeatable process for improving existing website content so it better meets user needs, matches search intent, supports SEO performance, and contributes to business goals.

    What are the main elements of content optimization?

    Common elements include search intent, content quality, keyword targeting, headings, metadata, internal links, images, readability, content freshness, calls to action, publishing QA, and performance measurement.

    How often should website content be optimized?

    Content should be reviewed when performance declines, information becomes outdated, search intent changes, competitors improve significantly, or business information changes. Not every page needs to be updated on the same fixed schedule.

    How do you optimize existing content for SEO?

    Start by reviewing performance and search intent. Update outdated information, improve topic coverage, optimize headings and metadata, strengthen internal links, optimize images, improve formatting, perform publishing QA, and monitor results after the update.

    What is the difference between content optimization and content strategy?

    Content strategy determines what content a business should create, who it should serve, and what goals it should support. Content optimization focuses on improving individual pages so they perform better within that broader strategy.

    Can updating old content improve SEO rankings?

    Updating old content can improve its usefulness and competitiveness when the changes address real problems such as outdated information, weak topic coverage, poor search intent alignment, missing internal links, or ineffective metadata. Updates should be based on meaningful opportunities rather than changing content simply to make it appear fresh.