Author: Muhammad Ansar

  • How to Do SEO for a Website: Step-by-Step Guide

    How to Do SEO for a Website: Step-by-Step Guide

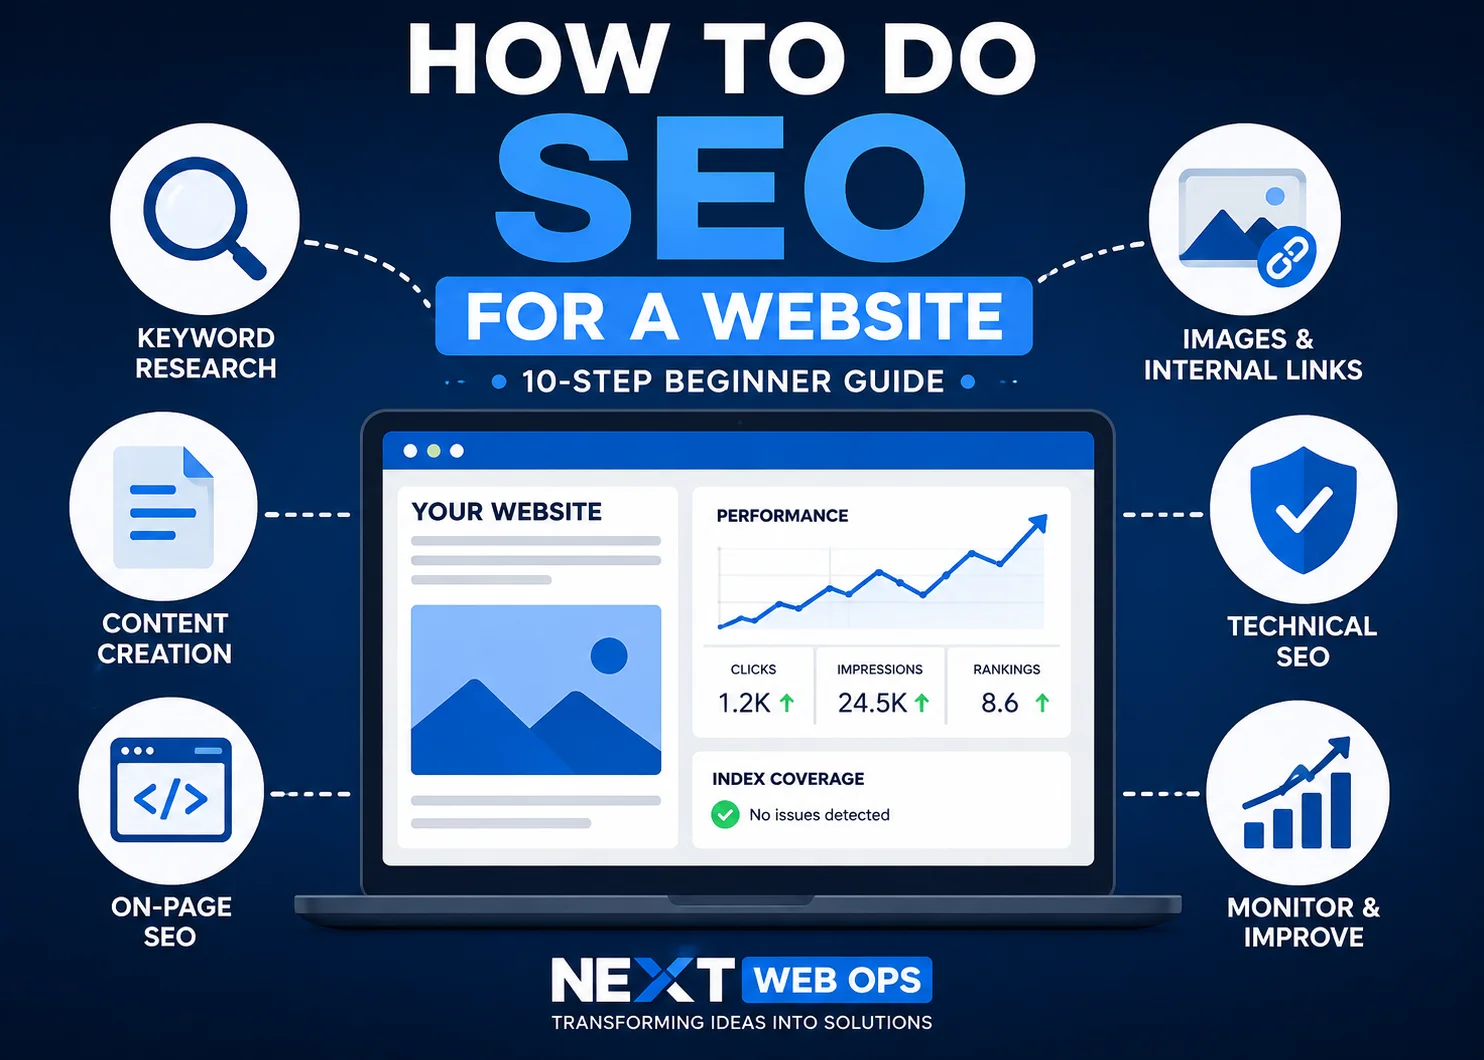
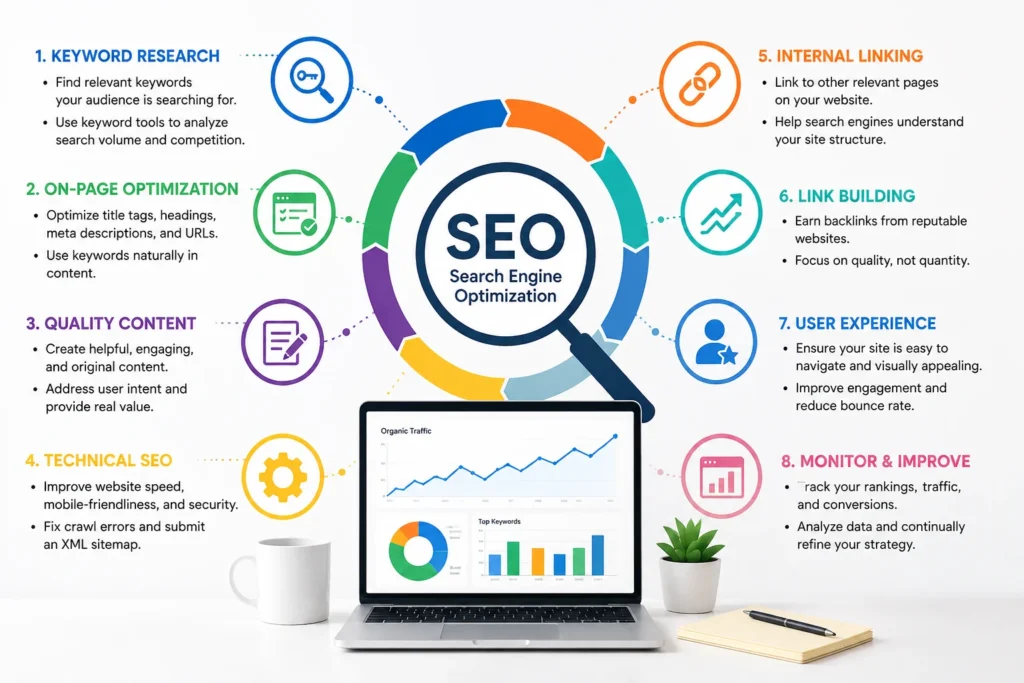
    If you are trying to learn how to do SEO for website growth, the process can look more complicated than it really is. SEO includes keyword research, content creation, on-page optimization, technical improvements, internal linking, image optimization, and ongoing performance monitoring.

    The key is to work through these areas in the right order instead of trying to optimize everything at once.

    This guide explains how to do SEO for a website step by step, with practical actions you can apply to a small business site, company website, blog, or service-based website.

    How SEO for a Website Works

    Search engine optimization helps search engines discover, understand, and evaluate your website so relevant pages can appear when people search for related information, products, or services.

    At a basic level, SEO depends on several connected factors:

    • Crawling: Search engines need to be able to access your pages.
    • Indexing: Your pages need to be eligible for inclusion in search results.
    • Relevance: Your content should match what people are searching for.
    • Quality: The page should provide a useful and complete answer.
    • Authority: Search engines consider signals such as relevant links and mentions from other websites.
    • User experience: Pages should be accessible, readable, mobile-friendly, and reasonably fast.

    SEO works best when these elements support each other. Publishing good content will not help much if search engines cannot crawl the page. Likewise, technically perfect pages may struggle if they do not satisfy search intent.

    How to Do SEO for a Website Step by Step

    You do not need to complete every possible SEO task before seeing progress. Start with the fundamentals below and build from there.

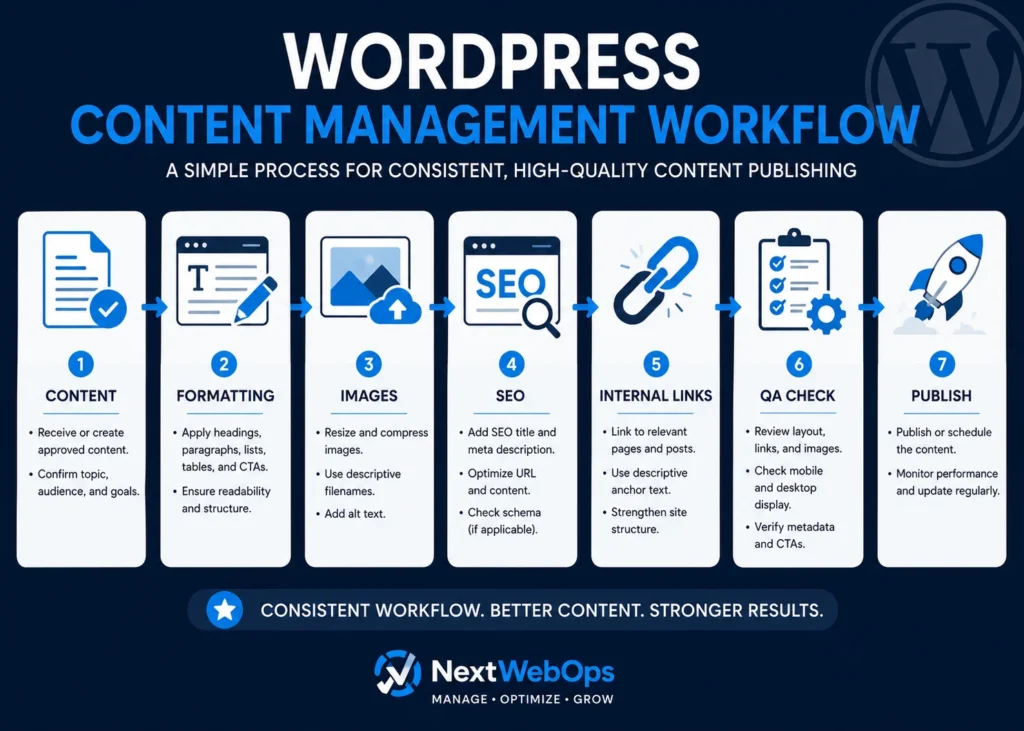
    Website SEO step-by-step workflow from keyword research to performance monitoring

    1. Set Up Google Search Console

    Google Search Console should be one of the first tools you set up for a website you want to grow through organic search.

    It can help you see:

    • Whether Google can find and index your pages
    • Which search queries generate impressions and clicks
    • Which pages receive organic traffic
    • Whether Google reports indexing problems
    • Which pages are excluded from the index
    • Whether your sitemap has been discovered successfully

    After verifying your website, submit your XML sitemap if your website platform generates one. WordPress SEO plugins, Shopify, Webflow, and many other content management systems can create sitemaps automatically.

    You can also use URL Inspection in Search Console to check individual pages after publishing or updating them.

    2. Find Keywords Your Customers Search For

    Keyword research helps you understand the language people use when searching for information related to your business.

    A common beginner mistake is choosing the broadest keyword available. Broad terms can be highly competitive and may not clearly reflect what the searcher wants.

    Instead, look for specific keywords that match a real problem, question, service, or buying need.

    For example, a small business may find it difficult to compete for a broad keyword such as:

    SEO

    A more specific search could be:

    SEO checklist for small business website

    The more specific phrase gives you a clearer idea of what kind of content the searcher expects.

    When researching keywords, evaluate:

    • Search intent
    • Relevance to your business
    • Competition
    • Search demand
    • Commercial value
    • Whether you already have another page targeting the same topic

    You can use Google Keyword Planner, Google Search Console, paid SEO tools, and Google search results to identify possible topics.

    3. Match Each Page to Search Intent

    Finding a keyword is only the beginning. Your page also needs to match what the person searching that keyword actually wants.

    Search intent usually falls into a few broad categories:

    • Informational: The person wants to learn something.
    • Commercial research: The person is comparing solutions or providers.
    • Transactional: The person is ready to buy, contact, subscribe, or take another action.
    • Navigational: The person wants to reach a specific website or page.

    For example, someone searching “how to optimize images for SEO” probably wants a guide. Someone searching “SEO content publishing service” is more likely looking for a provider.

    Do not automatically create a blog post for every keyword. Some keywords are better served by a service page, landing page, category page, product page, or other commercial content.

    4. Create Helpful Content That Answers the Search

    Good SEO content should solve the searcher’s problem rather than simply repeat the target keyword.

    Before writing, review the results already ranking for your target query. Look at the types of pages Google is showing and the topics those pages commonly cover.

    Then ask how your page can be more useful.

    This can mean adding:

    • Clearer instructions
    • Practical examples
    • Better organization
    • Original explanations
    • Useful checklists
    • Common mistakes
    • More current information
    • Answers to related questions

    Avoid adding paragraphs simply to make an article longer. A 1,500-word page that answers the query clearly can be more useful than a 4,000-word article filled with repetition.

    Older content also needs attention. Rankings and search behavior can change over time. Reviewing outdated pages, improving weak sections, updating examples, and checking links can keep existing content useful. If you already have published articles losing visibility, see our guide on how to update old blog posts for SEO.

    5. Optimize Your SEO Title, URL, and Meta Description

    Once the content direction is clear, optimize the main page elements that help users and search engines understand the topic.

    Your SEO title should clearly describe the page and, when natural, include the primary keyword near the beginning.

    A good URL should usually be short and descriptive.

    For example:

    example.com/how-to-do-seo-for-website/

    is easier to understand than:

    example.com/blog/post?id=29482&category=7

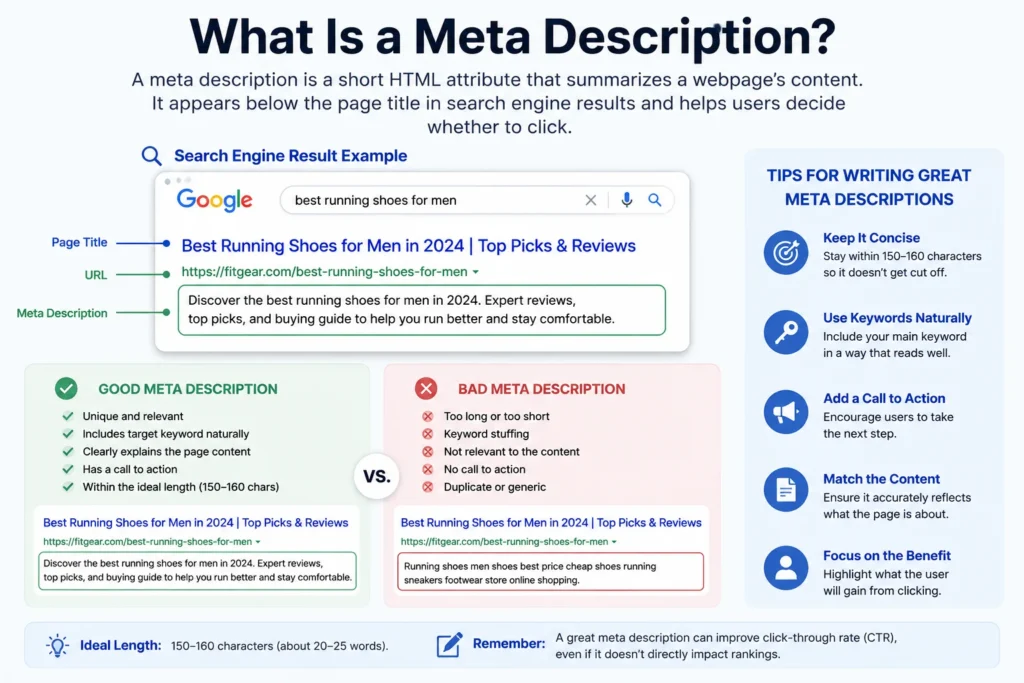
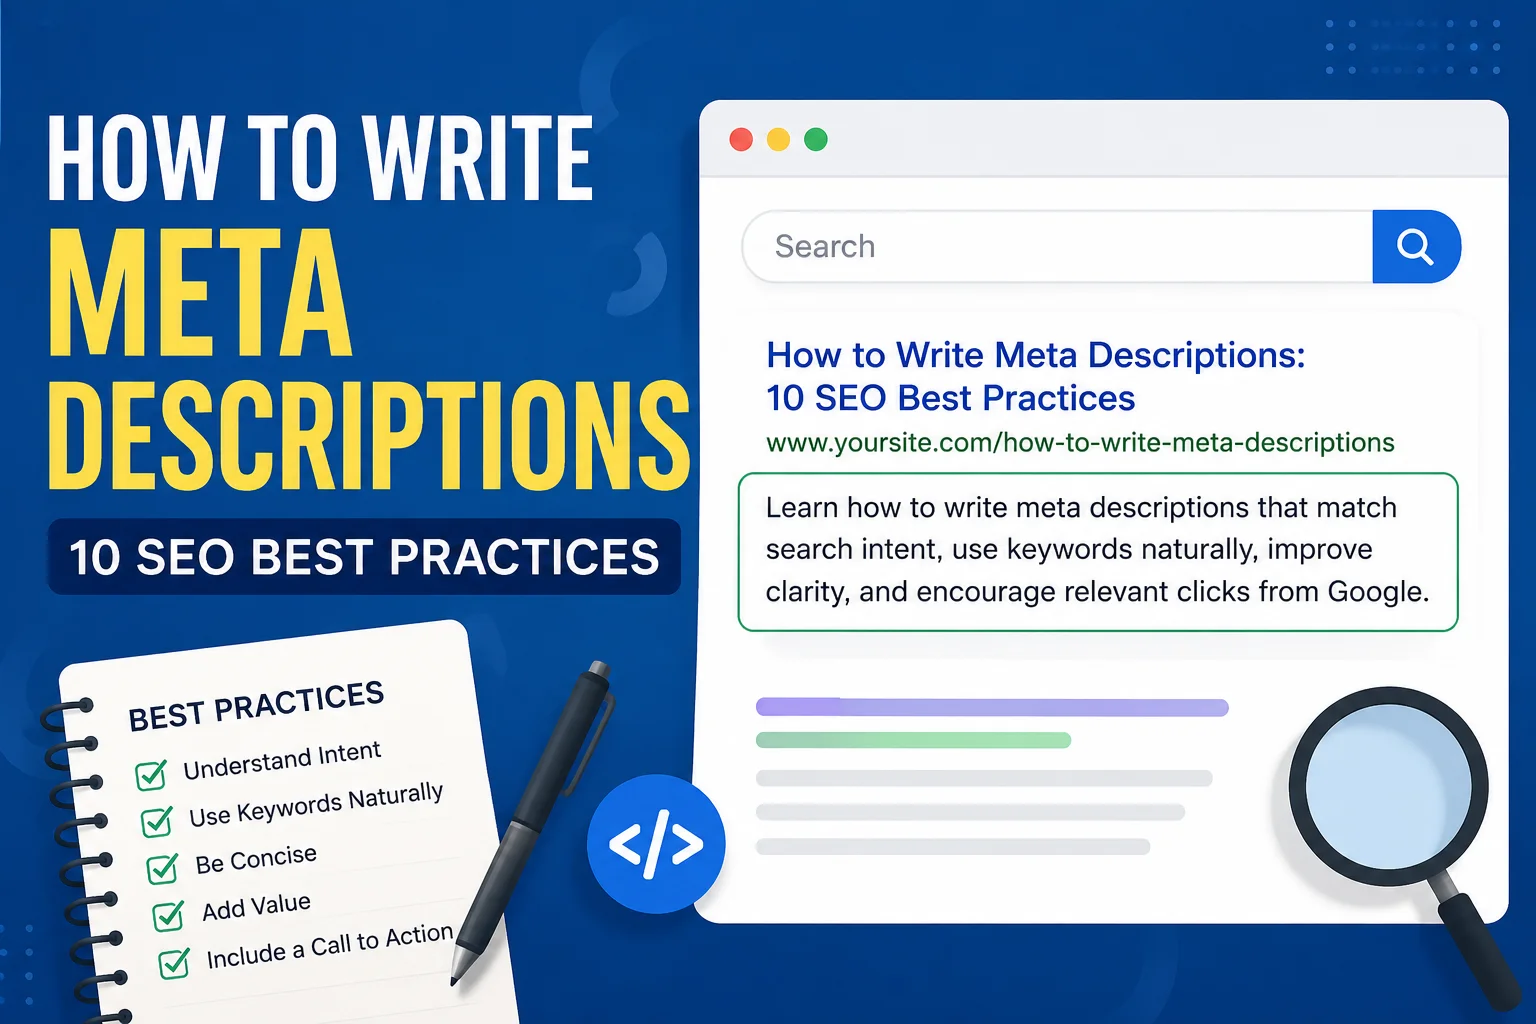
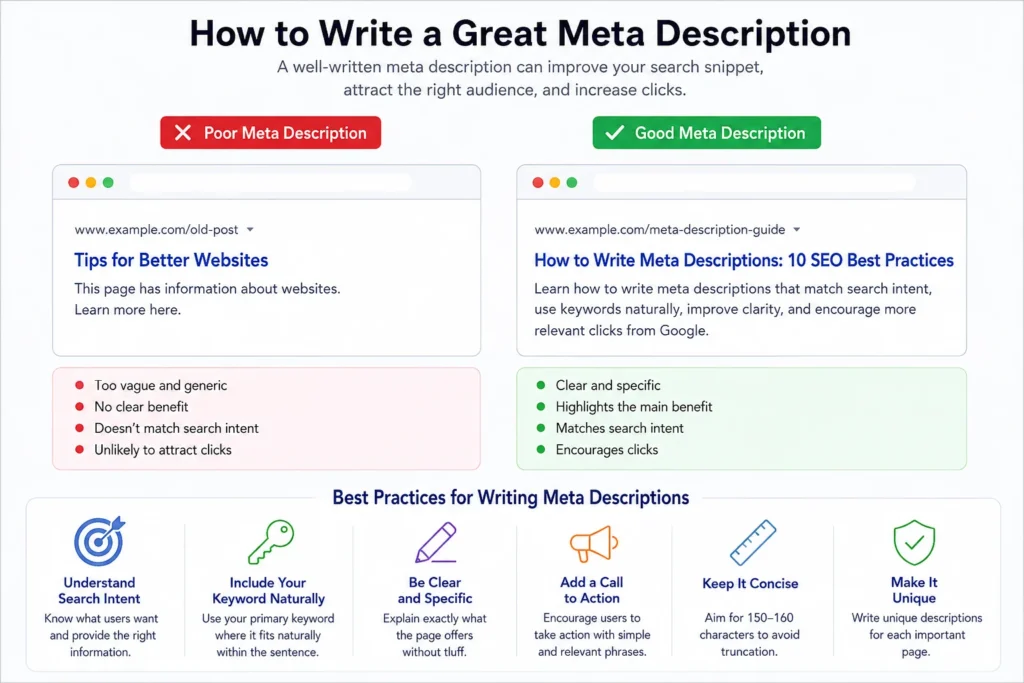
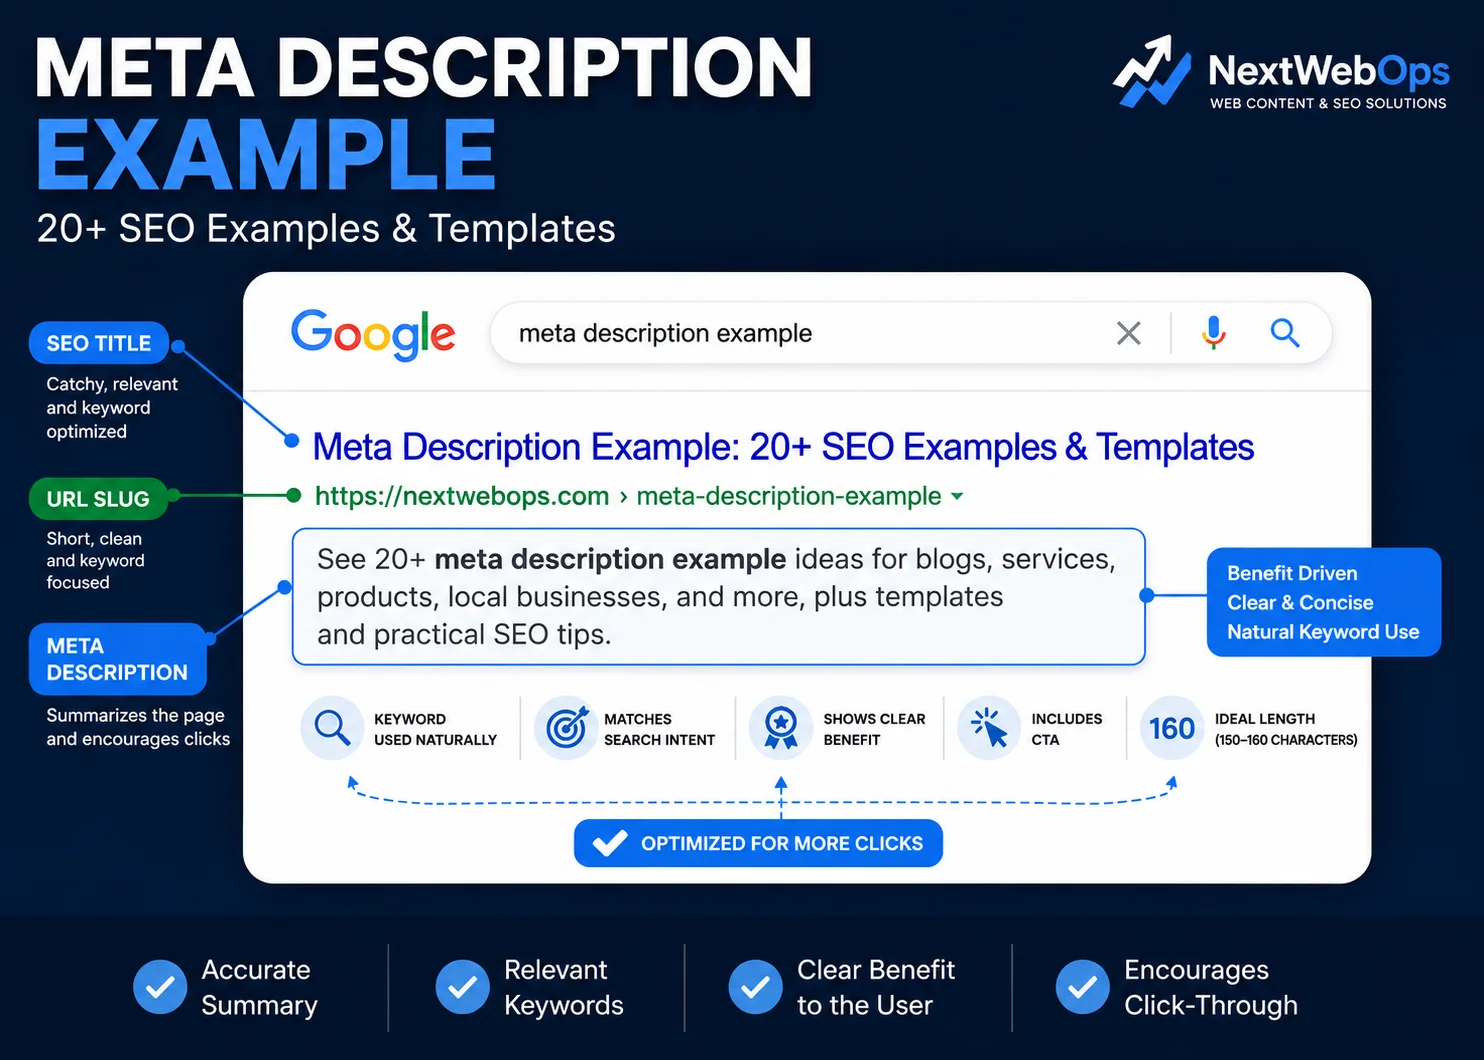
    Your meta description should briefly explain what the user will find on the page. While Google may rewrite descriptions in search results, writing a clear one still gives search engines and searchers useful context.

    Avoid forcing the exact keyword into every field if it makes the text unnatural. Optimization should improve clarity, not make the page read like it was written for a plugin score.

    6. Optimize Headings and On-Page Content

    Your page should have a clear heading structure.

    Normally, the page title is the main H1. Major sections should use H2 headings, while subsections beneath them should use H3 headings.

    For example:

    • H1: Main page topic
    • H2: Major section
    • H3: Specific point inside that section

    Headings help users scan the page and help search engines understand how topics relate to one another.

    Use your main keyword naturally near the beginning of the page and within relevant content, but do not repeatedly insert it where it does not belong.

    You should also review:

    • Paragraph length
    • Content clarity
    • Keyword variations
    • Relevant entities and terminology
    • Internal links
    • Image optimization
    • Broken links
    • Outdated content

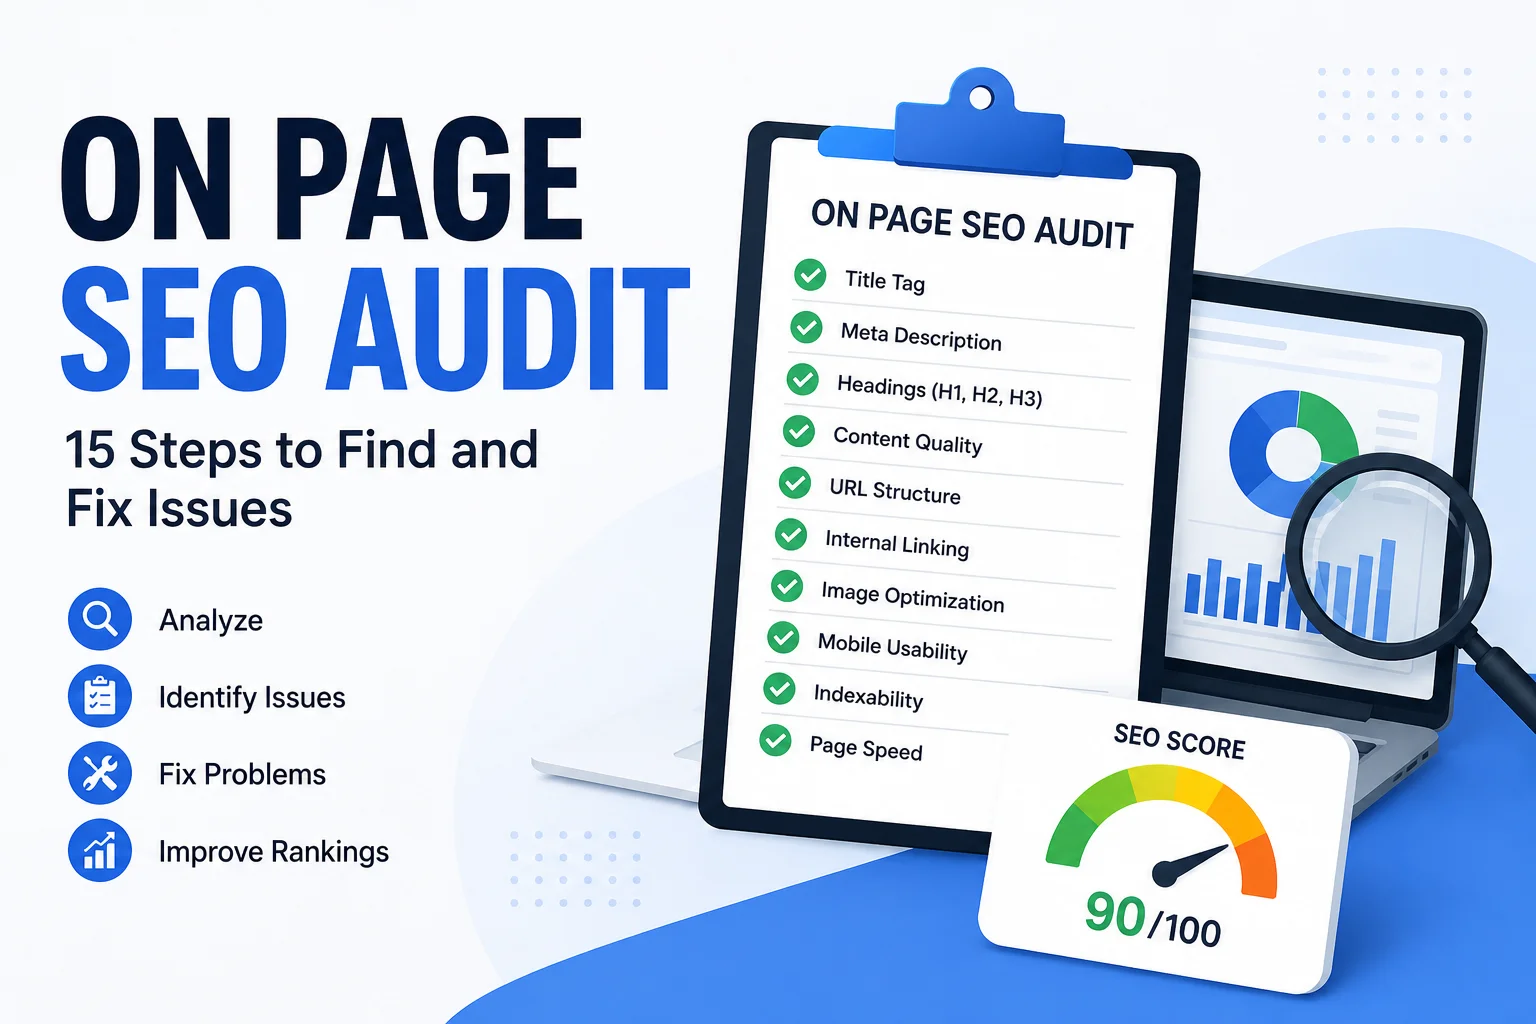
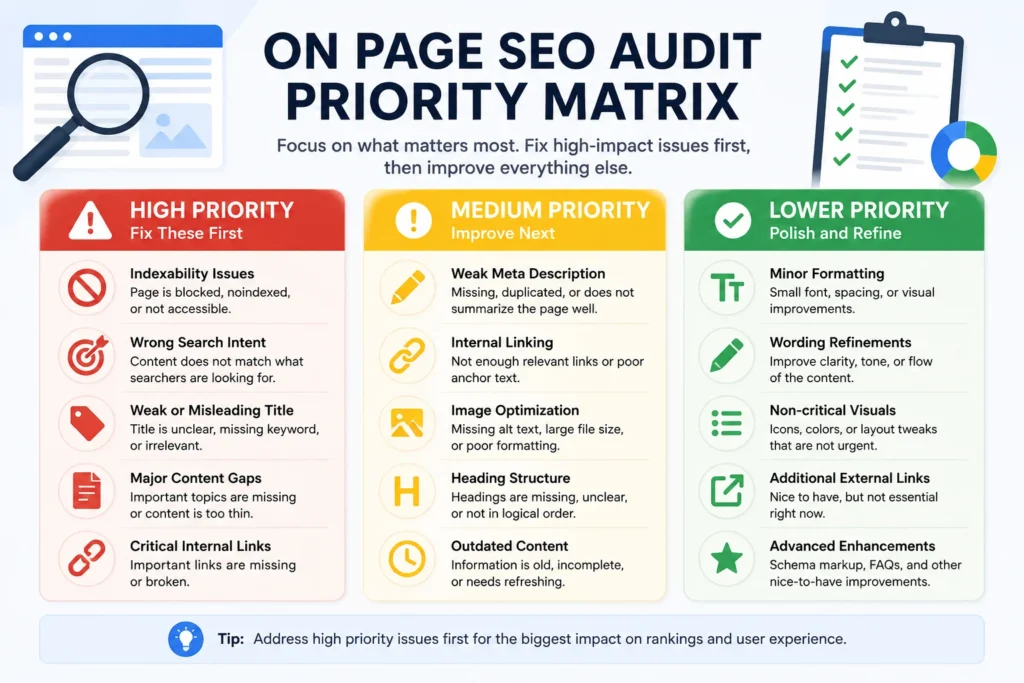
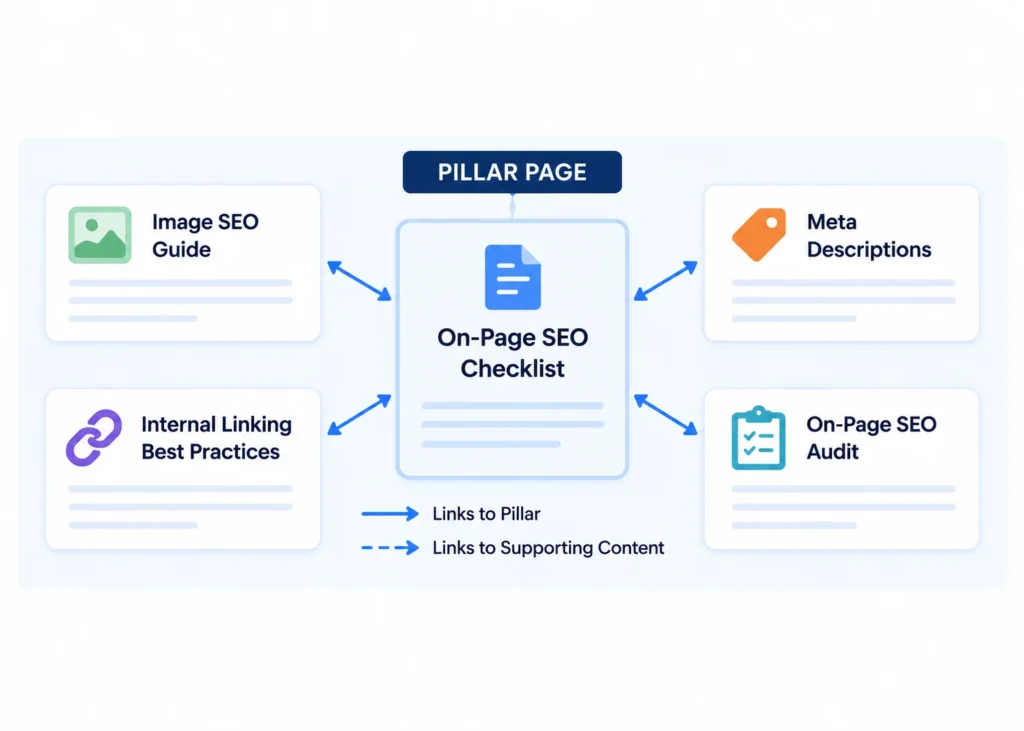
    For a more detailed page-by-page process, use our on-page SEO checklist. If you are reviewing an existing website rather than optimizing a new page, an on-page SEO audit can help identify what needs improvement.

    7. Optimize Website Images

    Images affect both user experience and website performance, so they should be part of your SEO publishing process.

    Before uploading an image, consider:

    • Whether the dimensions are larger than necessary
    • Whether the file has been compressed
    • Whether WebP is an appropriate format
    • Whether the filename describes the image
    • Whether the image needs descriptive alt text

    For example, instead of uploading:

    IMG_48291.jpg

    a descriptive filename might be:

    website-seo-workflow.webp

    Alt text should describe the image accurately for accessibility. Do not fill every alt attribute with keywords simply because an SEO plugin recommends using the target phrase.

    Large, poorly optimized images can also increase page weight and slow down loading. For a deeper process, see our guide to image SEO and image optimization.

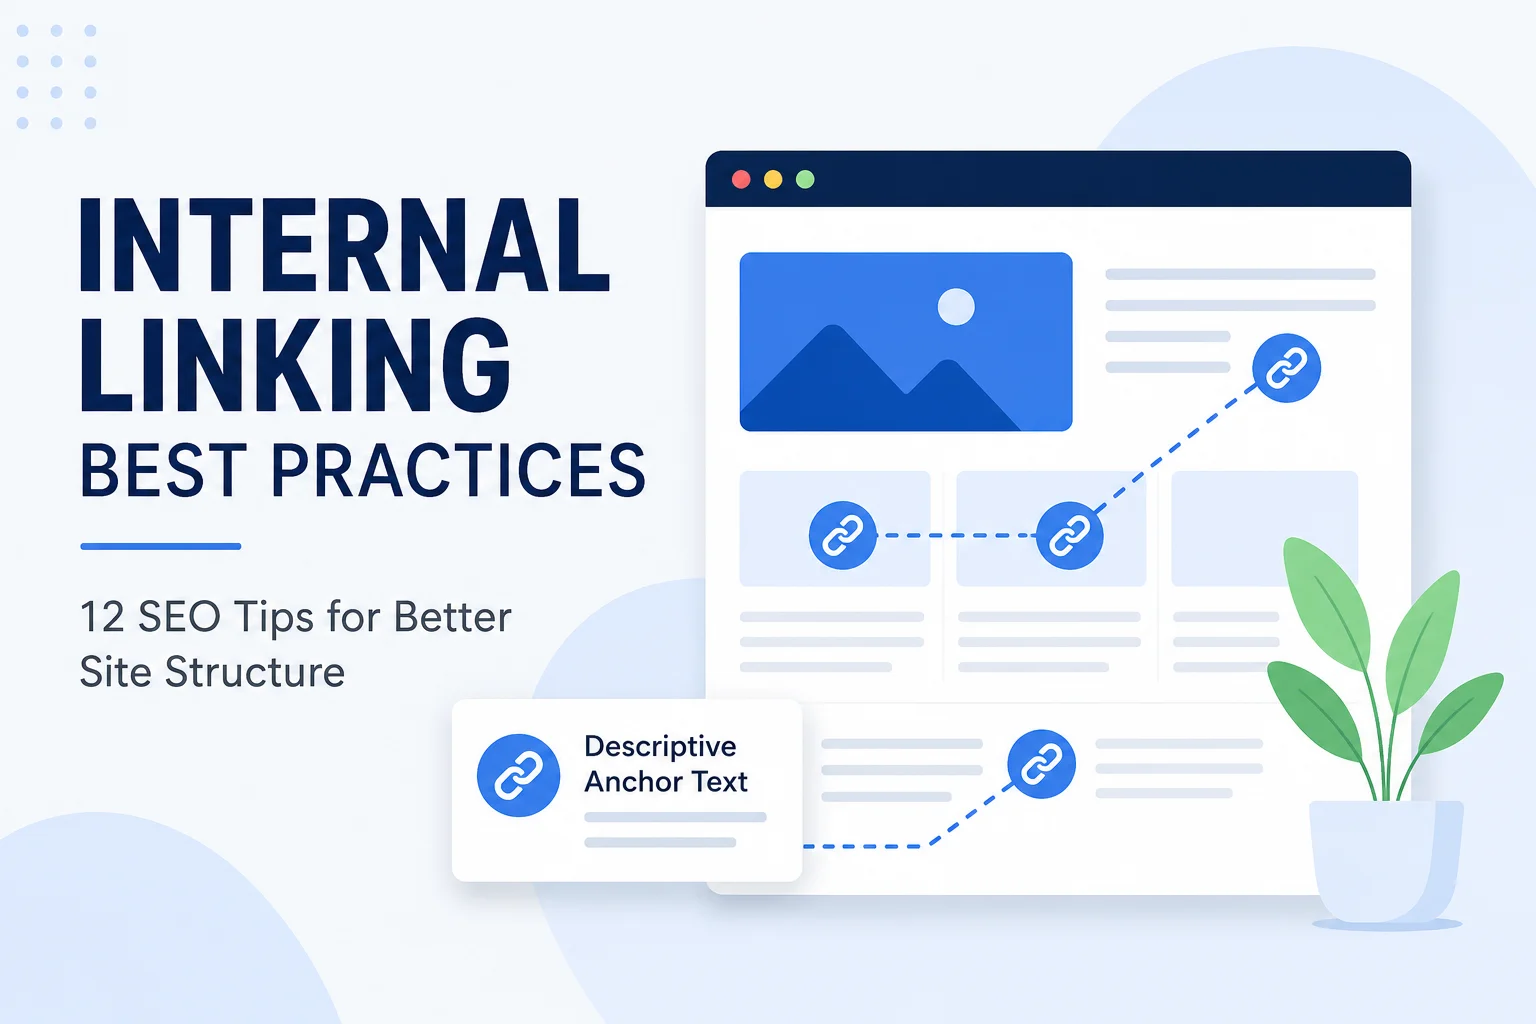
    8. Add Internal Links

    Internal links connect one page on your website to another.

    They help visitors discover useful content and give search engines additional context about your site structure.

    When adding internal links:

    • Link to pages that are genuinely relevant
    • Use descriptive anchor text
    • Place links where they are useful to the reader
    • Link important pages from other relevant pages
    • Avoid adding dozens of unrelated links simply for SEO

    For example, if you mention image optimization inside an SEO guide, linking to a detailed image SEO article makes sense. Linking to an unrelated service only because you want to increase internal link counts does not.

    Strong internal linking also helps prevent useful pages from becoming isolated. Read our internal linking best practices for a more detailed strategy.

    9. Fix Important Technical SEO Problems

    Technical SEO can become complex, but beginners do not need to solve every advanced issue at once.

    Start with problems that can prevent search engines or users from accessing your website properly.

    Check that:

    • Your site uses HTTPS
    • Important pages are crawlable
    • Important pages are not accidentally marked noindex
    • Your XML sitemap works
    • Your website works well on mobile devices
    • Pages do not contain obvious broken links
    • Redirects work properly after URL changes
    • Your website loads at a reasonable speed
    • Duplicate pages are handled appropriately
    • Your robots.txt file is not blocking important content

    Google Search Console can help identify some indexing and crawling problems. Performance tools such as PageSpeed Insights can also help you understand speed and Core Web Vitals issues.

    Do not make technical changes you do not understand simply because an SEO audit tool labels something as an error. Some warnings are more important than others, and incorrect changes to canonical tags, redirects, robots.txt, or index settings can create larger problems.

    10. Build Authority and Earn Relevant Links

    Backlinks are links from other websites to yours. They can help search engines discover content and may contribute to how search engines evaluate a site’s authority and reputation.

    However, link building should not mean buying hundreds of low-quality links.

    Better approaches include:

    • Publishing genuinely useful resources
    • Creating original research or data
    • Earning mentions from relevant industry websites
    • Contributing expert insight to publications
    • Building legitimate partnerships
    • Creating tools, templates, or resources people want to reference

    A few relevant and credible links can be more valuable than a large number of unrelated or spammy links.

    SEO Checklist for Every New Page

    One of the easiest ways to improve website SEO over time is to build optimization into your publishing workflow.

    Before publishing an important page or article, review this checklist:

    • Choose one clear primary topic or keyword.
    • Confirm the page matches search intent.
    • Write a descriptive SEO title.
    • Create a short, understandable URL.
    • Use one clear H1.
    • Organize sections with logical H2 and H3 headings.
    • Answer the main search question directly.
    • Add useful supporting details and examples.
    • Write a relevant meta description.
    • Add internal links to related pages.
    • Optimize image dimensions and file sizes.
    • Use descriptive image filenames.
    • Add appropriate alt text.
    • Check the page on mobile.
    • Test important links.
    • Confirm the page is indexable.
    • Review the finished page after publishing.

    This final publishing review is often overlooked. A well-written article can still go live with a broken link, oversized image, missing metadata, incorrect heading structure, formatting issue, or accidental noindex setting.

    Need help implementing SEO updates across your website? NextWebOps supports businesses with on-page SEO execution, content implementation, internal linking, image optimization, metadata, content formatting, and publishing QA. Get help with website SEO implementation.

    How Long Does Website SEO Take?

    There is no single timeline for SEO results.

    Some changes can be discovered by search engines relatively quickly, especially on websites that are crawled frequently. Meaningful ranking improvements can take longer.

    The timeline can depend on factors such as:

    • The competitiveness of the keyword
    • The age and authority of the website
    • How frequently search engines crawl the site
    • The quality and relevance of the page
    • The strength of competing pages
    • Internal linking
    • Technical problems
    • External links and brand authority

    It is better to treat SEO as an ongoing improvement process than as a one-time project.

    Publish useful pages, monitor how they perform, improve weak pages, add internal links, update old information, and continue building topical authority around subjects that matter to your customers.

    Common SEO Mistakes Beginners Should Avoid

    Targeting the Same Keyword With Multiple Pages

    Creating several similar pages for the same search intent can make it difficult to decide which page should be your strongest result.

    Before creating new content, check whether an existing page already covers the topic. In some cases, improving the existing page is better than publishing another similar article.

    Stuffing Keywords Into Content

    Repeating the target keyword in every paragraph does not make a page more useful.

    Use your primary keyword where it naturally clarifies the subject, then use normal language and relevant terminology throughout the rest of the content.

    Ignoring Search Intent

    A perfectly optimized page can still struggle if it does not provide the type of result users expect.

    If Google is primarily ranking detailed informational guides, a short sales page may not satisfy the query. If the results are mostly product or service pages, writing another long educational article may also be the wrong choice.

    Publishing Without Internal Links

    New pages should not exist in isolation.

    Look for relevant existing pages that can link to your new content, and add useful links from the new page to related resources.

    Uploading Huge Images

    Uploading a multi-megabyte image and relying on WordPress or another platform to fix everything automatically can unnecessarily increase page weight.

    Resize and compress images before publishing whenever possible.

    Focusing Only on an SEO Plugin Score

    Tools such as Rank Math and Yoast can make common SEO tasks easier, but a green score does not guarantee rankings.

    An SEO plugin cannot determine whether your content genuinely satisfies search intent, offers something useful, earns trust, or deserves to outperform competing pages.

    Use plugin recommendations as guidance, not as the entire SEO strategy.

    Publishing Content and Never Updating It

    Websites change, links break, screenshots become outdated, search intent evolves, and competing pages improve.

    Review important content periodically and improve it when there is a clear reason to do so.

    Can You Do Website SEO Yourself?

    Yes. A beginner can handle many foundational SEO tasks.

    You can learn how to research keywords, improve titles, write useful content, optimize images, add internal links, use Search Console, and review basic technical issues.

    The difficulty often appears when SEO has to be implemented consistently across dozens or hundreds of pages.

    A business may already know what should be improved but still need someone to:

    • Publish and format content correctly
    • Update title tags and meta descriptions
    • Add internal links across existing pages
    • Resize and optimize images
    • Fix heading structures
    • Migrate content between platforms
    • Perform publishing QA
    • Keep website content updated

    That is the difference between SEO strategy and SEO implementation. A strategy identifies what needs to happen. Implementation makes sure those changes are actually completed correctly on the website.

    If your team has an SEO plan but lacks the time to execute all of the website updates, talk to NextWebOps about content and SEO implementation.

    Final SEO Action Plan

    If you are starting from scratch, do not try to complete every SEO tactic at once.

    Use this order:

    1. Set up Google Search Console.
    2. Research keywords related to your customers and services.
    3. Map one clear search intent to each important page.
    4. Create or improve genuinely useful content.
    5. Optimize titles, URLs, headings, and metadata.
    6. Optimize images.
    7. Add relevant internal links.
    8. Fix important crawling, indexing, mobile, and performance issues.
    9. Earn relevant links and industry mentions over time.
    10. Monitor results and continue improving your strongest opportunities.

    Learning how to do SEO for a website is not about finding one ranking trick. It is about consistently making your website easier to discover, easier to understand, and more useful to the people searching for what your business offers.

    For small websites, you can implement many of these improvements yourself. For larger websites or teams managing ongoing publishing, the challenge is often maintaining consistent execution across every page.

    Talk to NextWebOps about your website if you need support with content implementation, WordPress publishing, Shopify publishing, Webflow publishing, on-page SEO, internal linking, image optimization, metadata, content formatting, migration, or publishing QA.

    Frequently Asked Questions

    Can I do SEO for my website myself?

    Yes. Website owners can handle many basic SEO tasks themselves, including keyword research, content improvements, metadata, internal linking, image optimization, and Search Console monitoring. More complex technical issues or large-scale implementation may require specialist support.

    Can a beginner do SEO?

    Yes. Beginners can learn the fundamentals of SEO by focusing first on search intent, useful content, on-page optimization, internal linking, indexing, and basic technical health. You do not need to master every advanced SEO discipline before improving a website.

    How do I start SEO for a new website?

    Start by setting up Google Search Console, checking that your site can be indexed, researching keywords, assigning important keywords to relevant pages, publishing useful content, and optimizing each page before you begin more advanced link-building or technical work.

    How can I improve my SEO on Google?

    Improve the relevance and usefulness of your pages, optimize important on-page elements, strengthen internal links, fix crawling and indexing problems, improve website usability, and earn relevant links and mentions from trustworthy websites.

    How long does SEO take to work?

    There is no fixed SEO timeline. Search engines may discover some changes quickly, while meaningful ranking improvements can take considerably longer. Competition, website authority, content quality, technical health, and links can all affect the timeline.

    Do I need an SEO plugin for WordPress?

    No SEO plugin is required for Google to rank a WordPress website, but plugins such as Rank Math can make tasks like editing titles, meta descriptions, schema settings, sitemaps, and index controls easier. The plugin should support your SEO process rather than replace it.

    Is SEO still worth doing with AI search?

    Yes. Businesses still benefit from creating useful, accessible, well-structured content that search engines and other discovery systems can understand. Strong SEO fundamentals also improve site organization, content quality, and user experience beyond traditional search results.

  • WebP Image Optimization: How to Reduce Image Size Without Ruining Quality

    WebP Image Optimization: How to Reduce Image Size Without Ruining Quality

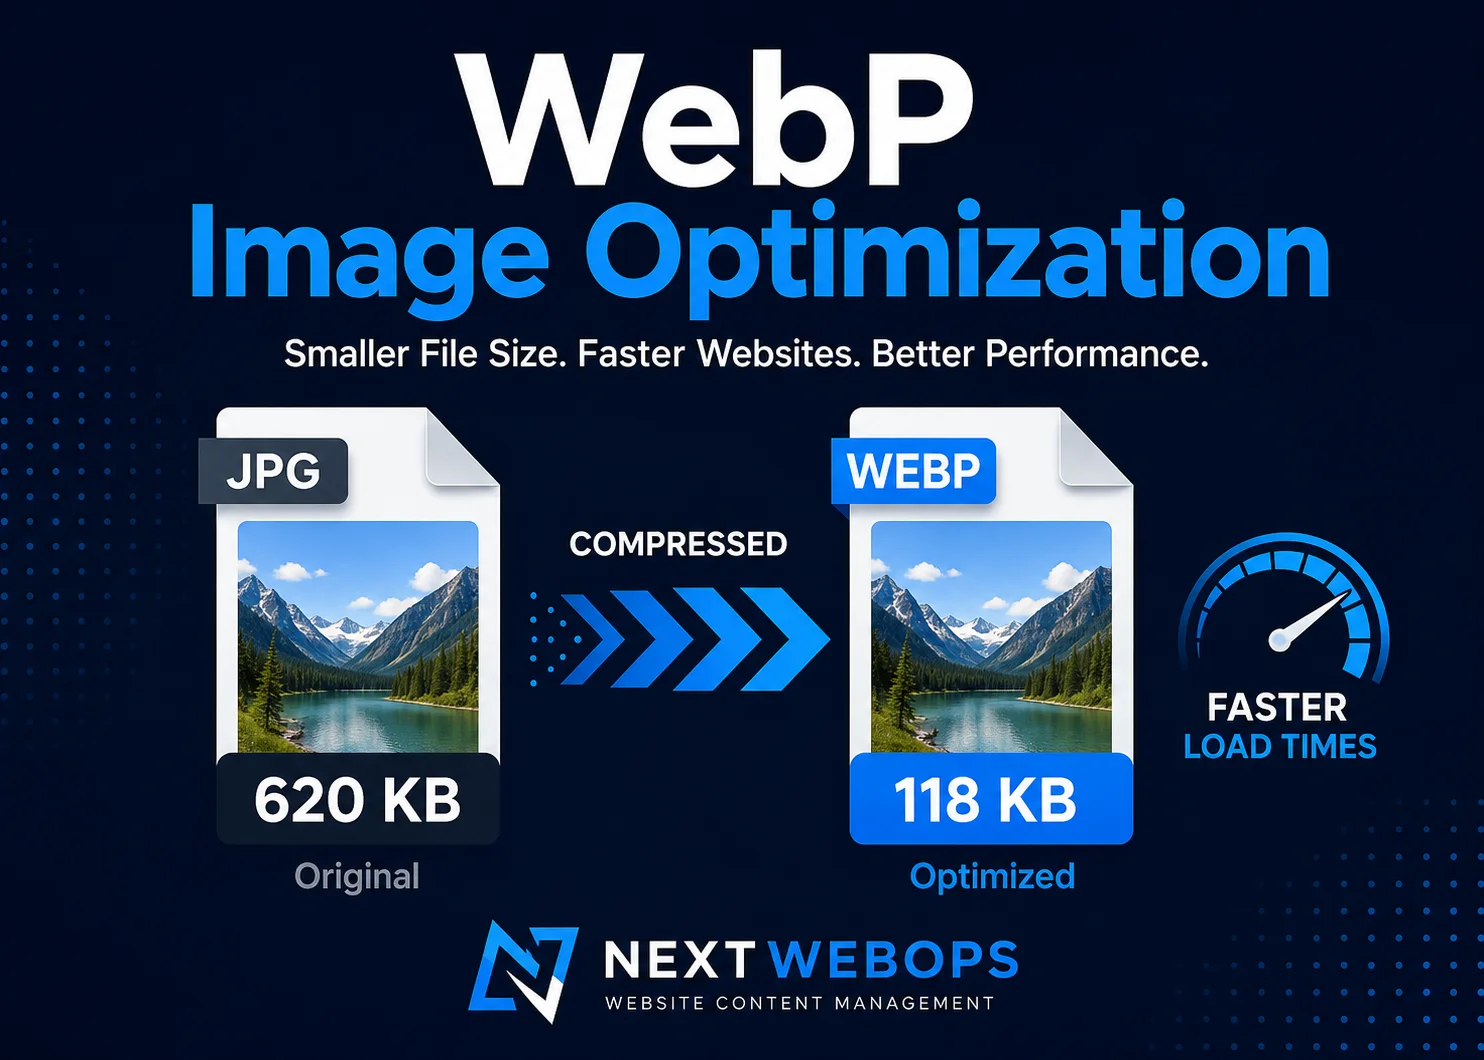
    WebP image optimization is more than converting a JPEG or PNG file to the WebP format. A properly optimized WebP image should also have appropriate dimensions, sensible compression, good visual quality, descriptive image information, and correct implementation on the page.

    That distinction matters because an oversized or poorly compressed WebP file can still slow down a website. Changing the file extension does not automatically solve image performance problems.

    For businesses, agencies, and website managers publishing content regularly, the best approach is to treat image optimization as part of the complete publishing workflow. This guide explains how to optimize WebP images while balancing file size, visual quality, page performance, and SEO.

    What Is WebP Image Optimization?

    WebP image optimization is the process of preparing a WebP image so that it delivers the required visual quality without transferring unnecessary data to the visitor’s browser.

    WebP supports both lossy and lossless compression. That makes it suitable for many photographs, graphics, screenshots, and images requiring transparency.

    However, the image format is only one part of optimization. A complete workflow also considers:

    • Image dimensions
    • Compression level
    • Visual quality
    • File size
    • Filename
    • Alt text
    • Responsive image delivery
    • Lazy loading
    • Published-page testing

    For example, converting a 3500-pixel-wide JPEG into a 3500-pixel-wide WebP does not make sense if the website displays the image at only 800 pixels wide. Resizing the image before or during optimization can remove a large amount of unnecessary data.

    Why Optimize WebP Images?

    Images often account for a significant portion of the content a browser must download. Reducing unnecessary image bytes can therefore improve the overall loading experience, especially for visitors on slower connections or mobile devices.

    Reduce Page Weight

    Smaller image files reduce the amount of data transferred when someone opens a page. The benefit becomes more noticeable on pages containing multiple photographs, product images, screenshots, or large visual elements.

    Improve Loading Performance

    Properly sized and compressed images can load faster than unnecessarily large alternatives. Image optimization can therefore support broader website performance work and Core Web Vitals improvements.

    Maintain Useful Visual Quality

    Optimization should not mean making every image as small as technically possible. A heavily compressed image that looks blurry, creates artifacts, or makes text difficult to read has gone too far.

    The objective is to find a useful balance between appearance and file size.

    How to Optimize WebP Images Step by Step

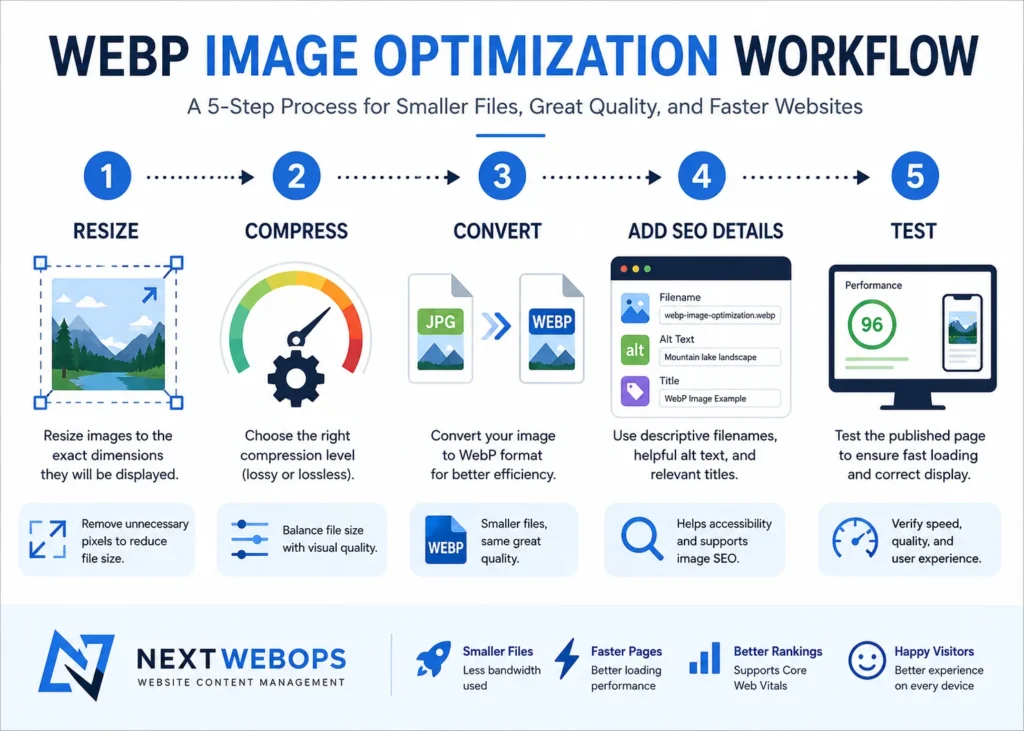
    1. Resize Images Before Converting Them

    Start with image dimensions.

    WebP image optimization workflow showing resizing, compression, conversion, SEO details, and performance testing

    If a blog content area displays an image at roughly 700 pixels wide, uploading a 3000-pixel-wide source file is usually unnecessary unless the website has a specific high-resolution requirement.

    Determine how large the image actually needs to appear in the layout, then prepare an appropriately sized source.

    Resizing before compression also gives the encoder fewer pixels to process, which can dramatically reduce the final file size.

    2. Choose Lossy or Lossless Compression

    WebP supports both lossy and lossless compression, but they serve different purposes.

    Lossy WebP is usually a good starting point for photographs and visually complex images. Some image information is discarded to achieve a smaller file.

    Lossless WebP preserves the image data without lossy degradation. It may be useful for certain graphics, interface elements, screenshots, or images where precise detail matters.

    Do not automatically select lossless because it sounds better. The resulting file may be larger than necessary for the image’s actual purpose.

    3. Start With a Sensible WebP Quality Setting

    There is no single WebP quality percentage that is correct for every image.

    For photographs, a quality range around 75 to 85 can be a useful starting point. Thumbnails and less prominent images may tolerate stronger compression, while screenshots or graphics containing small text may require a higher quality setting.

    Instead of treating the quality number as a rule, export the image and inspect it at the size users will actually see it.

    Compare:

    • Fine details
    • Faces
    • Gradients
    • Edges
    • Small text
    • Brand colors

    If you cannot notice a meaningful improvement at a much higher quality setting, the extra bytes may not be providing much value.

    4. Remove Unnecessary Metadata

    Images can contain metadata such as camera information and other embedded details. Some metadata is useful in specific workflows, but much of it may be unnecessary for ordinary website publishing.

    A good image optimization workflow removes unnecessary information while preserving anything required for the website or organization.

    5. Use Descriptive WebP Filenames

    Do not upload images using filenames such as:

    IMG_8427.webp

    A descriptive filename gives the file useful context and keeps the media library easier to manage.

    For an image demonstrating this article’s workflow, a better filename might be:

    webp-image-optimization-workflow.webp

    Keep filenames concise, descriptive, lowercase, and separated with hyphens.

    Filename optimization is only one part of broader image SEO best practices. Avoid stuffing keywords into filenames simply because you want an image to rank.

    6. Write Useful Alt Text

    Alt text should describe the meaningful content or function of an image when a text alternative is appropriate.

    For example, if an illustration shows an image being resized, compressed, and converted to WebP, useful alt text could be:

    WebP image optimization workflow showing resizing, compression, and website testing.

    That description is more useful than repeating the target keyword several times.

    Decorative images may not need descriptive alt text. The correct approach depends on the role of the image on the page.

    7. Use Responsive Image Sizes

    Optimizing the original file is useful, but the browser should also receive an image appropriate for the visitor’s screen and layout.

    Responsive image functionality allows a website to provide multiple image sizes so the browser can choose an appropriate version.

    Content management systems such as WordPress often generate several sizes automatically. The important publishing check is making sure the page uses suitable generated sizes instead of unnecessarily serving the largest uploaded file everywhere.

    8. Be Careful With Lazy Loading Above the Fold

    Lazy loading can reduce unnecessary image downloads by delaying off-screen images until they are needed.

    But the main image visible immediately when a page opens may need different treatment. Delaying a critical above-the-fold image can work against loading performance rather than improving it.

    Use lazy loading strategically instead of applying it blindly to every image.

    9. Test the Published Page

    Optimization should not stop when the image is uploaded.

    Open the finished page and confirm:

    • The correct image displays
    • The image is not blurry or overcompressed
    • The displayed dimensions make sense
    • The browser is not downloading an unnecessarily huge version
    • Alt text is correct where required
    • The image does not create layout problems
    • Lazy loading behaves correctly
    • The page performs well on mobile

    Tools such as PageSpeed Insights and browser developer tools can help identify large image transfers and other performance issues.

    Image checks can also be incorporated into a broader on-page SEO audit when reviewing existing pages.

    WebP Quality vs. File Size: What Setting Should You Use?

    The correct WebP setting depends on what the image contains and how prominently it appears.

    Image Type Recommended Starting Approach
    Photographs Lossy WebP with moderate compression
    Blog graphics Moderate to higher quality depending on text and detail
    Screenshots with small text Higher quality or test lossless WebP
    Thumbnails More aggressive compression may be acceptable
    Logos and icons Consider SVG when the artwork is suitable for vector delivery

    The best workflow is simple: test the image rather than relying only on a quality slider.

    Two WebP images exported at the same quality setting can have very different file sizes because their visual complexity is different.

    WebP Image Optimization for WordPress

    WordPress can work with WebP images, making the format practical for many blogs, service websites, and content-heavy sites.

    A good WordPress workflow starts before the image reaches the Media Library.

    Prepare the image by:

    • Choosing appropriate dimensions
    • Compressing it
    • Checking visual quality
    • Using a descriptive filename
    • Uploading the optimized file
    • Adding appropriate alt text
    • Selecting a suitable image size in the page or post

    Image optimization plugins and CDN-based tools can automate parts of this process, but automation does not eliminate the need for quality control.

    For example, a plugin can compress an image but cannot always determine whether the original source was unnecessarily large, whether the image belongs in that position, whether its alt text is appropriate, or whether the wrong generated size was inserted into a post.

    That is why image preparation should be part of a complete WordPress publishing checklist.

    Need help with website content publishing and image optimization? NextWebOps can help prepare, format, optimize, publish, and QA website content so image handling is consistent across your pages.

    WebP Optimization for Shopify and Other CMS Platforms

    The same principles apply to Shopify, Webflow, and other content management systems even when the platform handles some image transformation automatically.

    Platform-level optimization should not be an excuse to upload unnecessarily large source images.

    Before publishing, consider:

    • What dimensions the image requires
    • Whether the source is already compressed
    • How the platform creates responsive variants
    • Whether the image contains unnecessary transparent areas
    • Whether text remains readable after compression
    • Whether the published page loads the expected image version

    For teams publishing content across many pages, standardizing these decisions can save time and reduce inconsistent media libraries.

    Common WebP Image Optimization Mistakes

    Converting Oversized Images Without Resizing

    This is one of the easiest mistakes to avoid. A smaller format does not compensate for millions of unnecessary pixels.

    Using Maximum Quality for Every Image

    Maximum quality often creates larger files without providing a noticeable visual benefit at normal viewing sizes.

    Overcompressing Screenshots and Graphics

    Strong compression can make small text, interface elements, and sharp edges difficult to read. Review these images carefully.

    Assuming WebP Automatically Fixes Page Speed

    Image format is only one performance factor. Dimensions, delivery size, caching, server performance, scripts, fonts, CSS, and other page elements also influence loading performance.

    Ignoring Width and Height

    Images should be implemented so the page can reserve appropriate space for them. Consistent dimensions also help prevent visual layout problems during loading.

    Forgetting Image SEO Basics

    WebP is a file format, not an SEO strategy. Continue using relevant filenames, useful alt text, appropriate surrounding content, and proper page optimization.

    Use the broader on-page SEO checklist to review the rest of the page instead of optimizing images in isolation.

    WebP vs. JPEG vs. PNG: Which Should You Use?

    WebP is useful for many website images, but you do not need to force every asset into the same format.

    WebP: A strong general-purpose option for photographs, graphics, transparency, and efficient web delivery.

    JPEG: Still widely used for photography and older publishing workflows, although newer formats can often provide better compression.

    PNG: Useful when lossless image data or specific transparency requirements matter, although files can become large.

    SVG: Often ideal for scalable logos, icons, and simple vector graphics.

    AVIF: Another modern image format worth evaluating when it fits your browser, CMS, editing, and publishing workflow.

    The best format is the one that provides the required appearance and functionality at an efficient file size while fitting your publishing process.

    WebP Image Optimization Checklist

    Before publishing a WebP image, check the following:

    • Resize the image to appropriate dimensions
    • Choose lossy or lossless compression intentionally
    • Use a sensible quality setting
    • Inspect the exported image visually
    • Remove unnecessary metadata where appropriate
    • Use a descriptive filename
    • Add useful alt text when needed
    • Use an appropriate responsive image size
    • Review lazy-loading behavior
    • Test the final published page

    A repeatable checklist is especially valuable when multiple writers, editors, designers, or virtual assistants publish content on the same website.

    When WebP Optimization Should Be Part of Your Publishing Workflow

    Optimizing one image manually is straightforward. The challenge appears when a website publishes dozens or hundreds of images across blog posts, landing pages, products, and older content.

    Without a consistent process, media libraries can quickly accumulate:

    • Oversized originals
    • Inconsistent filenames
    • Missing alt text
    • Duplicate files
    • Poorly compressed graphics
    • Images inserted at inappropriate sizes

    WebP image optimization works best when it becomes part of content implementation rather than a separate task someone remembers occasionally.

    Contact NextWebOps for content implementation support if your team needs help with image resizing, WebP preparation, metadata, formatting, WordPress publishing, and publishing QA.

    Frequently Asked Questions About WebP Image Optimization

    What is WebP image optimization?

    WebP image optimization is the process of reducing unnecessary image data while maintaining suitable visual quality and implementing the image correctly on a website. It includes more than simply converting an image to WebP.

    What is the best quality setting for WebP images?

    There is no universal setting. Around 75 to 85 can be a useful starting range for many photographs, but the best setting depends on the image. Always compare visual quality with the resulting file size.

    Does WebP reduce image quality?

    Lossy WebP compression can remove image information, so aggressive compression can reduce visible quality. Lossless WebP preserves image data. With lossy compression, the goal is to choose a level where the visual difference is acceptable for the intended use.

    Is WebP better than JPEG?

    WebP can often deliver photographic images efficiently and also supports capabilities such as transparency. However, the best choice depends on the image, publishing environment, and workflow rather than the file extension alone.

    Is WebP better than PNG?

    WebP can be a useful alternative to PNG for many website images, including images requiring transparency. PNG may still be appropriate when a particular lossless workflow or compatibility requirement calls for it.

    Does WebP improve SEO?

    Using WebP does not automatically improve rankings. Properly optimized images can support faster pages and a better user experience, while filenames, alt text, relevant page content, and other technical factors contribute to broader image and on-page SEO.

    How do I reduce a WebP image’s file size?

    Start by reducing unnecessary dimensions. Then test a lower lossy quality setting, remove unnecessary metadata, and compare the result visually. Do not compress the file more than necessary simply to reach an arbitrary file-size target.

    Should every website image be WebP?

    No. WebP is appropriate for many website images, but SVG, PNG, JPEG, AVIF, or another format may be more appropriate depending on the asset and technical requirements.

    Build Image Optimization Into Your Content Process

    WebP is an efficient image format, but the extension alone does not make an image optimized.

    The strongest workflow combines appropriate dimensions, compression, visual QA, descriptive image information, responsive delivery, and final page testing.

    When those steps become part of normal website publishing, image optimization becomes more consistent and easier to maintain as the site grows.

    If your business or agency publishes content regularly and needs a reliable process for image preparation, formatting, SEO implementation, and publishing QA, talk to NextWebOps about website content management and publishing support.

  • On Page SEO Best Practices: 12 Ways to Improve Your Pages

    On Page SEO Best Practices: 12 Ways to Improve Your Pages

    On page SEO best practices help make individual web pages easier for search engines to understand and more useful for the people who visit them. Good on-page optimization is not about repeating a keyword a certain number of times or chasing a perfect plugin score. It is about aligning the page with search intent, structuring the content clearly, optimizing important page elements, and making the final result useful and easy to navigate.

    For businesses, marketers, and content teams, on-page SEO also needs to be practical. A recommendation is only useful if it can be implemented correctly on the live page.

    This guide covers 12 on-page SEO best practices that can improve how your pages are organized, understood, and presented in search. It also explains common mistakes to avoid and how to build a repeatable optimization workflow.

    What Is On-Page SEO?

    On-page SEO is the process of optimizing elements on an individual web page to help search engines understand the page and to improve the experience for visitors.

    These elements can include:

    • Page content
    • SEO titles
    • Meta descriptions
    • URLs
    • Heading structure
    • Keyword usage
    • Internal links
    • External references
    • Images
    • Alt text
    • Page readability
    • Calls to action

    On-page SEO is different from off-page SEO, which focuses more on signals that happen outside your website, such as backlinks and brand mentions.

    It is also different from technical SEO, which often deals with broader issues such as crawling, indexing, site architecture, rendering, canonicalization, and technical performance.

    There can be overlap between these areas, but on-page SEO is primarily focused on improving the quality and structure of individual pages.

    Why On-Page SEO Best Practices Matter

    A well-optimized page gives search engines and users clearer signals about what the page is about and why it is useful.

    Following good on-page SEO practices can help you:

    • Match content more closely to search intent
    • Make important topics easier to understand
    • Improve page structure and readability
    • Create more useful search snippets
    • Connect related content through internal links
    • Optimize images and other page elements
    • Reduce common publishing mistakes
    • Keep important pages useful over time

    None of these practices guarantees rankings on its own. On-page SEO works best when it supports genuinely useful content and a well-organized website.

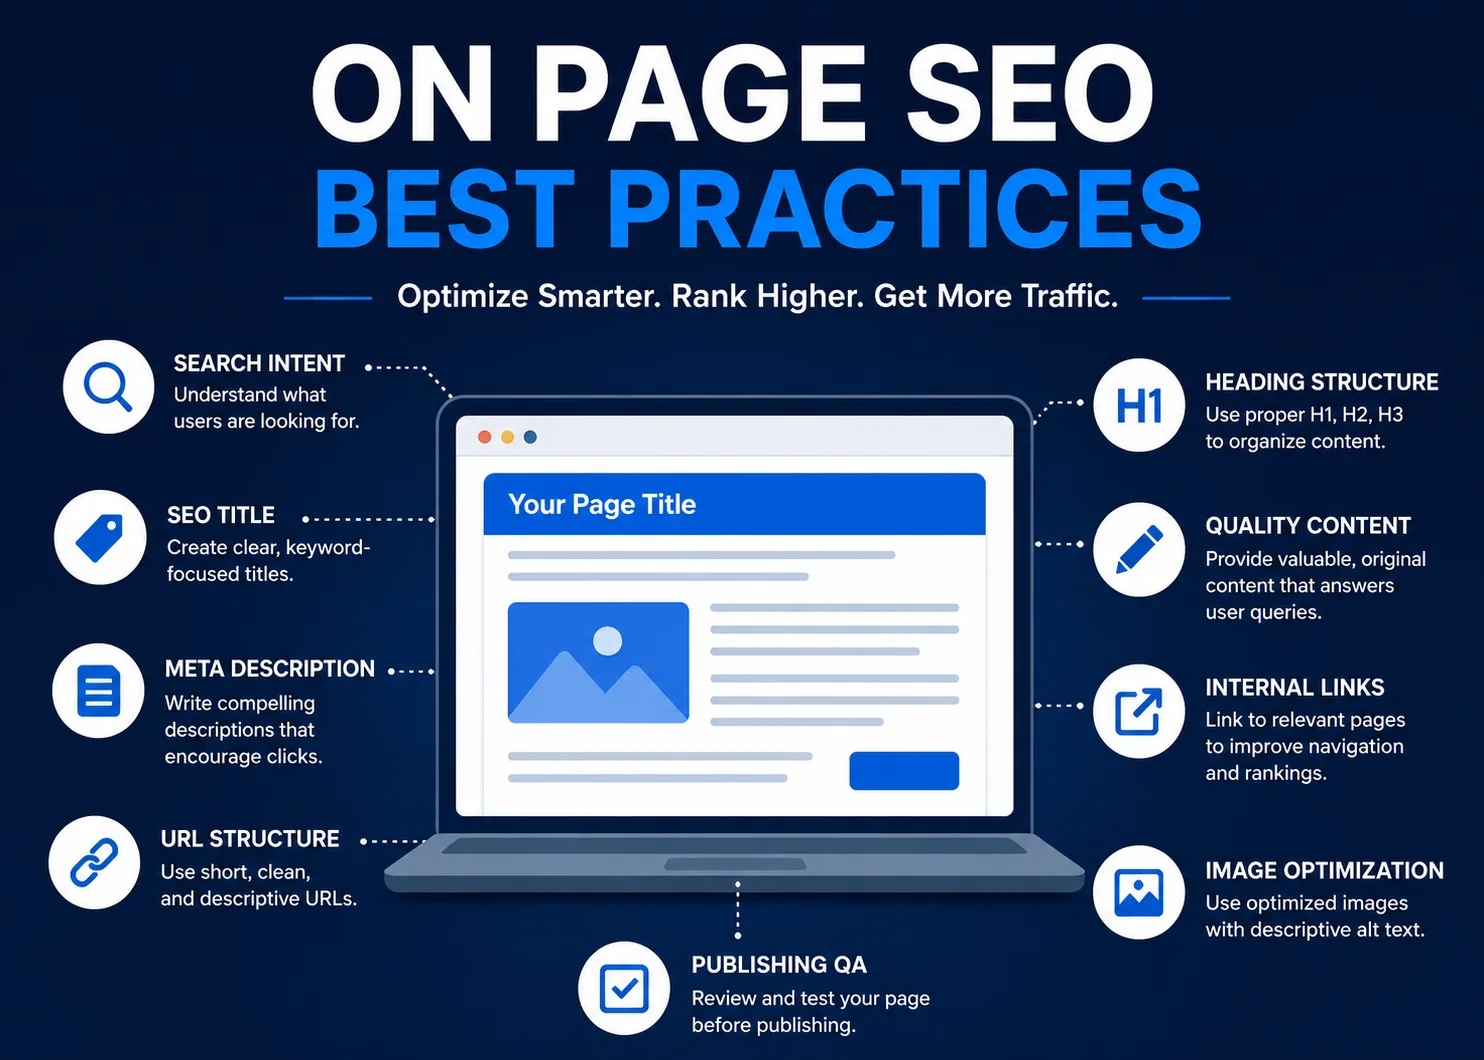
    12 On Page SEO Best Practices

    1. Match Search Intent Before Optimizing Anything

    The most important place to start is not the title tag or keyword placement. It is search intent.

    Search intent is the reason behind a query. Common intent types include:

    • Informational: the user wants to learn something.
    • Commercial: the user is comparing options or researching a purchase.
    • Transactional: the user is ready to take an action such as buying, booking, or contacting.
    • Navigational: the user wants to reach a specific website or page.

    If your page does not satisfy the dominant intent behind the keyword, optimizing headings and metadata will not fix the mismatch.

    Before writing or optimizing a page, review the search results for the target query. Look at the types of pages that rank, the angle they take, the depth of coverage, and the questions they answer.

    For example, if most top results are detailed guides, a thin service page may struggle to satisfy the same intent. If most results are product or service pages, a purely educational article may not be the best fit.

    2. Use the Primary Keyword Naturally

    Your primary keyword should help define the topic of the page, but it should not control every sentence.

    Useful places to include it naturally can include:

    • The SEO title
    • The page title
    • The opening section
    • A relevant subheading
    • The body copy
    • The URL when appropriate
    • The meta description

    Avoid using the exact phrase repeatedly just to increase keyword frequency.

    Modern content usually covers a topic using a mix of:

    • Primary keywords
    • Close variations
    • Related terms
    • Relevant entities
    • Natural language

    The goal is to make the topic clear without making the content sound robotic.

    3. Write a Strong SEO Title

    The SEO title is one of the most important page elements because it can influence how the page appears in search results and how clearly the topic is communicated.

    A useful SEO title should:

    • Describe the page accurately
    • Include the primary keyword naturally
    • Place the keyword near the beginning when it reads well
    • Give the searcher a reason to click
    • Be unique to the page
    • Avoid unnecessary words

    For NextWebOps publishing, a practical target is to keep SEO titles at 60 characters or fewer when possible.

    A weak title might be:

    SEO Guide for Website Pages and Optimization Tips

    A stronger title might be:

    On Page SEO Best Practices: 12 Tips That Work

    The second version is clearer, more specific, and closely aligned with the search query.

    4. Write a Useful Meta Description

    The meta description gives you space to summarize the page and encourage the searcher to click.

    A good meta description should:

    • Accurately summarize the content
    • Include the focus keyword naturally
    • Communicate a clear benefit
    • Avoid duplicate descriptions across multiple pages
    • Stay concise

    For NextWebOps, keep meta descriptions at 160 characters or fewer.

    Do not treat the meta description as a place to insert every related keyword. It should read like a useful summary written for a person.

    5. Keep URLs Short and Descriptive

    A clear URL helps both users and search engines understand the topic of a page.

    A good example is:

    /on-page-seo-best-practices/

    A weaker version might be:

    /blog/2026/09/05/complete-best-on-page-seo-practices-guide-tips-123/

    In most cases, URLs should:

    • Be concise
    • Describe the page topic
    • Use lowercase letters
    • Use hyphens between words
    • Avoid unnecessary parameters or filler words
    • Include the primary keyword when it fits naturally

    Do not change an established URL casually. Changing published URLs can create unnecessary redirect and indexing work if there is no clear benefit.

    6. Use a Logical Heading Structure

    Headings help organize the content for both readers and search engines.

    A typical structure includes:

    • One main page title or H1
    • H2 headings for major sections
    • H3 headings for supporting points

    Headings should describe the content that follows them. They should not be selected only because of how large or bold they look in the editor.

    For example:

    H2: On Page SEO Best Practices

    H3: Write a Strong SEO Title

    H3: Optimize Your Meta Description

    This creates a clear hierarchy and makes long content easier to scan.

    7. Create Content That Fully Answers the Query

    On-page SEO is not only about optimizing HTML elements. The content itself has to be useful.

    Strong content should:

    • Answer the main question clearly
    • Cover important supporting questions
    • Use practical examples
    • Avoid unnecessary filler
    • Explain concepts at the right depth
    • Stay focused on the searcher’s needs

    Longer content is not automatically better. A 2,000-word article that repeats itself is less useful than a shorter page that answers the query completely.

    Likewise, adding sections simply because competitors have them does not make your page stronger. The better approach is to understand what searchers expect and then create something clearer, more practical, or more complete.

    8. Add Relevant Internal Links

    Internal links connect related pages on the same website.

    They can help:

    • Users discover additional information
    • Search engines understand relationships between pages
    • Distribute attention toward important content
    • Reduce isolated pages
    • Build stronger topic clusters

    Use descriptive anchor text that explains where the link leads.

    For example, instead of:

    click here

    use:

    internal linking best practices

    For a deeper look at this process, see the NextWebOps guide to internal linking best practices.

    Internal links should be relevant. Do not add unrelated links just to increase the total number of links on a page.

    9. Optimize Images

    Images should support the content without adding unnecessary page weight.

    A practical image optimization process includes:

    • Resizing images before upload
    • Compressing files
    • Using an appropriate format
    • Using descriptive filenames
    • Adding useful alt text where needed
    • Checking mobile presentation

    Modern formats such as WebP can also help reduce file size in many publishing workflows.

    For broader guidance, see the NextWebOps guide to image SEO.

    If you are working specifically in WordPress, the WordPress image optimization guide covers resizing, compression, formats, alt text, and publishing workflow in more detail.

    10. Improve Readability and Page Structure

    A page can be technically optimized and still be difficult to read.

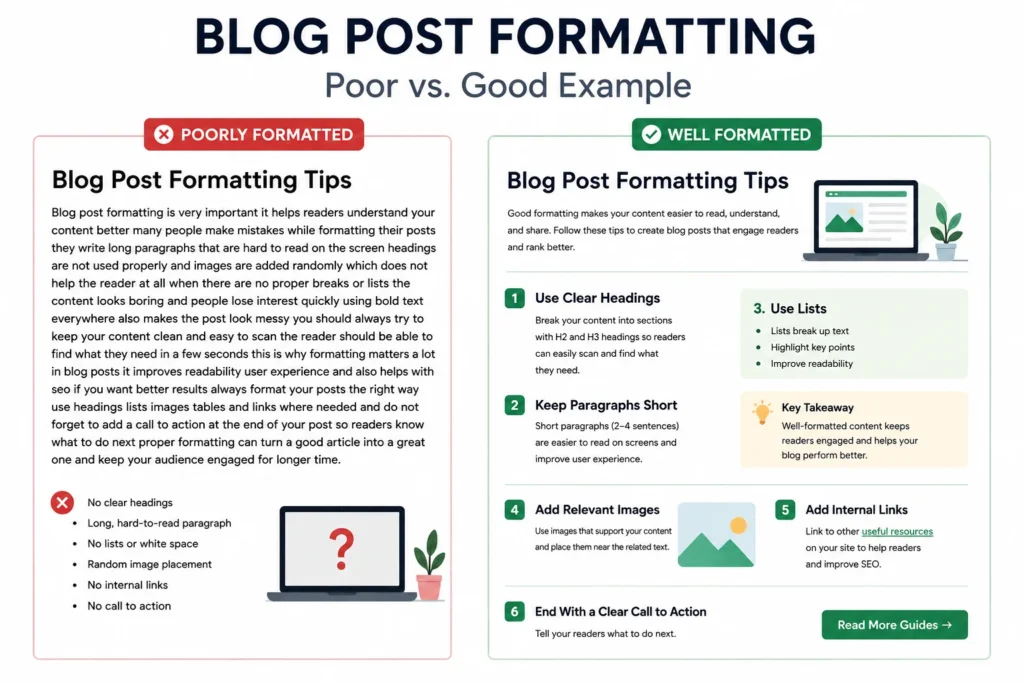
    Use formatting that helps visitors move through the content easily.

    That may include:

    • Short paragraphs
    • Clear headings
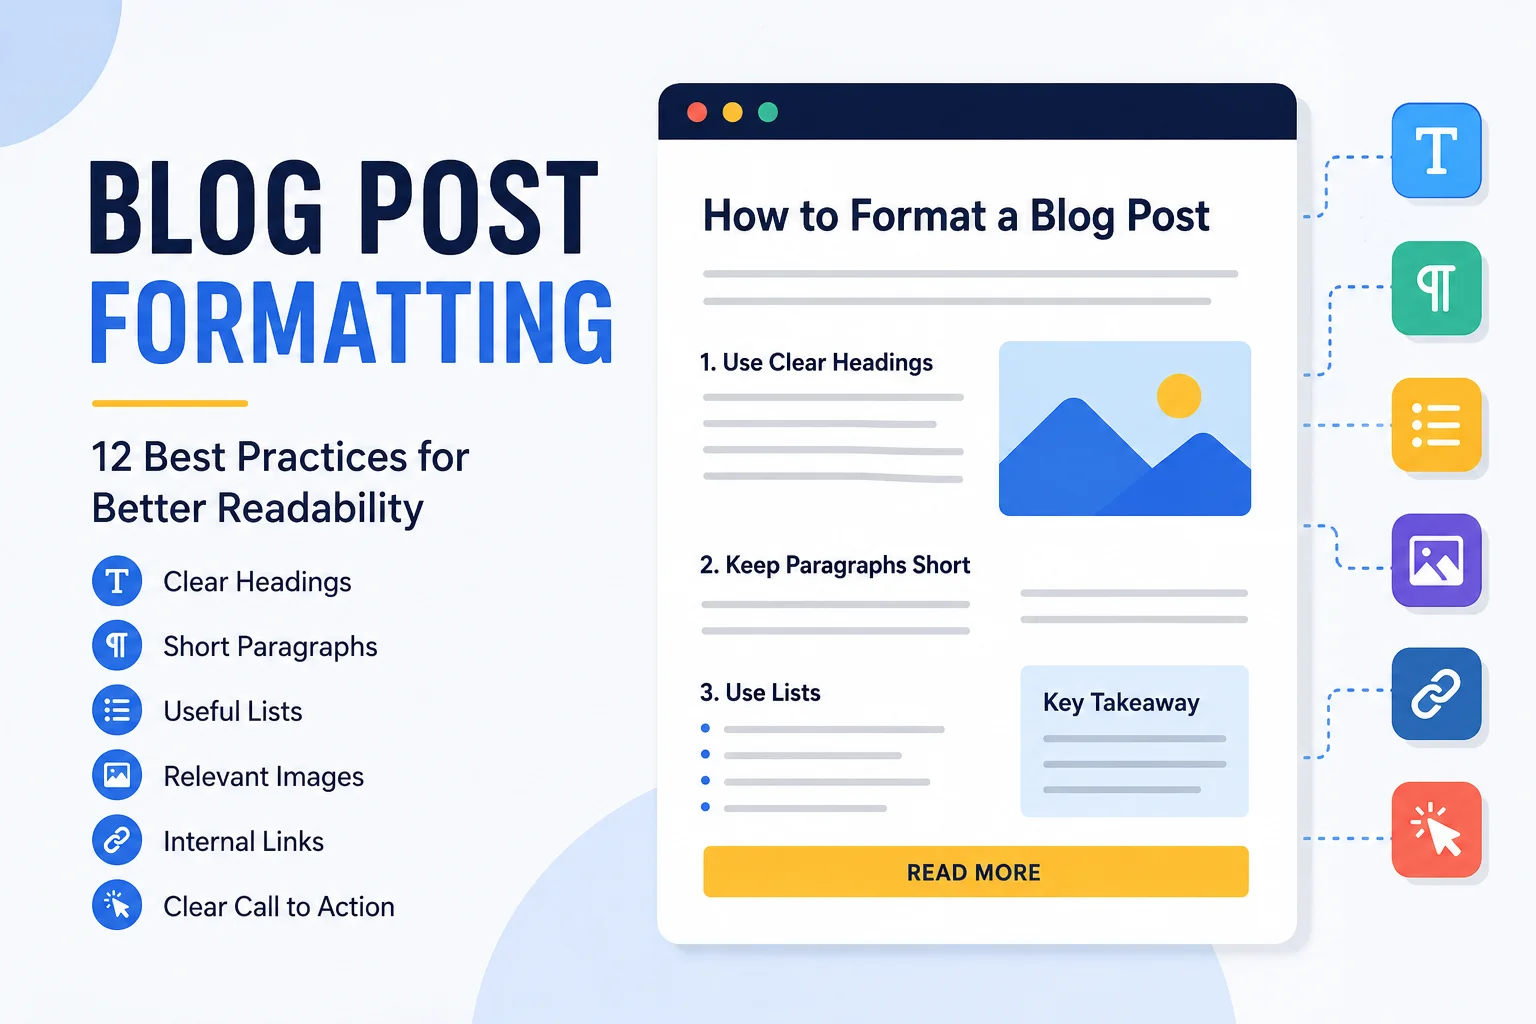
    • Bulleted lists
    • Numbered steps
    • Tables when they genuinely help
    • Bold text for important points
    • Useful examples
    • Clear calls to action

    Do not format content simply to make the page look busy. Good formatting should make information easier to understand.

    11. Link to Useful External Sources When Appropriate

    External links can strengthen a page when they point readers toward useful primary or authoritative sources.

    Good reasons to use an external link include:

    • Supporting a factual claim
    • Referencing official documentation
    • Providing additional technical detail
    • Pointing to original research
    • Helping the reader verify information

    Do not add external links simply because an SEO tool suggests that every page should contain a certain number.

    Relevance and usefulness matter more than hitting an arbitrary target.

    12. Review and Update Important Pages

    On-page SEO should not be treated as a one-time task.

    Over time, pages may develop problems such as:

    • Outdated information
    • Broken external links
    • Old screenshots
    • Weak internal linking
    • Outdated metadata
    • Missing references to newer content
    • Changes in search intent

    Important pages should be reviewed periodically.

    When updating an older article, look for opportunities to improve the content itself rather than changing a few words just to alter the publication date.

    The NextWebOps guide on how to update old blog posts for SEO covers this process in more detail.

    On-Page SEO Practices to Avoid

    Some optimization tactics create more problems than they solve.

    Keyword Stuffing

    Repeating the same keyword unnaturally can make content harder to read.

    Use keywords where they help clarify the topic, then write naturally.

    Writing for SEO Tools Instead of Readers

    SEO plugins can be useful for identifying missing fields or basic optimization issues, but a perfect score is not the goal.

    Trying to satisfy every suggestion can lead to:

    • Awkward keyword repetition
    • Forced headings
    • Unnecessary links
    • Overly long titles
    • Content that sounds mechanical

    Use tools as guidance, not as a substitute for editorial judgment.

    Forcing the Exact Keyword Into Every Heading

    Not every H2 or H3 needs the exact focus keyword.

    Use descriptive subheadings that help readers understand the structure of the article.

    Creating Long Titles to Fit More Keywords

    An SEO title should be clear and useful, not a container for every keyword variation.

    Adding Unrelated Internal Links

    Internal linking should connect useful related content. Random links can distract readers and weaken the logic of your site structure.

    Using Headings Only for Styling

    Do not use H2 or H3 tags simply because you want larger text. Headings should represent content hierarchy.

    Publishing Thin Content

    A page that barely answers the query is unlikely to become more useful because its title tag and meta description are optimized.

    Ignoring Search Intent

    Intent should guide the entire page. If the searcher wants a tutorial, do not give them a vague sales page.

    Optimizing Once and Never Revisiting the Page

    Important pages should evolve when information, internal-link opportunities, products, services, or search expectations change.

    On-Page SEO Best Practices vs. Technical SEO

    On-page SEO and technical SEO support each other, but they solve different types of problems.

    On-page SEO commonly includes:

    • Content optimization
    • SEO titles
    • Meta descriptions
    • URLs
    • Headings
    • Internal links
    • Image optimization
    • Content structure

    Technical SEO can include:

    • Crawling and indexing
    • Site architecture
    • Canonical implementation
    • Rendering
    • Structured technical issues
    • Sitewide performance
    • Sitemaps and robots directives

    A page can have excellent content and still struggle if major technical problems prevent search engines from crawling or indexing it properly.

    Likewise, a technically perfect page still needs useful content and clear on-page optimization.

    A Practical On-Page SEO Workflow

    A repeatable workflow helps teams turn SEO recommendations into consistent publishing standards.

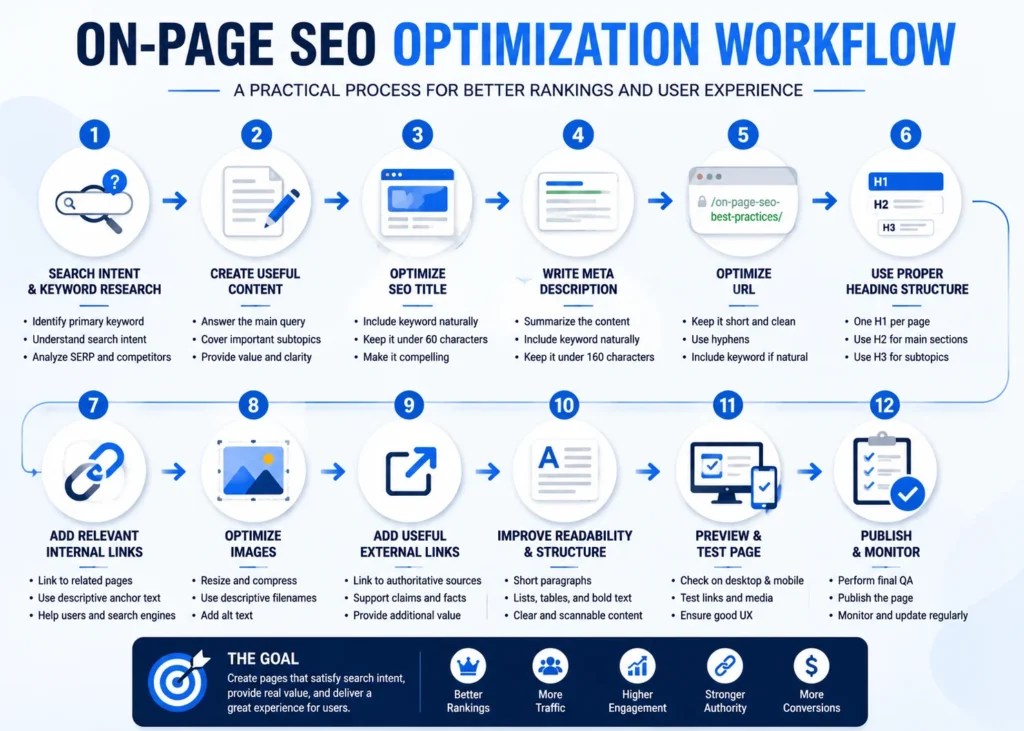
    On-page SEO workflow covering search intent, content, titles, links, images, QA, and publishing

    1. Confirm the primary keyword and intent. Make sure the topic matches what the searcher expects.
    2. Review the SERP. Understand common page types, subtopics, and content depth.
    3. Create useful content. Answer the query clearly and completely.
    4. Optimize the SEO title. Include the primary keyword naturally and keep it concise.
    5. Set a clean URL. Use a short, descriptive slug.
    6. Write the meta description. Summarize the page and communicate a clear benefit.
    7. Check heading structure. Use logical H2 and H3 hierarchy.
    8. Add internal links. Connect relevant supporting pages.
    9. Optimize images. Resize, compress, rename, and add appropriate alt text.
    10. Add useful external sources. Support claims where necessary.
    11. Preview the page. Review desktop and mobile presentation.
    12. Complete publishing QA. Check links, metadata, headings, images, and layout.
    13. Publish. Make sure the final URL and page settings are correct.
    14. Monitor and update. Improve important pages as new opportunities appear.

    If you prefer a task-based implementation process, use the NextWebOps on-page SEO checklist before publishing.

    For existing pages where you need to identify problems first, an on-page SEO audit is the better starting point.

    How NextWebOps Supports On-Page SEO Implementation

    SEO recommendations create value only when they are implemented correctly on the live website.

    NextWebOps supports businesses, agencies, and marketing teams with hands-on content implementation tasks such as:

    • SEO title implementation
    • Meta description setup
    • Heading formatting
    • Internal linking
    • Image optimization
    • Content formatting
    • WordPress publishing
    • Shopify publishing
    • Webflow publishing
    • Content updates
    • Publishing QA

    This can be especially useful when strategists, writers, or SEO teams already know what needs to be done but do not want to spend additional time implementing every recommendation manually.

    If your team needs help applying on-page SEO recommendations across WordPress, Shopify, or Webflow, contact NextWebOps to discuss your content implementation workflow.

    Frequently Asked Questions About On-Page SEO Best Practices

    What are the most important on-page SEO best practices?

    The most important practices include matching search intent, creating useful content, optimizing titles and meta descriptions, using clear URLs and headings, adding relevant internal links, optimizing images, and reviewing important pages over time.

    Where should keywords be placed for on-page SEO?

    The primary keyword can appear naturally in the SEO title, page title, introduction, a relevant subheading, body copy, URL, and meta description. Avoid forcing it into every section or repeating it excessively.

    How long should an SEO title be?

    A practical target is around 60 characters or fewer when possible. Clarity and relevance matter more than hitting an exact number.

    How long should a meta description be?

    A practical publishing target is 160 characters or fewer. It should summarize the page accurately and give searchers a reason to click.

    Does internal linking help on-page SEO?

    Internal links help users discover related content and help search engines understand relationships between pages. Use relevant links and descriptive anchor text rather than adding links randomly.

    How often should on-page SEO be updated?

    There is no fixed schedule for every page. Review important pages when information changes, rankings decline, search intent shifts, new internal-link opportunities appear, or the page becomes outdated.

    Focus on Useful Pages, Not Optimization Tricks

    The strongest on page SEO best practices are not complicated tricks. They are a collection of practical decisions that make a page clearer, more useful, and easier to understand.

    Start with search intent. Create content that genuinely answers the query. Use descriptive titles, URLs, and headings. Add relevant internal links. Optimize images. Keep the page readable. Then review the final result before publishing.

    When those practices become part of a consistent publishing process, on-page SEO becomes less about fixing mistakes after publication and more about producing better pages from the beginning.

  • WordPress Image Optimization: A Practical Guide for Faster Websites

    WordPress Image Optimization: A Practical Guide for Faster Websites

    WordPress image optimization is the process of reducing unnecessary image weight while keeping images clear, useful, and properly formatted for your website. It includes choosing appropriate dimensions, compressing files, selecting the right format, using descriptive filenames, adding useful alt text, and checking how images load and display after publication.

    Images are often some of the largest files on a web page. Uploading oversized photos directly from a camera, design tool, or stock library can add unnecessary weight to a WordPress site. At the same time, compressing images too aggressively can leave them blurry and unprofessional.

    The goal is not to make every image as small as possible. The goal is to find a practical balance between visual quality, file size, website performance, accessibility, and SEO.

    This guide explains how businesses, marketers, and content teams can build a repeatable WordPress image optimization workflow for both new and existing content.

    What Is WordPress Image Optimization?

    WordPress image optimization involves preparing and delivering images in a way that avoids unnecessary file size while maintaining acceptable visual quality.

    A complete optimization process can include:

    • Choosing appropriate image dimensions
    • Selecting the right file format
    • Compressing image files
    • Using WebP or AVIF when appropriate
    • Renaming image files before upload
    • Writing descriptive alt text
    • Using suitable WordPress image sizes
    • Taking advantage of responsive images
    • Using lazy loading appropriately
    • Reviewing images during publishing QA

    This is why image optimization should not be treated as simply installing a plugin and assuming the job is finished.

    Plugins can automate useful tasks, but they cannot always determine whether an image was uploaded at unnecessarily large dimensions, whether its filename is meaningful, whether the alt text accurately describes it, or whether the image is actually useful to the page.

    Why WordPress Image Optimization Matters

    Faster Page Loading

    Large image files increase the amount of data a browser must download before a page is fully displayed.

    For example, if a blog post includes several images that are each more than a megabyte, those images can quickly become a major portion of the page’s total weight.

    Reducing unnecessary image size can make pages lighter and improve the experience for visitors, particularly those using mobile devices or slower connections.

    Better User Experience

    Visitors expect website content to appear quickly and display properly across different screen sizes.

    An image that takes too long to load can interrupt reading. An image uploaded at the wrong dimensions may also appear stretched, cropped awkwardly, or unnecessarily large.

    Image optimization therefore includes both performance and presentation.

    Better SEO Implementation

    Image optimization supports SEO in several ways. Descriptive filenames and useful alt text provide context, while efficient image delivery contributes to a better-performing page.

    However, simply compressing an image does not automatically produce higher search rankings. Image optimization works best as part of a broader on-page optimization process that includes useful content, logical headings, metadata, internal linking, and a good user experience.

    For the broader search optimization side of the topic, see the NextWebOps guide to image SEO best practices.

    Lower Storage and Bandwidth Requirements

    Smaller files can also reduce unnecessary storage and bandwidth use.

    This may not matter much on a small website with only a few images, but the difference becomes more noticeable when a WordPress Media Library contains hundreds or thousands of uploads.

    10 WordPress Image Optimization Best Practices

    1. Resize Images Before Uploading

    One of the most useful WordPress image optimization habits is also one of the simplest: do not upload images much larger than you actually need.

    Imagine that your blog content displays an image at approximately 900 pixels wide. Uploading a 5000-pixel-wide photo usually provides little practical benefit for that placement, yet the source file may be significantly larger.

    Before uploading, determine roughly how large the image needs to appear on the site and export it at suitable dimensions.

    Remember that image dimensions and image file size are different:

    • Dimensions describe width and height in pixels.
    • File size describes how much storage the file requires, such as KB or MB.

    A properly optimized workflow pays attention to both.

    2. Choose the Right Image Format

    Different image formats are useful for different situations.

    Common options include:

    • JPEG: commonly suitable for photographs and images with many colors.
    • PNG: useful when transparency is required or for certain graphics, but files can be larger than necessary for photographs.
    • WebP: a modern format that can provide good image quality at relatively efficient file sizes.
    • AVIF: another modern format capable of strong compression, depending on your workflow and site setup.
    • SVG: useful for certain vector graphics such as icons and logos when handled securely and appropriately.

    There is no requirement to convert every image to the same format. The goal is to choose the format that suits the image and publishing environment.

    3. Compress Images Without Destroying Quality

    Compression reduces the amount of data stored in an image file.

    Two concepts you may encounter are:

    • Lossless compression: aims to reduce file size without discarding image information.
    • Lossy compression: can achieve greater file-size reductions by removing some information from the image.

    For website publishing, some level of lossy compression can often produce a useful balance between appearance and file size. The exact settings depend on the image.

    Do not optimize based only on the smallest possible number. A 40 KB image is not an improvement if text inside the graphic is unreadable or the photo looks visibly degraded.

    After compression, inspect the image at the size visitors will actually see it.

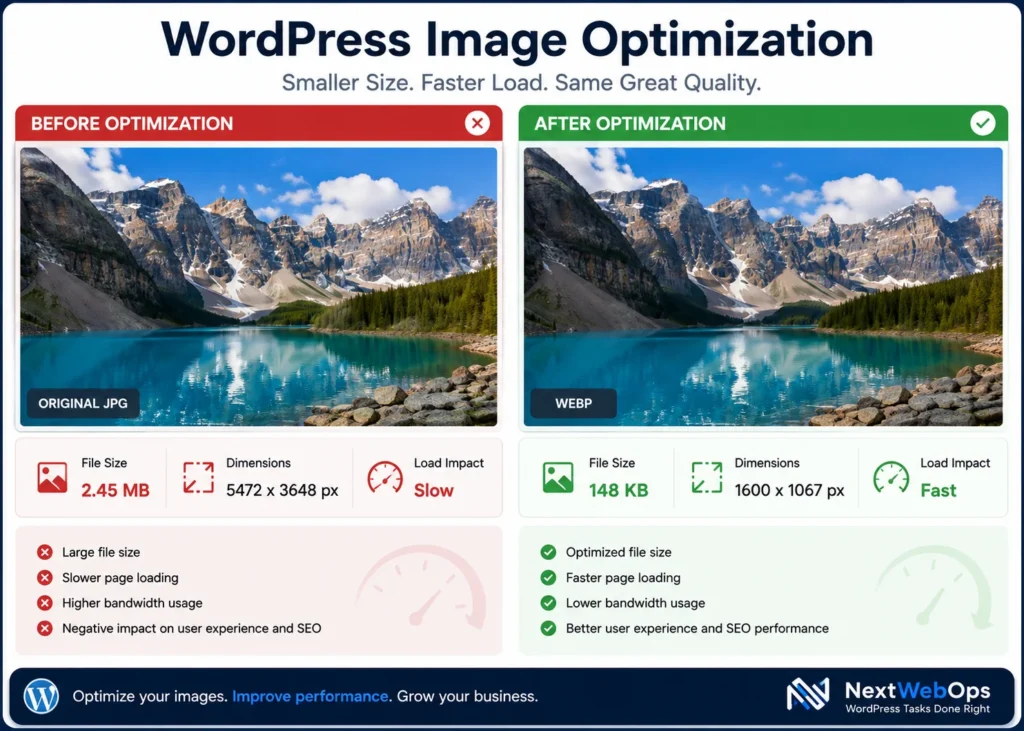
    WordPress image optimization before and after comparison showing reduced file size and faster loading

    4. Use WebP or AVIF When Appropriate

    Modern formats such as WebP and AVIF can reduce image file sizes while maintaining useful visual quality.

    For many WordPress publishing workflows, WebP is a practical option because it works well for common website images and is supported by many optimization tools.

    AVIF can also produce efficient files, but whether it belongs in your workflow depends on your WordPress setup, optimization tools, browser delivery method, and publishing process.

    The important point is to avoid using a format simply because it is newer. Compare file size, visual quality, compatibility, and how the site actually serves the image.

    5. Rename Image Files Before Uploading

    A camera or design application may generate filenames such as:

    IMG_8472.jpg

    That filename gives little indication of what the image contains.

    A descriptive filename such as:

    wordpress-image-optimization-workflow.webp

    is easier to recognize in the WordPress Media Library and gives the file clearer context.

    Keep filenames:

    • Descriptive
    • Concise
    • Lowercase
    • Separated with hyphens
    • Relevant to the actual image

    Avoid forcing keywords into unrelated filenames just for SEO.

    6. Write Useful Alt Text

    Alternative text, or alt text, helps communicate the purpose or content of an image when the image cannot be seen and is particularly important for accessibility.

    Good alt text should usually describe what is relevant about the image within the context of the page.

    Avoid alt text such as:

    wordpress image optimization wordpress image optimization SEO best WordPress images

    That does not help the reader and is simply keyword stuffing.

    A more useful example for a workflow graphic might be:

    WordPress image optimization workflow showing resizing, compression, WebP conversion, and publishing

    Not every decorative image requires descriptive alt text. Alt text decisions should be based on the purpose of the image rather than a desire to insert more keywords.

    7. Use Responsive Images Correctly

    Modern WordPress sites can generate multiple image sizes and provide browsers with options so an appropriate image can be selected for the visitor’s screen.

    This is useful, but it does not mean source-image preparation should be ignored.

    If a publisher uploads an unnecessarily huge original file every time, WordPress still has to store and process that asset. A cleaner workflow starts with an appropriately prepared source image and then lets WordPress handle the responsive variations required by the theme or layout.

    8. Use Lazy Loading Where Appropriate

    Lazy loading delays the loading of certain images until they are needed, such as when a visitor scrolls farther down a page.

    This can reduce the amount of content that needs to load immediately.

    However, lazy loading should not automatically be applied to every image without considering its location.

    A prominent image near the top of the page may need to load immediately. Delaying an important above-the-fold image can work against the performance improvement you are trying to achieve.

    Use lazy loading as part of a broader performance strategy rather than as a universal rule.

    9. Optimize Existing WordPress Images

    Image optimization is not limited to new uploads.

    Older WordPress websites may already contain years of unoptimized media. Common problems include:

    • Very large original photographs
    • PNG files that could have used a more efficient format
    • Missing alt text
    • Generic filenames
    • Duplicate uploads
    • Old featured images that are much larger than necessary

    Start by identifying the highest-impact images rather than trying to replace every Media Library item immediately.

    Priority pages may include:

    • Homepage
    • Important service pages
    • High-traffic blog posts
    • Landing pages
    • Pages with many large images

    Image optimization plugins can also provide bulk-compression or next-generation format conversion features for existing files.

    Before running large-scale changes, make sure you understand how the plugin handles originals, backups, replacement files, and image URLs. After bulk optimization, review important pages to confirm that images still display correctly.

    10. Check Images During Publishing QA

    The final image optimization step should happen before publication.

    Check:

    • Is the correct image being used?
    • Are the dimensions appropriate?
    • Does the image still look sharp enough?
    • Is the file format suitable?
    • Is the filename descriptive?
    • Does the image need alt text?
    • Does it display properly on mobile?
    • Does the featured image use the correct dimensions?
    • Are linked images pointing to the correct destination?
    • Does the page remain visually stable while images load?

    A repeatable WordPress publishing checklist can help make these checks part of the normal publishing process instead of an occasional cleanup task.

    WordPress Image Optimization Plugins: Do You Need One?

    A WordPress image optimization plugin can automate many useful tasks.

    Depending on the plugin, features may include:

    • Automatic image compression
    • Bulk optimization
    • Automatic resizing
    • WebP conversion
    • AVIF conversion
    • Lazy loading
    • Image CDN delivery
    • Optimization of existing Media Library files

    Common image optimization tools include Imagify, ShortPixel, Smush, EWWW Image Optimizer, and Optimole.

    There is no universally best plugin for every WordPress website. The right choice depends on factors such as:

    • Number of images
    • Monthly upload volume
    • Whether you need bulk optimization
    • WebP or AVIF requirements
    • Storage and CDN preferences
    • Budget
    • Existing caching or performance tools
    • How much control you want over image quality

    Do not install multiple plugins that perform overlapping image-processing tasks without understanding how they interact.

    Manual Image Optimization vs. WordPress Plugins

    Manual optimization and plugin automation are not necessarily competing approaches.

    When Manual Optimization Works Well

    Preparing images before upload is useful when:

    • You control the publishing workflow.
    • You know the required image dimensions.
    • Publishing volume is manageable.
    • You want control over image quality.
    • You want clean filenames before files enter the Media Library.

    Manual preparation can prevent unnecessarily large source images from entering WordPress in the first place.

    When Plugin Automation Helps

    Plugins become particularly useful when:

    • Multiple contributors upload images.
    • You publish large amounts of content.
    • Your Media Library already contains unoptimized files.
    • You want automatic WebP or AVIF generation.
    • You need bulk compression.
    • You want an additional optimization layer after upload.

    The Practical Combination

    For many websites, the strongest workflow is:

    Prepare images correctly before upload, then use WordPress automation as a safety net.

    For example, a publisher can resize an image, select an appropriate format, give it a descriptive filename, and compress it before upload. The site’s image optimization system can then perform additional compression or create alternate formats if needed.

    This approach avoids asking a plugin to compensate for every publishing mistake.

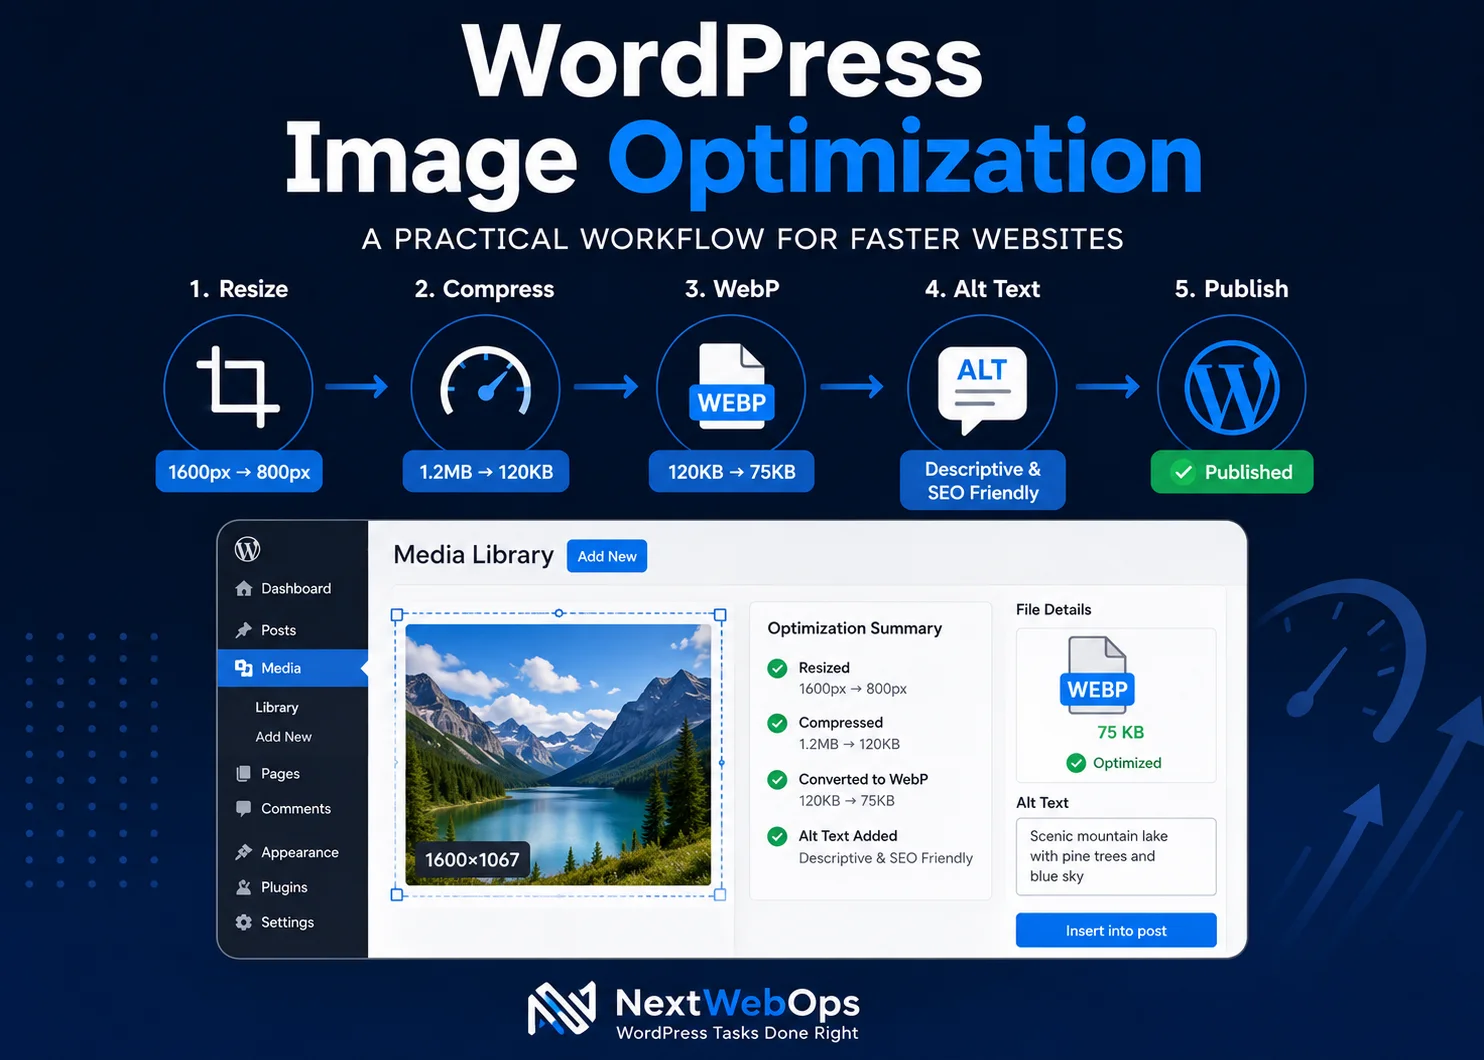
    A Simple WordPress Image Optimization Workflow

    A documented process helps businesses and agencies optimize images consistently, even when several people publish content.

    1. Choose the image. Confirm that it adds value to the page.
    2. Crop and resize it. Prepare dimensions appropriate for the intended placement.
    3. Choose the format. Select JPEG, PNG, WebP, AVIF, or another appropriate format.
    4. Compress the image. Reduce unnecessary file size while preserving acceptable visual quality.
    5. Rename the file. Use a descriptive filename before uploading it.
    6. Upload it to WordPress. Add the prepared image to the Media Library.
    7. Add appropriate alt text. Describe the image when needed for accessibility and context.
    8. Insert the correct image size. Avoid displaying unnecessarily large versions.
    9. Preview the page. Review both desktop and mobile presentation.
    10. Complete publishing QA. Check visual quality, placement, links, metadata, and loading behavior.

    Making image optimization part of a broader on-page SEO checklist also helps prevent images from being treated as a separate task after the rest of the page has already been published.

    Common WordPress Image Optimization Mistakes

    Uploading Full-Resolution Images Directly

    A 4000- or 5000-pixel-wide image may be useful for print or detailed editing, but it is often unnecessary for a standard blog article.

    Using PNG for Every Image

    PNG is useful in specific situations, but using it automatically for large photographs can result in unnecessarily large files.

    Compressing Images Too Aggressively

    Optimization should not make your website look worse. Always check visual quality after compression.

    Ignoring Modern Formats

    WebP and AVIF can be useful options when they fit your site’s workflow and delivery setup.

    Keyword-Stuffing Alt Text

    Alt text should describe the image and its purpose. It is not a field for repeating every target keyword.

    Leaving Generic Filenames

    Files such as IMG_1837.jpg are harder to identify later and provide little descriptive context.

    Assuming a Plugin Fixes Everything

    An image compression plugin cannot decide whether the image is useful, whether its filename makes sense, whether its alt text is appropriate, or whether it is displayed correctly within the article.

    Skipping Mobile QA

    An image that looks good on a desktop screen may be awkwardly cropped, oversized, or difficult to read on a phone.

    How WordPress Image Optimization Fits Into SEO

    WordPress image optimization is one part of a larger website optimization process.

    From a publishing perspective, the main priorities are to make images:

    • Appropriately sized
    • Efficiently compressed
    • Delivered in a suitable format
    • Descriptively named
    • Accessible when alt text is needed
    • Relevant to the surrounding content
    • Properly displayed across devices

    Image optimization should then work alongside other on-page elements such as headings, metadata, internal links, useful content, and page structure.

    If you are reviewing the broader optimization of a page rather than images alone, an on-page SEO audit can help identify issues across the complete page.

    How NextWebOps Supports WordPress Image Optimization

    For teams publishing content regularly, image preparation can become another repetitive step between receiving finished content and getting a polished page live.

    NextWebOps supports WordPress publishing workflows with tasks such as:

    • Image resizing
    • Image compression
    • Format preparation
    • Descriptive filenames
    • Alt text implementation
    • Featured image preparation
    • WordPress media uploads
    • Content formatting
    • Internal linking
    • On-page SEO implementation
    • Publishing QA

    This allows writers, marketers, and agencies to focus more on creating and approving content while the implementation work is handled consistently.

    If you have WordPress content ready to publish and need help preparing images, formatting pages, implementing SEO elements, or completing publishing QA, contact NextWebOps to discuss your publishing workflow.

    Frequently Asked Questions About WordPress Image Optimization

    How do I optimize images in WordPress?

    Start by resizing images to appropriate dimensions, selecting a suitable file format, compressing the files, using descriptive filenames, adding useful alt text where needed, and checking the final page. A WordPress optimization plugin can automate additional tasks such as compression, WebP or AVIF conversion, and bulk optimization.

    What is the best image format for WordPress?

    There is no single best format for every image. JPEG can work well for photographs, PNG is useful when transparency is required, and modern formats such as WebP and AVIF can provide efficient compression. Choose according to image type, visual quality, file size, and your website’s delivery setup.

    Should I use WebP images in WordPress?

    WebP is a practical option for many WordPress websites because it can reduce file size while preserving useful visual quality. Whether you convert files manually or through a plugin depends on your publishing workflow.

    Should I compress images before uploading them to WordPress?

    In many cases, yes. Preparing appropriately sized and compressed images before upload prevents unnecessarily large source files from entering the Media Library. An optimization plugin can then provide an additional automation layer if required.

    Do I need a WordPress image optimization plugin?

    Not necessarily. A low-volume site with a disciplined manual workflow may be able to prepare images before upload. Plugins become more useful when publishing volume is high, several people upload images, or an existing Media Library needs bulk optimization.

    How do I optimize images already uploaded to WordPress?

    Start by identifying oversized or high-impact images on important pages. Depending on your setup, you can replace large files manually or use an image optimization plugin with bulk-compression and next-generation format features. Review important pages after making large-scale changes.

    Build Image Optimization Into Your Publishing Process

    The most reliable approach to WordPress image optimization is to treat it as part of publishing rather than as an emergency performance fix.

    Resize images before upload. Choose formats intentionally. Compress files without sacrificing useful quality. Use clear filenames and appropriate alt text. Take advantage of WordPress automation where it helps, but do not expect a plugin to replace good publishing decisions.

    When these steps become part of a repeatable workflow, it becomes much easier to maintain a WordPress website with cleaner media, lighter pages, more consistent content, and fewer image-related publishing issues.

  • WordPress Content Management: A Practical Guide for Businesses

    WordPress Content Management: A Practical Guide for Businesses

    WordPress content management is more than adding text to a website and clicking Publish. For businesses, agencies, and marketing teams, it includes organizing content, formatting pages, managing images, adding internal links, configuring metadata, updating older content, and checking every page before it goes live.

    WordPress makes it relatively easy to create and edit website content, but maintaining a consistent publishing process becomes more important as your website grows. Without clear standards, websites can quickly accumulate inconsistent formatting, oversized images, weak internal linking, outdated information, missing metadata, and publishing errors.

    This guide explains what WordPress content management involves, what you can manage inside WordPress, and the practical processes businesses can use to keep their websites organized, optimized, and ready for visitors.

    What Is WordPress Content Management?

    WordPress content management is the ongoing process of creating, organizing, editing, optimizing, publishing, and maintaining content on a WordPress website.

    That content can include:

    • Blog posts
    • Service pages
    • Landing pages
    • Images and other media
    • Categories and tags
    • Internal links
    • SEO titles and meta descriptions
    • Calls to action
    • Navigation content
    • Older pages that need updating

    WordPress provides the content management system, but the quality of the final website still depends on the workflow used by the people managing it.

    For example, two businesses can use the same WordPress setup and still produce very different results. One may follow a standardized process for formatting, image optimization, SEO, internal links, and publishing QA. Another may simply paste content into WordPress and publish it without reviewing the page.

    The technology is the same. The content management process is not.

    WordPress.com vs. WordPress.org

    WordPress.com and WordPress.org both use WordPress, but they are different approaches to running a website.

    WordPress.com provides a hosted service with various plans and built-in website management features. WordPress.org provides the open-source WordPress software that can be installed with a hosting provider.

    For content teams, many of the day-to-day publishing concepts are similar: creating posts and pages, uploading images, organizing content, editing text, managing users, and publishing updates.

    What Can You Manage in WordPress?

    A WordPress website usually contains many different types of content. Good content management means handling each type consistently instead of treating publishing as a simple copy-and-paste task.

    Posts and Pages

    Posts are commonly used for blog articles, news, updates, and other chronological content. Pages are generally used for more permanent content such as service pages, About pages, landing pages, and contact information. The official WordPress documentation on pages explains how pages work and how they differ from posts.

    Businesses should define when each content type should be used. A consistent structure makes the site easier to maintain and reduces confusion for future editors.

    Images and Media

    Images can improve a page, but poorly managed media can create unnecessary problems.

    Before uploading an image to WordPress, it is usually better to resize and compress it first. Descriptive filenames and appropriate alt text can also make the media library easier to manage while supporting accessibility and image SEO.

    For a deeper look at this process, see the NextWebOps guide to image SEO best practices.

    Categories and Tags

    Categories and tags help organize WordPress content, especially on larger blogs. WordPress refers to these as taxonomies used to group related content. You can learn more in the official WordPress taxonomy documentation.

    The problem is that teams often create new categories or tags without checking what already exists. Over time, this can lead to duplicate, overlapping, or nearly empty archive pages.

    A controlled taxonomy is easier for users, editors, and search engines to understand.

    Internal Links

    Internal links connect related pages on the same website. They help visitors discover additional information and help search engines understand relationships between pages.

    Internal linking should be part of the publishing workflow rather than something added randomly months later.

    Use descriptive anchor text and link only where another page genuinely helps the reader. The NextWebOps guide to internal linking best practices explains how to approach this more systematically.

    Metadata and SEO Settings

    Depending on the SEO plugin and website setup, content editors may also manage:

    • SEO titles
    • Meta descriptions
    • Canonical URLs
    • Social sharing metadata
    • Schema settings
    • Indexing controls

    These fields should be checked before publishing because they influence how pages can appear in search results and how search engines interpret them.

    10 WordPress Content Management Best Practices

    A reliable WordPress content management process helps reduce publishing mistakes and keeps the website consistent as more content is added.

    1. Create a Consistent Publishing Workflow

    Do not rely on every editor remembering every task.

    Define a publishing workflow that can be followed each time new content is added. A typical process may include:

    1. Receive or approve the content.
    2. Create the WordPress draft.
    3. Apply the correct heading structure.
    4. Format paragraphs, lists, tables, and other elements.
    5. Prepare and upload images.
    6. Add relevant internal links.
    7. Configure metadata.
    8. Preview the page.
    9. Complete publishing QA.
    10. Publish or schedule the content.

    A documented process becomes especially useful when several writers, editors, SEO specialists, or external partners work on the same site.

    2. Format Content for Readability

    Good content can become difficult to read when it is poorly formatted.

    Large blocks of text, inconsistent headings, excessive bolding, and irregular spacing make pages harder to scan.

    A practical formatting standard should cover:

    • Short paragraphs
    • Logical H2 and H3 headings
    • Bulleted or numbered lists when useful
    • Consistent bold text
    • Appropriate tables
    • Clear calls to action
    • Consistent spacing

    The goal is not to decorate the article. The goal is to make the content easier to understand.

    3. Optimize Every Page Before Publishing

    Content publishing and on-page SEO should not be treated as completely separate jobs.

    Before a page goes live, review elements such as:

    • Page title
    • URL
    • SEO title
    • Meta description
    • Heading hierarchy
    • Keyword usage
    • Internal links
    • Image alt text
    • Relevant schema settings

    A practical on-page SEO checklist can help teams avoid missing important elements during routine publishing.

    4. Optimize Images Before Uploading

    Uploading large original image files directly from a camera, stock library, or design tool can unnecessarily increase page weight.

    Prepare images before they enter the WordPress media library.

    A simple process includes:

    • Resize images to appropriate display dimensions.
    • Compress them.
    • Use an efficient format such as WebP when suitable.
    • Rename files descriptively.
    • Add useful alt text.
    • Check how images display on the finished page.

    Image optimization is one of the easiest publishing tasks to standardize because the same process can be followed on every new page.

    5. Add Relevant Internal Links

    Every new article creates opportunities to connect related content.

    Before publishing, look for pages that can provide additional context to the reader. Also consider whether older articles should later be updated to link back to the new page.

    A good internal link should feel like a natural next step rather than an SEO insertion.

    6. Maintain Consistent Categories and Tags

    Do not create a new WordPress category every time a new variation of a topic appears.

    Before adding a taxonomy term, check whether an appropriate category or tag already exists.

    Businesses should periodically review their taxonomy and remove unnecessary complexity where appropriate. A smaller, deliberate structure is often easier to maintain than dozens of overlapping labels.

    7. Use WordPress User Roles Properly

    Not everyone who works on website content needs full administrative access. WordPress includes different user roles that provide varying levels of permission. The official WordPress Roles and Capabilities documentation explains the permissions available to roles such as Administrator, Editor, Author, Contributor, and Subscriber.

    WordPress includes different user roles that can provide varying levels of permission. Depending on the site’s workflow, writers may only need content-level access while technical administrators retain broader control.

    Using appropriate permissions can make editorial workflows easier to manage and reduce unnecessary access.

    8. Perform Publishing QA

    Publishing QA is the final review between “the content is entered” and “the page is ready for visitors.”

    This step can catch problems that are easy to miss while editing.

    Check items such as:

    • Heading order
    • Broken links
    • Missing images
    • Incorrect image sizes
    • Missing alt text
    • Spacing problems
    • Buttons and calls to action
    • Metadata
    • Desktop display
    • Mobile display
    • Published URL

    The NextWebOps WordPress publishing checklist provides a more detailed publishing review process.

    9. Update Existing Content Regularly

    WordPress content management does not stop when a page is published.

    Older articles may eventually contain:

    • Outdated information
    • Old screenshots
    • Broken external links
    • Weak internal linking
    • Old calls to action
    • Incomplete information
    • References to services or products that have changed

    Periodic content reviews help keep the site useful instead of allowing old pages to slowly lose accuracy.

    If content refreshing is part of your SEO strategy, see the guide on how to update old blog posts for SEO.

    10. Document Your Content Standards

    A website becomes harder to manage when publishing knowledge exists only in one person’s head.

    Create basic documentation covering your preferred:

    • Heading structure
    • Image dimensions
    • Image naming conventions
    • Alt text approach
    • Internal linking process
    • Category usage
    • SEO fields
    • CTA placement
    • QA checklist
    • Publishing approval process

    This is especially useful when content production grows or work is shared between internal and external teams.

    A Simple WordPress Content Management Workflow

    A practical content workflow does not need to be complicated. It simply needs to make the important publishing steps repeatable.

    A Simple WordPress Content Management Workflow

    Step 1: Receive Approved Content

    Start with a final or clearly identified draft. Publishing unfinished or unapproved versions can create unnecessary rework.

    Step 2: Create the WordPress Draft

    Add the content to the correct post or page type and confirm the intended URL, author, category, and other relevant settings.

    Step 3: Apply Formatting

    Format headings, paragraphs, lists, tables, quotations, calls to action, and other content elements according to the site’s standards.

    Step 4: Prepare Images

    Resize, compress, rename, and upload images. Add appropriate alt text and verify that each image appears in the correct location.

    Step 5: Add Internal Links

    Connect the new page to useful related resources on the website.

    Step 6: Configure SEO Metadata

    Add the SEO title, meta description, focus keyword if your workflow uses one, and other relevant plugin settings.

    Step 7: Preview the Page

    Do not evaluate the article only inside the editor. Preview the actual page and look at how the content appears to visitors.

    Step 8: Complete Publishing QA

    Check layout, links, images, headings, metadata, calls to action, and responsive presentation.

    Step 9: Publish or Schedule

    Once the page passes review, publish it immediately or schedule it for the appropriate date.

    Step 10: Maintain the Content

    Revisit important pages periodically to make sure they remain useful and accurate.

    WordPress Content Management vs. Website Maintenance

    WordPress content management and website maintenance overlap, but they are not exactly the same.

    WordPress content management typically focuses on the information visitors see and interact with, such as:

    • Publishing pages and posts
    • Formatting content
    • Updating text
    • Managing images
    • Adding internal links
    • Managing categories and tags
    • Updating metadata
    • Performing publishing QA

    Website maintenance often includes broader technical tasks such as:

    • Updating WordPress
    • Updating themes and plugins
    • Managing backups
    • Monitoring security
    • Troubleshooting technical problems
    • Reviewing site performance

    Some businesses combine these responsibilities under one website management process. Others assign them to different people or service providers.

    The important point is to make sure both areas have clear ownership.

    Common WordPress Content Management Problems

    Many content problems do not come from WordPress itself. They come from inconsistent publishing processes.

    Inconsistent Formatting

    One article uses short paragraphs while another contains large text blocks. One editor uses H2s correctly while another uses bold text instead of headings.

    Without standards, the site begins to look inconsistent.

    Missing Metadata

    Pages may be published without reviewing SEO titles, meta descriptions, or social settings.

    This is especially common when publishing responsibilities are separated from SEO responsibilities without a clear handoff.

    Oversized Images

    Large image files can enter the media library when contributors upload files without resizing or compression.

    Weak Internal Linking

    New content may be published as an isolated page instead of being connected to related resources.

    Outdated Content

    Teams often focus on publishing new articles while older content remains untouched for years.

    Duplicate Categories and Tags

    Multiple editors may create similar taxonomy terms because no one checks the existing structure first.

    Incorrect Heading Structure

    Headings may be selected because of their visual size rather than their structural meaning.

    Publishing Without QA

    Typos, broken links, missing images, layout problems, or incorrect URLs can make it to the live website when there is no final review.

    Should You Manage WordPress Content In-House or Outsource It?

    There is no single answer for every business.

    Managing content internally can work well when publishing volume is low and someone on the team has enough time and WordPress knowledge to handle the process consistently.

    An in-house workflow may be appropriate when:

    • You publish only occasionally.
    • Your team is comfortable using WordPress.
    • Someone is responsible for SEO implementation.
    • Someone reviews pages before publication.
    • Website updates do not distract the team from higher-priority work.

    Outsourcing becomes more useful when content production grows or publishing starts taking significant time away from writers, marketers, or business owners.

    It can make sense to outsource WordPress content management when:

    • You publish frequently.
    • Your marketing team has a backlog of approved content.
    • Formatting varies between articles.
    • Images are not consistently optimized.
    • Metadata is regularly missed.
    • Internal linking is inconsistent.
    • Content updates are delayed.
    • Publishing QA is becoming a bottleneck.
    • You manage content across multiple websites.

    The goal of outsourcing is not simply to transfer the task of clicking Publish. A good publishing process should reduce operational work while maintaining consistent standards across the site.

    How NextWebOps Supports WordPress Content Management

    NextWebOps helps businesses and agencies handle the implementation work that comes between finished content and a properly published WordPress page.

    Depending on the project, that can include:

    • WordPress content publishing
    • Content formatting
    • Image preparation and optimization
    • Metadata implementation
    • On-page SEO execution
    • Internal linking
    • Content updates
    • Content migration
    • Publishing QA

    This type of support can be useful when writers and marketing teams want to focus on strategy and content creation without spending additional time handling repetitive website publishing tasks.

    If your team has content ready but needs help getting it properly formatted, optimized, and published, contact NextWebOps to discuss your WordPress content management needs.

    Frequently Asked Questions About WordPress Content Management

    What is WordPress content management?

    WordPress content management is the process of creating, organizing, editing, formatting, optimizing, publishing, and maintaining content on a WordPress website. It can include posts, pages, images, metadata, internal links, categories, tags, and ongoing content updates.

    Is WordPress a content management system?

    Yes. WordPress is a content management system that allows users to create, edit, organize, and publish website content through an administrative interface.

    What is the difference between WordPress content management and website maintenance?

    Content management primarily focuses on website content, including publishing, formatting, images, links, metadata, and updates. Website maintenance often includes technical tasks such as software updates, backups, security, plugin maintenance, and troubleshooting.

    What should a WordPress publishing workflow include?

    A practical workflow should include content preparation, formatting, image optimization, internal linking, metadata configuration, page previewing, publishing QA, publication, and periodic content updates.

    Can WordPress content management be outsourced?

    Yes. Businesses and agencies can outsource tasks such as WordPress publishing, formatting, image optimization, metadata implementation, internal linking, content migration, updates, and publishing QA when they do not want internal marketing teams handling those tasks manually.

    Build a More Consistent WordPress Publishing Process

    Effective WordPress content management is less about knowing where the Publish button is and more about creating a repeatable process around everything that happens before and after publication.

    Formatting, images, metadata, internal links, content organization, updates, and QA all affect the quality of the finished website.

    Businesses that document these processes can publish more consistently, reduce avoidable mistakes, and make it easier for multiple people to contribute to the same website.

    And when maintaining that workflow becomes too time-consuming internally, WordPress content management can be delegated so writers and marketers can spend more of their time creating and improving content rather than implementing it.

  • On Page SEO Audit: 15 Steps to Find and Fix Issues

    On Page SEO Audit: 15 Steps to Find and Fix Issues

    On page SEO audit work is about reviewing an individual webpage to find issues that may be limiting its relevance, usability, crawlability, or organic search performance.

    A useful audit goes beyond checking whether a title contains a keyword or whether an SEO plugin gives the page a green score. It looks at search intent, content quality, headings, metadata, internal links, images, URL structure, indexing signals, and actual performance data.

    The goal is not to collect as many warnings as possible. The goal is to identify the issues that matter most, prioritize them, and improve the page in a way that helps both users and search engines.

    This guide explains how to perform an on page SEO audit using a practical 15-step process, including manual checks, useful tools, prioritization, and common mistakes to avoid.

    What Is an On Page SEO Audit?

    An on page SEO audit is a review of the elements on a specific webpage that affect how clearly the page communicates its topic, satisfies search intent, and supports search visibility.

    Typical audit areas include:

    • SEO title
    • Meta description
    • H1 and subheadings
    • Content quality
    • Keyword use
    • URL structure
    • Internal links
    • External links
    • Images
    • Indexability
    • Mobile usability
    • Search performance

    An on page SEO audit is different from a full technical SEO audit. Technical SEO may include sitewide crawl issues, server configuration, XML sitemaps, redirects, JavaScript rendering, and other infrastructure-level concerns.

    On-page auditing is more focused on the quality and implementation of a particular page.

    Why an On Page SEO Audit Matters

    An on page SEO audit helps you understand why a page may not be performing as well as expected.

    It Identifies Page-Level SEO Problems

    You may discover missing metadata, weak headings, poor internal linking, thin content, or unclear search intent.

    It Helps Improve Content Relevance

    A page can be technically accessible and still fail because it does not fully answer the query it targets.

    It Reveals Weak Structure and Metadata

    Titles, descriptions, H1s, and headings all help explain what the page is about and how the content is organized.

    It Helps Prioritize Updates

    Not every issue deserves equal attention. A page that is accidentally noindexed has a much bigger problem than a minor wording issue.

    It Supports Better Publishing QA

    An audit often reveals implementation problems that should have been caught before publishing. That makes it useful both for existing content and for improving future workflows.

    On Page SEO Audit Checklist: 15 Steps

    1. Confirm the Page Is Indexable

    Start with the basics.

    Check whether the page is actually available for indexing.

    Look for:

    • Accidental noindex directives
    • Incorrect canonical tags
    • Broken page access
    • Unexpected redirects
    • Indexing exclusions in Search Console

    If a page cannot be indexed, most other on-page improvements will not matter until that problem is fixed.

    2. Check the Primary Search Intent

    Before reviewing tags and formatting, determine what the page is supposed to achieve.

    Ask:

    • What keyword or topic is this page targeting?
    • What does the searcher want?
    • Is the intent informational, commercial, transactional, or navigational?
    • Does the page actually satisfy that intent?

    A common audit mistake is optimizing a page for a keyword without checking whether the page type matches the search results.

    3. Review the SEO Title

    The SEO title should clearly identify the topic of the page.

    Check whether it is:

    • Unique
    • Specific
    • Relevant
    • Readable
    • Aligned with search intent
    • Using the primary keyword naturally

    Do not treat a specific character count as a strict Google rule. The main goal is to communicate the page topic clearly and concisely.

    4. Review the Meta Description

    The meta description should accurately summarize the page and support the search result.

    Check:

    • Is it unique?
    • Does it match the page content?
    • Does it use the focus keyword naturally?
    • Does it communicate a useful benefit?
    • Is the important information near the beginning?

    If the description is weak or outdated, rewrite it.

    For a deeper breakdown, see the NextWebOps guide on how to write meta descriptions.

    5. Check the H1

    The H1 should clearly describe the main topic of the page.

    Review whether:

    • There is a clear main heading
    • It aligns with the SEO title
    • It reflects the target topic
    • It is written for humans

    In many CMS setups, the post title becomes the H1 automatically.

    6. Review H2 and H3 Structure

    Headings should organize the article into logical sections.

    Look for:

    • Clear H2 sections
    • Relevant H3 subsections
    • Logical hierarchy
    • No random heading jumps
    • Headings that describe the content below them

    Do not use bold text as a substitute for headings.

    7. Audit Content Quality and Completeness

    This is one of the most important parts of an on page SEO audit.

    Ask whether the content:

    • Answers the main query clearly
    • Covers the important subtopics
    • Uses current information
    • Avoids repetition
    • Includes useful examples
    • Provides enough detail for the search intent
    • Removes outdated or irrelevant sections
    • Supports claims appropriately

    Do not assume that adding more words automatically improves the page.

    Sometimes the better fix is removing weak sections, combining repetitive ideas, or rewriting the content around the actual search intent.

    If the article is older, use a structured process for updating old blog posts for SEO.

    8. Review Keyword Use Without Stuffing

    The focus keyword should appear naturally where it helps explain the page.

    Check whether the primary phrase appears in appropriate locations such as:

    • SEO title
    • Introduction
    • H1
    • Relevant subheadings
    • Body content
    • Meta description
    • URL where appropriate

    Do not chase a fixed keyword density percentage.

    A page can be over-optimized even if an SEO tool says the density is acceptable.

    Read the content as a human would and remove forced repetition.

    9. Check URL Structure

    A good URL should generally be short, descriptive, and easy to understand.

    Review:

    • Is the URL readable?
    • Does it describe the page topic?
    • Does it avoid unnecessary parameters?
    • Is it stable?

    Do not change a published URL just because you think a slightly shorter version looks better.

    Unnecessary URL changes can create redirect work and risk losing existing signals.

    10. Audit Internal Links

    Internal links help users and search engines understand how pages relate to one another.

    Check:

    • Does the page link to relevant supporting content?
    • Do important pages link back to it?
    • Is the anchor text descriptive?
    • Are any internal links broken?
    • Is the page at risk of becoming orphaned?

    Use links where they genuinely help the reader.

    For more detail, review the NextWebOps guide on internal linking best practices.

    11. Review External Links

    External links should support the content rather than simply increase link count.

    Check whether external sources are:

    • Relevant
    • Credible
    • Current
    • Working

    Remove or replace outdated references and broken links.

    12. Audit Images

    Images are part of the on-page experience and should be reviewed during the audit.

    Check:

    • Descriptive filenames
    • Useful alt text
    • Correct dimensions
    • Reasonable file size
    • Relevant placement
    • Modern formats where appropriate
    • No unnecessarily oversized media

    A large, uncompressed image can slow down the page and create a poor user experience.

    For a complete image review process, see the NextWebOps guide to image SEO.

    13. Review Mobile Usability and Page Experience

    Do not evaluate the page only on desktop.

    Check whether:

    • Text is easy to read
    • Buttons are easy to tap
    • Images fit correctly
    • Tables remain usable
    • There are no obvious layout issues
    • Popups or intrusive elements do not block content

    You do not need to turn every on-page audit into a full Core Web Vitals project, but obvious usability problems should be documented.

    14. Check Search Performance Data

    Search Console data can help explain how the page is performing in real search results.

    Review:

    • Impressions
    • Clicks
    • Average position
    • Search queries
    • Click-through rate

    Google provides these metrics in the Google Search Console Performance report.

    This data can reveal different problems.

    For example:

    • Low impressions: the page may not be relevant enough or may not be ranking.
    • High impressions but low clicks: the title or search snippet may need improvement.
    • Good position but poor conversions: the page may not satisfy intent after the click.

    15. Prioritize Fixes by Impact

    An on page SEO audit is only useful if the findings are organized by importance.

    Do not treat every issue as equally urgent.

    On page SEO audit priority matrix showing high, medium, and lower priority fixes for indexability, search intent, metadata, links, images, headings, and content

    A practical priority system is:

    High Priority Issues

    • Page is not indexable
    • Search intent is wrong
    • SEO title is misleading or irrelevant
    • Major content gaps
    • Critical internal links are missing or broken

    Medium Priority Issues

    • Weak meta description
    • Poor heading structure
    • Outdated sections
    • Weak internal linking
    • Oversized or poorly optimized images

    Lower Priority Issues

    • Minor formatting inconsistencies
    • Small wording improvements
    • Non-critical visual refinements

    Prioritization keeps the audit focused on changes that are most likely to improve the page.

    On Page SEO Audit Example

    A simple audit table can make findings easier to act on.

    Element Issue Priority Recommended Fix
    SEO Title Too vague High Rewrite around the primary topic and search intent
    Meta Description Missing Medium Add a unique, concise description
    H2 Structure Weak Medium Add logical subtopics and clearer section headings
    Internal Links Only one contextual link Medium Add relevant internal links with descriptive anchors
    Hero Image 1.8 MB Medium Resize, compress, and use an appropriate format

    This is more useful than a single score because it tells you what is wrong, how important it is, and what action to take.

    Useful On Page SEO Audit Tools

    Tools can speed up parts of an audit, but they should support your judgment rather than replace it.

    Google Search Console

    Use Search Console for:

    • Indexing checks
    • Search queries
    • Clicks
    • Impressions
    • Average position
    • URL inspection

    Screaming Frog

    Screaming Frog can help review:

    • Titles
    • Meta descriptions
    • H1s and H2s
    • Canonicals
    • Status codes
    • Internal links

    Semrush, Ahrefs, and Similar Platforms

    Site audit tools can help identify technical and on-page issues at scale.

    They are useful for finding patterns across larger websites, but automated reports still need human review.

    Rank Math and Other SEO Plugins

    SEO plugins can help with page-level implementation checks such as focus keyword placement, metadata, links, and schema settings.

    However, a plugin cannot fully judge:

    • Search intent
    • Content usefulness
    • Accuracy
    • Readability
    • Whether the page genuinely solves the user’s problem

    Use the score as guidance, not as the definition of a successful page.

    Automated Audit vs. Manual Audit

    Automated tools and manual review are both useful, but they are good at different things.

    Automated Audit Manual Audit
    Missing titles Search intent
    Duplicate metadata Content usefulness
    Broken links Accuracy and clarity
    Missing alt attributes Awkward keyword use
    Status codes Content depth
    Crawl patterns CTA relevance

    The strongest audit combines both.

    Use tools to identify problems quickly, then review the page manually to understand whether those issues actually matter.

    Common On Page SEO Audit Mistakes

    Focusing Only on SEO Scores

    A score can highlight possible issues, but it cannot fully evaluate content quality or intent.

    Treating Every Issue as Equal

    Fix major indexing or content problems before minor formatting details.

    Chasing Keyword Density

    Do not force the keyword into the page to reach a fixed percentage.

    Changing URLs Without Need

    Stable URLs are often better than unnecessary rewrites.

    Ignoring Search Intent

    A technically optimized page can still fail if it answers the wrong question.

    Looking Only at Metadata

    Titles and descriptions matter, but they are only part of the audit.

    Ignoring Internal Links

    Pages need contextual connections to relevant content across the site.

    Ignoring Images

    Large or poorly optimized images can create usability and page experience issues.

    Updating Content Without Measuring Performance

    Use Search Console or another analytics source to understand what changed after updates.

    Confusing On-Page SEO With Technical SEO

    Keep the audit focused on page-level relevance and implementation while documenting technical issues separately when needed.

    On Page SEO Audit Checklist

    Use this quick checklist when reviewing a page:

    • Is the page indexable?
    • Does it match search intent?
    • Is the SEO title clear and relevant?
    • Is the meta description useful and unique?
    • Is the H1 accurate?
    • Are H2 and H3 headings logical?
    • Is the content complete and current?
    • Is the keyword used naturally?
    • Is the URL clear and stable?
    • Are internal links useful?
    • Are external links credible?
    • Are images optimized?
    • Does the page work well on mobile?
    • Have Search Console metrics been reviewed?
    • Are findings prioritized by impact?

    How Often Should You Run an On Page SEO Audit?

    There is no single schedule that works for every website.

    Useful times to run an audit include:

    • Before publishing an important page
    • After a major content update
    • When rankings decline
    • When impressions increase but clicks remain weak
    • After a redesign or migration
    • When refreshing high-value evergreen content

    High-priority pages usually deserve more attention than low-value pages that receive little traffic.

    Make On Page SEO Audits Part of Content Maintenance

    An audit only creates value when the findings are implemented.

    Common fixes include:

    • Rewriting SEO titles
    • Improving meta descriptions
    • Updating headings
    • Expanding or simplifying content
    • Adding internal links
    • Optimizing images
    • Fixing formatting
    • Improving publishing QA

    Use the audit alongside a broader on-page SEO checklist so the issues you find become part of a repeatable optimization process.

    NextWebOps provides hands-on content implementation, metadata optimization, internal linking, image optimization, formatting, content updates, and publishing QA across WordPress, Shopify, and Webflow.

    If you have pages that need to be audited and improved, contact NextWebOps to discuss your website content and optimization workflow.

    Frequently Asked Questions About On Page SEO Audits

    What is an on page SEO audit?

    An on page SEO audit is a review of an individual webpage to identify issues with search intent, content, metadata, headings, links, images, indexing, and other page-level SEO elements.

    How do I perform an on page SEO audit?

    Start by checking indexability and search intent, then review the title, meta description, H1, subheadings, content, keyword use, URL, links, images, mobile usability, and search performance. Finish by prioritizing the findings.

    What should an on-page SEO audit include?

    It should include page-level checks for metadata, content quality, heading structure, URL structure, internal links, external links, images, indexability, mobile usability, and search performance.

    What is the difference between an on-page SEO audit and a technical SEO audit?

    An on-page audit focuses on the content and implementation of a specific page. A technical SEO audit usually covers broader site infrastructure such as crawling, redirects, rendering, sitemaps, and server-level issues.

    What tools can I use for an on-page SEO audit?

    Useful tools include Google Search Console, Screaming Frog, Semrush, Ahrefs, and SEO plugins such as Rank Math. These tools are most effective when combined with manual review.

    How often should I audit a page for SEO?

    Audit important pages when performance declines, after significant updates, after redesigns or migrations, or during planned content refreshes.

    Can an SEO tool replace a manual audit?

    No. Tools can detect many technical and implementation issues, but they cannot fully evaluate search intent, usefulness, accuracy, or whether the content genuinely satisfies the user.

    How long does an on-page SEO audit take?

    It depends on page complexity and audit depth. A simple page can be reviewed quickly, while a detailed or high-value page may require a deeper review of content, links, performance data, and implementation.

  • Blog Post Formatting: 12 Best Practices for Better Readability

    Blog Post Formatting: 12 Best Practices for Better Readability

    Blog post formatting is the process of structuring and presenting an article so readers can quickly understand it, scan important sections, and move through the content without unnecessary friction.

    A strong draft can still perform poorly if it is published as a wall of text. Clear headings, short paragraphs, useful lists, relevant visuals, internal links, and consistent spacing all make a blog post easier to read and easier to navigate.

    Good formatting also makes content publishing more consistent. Instead of treating each article differently, your team can follow a repeatable structure that works across WordPress, Shopify, Webflow, or another CMS.

    This guide explains 12 blog post formatting best practices you can use to turn a written draft into a clean, readable, publish-ready article.

    What Is Blog Post Formatting?

    Blog post formatting is the way written content is organized and displayed on a webpage.

    It includes elements such as:

    • Post title
    • Introduction
    • Heading hierarchy
    • Paragraph length
    • Bullet and numbered lists
    • Bold text
    • Images
    • Internal and external links
    • Tables
    • Calls to action
    • Spacing and visual flow

    Formatting is different from writing. Writing focuses on what the article says. Formatting focuses on how that information is presented after the draft exists.

    That distinction matters because many content teams finish the writing but still need someone to handle the implementation before the post is ready to publish.

    Why Blog Post Formatting Matters

    Blog post formatting matters because online readers rarely consume long articles exactly the same way they would read a printed document.

    They scan headings, jump between sections, look for examples, and use visual cues to decide what deserves attention.

    It Improves Readability

    Shorter paragraphs, clear headings, and logical spacing reduce the effort required to understand the content.

    It Makes Content Easier to Scan

    Headings, lists, bold text, and visuals help readers find the information they need without reading every sentence from beginning to end.

    It Helps Organize Information

    A proper heading structure shows which ideas are major sections and which are supporting details.

    It Supports Better Publishing Consistency

    If every article follows a repeatable structure, your website feels more professional and your publishing team spends less time fixing inconsistent layouts.

    It Supports On-Page SEO Implementation

    Formatting alone is not an SEO shortcut, but it supports elements that matter during implementation, including heading structure, internal links, images, and page organization.

    That is why formatting should work alongside a broader on-page SEO checklist.

    Blog Post Formatting: 12 Best Practices

    1. Start With a Clear Blog Post Title

    The title should tell readers what the article is about before they start reading.

    A vague title creates unnecessary uncertainty.

    Weak:

    Some Thoughts About Better Content

    Better:

    Blog Post Formatting: 12 Best Practices for Better Readability

    The second title is specific, relevant, and immediately communicates the topic.

    In WordPress, the post title usually serves as the H1, so there is normally no need to place another H1 inside the article body.

    2. Write a Short, Useful Introduction

    The introduction should explain what the article covers and why the reader should continue.

    Avoid long generic openings that delay the answer.

    A practical introduction usually does three things:

    • Introduces the problem
    • Explains what the article will cover
    • Shows the reader what they will gain

    For example, a blog post formatting article should quickly explain that formatting improves readability, scanning, and publishing consistency.

    3. Use a Logical Heading Hierarchy

    A logical heading structure is one of the most important parts of blog post formatting.

    A simple hierarchy looks like this:

    • H1: Post title
    • H2: Main section
    • H3: Supporting subsection

    For example:

    <h2>Blog Post Formatting Best Practices</h2>

    <h3>Keep Paragraphs Short</h3>

    Do not use bold text as a substitute for headings.

    A heading is structural. Bold text is only visual emphasis.

    W3C guidance also recommends organizing headings logically so page structure is easier to understand. You can review the official W3C guidance on page headings.

    4. Keep Paragraphs Short and Readable

    Long blocks of text are harder to scan on a screen.

    For many blog posts, paragraphs of around two to four sentences create useful white space. However, this should not become a rigid rule.

    Some ideas need one sentence. Others need a few more.

    The goal is readability.

    If a paragraph becomes visually heavy, ask whether it contains more than one idea and whether it should be split.

    5. Use Bullet and Numbered Lists When They Help

    Lists are useful when several items belong together.

    Use bullet lists for:

    • Features
    • Benefits
    • Checks
    • Examples
    • Options

    Use numbered lists when order matters, such as:

    1. Prepare the draft
    2. Add headings
    3. Format paragraphs
    4. Add images
    5. Insert links
    6. Preview the page
    7. Publish

    Do not convert every section into a list simply because lists are easy to scan. Use them when they genuinely improve the presentation.

    6. Use Bold Text Selectively

    Bold text can help draw attention to an important phrase, warning, definition, or takeaway.

    But if every second sentence is bold, nothing feels important anymore.

    Use <strong> for meaningful emphasis, not decoration.

    Avoid bolding every keyword or entire paragraphs.

    7. Add Relevant Images

    Images can improve understanding when they explain something the text alone does not communicate as efficiently.

    Useful blog visuals include:

    • Screenshots
    • Before-and-after examples
    • Diagrams
    • Charts
    • Process illustrations
    • Annotated examples

    Do not add images only to create visual breaks.

    An unrelated stock photo may make the page look busier without helping the reader.

    When adding images, also consider filenames, alt text, dimensions, compression, and placement. The NextWebOps image SEO guide covers those implementation details in more depth.

    8. Place Images Near the Content They Support

    Image placement is part of blog post formatting.

    If an image explains a specific process, place it close to the paragraph or heading where that process is discussed.

    For example, a visual comparing poorly formatted and well-formatted blog posts should appear inside the section explaining formatting examples rather than at the very end of the article.

    This helps readers connect the visual with the explanation immediately.

    9. Add Internal Links Naturally

    Internal links help readers move from one useful resource to another.

    For example, an article about blog formatting can naturally link to:

    • Image optimization guidance
    • Internal linking guidance
    • Publishing checklists
    • On-page SEO resources

    The anchor text should clearly describe the destination.

    Instead of:

    click here

    use something descriptive such as:

    internal linking best practices

    For a more detailed explanation, see the NextWebOps guide to internal linking best practices.

    10. Use Tables When They Make Comparison Easier

    Tables work well when readers need to compare information across several categories.

    For example:

    Formatting Element Poor Use Better Use
    Headings Random bold text Logical H2 and H3 structure
    Paragraphs Large walls of text Short focused paragraphs
    Images Unrelated stock photos Relevant screenshots or diagrams
    Lists Used everywhere Used when grouping information helps

    Do not force information into a table if normal paragraphs are easier to understand, especially on mobile screens.

    11. Use a Clear Call to Action

    A blog post should usually give the reader a logical next step.

    That next step depends on the page.

    Examples include:

    • Read a related guide
    • Download a resource
    • Review a checklist
    • Contact the business
    • Compare services

    A CTA should feel like a natural continuation of the article, not an unrelated advertisement inserted at the end.

    12. Review the Published Page Before You Finish

    The final formatting check should happen on the actual published or previewed page.

    Review:

    • Heading hierarchy
    • Paragraph spacing
    • List indentation
    • Image alignment
    • Image size
    • Internal links
    • External links
    • Tables
    • CTA placement
    • Mobile display

    This is an important part of publishing QA.

    A draft can look perfect in a document editor but still have spacing, image, or link problems once it is implemented in WordPress.

    Recommended Blog Post Formatting Structure

    A consistent blog post structure makes content easier to publish and easier for readers to follow.

    A useful template is:

    1. Post title
    2. Short introduction
    3. Main H2 sections
    4. H3 subsections where needed
    5. Lists for grouped information
    6. Supporting visuals
    7. Internal links
    8. Optional tables
    9. Call to action
    10. FAQs if useful
    11. Final publishing QA

    This structure can be adjusted according to search intent and article type.

    A short opinion post may not need every element. A detailed SEO guide may need most of them.

    Blog Post Formatting Example: Poor vs. Improved

    A simple before-and-after comparison shows how much presentation can affect readability.

    Poor and well-formatted blog post examples showing headings, short paragraphs, lists, images, internal links, and a clear call to action

    Poor Formatting

    A poorly formatted article may include:

    • A long introduction
    • No useful headings
    • Large blocks of text
    • Random bold sentences
    • No internal links
    • Unrelated images
    • No CTA

    Improved Formatting

    The same article can become much easier to use when it includes:

    • A clear title
    • A short introduction
    • Logical H2 and H3 headings
    • Short focused paragraphs
    • Relevant lists
    • Useful images
    • Contextual internal links
    • A clear next step

    The information itself may not change much, but the reading experience improves significantly.

    Blog Post Formatting in WordPress Classic Editor

    WordPress Classic Editor gives you both a Visual view and a Text view.

    For clean implementation, the Text view can be especially useful when you want direct control over HTML structure.

    Useful tags include:

    <p> for paragraphs

    <h2> for main sections

    <h3> for supporting subsections

    <ul> and <ol> for lists

    <strong> for emphasis

    <a> for links

    For example:

    <h2>Blog Post Formatting Best Practices</h2>

    <p>Keep paragraphs focused and easy to scan.</p>

    <h3>Use Lists Where Helpful</h3>

    <ul><li>Point one</li><li>Point two</li></ul>

    Do not manually style normal paragraph text to look like a heading. Use the correct HTML element instead.

    Before publishing, use a full WordPress publishing checklist to verify formatting, metadata, links, images, and other implementation details.

    Common Blog Post Formatting Mistakes

    Publishing Large Walls of Text

    Long uninterrupted sections are difficult to scan. Break content into logical paragraphs and sections.

    Using Bold Text Instead of Headings

    Bold text does not create document structure. Use proper heading tags.

    Skipping Heading Levels Randomly

    Keep the hierarchy logical. Do not jump between heading levels simply because one looks visually better.

    Adding Too Many Images

    Images should support the content. More images do not automatically create a better article.

    Using Irrelevant Stock Photos

    Prefer visuals that explain, demonstrate, or support the topic.

    Overusing Lists

    Lists are useful, but an article made almost entirely of bullet points can feel fragmented.

    Adding Links Without Context

    Links should be relevant to the surrounding paragraph and use clear anchor text.

    Using Inconsistent Spacing

    Random blank lines, inconsistent image gaps, and uneven paragraph spacing make the page look unfinished.

    Ignoring Mobile Formatting

    A table, image, or long heading may look fine on desktop and become awkward on a smaller screen.

    Publishing Without Previewing

    Always review the actual page before considering the formatting complete.

    Blog Post Formatting Checklist

    Use this checklist before publishing:

    • Is the post title clear?
    • Is the introduction concise?
    • Does the article use a logical H2/H3 hierarchy?
    • Are paragraphs easy to scan?
    • Are lists used only where helpful?
    • Is bold text used selectively?
    • Are images relevant?
    • Do images include appropriate alt text?
    • Are images placed near relevant content?
    • Are internal links descriptive and useful?
    • Are external references appropriate?
    • Are tables readable?
    • Is there a clear CTA?
    • Does the page display correctly on mobile?
    • Has the final published page been reviewed?

    Make Blog Post Formatting Part of Your Publishing Workflow

    A finished draft is not the same thing as a finished webpage.

    Before publication, content may still need:

    • Heading implementation
    • Paragraph formatting
    • Image optimization
    • Alt text
    • Internal links
    • External sources
    • Metadata
    • CTA placement
    • Mobile checks
    • Final publishing QA

    This is why blog post formatting should be built into the publishing process rather than handled as an afterthought.

    If an article was developed from a content plan, the final formatting should also reflect the structure and intent established in the original SEO content brief.

    NextWebOps provides hands-on content implementation and website publishing support, including formatting, metadata, image optimization, internal linking, content migration, and publishing QA across WordPress, Shopify, and Webflow.

    If your content is written but still needs professional implementation, contact NextWebOps to discuss your website publishing workflow.

    Frequently Asked Questions About Blog Post Formatting

    What is the best format for a blog post?

    A practical format usually includes a clear title, short introduction, logical H2 and H3 headings, readable paragraphs, useful lists, relevant images, internal links, and a clear CTA.

    How should a blog post be structured?

    Start with the title and introduction, divide the content into main H2 sections, use H3 subsections where needed, add visuals and links in relevant places, and finish with a useful next step or FAQ section.

    How long should blog paragraphs be?

    There is no fixed rule, but short paragraphs are usually easier to read online. Two to four sentences is a useful guideline for many sections, as long as the paragraph still communicates one clear idea.

    How many headings should a blog post have?

    Use as many headings as needed to organize the content clearly. Do not add headings only to increase their number.

    Should blog posts include images?

    Use images when they help explain, demonstrate, compare, or support the content. Avoid adding irrelevant visuals simply to break up text.

    Should every blog post have a table of contents?

    No. A table of contents can be helpful for long or complex guides, but shorter articles may not need one.

    What is the difference between H1, H2, and H3?

    H1 is typically the main page or post title. H2 headings divide the article into major sections, while H3 headings organize supporting points within those sections.

    How do I format a blog post in WordPress?

    Use the WordPress editor to apply proper headings, paragraphs, lists, links, and images. In Classic Editor, Text view can help you control the underlying HTML before previewing and publishing the final page.

  • How to Write Meta Descriptions: 10 SEO Best Practices

    How to Write Meta Descriptions: 10 SEO Best Practices

    How to write meta descriptions effectively comes down to understanding what a page offers, matching the searcher’s intent, using the main keyword naturally, and giving people a clear reason to choose your result.

    A meta description is often one of the first pieces of information a potential visitor sees in Google Search. While Google may sometimes generate a different snippet from your page content, writing a clear and relevant description still gives search engines useful information and helps you control how your page may be presented.

    In this guide, you will learn how to write meta descriptions using 10 practical SEO best practices, along with examples, recommended length guidelines, common mistakes, and a simple publishing checklist.

    What Is a Meta Description?

    A meta description is a short summary associated with a web page. It is added to the HTML <head> section using a meta tag such as:

    <meta name="description" content="Learn how to write useful meta descriptions for better search snippets.">

    Search engines may use this text as the descriptive snippet shown beneath the SEO title in search results.

    A search result commonly includes:

    • An SEO title
    • The page URL or breadcrumb
    • A descriptive search snippet

    The meta description helps explain what the page contains and why someone might want to visit it.

    However, your submitted description is not guaranteed to appear exactly as written. Google may use other text from the page when it believes that text better matches a particular query.

    Why Learning How to Write Meta Descriptions Matters

    Understanding how to write meta descriptions is useful because metadata affects how clearly your pages are presented to people searching for information, products, services, or solutions.

    Meta descriptions are not a shortcut to higher rankings, but they can make your search result more understandable and more relevant to the searcher’s needs.

    They Explain What the Page Offers

    A good description gives users a quick preview of the content before they click.

    For example, someone searching for an SEO checklist should immediately understand whether the page includes actionable steps or only a general explanation.

    They Help Match Search Intent

    The wording of a meta description should reflect why someone is searching.

    An informational article may use phrases such as “learn,” “understand,” or “use this guide,” while a service page may explain the service and invite a relevant inquiry.

    They Support Better Search Presentation

    A specific description can help distinguish your page from vague or generic search results.

    Meta descriptions should therefore be reviewed as part of a broader on-page SEO checklist, along with titles, headings, content, links, and images.

    How to Write Meta Descriptions: 10 Best Practices

    1. Understand Search Intent Before Writing

    The first step in learning how to write meta descriptions is understanding what the user wants from the page.

    Most searches fall into one of several broad intent categories:

    • Informational: The searcher wants to learn something.
    • Commercial: The searcher is comparing options or researching before making a decision.
    • Transactional: The searcher wants to buy, contact, book, download, or complete an action.
    • Navigational: The searcher wants a particular website, company, or page.

    Your meta description should reflect that intent.

    For example, an informational article about image optimization might promise practical tips, while a website publishing service page should explain the service being offered.

    2. Accurately Summarize the Page

    A meta description should describe what the visitor will actually find after clicking.

    Do not advertise:

    • A free template that does not exist
    • A discount that is unavailable
    • A checklist that is not included
    • A number of examples the article does not contain

    Before writing, ask:

    • What is the main purpose of this page?
    • What problem does it solve?
    • What information or value does it provide?
    • What should the visitor expect after clicking?

    If your description answers those questions clearly, you are already moving in the right direction.

    3. Use the Primary Keyword Naturally

    When deciding how to write meta descriptions for SEO, include the primary keyword naturally when it accurately describes the page.

    For example:

    Learn how to write meta descriptions that match search intent and clearly summarize your page.

    This is natural and understandable.

    A poor version would be:

    How to write meta descriptions SEO meta description writing meta descriptions SEO tips.

    Repeating the same phrase does not make the description more useful.

    Use your focus keyword once where it fits naturally, then use the remaining space to explain the page’s value.

    4. Put Important Information Near the Beginning

    Search snippets can appear differently across devices and search queries.

    For that reason, avoid putting the main topic or benefit at the very end.

    Weak example:

    Find useful website information and SEO ideas that may help you, including information about meta descriptions.

    Better example:

    Learn how to write meta descriptions that match search intent, use keywords naturally, and clearly explain your page.

    The second version immediately communicates what the page is about.

    5. Write Unique Descriptions for Important Pages

    Every important indexable page should ideally have metadata that reflects its individual purpose.

    A guide about image SEO should not use the same description as an article about internal linking.

    For example, these NextWebOps resources cover different topics:

    Each page should have its own description because each page answers a different search need.

    Duplicate descriptions can become especially problematic on large websites where the same default metadata is automatically used across many pages.

    6. Write for Searchers, Not Only for Rank Math

    Rank Math is useful for checking whether your focus keyword appears in important locations and whether your metadata falls within practical limits.

    But learning how to write meta descriptions well means going beyond the plugin score.

    A description can satisfy every technical check and still sound unnatural.

    Over-optimized example:

    How to write meta descriptions guide for how to write meta descriptions and meta description SEO.

    Better version:

    Learn how to write meta descriptions with practical tips for search intent, keywords, clarity, length, and stronger search snippets.

    Use Rank Math as guidance, then read the description as a real searcher would.

    7. Use Specific and Active Language

    Specific wording usually communicates more value than vague descriptions.

    Weak:

    This page has information about SEO.

    Better:

    Use this practical SEO checklist to review titles, headings, content, internal links, images, and metadata before publishing.

    Useful action-oriented words include:

    • Learn
    • Review
    • Compare
    • Discover
    • Check
    • Improve
    • Explore
    • Use

    The goal is not to make every description sound promotional. It is to make the purpose of the page clear.

    8. Add a Call to Action When Appropriate

    A call to action can help show searchers what they can do after visiting the page.

    Examples include:

    • Learn how…
    • See practical examples…
    • Use this checklist…
    • Compare the options…
    • Explore the guide…

    For commercial pages, calls to action such as “Request a quote” or “Discuss your project” may be appropriate.

    Do not force a CTA into every description. Match it to the purpose of the page.

    9. Keep Your Meta Description Concise

    A common recommendation is to aim for roughly 150 to 160 characters.

    That is a useful editorial guideline, but it is not a strict Google requirement.

    Google does not guarantee that every description will display to a fixed number of characters. Snippet length can vary, and Google may choose a different portion of the page for certain searches.

    The safest approach is to put the important information early and avoid unnecessary filler.

    You can review Google’s official guidance on search snippets and meta descriptions for details about how snippets are generated and how meta descriptions may be used.

    10. Check the Description Before Publishing

    The final step in how to write meta descriptions is quality assurance.

    Before publishing, confirm:

    • The focus keyword appears naturally
    • The description matches the final page
    • Spelling and grammar are correct
    • The wording is unique
    • The SEO title and description work together
    • The most important information appears early
    • The description is entered in the correct SEO field
    • The page preview looks reasonable

    A consistent WordPress publishing checklist can help ensure metadata is reviewed before content goes live.

    A Simple Formula for How to Write Meta Descriptions

    You do not need a complicated formula to create useful metadata.

    Try this structure:

    Main topic + what the reader gets + key benefit + optional action

    Example:

    Learn how to write meta descriptions with practical SEO tips for keywords, search intent, length, uniqueness, and better search snippets.

    For an image SEO article:

    Learn image SEO best practices for filenames, alt text, formats, compression, responsive images, and Google Images visibility.

    The formula should guide your writing, not force every page into identical wording.

    Good and Bad Meta Description Examples

    Examples make it easier to understand how to write meta descriptions that are specific instead of generic.

    Good and bad meta description examples showing search intent, keyword use, clarity, calls to action, and concise writing

    Blog Article Example

    Weak:

    This article tells you everything about image SEO and images.

    Better:

    Learn image SEO best practices for filenames, alt text, formats, compression, responsive images, and Google Images visibility.

    SEO Checklist Example

    Weak:

    SEO checklist with tips about SEO.

    Better:

    Use this practical on-page SEO checklist to review titles, headings, content, links, images, metadata, and other page elements.

    Website Publishing Service Example

    Weak:

    We provide great professional website services.

    Better:

    Get website content publishing support for formatting, metadata, images, internal links, migrations, and final publishing QA.

    The improved descriptions are more useful because they explain exactly what the visitor can expect.

    How Long Should a Meta Description Be?

    When learning how to write meta descriptions, it is easy to become overly focused on character count.

    There is no fixed length that guarantees Google will display every word.

    Around 150 to 160 characters is often a practical editorial range because it encourages concise writing and gives enough room to communicate the page topic and benefit.

    However:

    • Search snippets can vary by query
    • Desktop and mobile presentation can differ
    • Google may generate a different snippet
    • The visible length is not controlled by one fixed character rule

    Prioritize clear writing rather than trying to reach exactly 155 or 160 characters.

    Why Google May Change Your Meta Description

    Even if you know how to write meta descriptions correctly, Google may not always show your submitted version.

    Google can generate a snippet from visible page content when it determines that another section better answers the user’s query.

    For example, this article discusses:

    • How to write meta descriptions
    • Meta description length
    • Keyword use
    • Search intent
    • Meta description examples
    • Google snippet rewriting

    If somebody searches specifically for “meta description length,” Google may select text from the section discussing length rather than display the general meta description.

    This is why the page content itself needs to be well structured and relevant in addition to having properly written metadata.

    Meta Description vs. SEO Title

    Element SEO Title Meta Description
    Main purpose Identify the primary page topic Explain the page in more detail
    Search appearance Usually the prominent result headline Usually supporting descriptive text
    Keyword use Use the primary topic naturally Include relevant terms naturally
    Writing goal Communicate relevance and topic Provide context and a reason to visit

    The SEO title and description should complement each other rather than repeat the same sentence.

    How to Write Meta Descriptions in WordPress

    If you use WordPress with Rank Math, adding the description is straightforward.

    1. Open the post or page in WordPress.
    2. Open the Rank Math SEO settings.
    3. Go to the snippet editor.
    4. Review the SEO title.
    5. Enter the meta description.
    6. Check the preview.
    7. Confirm the focus keyword appears naturally.
    8. Publish or update the page.

    Do not rely only on the score. Read the final metadata manually and compare it with the actual page.

    When performing an on-page SEO audit, review existing meta descriptions for missing text, duplication, outdated information, and weak search intent alignment.

    Common Mistakes When Writing Meta Descriptions

    Keyword Stuffing

    Do not repeat the focus keyword several times simply to increase keyword density.

    Using Duplicate Descriptions

    Important pages should have descriptions that accurately reflect their individual content.

    Writing Only for Character Count

    A description is not automatically effective because it contains exactly 155 characters.

    Making Unsupported Claims

    Do not promise something that the visitor cannot find on the page.

    Repeating the SEO Title

    Use the description to add context rather than restating the title word for word.

    Using Generic Copy

    Descriptions such as “Welcome to our website” do little to explain why someone should visit.

    Ignoring Metadata When Updating Content

    If a page changes substantially, its old description may no longer be accurate.

    Include metadata when you update old blog posts for SEO.

    Expecting Google to Always Use Your Version

    The meta description you submit can influence the snippet, but Google may generate different text for certain queries.

    How to Write Meta Descriptions: Final Checklist

    Before publishing, use this checklist:

    • Does the description accurately summarize the page?
    • Does it satisfy the intended search intent?
    • Does it use the focus keyword naturally?
    • Is the most useful information near the beginning?
    • Is it unique for this page?
    • Does it communicate a clear benefit?
    • Is the wording specific?
    • Is it concise?
    • Does it complement the SEO title?
    • Is it entered correctly in Rank Math or your CMS?
    • Have you checked spelling and grammar?
    • Does the final page support the promise made in the description?

    Make Meta Descriptions Part of Your Publishing Workflow

    Knowing how to write meta descriptions is most useful when metadata becomes a standard part of your publishing process.

    A complete content implementation workflow should review:

    • SEO title
    • Meta description
    • URL slug
    • Heading structure
    • Internal links
    • External references
    • Images and alt text
    • Content formatting
    • Schema settings
    • Desktop and mobile presentation
    • Final publishing QA

    If the article was created from an SEO strategy, its metadata should also reflect the search intent and positioning defined in the original SEO content brief.

    NextWebOps provides hands-on website content implementation, metadata optimization, internal linking, image optimization, formatting, migrations, and publishing QA for WordPress, Shopify, and Webflow websites.

    If your content is written but your team needs help implementing and publishing it correctly, contact NextWebOps to discuss your website publishing workflow.

    Frequently Asked Questions About How to Write Meta Descriptions

    What is a meta description?

    A meta description is a short summary associated with a web page that Google and other search engines may use when creating the descriptive text displayed in a search result.

    How do you write a good meta description?

    To write a good meta description, accurately summarize the page, match search intent, include the primary keyword naturally, communicate the main value early, use specific language, and keep the wording concise.

    How long should a meta description be?

    There is no strict Google character requirement. Around 150 to 160 characters is a useful editorial range for many pages, but snippet display length varies.

    Do meta descriptions help SEO?

    Meta descriptions should not be treated as a direct ranking factor. Their primary value is helping communicate relevance and page content to searchers when the description is used in a search snippet.

    Should the focus keyword be in the meta description?

    Yes, when it naturally describes the page. Include it once where appropriate rather than repeating it unnecessarily.

    Why does Google rewrite meta descriptions?

    Google can choose page text that it believes better answers a specific search query, so the search snippet may differ from the meta description entered in your CMS.

    Should every page have a unique meta description?

    Important indexable pages should generally use descriptions that accurately represent their individual content rather than sharing the same generic description.

    What is a good meta description example?

    For this article, an example is: Learn how to write meta descriptions that match search intent, use keywords naturally, improve clarity, and encourage relevant clicks from Google.

  • Internal Linking Best Practices: 12 SEO Tips for Better Site Structure

    Internal Linking Best Practices: 12 SEO Tips for Better Site Structure

    Internal linking best practices help you connect related pages in a way that makes your website easier for visitors to navigate and easier for search engines to understand.

    A good internal linking strategy is not about adding as many links as possible. It is about sending readers to genuinely useful pages, using descriptive anchor text, connecting related topics, preventing important content from becoming isolated, and maintaining those links as your website grows.

    For businesses managing dozens or hundreds of pages, internal linking also becomes an important part of content publishing and website maintenance.

    This guide explains 12 practical internal linking best practices you can use to improve site structure, content discovery, and SEO.

    What Is Internal Linking?

    An internal link connects one page on your website to another page on the same website.

    For example, if a blog post about website optimization links to an on-page SEO checklist published on the same domain, that is an internal link.

    Internal links differ from external links. An internal link keeps the visitor within your website, while an external link points to a different domain.

    Internal links can appear in several places, including:

    • Article and page content
    • Main navigation menus
    • Breadcrumbs
    • Category and archive pages
    • Sidebars
    • Footers
    • Images that function as links

    For SEO and content strategy, contextual links inside relevant page copy are particularly useful because the surrounding text helps explain why the destination page is relevant.

    Why Internal Linking Matters for SEO

    Internal links serve both visitors and search engines. When implemented carefully, they create clearer paths between related areas of your website.

    Internal Links Help Search Engines Discover Pages

    A search engine crawler can follow links from one page to another. If an important page has no internal links pointing to it, discovering and understanding that page can become more difficult.

    This is one reason publishing a new article should not end when you press the Publish button. Relevant older pages should also be reviewed to find opportunities to link to the new content.

    Internal Links Help Explain Site Structure

    The pattern of links across your website provides information about how different pages relate to each other.

    A broad guide may link to several detailed supporting articles. Those supporting articles can link back to the broader guide and to other closely related pages where appropriate.

    This creates a logical content structure rather than a collection of disconnected articles.

    Internal Links Help Visitors Continue Their Journey

    A reader may arrive on one article with a specific question but need additional information before making a decision.

    Well-placed links help that reader move naturally to the next relevant resource without needing to return to Google or search through your navigation menu.

    Internal Links Help Highlight Important Content

    Pages that are important to your business should not be buried deep within the website with few paths leading to them.

    Strategic contextual links can help connect supporting informational content with important pillar pages, service-related content, and other useful destinations.

    12 Internal Linking Best Practices

    1. Link Only to Pages That Are Relevant

    Relevance should be the first consideration when adding an internal link.

    Ask a simple question:

    Would someone reading this section genuinely benefit from visiting the linked page?

    If the answer is no, the link probably does not belong there.

    For example, a section explaining how images affect on-page optimization can reasonably link to an image SEO guide. Linking the same phrase to an unrelated website-maintenance article would create a weaker experience.

    Internal links should support the reader’s next step, not simply increase the number of links on a page.

    2. Use Descriptive Anchor Text

    Anchor text is the clickable text used for a link.

    Compare these examples:

    Weak: click here

    Better: on-page SEO audit

    The second version gives the reader an idea of what to expect before clicking.

    Google’s official guidance says good anchor text should be descriptive, reasonably concise, and relevant to both the current page and the destination. You can review Google’s SEO link best practices for its guidance on crawlable links, anchor text, and internal cross-referencing.

    Avoid vague anchors such as:

    • Click here
    • Read more
    • This page
    • Learn more
    • Website

    Those phrases can occasionally make sense in context, but a descriptive anchor is usually more useful when you can write one naturally.

    3. Keep Anchor Text Natural

    Descriptive anchor text does not mean using the exact target keyword every time you link to a page.

    Suppose you have an article targeting “on page SEO audit.” Natural anchors pointing to it could include:

    • on-page SEO audit
    • audit your on-page SEO
    • review individual page optimization
    • complete an SEO audit of the page

    The wording can vary according to the sentence.

    Avoid forcing awkward keyword-heavy anchors simply because you want a destination page to rank for a particular phrase. The link should sound like part of normal writing.

    4. Prioritize Contextual Internal Links

    Navigation menus and footers are important, but contextual links inside page content can connect very specific topics.

    For example, while explaining how to evaluate headings, metadata, links, images, and content quality, it would be natural to direct readers to a more detailed on-page SEO audit guide.

    The surrounding paragraph explains why that page is relevant.

    Look for internal linking opportunities while writing and again during publishing QA. It is easier to create useful links when they are treated as part of content implementation rather than something added randomly afterward.

    5. Give Important Pages Strong Internal Link Support

    Not every page on a website has equal importance.

    You may have:

    • Core service pages
    • Pillar guides
    • High-value product or category pages
    • Important conversion pages
    • Supporting informational articles

    Your internal linking structure should reflect those relationships.

    If a page is strategically important but has very few relevant internal links pointing to it, review related content and determine whether useful links are missing.

    This does not mean linking every article to the same service page. The connection should still make sense to the reader.

    6. Build Topic Clusters

    Internal links are especially useful for organizing related content into topic clusters.

    A topic cluster typically includes a broad pillar or central resource supported by narrower articles.

    For example, a NextWebOps SEO cluster could contain:

    • Pillar topic: On-Page SEO Checklist
    • Supporting topic: Image SEO
    • Supporting topic: Internal Linking Best Practices
    • Supporting topic: On-Page SEO Audit
    • Supporting topic: Meta Descriptions

    The supporting articles can link to the pillar resource when relevant, while the pillar can direct readers to deeper guides for specific tasks.

    The result is a useful network of related pages rather than isolated articles competing for attention.

    Internal links are especially useful for organizing related content into topic clusters

    7. Find and Fix Orphan Pages

    An orphan page is a page with no meaningful internal links pointing to it from other pages on the website.

    This often happens when businesses continually publish new content but never revisit older pages.

    For example:

    1. A new article is written.
    2. The writer adds links from the new article to older content.
    3. The article is published.
    4. No existing page is updated to link back to the new article.

    The new article technically exists, but its internal link support can be weak.

    When publishing a new page, identify relevant older pages that could naturally link to it. This creates inbound internal links and integrates the new content into the existing site structure.

    8. Update Internal Links in Older Content

    Internal linking should not happen only while creating new articles.

    Older content can contain some of your best internal linking opportunities because those pages already discuss topics related to newly published resources.

    When reviewing older articles, look for:

    • Mentions of topics you now cover in greater depth
    • Generic references that could point to a useful guide
    • Old internal destinations that have changed
    • Broken links
    • Pages that need stronger connections to a topic cluster

    This fits naturally into a broader process for updating old blog posts for SEO.

    For sites with large content libraries, reviewing old pages periodically can uncover internal linking opportunities that were impossible when the content was first published because the destination pages did not exist yet.

    9. Do Not Force an Arbitrary Number of Internal Links

    One of the most common questions is: How many internal links should a page have?

    There is no universal number that works for every page.

    A 700-word article with a narrow topic may need only a few contextual links. A 4,000-word comprehensive guide may reasonably contain many more.

    Google itself states that there is no magical ideal number of links for a page.

    The better questions are:

    • Is each link relevant?
    • Does it help the reader?
    • Does the destination add useful information?
    • Does the page feel overloaded with links?
    • Are you repeatedly linking to the same destination without a reason?

    For NextWebOps publishing, roughly three to five contextual internal links often provides a useful editorial starting point, but this should be adjusted according to the article rather than treated as a ranking formula.

    10. Avoid Unnecessary Repeated Links to the Same Page

    If you link to the same destination several times within a short section, additional links may provide little value.

    One clear contextual link is often sufficient.

    There are situations where linking to the same important destination more than once across a long article can make sense, especially when the reader could enter or skim the content at different points.

    The principle is not “never repeat a URL.” It is to avoid repetitive linking that makes the page cluttered without helping users.

    11. Link Directly to the Final URL

    Internal links should ideally point directly to the current destination rather than relying on unnecessary redirect chains.

    Suppose an old article contains this internal URL:

    /old-seo-guide/

    and that URL redirects to:

    /on-page-seo-checklist/

    The redirect may work, but when you discover the old internal link, update it to point directly to the final page.

    This becomes particularly important after:

    • Website migrations
    • Redesigns
    • Permalink changes
    • Content consolidation
    • HTTP-to-HTTPS migrations
    • Category restructuring

    Redirects have important uses, but your own internal links should generally reference the destination you actually want visitors and crawlers to reach.

    12. Audit Internal Links Regularly

    Internal linking changes as your website changes.

    A good link today could become broken after a URL change. A page that was once important may be consolidated. A new article may need internal links from several older resources.

    An internal link audit can look for:

    • Broken internal links
    • Links pointing through redirects
    • Orphan pages
    • Important pages with weak internal-link support
    • Outdated anchor text
    • Irrelevant links
    • Pages that no longer fit the content structure
    • New opportunities between related content

    Internal links should also be reviewed during a wider website or SEO audit rather than assessed completely separately.

    Internal Linking Example: Building a Topic Cluster

    Consider a website that publishes a broad guide called:

    On-Page SEO Checklist

    The site also publishes more specific resources about:

    • Image SEO
    • Internal linking
    • Meta descriptions
    • On-page SEO audits

    A weak structure would publish all of these articles without intentionally connecting them.

    A stronger structure could work like this:

    On-Page SEO Checklist → Image SEO
    When the pillar page discusses images, it links to the detailed image optimization guide.

    On-Page SEO Checklist → Internal Linking Best Practices
    When it discusses internal links, it directs the reader to this more detailed guide.

    Internal Linking Best Practices → On-Page SEO Checklist
    This article links back to the broader SEO process where appropriate.

    On-Page SEO Audit → Image SEO
    The audit article links to the image guide when discussing image problems.

    This structure creates useful pathways between related resources without inserting links simply because the pages share the word “SEO.”

    Types of Internal Links

    Not all internal links serve exactly the same purpose.

    Contextual Links

    These are links placed naturally inside page content. They usually point to resources that expand on something being discussed.

    Navigation Links

    These appear in menus and help users reach major areas of the website, such as services, categories, the blog, or contact information.

    Breadcrumb Links

    Breadcrumbs help show where a page sits within the broader hierarchy and provide convenient links back to higher-level sections.

    Category and Archive Links

    Blog categories, product collections, and other archive structures can connect individual pages to broader groups of related content.

    Footer Links

    Footers often contain links to important structural, company, contact, policy, or service pages. Avoid turning the footer into a large collection of keyword-stuffed SEO links.

    Image Links

    An image can also link internally. When an image functions as a link, its implementation and alternative text deserve particular attention because there may be no normal text anchor accompanying it.

    How to Choose Anchor Text for Internal Links

    The best anchor text tells the reader enough about the destination without turning the link into an awkward block of keywords.

    Destination Weak Anchor Better Anchor
    SEO checklist Click here on-page SEO checklist
    Image optimization guide Read this image SEO guide
    SEO audit article This page on-page SEO audit
    Content refresh guide Learn more update old blog posts for SEO

    Anchor text does not need to be identical every time a particular page is referenced.

    Write the sentence first for the reader, then choose the most natural descriptive words as the link.

    How Many Internal Links Should a Page Have?

    There is no fixed number of internal links that every page should contain.

    The right number depends on:

    • Content length
    • Topic complexity
    • Number of genuinely relevant resources
    • The purpose of the page
    • Existing navigation and site structure

    A practical guide may naturally link to several supporting articles. A simple landing page might need far fewer contextual links.

    Do not add ten internal links because a checklist says you need ten. Conversely, do not remove useful links merely to stay below an arbitrary limit.

    The reader should remain the primary test: does each link help them understand the subject or take a useful next step?

    Common Internal Linking Mistakes

    Using Generic Anchor Text Everywhere

    Repeatedly using phrases such as “click here” removes useful context. Descriptive wording usually creates a clearer experience.

    Linking to Irrelevant Pages

    A link should make sense within the surrounding discussion. Do not link unrelated pages simply because you want to send more internal authority to them.

    Overusing Exact-Match Keywords

    The exact target keyword does not need to appear in every anchor pointing to a page. Write naturally and vary anchors where the context calls for it.

    Leaving New Content Orphaned

    After publishing a new page, identify relevant existing content that can link to it.

    Ignoring Redirected Internal URLs

    If an old internal URL redirects to a new destination, update your own links when practical so they point directly to the current URL.

    Ignoring Broken Internal Links

    Deleted pages, changed URLs, migration mistakes, and editing errors can create broken links. Check them periodically.

    Linking Everything to the Homepage

    The homepage already receives substantial structural attention on most websites. Deep internal links to specific relevant pages are often more useful to someone reading about a particular subject.

    Treating Internal Linking as a One-Time Task

    Your website changes whenever new content is published, URLs are updated, pages are removed, or topics are reorganized. Your internal linking structure should evolve with it.

    Internal Linking Checklist

    Use this checklist before publishing or updating a page:

    • Does the page link to genuinely useful related content?
    • Are internal links contextually relevant?
    • Does each important link use descriptive anchor text?
    • Does the anchor sound natural within the sentence?
    • Are you unnecessarily repeating the same destination?
    • Does the article support an existing topic cluster?
    • Are important pages easy to reach?
    • Have you checked for broken internal links?
    • Do any internal links point through avoidable redirects?
    • Have you identified older pages that should link to this new content?
    • Have you tested the links on the published page?

    Make Internal Linking Part of Publishing QA

    A content draft may be well written and still be incomplete from a publishing perspective.

    Before a page goes live, someone needs to verify:

    • Heading structure
    • Formatting
    • Internal links
    • Anchor text
    • Metadata
    • Images
    • URLs
    • Mobile presentation
    • Final-page functionality

    This is why internal linking works best when it is built into the publishing workflow rather than treated as an occasional SEO project.

    A structured WordPress publishing checklist can help teams catch internal linking and other implementation issues before content goes live.

    For businesses and agencies managing growing content libraries, maintaining all of these details can become time-consuming. NextWebOps provides hands-on content implementation and website publishing support, including internal linking, metadata, image optimization, content formatting, migrations, and publishing QA.

    If your content is ready but your team needs reliable implementation across WordPress, Shopify, or Webflow, contact NextWebOps to discuss your publishing workflow.

    Frequently Asked Questions About Internal Linking

    What are internal links?

    Internal links connect one page on a website to another page on the same domain. They can appear in page content, navigation menus, breadcrumbs, category pages, footers, and other website elements.

    Does internal linking help SEO?

    Internal linking can help search engines discover pages, understand relationships between content, and navigate your site. It can also improve the user experience by directing visitors to relevant resources.

    How many internal links should a page have?

    There is no universal ideal number. Use as many internal links as genuinely help readers navigate to relevant content without making the page cluttered or repetitive.

    What is an example of an internal link?

    If an article on NextWebOps about image optimization links to another NextWebOps article about on-page SEO, that link is internal because both pages are on the same website.

    What anchor text should I use for internal links?

    Use concise, descriptive wording that helps users understand the destination. For example, “internal linking checklist” is usually more informative than “click here.” Keep the wording natural rather than forcing exact-match keywords into every link.

    What is an orphan page?

    An orphan page is a page that has no meaningful internal links pointing to it from other pages on the website. When new content is published, adding relevant inbound internal links from existing pages can help integrate it into the site’s structure.

    Should internal links open in a new tab?

    Internal links generally do not need to open in a new tab. Allowing them to open normally usually creates a straightforward navigation experience. There may be specific interface situations where another behavior makes sense, but it should not be the default simply for SEO.

    Do internal links need nofollow?

    Normal editorial internal links generally do not need a nofollow attribute. If you want search engines to discover and understand your own related pages, standard crawlable links are usually the appropriate implementation.