Author: Muhammad Ansar

  • Image SEO: 12 Best Practices to Optimize Images for Google

    Image SEO: 12 Best Practices to Optimize Images for Google

    Image SEO is the process of optimizing website images so search engines can discover, understand, and display them appropriately while users get a fast, accessible, and visually useful experience.

    Good image optimization goes well beyond adding a keyword to an alt attribute. It involves choosing relevant visuals, using descriptive filenames, selecting efficient formats, resizing and compressing files, adding appropriate alternative text, placing images in useful context, and checking that they load correctly across devices.

    Done properly, image SEO can support your visibility in Google Search and Google Images while also improving page performance and accessibility.

    This guide walks through 12 practical image SEO best practices you can apply when publishing or updating website content.

    What Is Image SEO?

    Image SEO means optimizing the images on a website so they are useful to visitors and easier for search engines to discover and understand.

    That can include:

    • Choosing images that match the surrounding content
    • Using descriptive image filenames
    • Writing useful alt text
    • Choosing an appropriate file format
    • Reducing unnecessary file size
    • Serving images at appropriate dimensions
    • Using responsive images
    • Making important images accessible to search engine crawlers
    • Providing relevant surrounding text and captions
    • Checking image implementation before publishing

    Image optimization is therefore both an SEO task and a website publishing task. A well-optimized image should make sense within the page, load efficiently, work across screen sizes, and provide useful information when the image itself cannot be seen.

    Why Image SEO Matters

    Images are often treated as decoration added after a page has been written. In reality, they are part of the page experience and should be considered during content implementation.

    Effective image SEO can contribute to several areas.

    Search visibility

    Relevant, crawlable, properly contextualized images can give search engines additional information about a page. Images may also appear in Google Images and other search features where visual content is displayed.

    Page performance

    Uploading an unnecessarily large image can increase the amount of data a browser has to download. Resizing, compressing, and selecting an efficient format can reduce that overhead while maintaining acceptable visual quality.

    User experience

    Images should look sharp without slowing down the page. They should also adapt to different devices rather than forcing mobile visitors to download or display images designed only for large desktop screens.

    Accessibility

    Alternative text can communicate the purpose or content of meaningful images to people using screen readers. This is why alt text should be written primarily to describe the image in context rather than simply to insert SEO keywords.

    Image optimization should be part of a broader on-page SEO checklist rather than an isolated task.

    12 Image SEO Best Practices

    1. Use Relevant Images That Support the Page

    Start with image relevance.

    An image should help explain, demonstrate, compare, or support the content around it. Adding unrelated stock photography simply because a section looks empty provides little value to either users or search engines.

    For example, a guide about optimizing WordPress images would benefit more from a screenshot showing image settings, a before-and-after optimization example, or a simple instructional graphic than from a generic photo of someone using a laptop.

    Whenever possible, use original screenshots, diagrams, examples, product images, charts, or branded graphics that contribute directly to the page.

    2. Rename Image Files Before Uploading

    Camera-generated names and automatic export filenames rarely explain what an image contains.

    Instead of uploading:

    IMG_4582.jpg

    use a descriptive filename such as:

    wordpress-image-optimization.webp

    A useful filename is short, readable, and descriptive. Separate words with hyphens and avoid stuffing several variations of the same keyword into the filename.

    For example, this would be unnecessary:

    image-seo-image-optimization-seo-image-best-practices.webp

    The goal is description, not keyword density.

    3. Write Useful Alt Text

    Alt text describes the purpose or content of an image when the image cannot be viewed. It is particularly important for accessibility and can also provide search engines with contextual information about meaningful images.

    Good alt text describes what matters about the image within the surrounding content.

    Suppose an article contains a screenshot comparing an original 1.8 MB JPEG with an optimized 120 KB WebP version.

    Weak alt text:

    image seo

    Better alt text:

    Comparison of original JPEG and compressed WebP image file sizes

    The second version actually explains what the reader would see.

    Do not force your focus keyword into every alt attribute. If the keyword accurately describes an image, using it can be natural. If it does not, leave it out.

    Decorative images that add no meaningful information may not need descriptive alt text at all, depending on how they are implemented.

    4. Choose the Right Image Format

    There is no single image format that is automatically best for every situation.

    • WebP: A practical modern choice for many website photographs and graphics because it can provide good visual quality at relatively efficient file sizes.
    • AVIF: Can offer excellent compression, although workflow and compatibility requirements should still be considered.
    • JPEG: Still useful for photographic images, especially in existing content and workflows.
    • PNG: Useful when transparency or certain lossless graphics are required, but files can become large.
    • SVG: Well suited to scalable icons, logos, and some illustrations when implemented securely and appropriately.

    For many blog graphics and website images, WebP is a sensible starting point. However, format decisions should account for the actual image, required quality, browser support, and publishing environment.

    5. Resize Images Before Uploading

    Image dimensions and file size are not the same thing.

    A photograph could be 4,000 pixels wide but displayed inside an article at only 700 pixels. Uploading the full-size version can force users to download substantially more image data than they need.

    Resize images according to how they will actually be used on the website.

    For example, if your blog layout never displays an article graphic wider than 700 pixels, there may be little benefit in uploading a 4,000-pixel-wide source file for that placement unless your responsive or high-density display strategy specifically requires it.

    This step should happen before or during publishing rather than after the page becomes slow.

    6. Compress Images Without Destroying Quality

    Compression reduces image file size, but the objective should not be to hit an arbitrary number for every image.

    A simple illustration may compress to a very small file, while a detailed photograph may need more data to remain visually acceptable.

    Instead of assuming every image must be below a particular KB limit, find a sensible balance between:

    • Visual quality
    • Image dimensions
    • File format
    • File size
    • The image’s importance on the page

    After compression, inspect the final image. Excessive compression can introduce visible artifacts, blurry text, color banding, or poor-looking product details.

    7. Use Responsive Images

    Visitors may open the same page on a large desktop display, tablet, or small smartphone. Serving exactly the same oversized image to every device can be inefficient.

    Responsive image techniques allow browsers to select a more appropriate version based on factors such as screen size and display requirements.

    HTML attributes such as srcset and sizes can help with this process, and modern content management systems often generate multiple image sizes automatically.

    The important publishing question is not simply whether several image files exist. Check that the website is actually outputting responsive image markup correctly and that the correct images appear across devices.

    8. Specify Image Width and Height

    Providing image dimensions helps browsers reserve the appropriate amount of space while a page loads.

    Without enough sizing information, surrounding content can shift as an image appears. Unexpected layout movement creates a frustrating experience, particularly when users are trying to read or interact with the page.

    When publishing images, make sure the final implementation preserves appropriate width and height information rather than stripping useful attributes without reason.

    9. Place Images Near Relevant Content

    Context matters.

    An image placed next to text discussing the exact subject shown in the image is easier for readers to understand than an isolated image surrounded by unrelated content.

    Use relevant:

    • Headings
    • Body copy
    • Captions when useful
    • Image filenames
    • Alt text

    These elements should work together naturally. They should not all repeat exactly the same keyword phrase.

    For example, if you show an image demonstrating WebP compression, introduce it within a section explaining WebP or image compression rather than inserting it randomly elsewhere on the page.

    10. Use Lazy Loading Carefully

    Lazy loading can delay the loading of images until they are needed, which can reduce unnecessary initial page loading.

    However, not every image should automatically be treated the same way.

    An important image near the top of the page may need to load promptly because it is immediately visible to the user. Carelessly delaying important above-the-fold images can hurt the experience rather than improve it.

    Use lazy loading strategically for images farther down the page, and test the actual result rather than assuming that enabling a setting automatically produces the best performance.

    11. Make Important Images Discoverable

    Search engines need to be able to find the images you want indexed.

    Google recommends using standard HTML image elements for images you want its systems to discover. You can review Google’s official image SEO best practices for guidance on image discovery, responsive images, contextual information, and image sitemaps.Avoid implementations that unnecessarily hide important images from crawlers or make their URLs inaccessible.

    Google also provides guidance for image sitemaps, which can be useful in helping Google discover images, particularly in situations where discovery may otherwise be difficult.

    Large websites should also use image URLs consistently rather than needlessly changing the URL for the same image.

    12. Check Image SEO During Publishing QA

    Many image problems are implementation mistakes rather than strategy mistakes.

    An image may have been optimized correctly before upload but published with the wrong version, incorrect alt text, broken dimensions, or poor mobile rendering.

    Add image checks to your normal publishing workflow.

    Before a page goes live, verify:

    • The image is relevant to the section
    • The filename is descriptive
    • The correct file was uploaded
    • The dimensions are appropriate
    • The format is suitable
    • The image has been compressed appropriately
    • Meaningful images have useful alt text
    • The image displays correctly on desktop and mobile
    • Text inside graphics remains readable
    • No image URL is broken
    • Responsive image behavior works as expected
    • Important images are crawlable

    This is the same reason a complete WordPress publishing checklist matters: optimization is only useful if the final implementation is correct.

    Image SEO Example: Before and After Optimization

    Consider a business publishing a blog post about improving website page speed.

    The original image looks like this:

    • Filename: Screenshot-2026-08-18-142533.png
    • Dimensions: 2400 × 1600 pixels
    • File size: unnecessarily large for its article placement
    • Alt text: missing
    • Placement: inserted without explanatory text
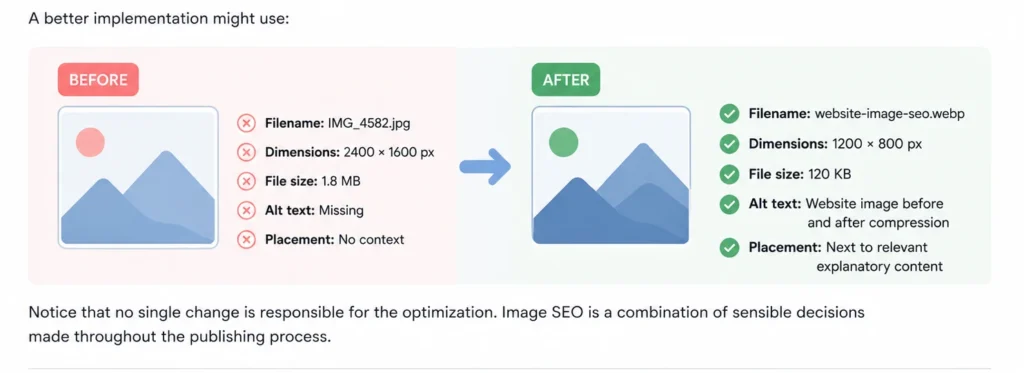
    Example of image SEO before and after optimization with improved filename, dimensions, file size, alt text, and placement

    A better implementation might use:

    • Filename: website-image-compression-example.webp
    • Dimensions: resized for the actual content width
    • Format: WebP where appropriate
    • Compression: optimized while keeping text and details clear
    • Alt text: Website image before and after compression
    • Placement: directly beside the section explaining image compression

    Notice that no single change is responsible for the optimization. Image SEO is a combination of sensible decisions made throughout the publishing process.

    Image Filename, Alt Text, Title, and Caption: What’s the Difference?

    These fields are sometimes treated as interchangeable, but they serve different purposes.

    Element Main Purpose Example
    Filename Identifies the image file and provides descriptive context image-seo-checklist.webp
    Alt text Describes meaningful image content or purpose when it cannot be seen Image SEO checklist showing filename, format, compression, and alt text
    Image title Can help organize media in a CMS but should not be treated as a replacement for alt text Image SEO Checklist
    Caption Visible supporting information for readers when a caption is useful Check filenames, alt text, dimensions, format, and compression before publishing.

    Do not copy the same keyword-filled sentence into all four fields. Use each field for its actual purpose.

    Image SEO for WordPress

    WordPress makes image publishing convenient, but convenience does not remove the need for optimization.

    Before adding an image to a WordPress post or page, check the filename, dimensions, format, and compression. After uploading it, add appropriate alternative text and confirm that WordPress is displaying the intended image size.

    WordPress can generate multiple image sizes, which may assist with responsive delivery, but themes, plugins, custom templates, and page builders can affect how those images are ultimately output.

    Do not assume an image is optimized simply because it was uploaded through the Media Library. Check the finished page.

    If you’re conducting a broader review, include images when performing an on-page SEO audit so image problems are evaluated alongside headings, metadata, internal links, content, and other page elements.

    Common Image SEO Mistakes

    Stuffing keywords into alt text

    Repeating your target keyword in every image description does not make the page more useful. Write alt text for the specific image and its context.

    Using the same alt text for every image

    Different meaningful images usually communicate different information. Their descriptions should reflect that.

    Uploading full-resolution source files unnecessarily

    A website normally does not need the same massive image file used for print design or high-resolution photography.

    Compressing images too aggressively

    A tiny file is not an improvement if text becomes unreadable or the image looks visibly damaged.

    Assuming a plugin handles everything

    An optimization plugin can automate useful tasks, but it cannot always determine whether an image is relevant, whether its alt text accurately represents the context, or whether the correct visual was selected in the first place.

    Ignoring mobile display

    Always inspect important pages at different screen sizes. An image that looks excellent on desktop may be cropped, unreadable, or awkwardly sized on a phone.

    Optimizing images but ignoring the rest of the page

    Image optimization works as part of broader on-page SEO. Titles, headings, content quality, metadata, internal linking, usability, and technical implementation still matter.

    Use image optimization alongside a complete on-page SEO process, not as a substitute for it.

    Practical Image SEO Checklist

    Use this quick checklist whenever you publish a new image:

    • Is the image genuinely useful to the page?
    • Does the filename clearly describe it?
    • Have unnecessary source dimensions been reduced?
    • Is the chosen file format appropriate?
    • Has the image been compressed without visible quality problems?
    • Does a meaningful image have accurate alt text?
    • Is the image positioned near relevant content?
    • Are width and height handled correctly?
    • Does responsive delivery work?
    • Is lazy loading being used appropriately?
    • Can search engines discover important images?
    • Does the image display correctly on desktop and mobile?

    When updating existing content, image optimization should also be part of the refresh process. The same pages that need outdated copy, broken links, or metadata improvements may contain oversized or poorly implemented images. See our guide on how to update old blog posts for SEO for a broader content-refresh workflow.

    Image SEO Is an Implementation Process

    The most effective approach to image SEO is not to add alt text after an article has already been published and consider the job complete.

    Think about images throughout the publishing workflow:

    Select → resize → choose format → compress → rename → upload → add alt text → position → test → publish.

    This approach makes image optimization repeatable and reduces the chance of small publishing mistakes accumulating across dozens or hundreds of pages.

    For businesses and agencies managing large volumes of website content, consistency becomes especially important. A clear publishing process helps ensure that filenames, image dimensions, formatting, metadata, internal links, and final-page QA are handled the same way across the site.

    NextWebOps provides hands-on content implementation and website publishing support, including image optimization, content formatting, metadata, internal linking, and publishing QA. If your team has content ready but needs reliable implementation, contact NextWebOps to discuss your publishing workflow.

    Frequently Asked Questions About Image SEO

    What is image SEO?

    Image SEO is the process of optimizing website images so they are useful to visitors, accessible where appropriate, efficiently delivered, and easier for search engines to discover and understand. It can include filenames, alt text, formats, dimensions, compression, responsive delivery, surrounding content, and crawlability.

    Does alt text help SEO?

    Alt text can help search engines understand meaningful images, but its primary purpose is to provide an alternative description when an image cannot be seen. Write accurate, useful descriptions rather than stuffing keywords into alt attributes.

    What is the best image format for SEO?

    There is no universal best format. WebP is a strong choice for many website images because it can deliver good quality with efficient file sizes. AVIF, JPEG, PNG, and SVG also have appropriate use cases. Choose based on the type of image, required quality, compatibility, and performance needs.

    Does the image filename matter for SEO?

    A descriptive filename gives search engines and website managers additional context about an image. Use short, readable filenames that describe the image, such as image-seo-checklist.webp, rather than generic names such as IMG_4582.jpg.

    How large should website images be?

    There is no single ideal file size for every website image. The appropriate size depends on the image’s dimensions, complexity, format, required visual quality, and placement. Resize images for their intended use and compress them enough to reduce unnecessary data without making them look poor.

    Can images rank in Google Images?

    Yes. Google can discover and index eligible website images and may show them in Google Images and other search experiences. Relevant content, accessible image URLs, standard HTML image implementation, descriptive information, and overall page quality can all contribute to how Google understands an image.

    Should every image have alt text?

    No. Meaningful images should generally have alternative text that communicates their content or purpose. Purely decorative images may use an empty alt attribute when appropriate so assistive technologies can ignore them. Alt text should be based on the image’s role on the page rather than added simply for SEO.
  • On Page SEO Checklist: 18 Essential Checks Before Publishing

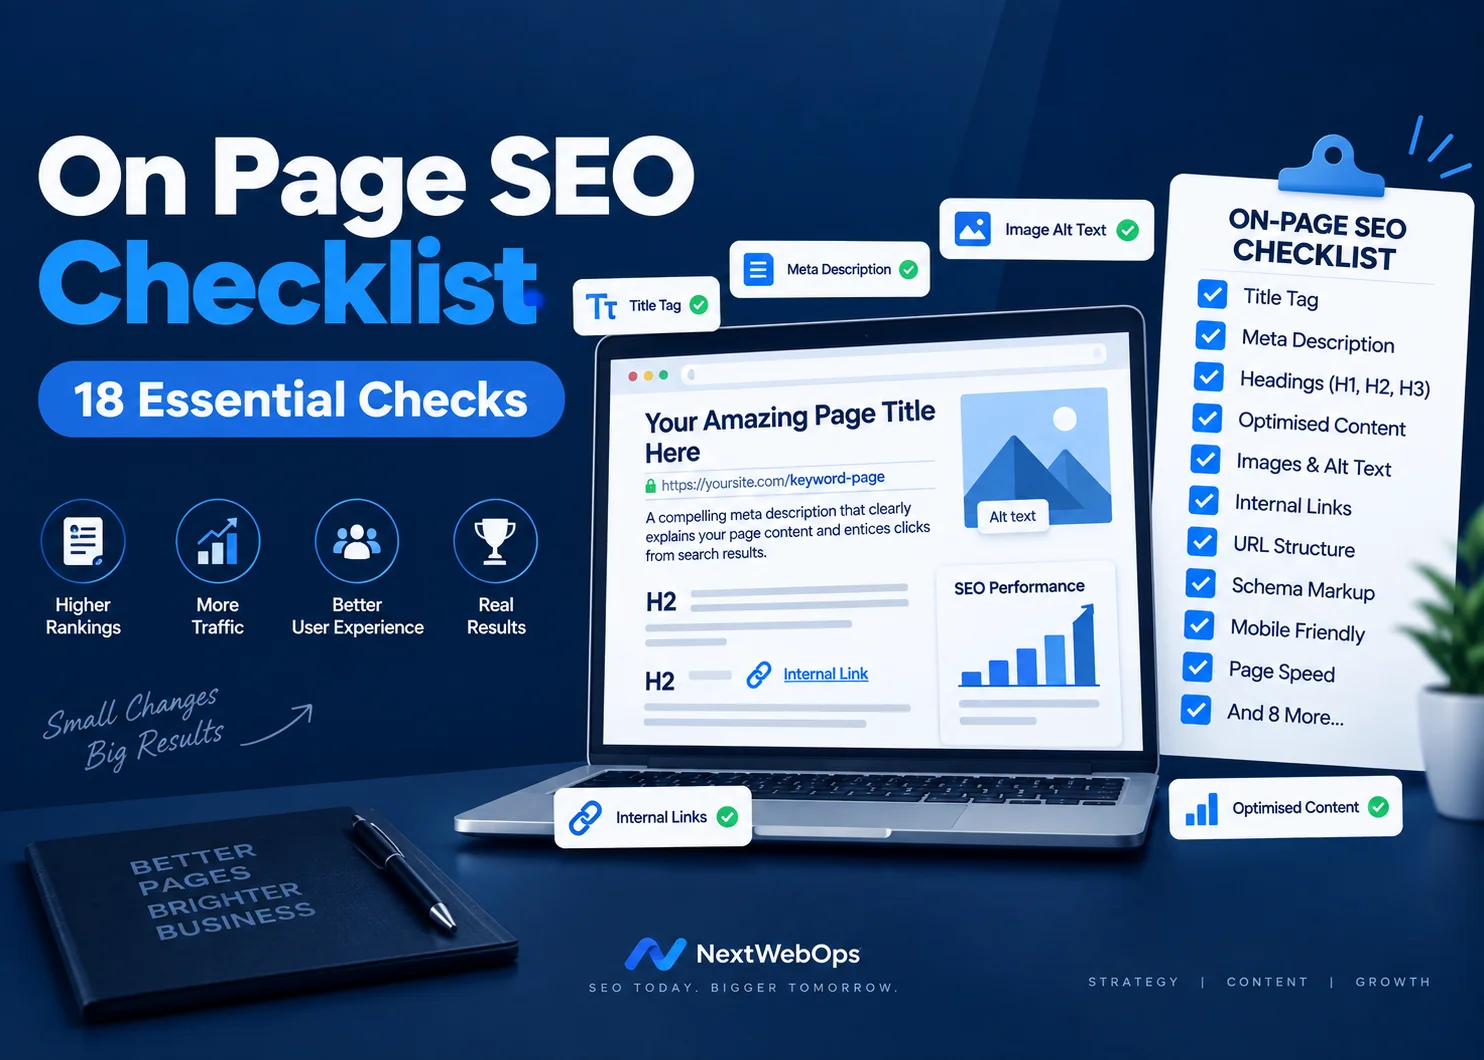
    On Page SEO Checklist: 18 Essential Checks Before Publishing

    On page SEO checklist tasks are easy to overlook when you are preparing a new article or webpage for publication. A page may contain useful information, but missing SEO titles, poor headings, unoptimized images, weak internal links, or incomplete metadata can reduce its chances of performing well in search results.

    Following a consistent on page SEO checklist helps you review these elements before publishing. Instead of relying on memory, you can work through the same process for every page and make sure the content is properly structured for both search engines and visitors.

    This guide covers 18 important checks you can complete before publishing or updating a page.

    What Is On-Page SEO?

    On-page SEO is the process of optimizing elements directly within a webpage to improve its search visibility, relevance, usability, and overall quality.

    These elements include:

    • SEO titles
    • Meta descriptions
    • URLs
    • Headings
    • Page content
    • Keyword usage
    • Internal links
    • External links
    • Images
    • Alt text
    • Page structure

    Unlike off-page SEO, which includes factors such as backlinks from other websites, on-page optimization focuses largely on elements you can control directly.

    If you are optimizing an existing page rather than preparing a new one, performing an on-page SEO audit can help identify missing or poorly optimized elements.

    1. Choose a Primary Focus Keyword

    Every page should have a clearly defined primary topic.

    Before writing or optimizing the content, decide which search term best represents what the page is about.

    For example, the primary keyword for this guide is on page seo checklist.

    You can also use related phrases naturally, including:

    • On-page SEO optimization
    • SEO checklist
    • On-page SEO factors
    • SEO publishing checklist
    • Page optimization checklist

    Your primary keyword gives the page a clear focus, while related terms allow you to explain the topic naturally without repeating exactly the same phrase in every paragraph.

    2. Understand Search Intent

    A well-optimized page still needs to provide what the searcher actually wants.

    Before publishing, ask:

    What is someone searching this keyword expecting to find?

    Search intent normally falls into several broad categories:

    • Informational: The user wants to learn something.
    • Commercial: The user is comparing products, services, or solutions.
    • Transactional: The user is ready to take an action such as purchasing or signing up.
    • Navigational: The user is looking for a particular website or page.

    A person searching for an on page SEO checklist is most likely looking for practical steps they can follow. That makes a detailed checklist more useful than a general discussion of what SEO means.

    You can also review the pages already ranking for your target keyword to understand the content format and questions Google currently associates with that search.

    3. Use a Clear H1

    The H1 is normally the main heading of the page.

    It should clearly communicate the topic to both readers and search engines.

    A strong H1 should:

    • Describe the main topic
    • Include the focus keyword naturally where appropriate
    • Be easy to understand
    • Match the content of the page

    On most WordPress themes, the post title automatically becomes the H1. If that is how your website is configured, you should not manually add another H1 inside the article body.

    Use H2 and H3 headings to organize the remaining sections.

    4. Create a Logical Heading Structure

    Headings make long content easier to scan and help establish relationships between different parts of the article.

    A typical structure is:

    H1: Main page title
    H2: Main sections
    H3: Supporting sections within an H2

    Do not select heading levels simply because you prefer their visual size.

    For example, if a section discusses image optimization and you need subsections for compression and alt text, the structure could be:

    H2: Optimize Images
    H3: Compress Images
    H3: Write Alt Text

    This gives both visitors and search engines a predictable content hierarchy.

    5. Optimize Your SEO Title

    The SEO title is one of the most important elements of your search result.

    It should accurately describe the page and encourage relevant users to click.

    For an on page SEO checklist, placing the primary keyword near the beginning of the SEO title makes the topic immediately clear.

    A good SEO title should:

    • Include the primary keyword
    • Communicate a clear benefit
    • Be relevant to the content
    • Avoid unnecessary words
    • Stay within a reasonable display length

    Rank Math allows you to control the SEO title separately from the visible post title. Always review the search preview before publishing.

    6. Write an Optimized Meta Description

    A meta description summarizes the page for users viewing it in search results.

    While Google can sometimes choose its own description from the page, providing a relevant meta description remains an important publishing step.

    Your meta description should:

    • Describe what the page contains
    • Include the primary keyword naturally
    • Give the searcher a reason to visit
    • Avoid excessive keyword repetition

    For this article, the meta description should clearly communicate that the reader will receive a practical on page SEO checklist covering content, headings, images, links, and metadata.

    7. Create a Short, Descriptive URL

    A page URL should be simple enough for users and search engines to understand.

    For this article, a clean URL is:

    nextwebops.com/on-page-seo-checklist/

    Avoid URLs that contain unnecessary information such as:

    • Random numbers
    • Long strings of words
    • Publication dates that are not required
    • Unrelated category names
    • Unnecessary stop words

    Once a page is published and starts receiving traffic or backlinks, avoid changing its URL without a good reason. If a URL must change, use the appropriate redirect.

    8. Include the Focus Keyword Early

    Your page should establish its subject quickly.

    Including the primary topic in the opening paragraph helps readers confirm that they have reached the right page.

    It also prevents long introductions that discuss several unrelated ideas before addressing the actual search query.

    Your focus keyword does not need to appear in every sentence. The goal is to use the on page SEO checklist phrase where it sounds natural while also using related language throughout the article.

    9. Cover the Topic Thoroughly

    SEO settings cannot compensate for content that does not answer the user’s question.

    Before publishing, review the article from the reader’s perspective.

    Ask whether there are:

    • Important questions left unanswered
    • Sections that need more explanation
    • Repeated sections that add little value
    • Claims that need supporting information
    • Topics included only to increase word count

    There is no universal word count required for SEO.

    A page should contain enough information to satisfy the user’s search intent. Some topics need only a short explanation, while comprehensive guides may require several thousand words.

    Google’s own guidance on creating helpful content emphasizes producing content primarily for people rather than creating pages simply to manipulate search rankings.

    10. Make the Content Easy to Read

    Good readability helps visitors find information quickly, particularly on mobile devices.

    Use formatting elements such as:

    • Short paragraphs
    • Clear headings
    • Bullet lists
    • Numbered steps
    • Bold text where useful
    • Enough white space

    Avoid long blocks of uninterrupted text.

    Many visitors scan an article before reading it closely, so headings and short sections can help them locate the information they need.

    11. Add Relevant Internal Links

    Internal links connect related pages within your website.

    They are useful for visitors because they provide a path to additional information. They can also help search engines discover pages and understand relationships between different topics on your site.

    For example, your on page SEO checklist is only one part of the publishing process. A complete WordPress publishing checklist can help you review categories, formatting, images, links, metadata, and other publishing tasks.

    When adding internal links:

    • Choose pages that are genuinely relevant
    • Use descriptive anchor text
    • Place links where they provide additional value
    • Avoid adding excessive links
    • Review older pages for new linking opportunities

    Internal links should make navigating your website easier rather than distracting readers.

    12. Optimize Anchor Text

    Anchor text is the clickable wording used within a link.

    Whenever possible, it should indicate what the linked page is about.

    Generic anchors such as these provide little context:

    • Click here
    • Read more
    • Learn more
    • Go here

    Instead, use descriptive wording that fits naturally into the sentence.

    For example, our guide to internal linking best practices provides more detail about choosing relevant pages and creating useful anchor text.

    Do not force the same keyword-rich anchor text into every link. Variation is natural and often better for readers.

    13. Optimize Images Before Uploading

    Images improve visual presentation, but unnecessarily large images can increase page size and slow loading.

    Before uploading an image, check:

    • Image dimensions
    • File size
    • File format
    • Filename
    • Alt text

    Use descriptive filenames rather than camera-generated or random filenames.

    For example:

    on-page-seo-checklist.webp

    is much clearer than:

    IMG_736291.jpg

    You can learn more about filenames, compression, image formats, and alternative text in our complete guide to image SEO.

    14. Add Descriptive Image Alt Text

    Alt text describes an image for users who cannot see it and is an important accessibility element.

    It can also provide search engines with additional context about an image.

    When an image genuinely represents the topic, the focus keyword can sometimes fit naturally into the alt text.

    For example:

    On page SEO checklist showing 18 optimization checks

    This is much better than stuffing several unrelated keywords into the alt attribute.

    Describe what the image actually shows. If the image is purely decorative, it may not need descriptive alt text.

    15. Include Useful External Links

    External links can provide readers with supporting information from authoritative sources.

    You should not add an outbound link simply to satisfy an SEO tool, but linking to a relevant primary source can improve the usefulness of an article.

    For example, Google’s SEO Starter Guide provides additional information about how Google recommends organizing and optimizing website content.

    Before publishing, check that outbound links:

    • Go to the intended page
    • Are still active
    • Support the surrounding information
    • Come from an appropriate source
    • Use appropriate link attributes

    Ordinary editorial links to useful resources generally do not need to be marked nofollow. Sponsored or paid links should be handled differently.

    16. Review Keyword Usage

    Once the content is complete, review how often and where your primary keyword appears.

    A strong on page SEO checklist article should make its topic obvious without repeating the same phrase unnaturally.

    Your primary keyword can appear naturally in areas such as:

    • Post title
    • SEO title
    • Meta description
    • URL
    • Opening paragraph
    • Selected headings
    • Body content
    • Relevant image alt text

    Do not attempt to reach an arbitrary keyword density by inserting the phrase into sentences where it does not belong.

    Use closely related terms throughout the content so the article remains natural and comprehensive.

    17. Review Your Rank Math SEO Settings

    After completing the content, open the Rank Math SEO panel and review its recommendations.

    Check:

    • Focus keyword
    • SEO title
    • Meta description
    • URL
    • Keyword placement
    • Internal links
    • External links
    • Image alt text
    • Content length
    • Content readability
    • Title readability
    • Schema settings

    A good on page SEO checklist should include this final plugin review because small issues are easy to miss during content production.

    However, Rank Math’s score is a recommendation system rather than a direct Google ranking score.

    Do not make content awkward simply to turn every recommendation green. The page should remain useful and natural for readers.

    18. Perform a Final Front-End Quality Check

    Do not rely only on what you see inside the WordPress editor.

    Preview the finished page on the front end before publishing.

    Check both desktop and mobile versions for:

    • Correct heading sizes
    • Paragraph spacing
    • Image alignment
    • Broken images
    • Broken links
    • Mobile readability
    • Buttons and calls to action
    • Author information
    • Categories
    • Metadata
    • Unexpected formatting

    This step is particularly important when content has been copied from Google Docs, Microsoft Word, or another CMS because unwanted formatting can sometimes carry over.

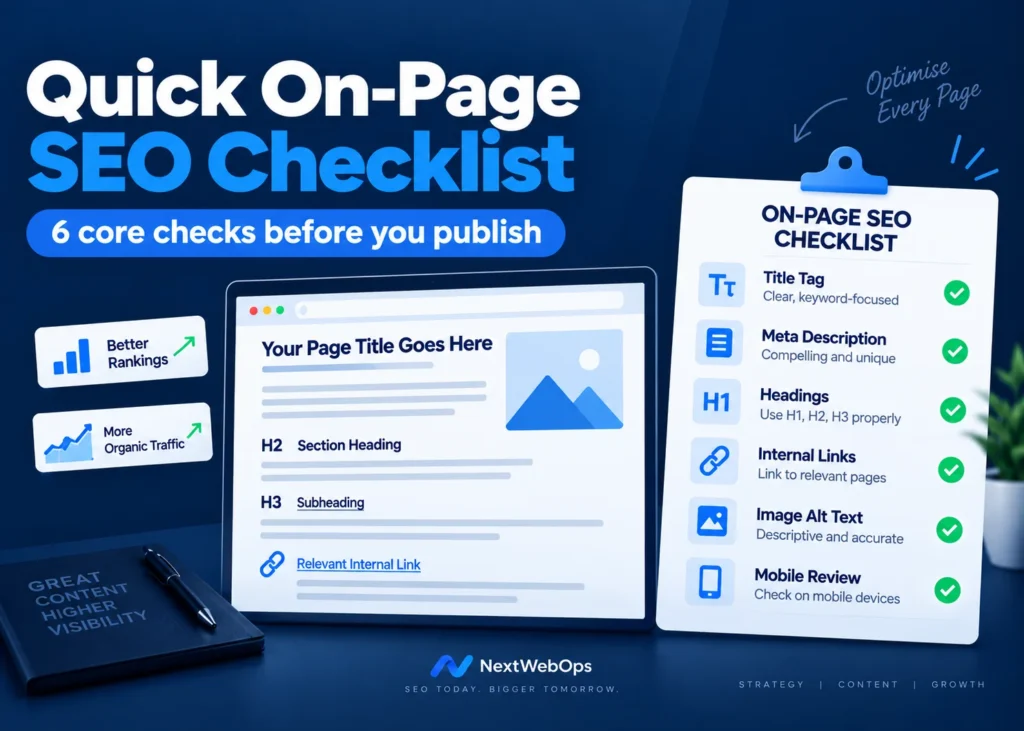
    Quick on page SEO checklist with six core checks before publishing


    Quick On Page SEO Checklist Before Publishing

    Use this final on page SEO checklist before clicking Publish:

    • ✓ Primary focus keyword selected
    • ✓ Search intent confirmed
    • ✓ One clear H1 used
    • ✓ H2 and H3 structure reviewed
    • ✓ Focus keyword included in the SEO title
    • ✓ Meta description added
    • ✓ Short descriptive URL created
    • ✓ Focus keyword appears early in the content
    • ✓ Topic is covered thoroughly
    • ✓ Content is easy to read
    • ✓ Internal links added
    • ✓ Anchor text reviewed
    • ✓ Images resized and compressed
    • ✓ Image filenames optimized
    • ✓ Alt text added where appropriate
    • ✓ Useful outbound links checked
    • ✓ Keyword usage reviewed
    • ✓ Rank Math recommendations checked
    • ✓ Desktop and mobile page reviewed

    A Consistent SEO Process Produces Better Pages

    Good on-page SEO does not depend on one setting, one keyword, or one plugin score.

    It comes from consistently optimizing the small elements that contribute to a complete page.

    Your title needs to communicate the topic. Your headings need to organize the content. Images should be properly prepared. Internal links should connect relevant information. Metadata should accurately represent the page, and the finished article should be easy to use on both desktop and mobile.

    Using the same on page SEO checklist every time you publish can make that process faster and more reliable.

    It also creates greater consistency across your website because each article goes through the same quality-control process before publication.

    Frequently Asked Questions About an On Page SEO Checklist

    What should an on page SEO checklist include?

    An on page SEO checklist should include keyword research, search intent, SEO titles, meta descriptions, URLs, heading structure, content optimization, internal linking, external links, image optimization, alt text, and final quality checks.

    How often should I perform on-page SEO checks?

    Perform the main checks before publishing every new page. You should also periodically review older pages because links, search intent, information, and competing search results can change over time.

    How many times should I use my focus keyword?

    There is no fixed number that works for every article. The primary keyword should appear naturally in important areas of the page without making the writing repetitive or difficult to read.

    Should the focus keyword appear in every heading?

    No. Use the keyword in headings when it naturally describes the section. You do not need to place it in every H2 or H3.

    Does Rank Math automatically optimize a page?

    No. Rank Math can identify possible optimization issues and help manage SEO settings, but you still need to create useful content, optimize headings and images, add relevant links, and review the finished page.

    Is a high Rank Math score enough to rank on Google?

    No. A high Rank Math score means the page meets many of the plugin’s recommended checks. Rankings can also depend on content quality, competition, backlinks, website authority, technical SEO, user intent, and other factors.

  • Website Maintenance Checklist for Small Businesses: What to Check and When

    Website Maintenance Checklist for Small Businesses: What to Check and When

    A website maintenance checklist for small businesses helps owners keep their sites secure, accurate and dependable without waiting for something to break. It creates a routine for checking updates, backups, forms, speed, content and search performance throughout the year.

    A business website may continue to look normal even when problems are developing behind the scenes. A contact form can stop delivering messages. A plugin can become outdated. A page can disappear from search results. A backup can fail silently for months.

    Regular maintenance makes these problems easier to find before they result in lost enquiries, security incidents or expensive emergency work. Some tasks deserve weekly attention, while others only need a monthly, quarterly or annual review. This guide organizes those responsibilities into a practical schedule.

    Why Website Maintenance Matters

    A website is not a finished product that can be published and forgotten. It depends on software, hosting, third-party services, domain settings, content and integrations that continue changing after launch.

    Routine website maintenance helps protect:

    • Website security
    • Customer information
    • Search visibility
    • Page speed
    • Lead generation and online sales
    • Brand credibility
    • Accessibility
    • Business continuity

    Maintenance also makes costs more predictable. A small problem discovered during a routine review is usually easier to resolve than an issue found after the website becomes unavailable. Testing a contact form may take only a few minutes. Discovering months later that messages were never delivered can mean lost leads that cannot be recovered.

    What Website Maintenance Includes

    Website maintenance is often treated as another name for installing software updates. Updates are important, but they represent only one part of the work.

    Software and Hosting

    This includes the website platform, theme, plugins, applications, server environment and connected services. Updates should be installed carefully and tested afterward.

    Backups and Recovery

    Automated backups should run regularly and be stored somewhere separate from the live website. A backup becomes dependable only when you know it can be restored.

    Security

    Security maintenance includes malware scans, user-access reviews, password practices, SSL checks and monitoring for unusual activity.

    Website Functionality

    Forms, buttons, menus, search tools, checkout processes, booking systems and email notifications should be tested as real visitors would use them.

    Speed and Mobile Usability

    A website should continue loading efficiently and working properly across common screen sizes. New images, plugins and tracking scripts can gradually reduce performance.

    Content and Business Information

    Service descriptions, prices, addresses, contact details, team information and policy notices should remain accurate.

    SEO and Analytics

    Maintenance should include checking indexing problems, broken links, redirects, search performance and conversion tracking.

    The exact schedule depends on the website. A small brochure site may require less frequent attention than an online store processing orders every day.

    What to Check Before Starting

    Before changing anything, document the current website setup. Record:

    • Website platform and version
    • Hosting provider and domain registrar
    • SSL certificate status
    • Active theme or template
    • Important plugins and applications
    • Backup location and schedule
    • Analytics and Search Console access
    • Main contact and conversion forms
    • Payment or booking integrations
    • Users with administrator access
    • Renewal dates for critical services

    Store this information securely. Do not place passwords or recovery codes inside a maintenance spreadsheet that several people can access.

    Decide who is responsible for software updates, backups, security alerts, content changes, analytics reviews, renewals and technical support. A checklist is not useful when everyone assumes someone else is monitoring the website.

    Create a Backup Before Making Changes

    Create a current backup before installing updates or making important changes. The backup should include the website files and database.

    Confirm when it was created, what it contains, where it is stored, how long it is retained, who can access it and how the website would be restored.

    Keeping every backup on the same hosting account creates unnecessary risk. Store at least one recent copy separately from the live server through secure cloud storage, a managed backup service or another approved location.

    Use a Staging Site for Risky Changes

    A staging site is a private copy of the website where changes can be tested before reaching visitors. Use it when installing major platform updates, changing themes, modifying checkout or booking features, adding custom code, changing navigation or removing an important integration.

    Not every text correction needs staging. The level of testing should match the risk. After deploying a tested change, confirm that the live website still works because caching, hosting settings and third-party services can behave differently.

    Weekly Website Maintenance Tasks

    Weekly maintenance should focus on issues that could quickly affect security, leads or sales.

    Review Available Updates

    Check the content-management system, theme, plugins and applications for updates. Review what each update changes, whether it is compatible with the setup and whether a current backup exists.

    After updating, check the homepage, navigation, important service pages, forms, mobile layout, checkout or booking process and administration area. Document problems and use the backup or rollback option when appropriate.

    Confirm That Backups Are Running

    Look for a recent successful backup, failed-job notices, available storage, correct retention settings, off-site copies and confirmation that files and database are included. A dashboard saying “backup enabled” is not proof that usable backup files exist.

    Check Website Uptime

    Uptime monitoring can alert you when the website becomes unavailable outside working hours. Investigate repeated downtime, which may result from hosting problems, expired services, traffic spikes, software conflicts or security incidents.

    Review Security Alerts

    Pay attention to failed administrator logins, unknown accounts, modified files, malware warnings, unexpected redirects, suspicious traffic and disabled security features. Do not ignore repeated alerts simply because the website still looks normal.

    Test Critical Customer Actions

    Complete the actions that matter most to the business. Submit the enquiry form, test the route to checkout or confirm that appointment availability displays correctly. Verify both sides: the visitor sees confirmation and the business receives the message, order or booking.

    Check Recently Published Content

    Review new pages and posts for incorrect formatting, missing images, broken links, wrong categories, spelling errors, poor mobile display, missing metadata and incorrect calls to action.

    Monthly Website Maintenance Tasks

    Monthly maintenance examines slower changes that may affect performance, search visibility and conversions.

    Test Every Important Form

    Test contact, quote, newsletter, application, registration, booking, account, checkout and upload forms. Confirm required fields, useful error messages, successful submission, saved entries and delivery of notifications to both the customer and business.

    If messages are regularly treated as spam, review the email-delivery setup. A transactional email service may be more reliable than sending messages directly through the web server.

    Review Buttons and Important Links

    Test navigation, calls to action, footer links and buttons leading to contact pages, services, checkout, booking, portals, downloads and social profiles. Automated tools find many broken links, but manual testing can reveal links that work while leading to the wrong page.

    Check Page Speed

    Test the homepage, main service pages, popular articles and conversion pages with a tool such as Google PageSpeed Insights. Compare results with earlier tests rather than chasing a perfect score.

    Common causes of slower loading include large images, unnecessary plugins, excessive scripts, weak caching, video embeds, database growth, slow hosting, font files and third-party tracking. Test mobile as well as desktop.

    Scan for Security Problems

    Run a security scan and confirm that SSL, HTTPS, security software, administrator accounts, file permissions, spam controls and login protection are working. A valid SSL certificate protects data in transit but does not prevent weak passwords, vulnerable plugins or malicious files.

    Review User Accounts and Permissions

    Remove accounts belonging to former employees, freelancers and agencies. Give each user only the access needed for their role. Check administrator accounts, recent users, dormant accounts, shared usernames, password practices, two-factor authentication and connected applications.

    Review Analytics and Conversions

    Review popular pages, traffic sources, enquiries, sales, devices and exits from important processes. Investigate large unexpected changes. Test tracked actions rather than assuming analytics tags still work, and document the test date and outcome.

    Check Google Search Console

    Review indexing errors, manual actions, security warnings, mobile performance, Core Web Vitals, sitemap status, declining pages and broken URLs. Not every excluded page is a problem; focus on valuable pages that should appear in search.

    Review 404 Errors and Redirects

    For important missing pages, decide whether to restore the page, correct the link, redirect it to a relevant replacement or leave a genuine 404. Do not redirect every missing page to the homepage. Remove redirect chains by linking directly to the final destination.

    Review Website Content for Accuracy

    Check business hours, phone numbers, addresses, team members, service descriptions, prices, delivery details, guarantees, certifications and policy information. Start with the homepage, contact page and high-value service pages.

    Optimize Newly Uploaded Images

    Confirm that new images have suitable dimensions, reasonable file sizes, descriptive filenames, helpful alt text, correct orientation and no unnecessary duplicates. Alt text should describe the image rather than repeat keywords.

    Clean Up Spam and Unnecessary Data

    Remove spam comments, abandoned drafts, expired submissions, temporary files, duplicates and test data in line with legal and record-retention requirements. Create a backup before using database-cleaning tools.

    Quarterly Website Maintenance Tasks

    Quarterly reviews ask whether the website still supports users and business goals effectively.

    Test a Backup Restoration

    Restore a backup in a safe environment and confirm that it includes pages, images, database content, users, settings, forms, orders or bookings, and theme or plugin configurations. Record how long recovery takes and who can complete it.

    Audit Plugins, Themes and Applications

    For each component, confirm that it is used, maintained, secure, licensed appropriately and not duplicating another feature. Remove unnecessary software after checking dependencies. Document the purpose of essential components.

    Review Mobile Usability

    Test on real phones and tablets. Check menus, text, buttons, forms, images, tables, popups, sticky elements, checkout, booking steps and content order. Complete important customer journeys from beginning to end.

    Review Navigation and Site Structure

    Confirm that visitors can find services, pricing, business information, contact details, policies and support. Remove outdated items and use labels that describe destinations clearly.

    Audit Calls to Action

    Ensure calls to action match the page, use clear language, lead to the correct destination, work on mobile and support current goals. Avoid presenting too many competing actions together.

    Review Accessibility

    Check heading hierarchy, keyboard navigation, form labels, alt text, colour contrast, link descriptions, button labels, video captions, focus visibility and error instructions. Combine automated scans with manual review.

    Review Privacy and Consent Features

    Check privacy information, cookie choices, form disclosures, data retention, third-party tracking and marketing subscriptions. Seek qualified advice when legal interpretation is required.

    Conduct a Content Performance Review

    Identify pages with declining traffic, low click-through rates, outdated information, competing topics, weak internal links or no useful next action. Decide whether to update, consolidate, redirect or remove each page based on evidence.

    Annual Website Maintenance Tasks

    Annual maintenance focuses on ownership, services, policies and strategic decisions.

    Review Domain and Hosting Renewals

    Confirm the registrar, registered owner, renewal date, payment method, administrative email, hosting provider and nameserver settings. The domain should be controlled by the business, not permanently held in a former employee or supplier account.

    Review whether hosting still meets requirements for storage, traffic, backups, security, performance and support. Compare renewal prices and included services rather than introductory offers alone.

    Check SSL Certificate Status

    Confirm that the certificate is valid, renews automatically, covers required domain versions and produces no browser warnings. HTTP addresses should redirect correctly to HTTPS.

    Review Ownership of Important Accounts

    Confirm business control of the domain, hosting, website, Analytics, Search Console, email, payments, booking tools, advertising, social accounts, backups and security services. Update recovery details and remove former team members.

    Review Licences and Subscriptions

    For every paid theme, plugin or service, record its purpose, renewal date, price, owner and cancellation effect. Do not cancel an unfamiliar service before confirming whether it supports forms, email, security or backups.

    Update Copyright and Business Information

    Check the copyright year, legal business name, address, phone, email, hours, social links, awards, certifications, staff profiles and service areas across templates and repeated elements.

    Review Legal and Policy Pages

    Confirm that privacy, terms, refunds, accessibility and cookie information reflect current business practices, tools, payments, marketing and customer regions. Obtain suitable professional guidance where needed.

    Conduct a Full Content Review

    Decide whether each important page should be kept, corrected, improved, combined, redirected, removed or supported with new content. Check traffic, backlinks and search visibility before deletion.

    Review Website Design and User Experience

    Ask whether the homepage explains the business, services are easy to find, the design represents the brand, calls to action remain relevant and important customer journeys are simple. Small improvements may solve problems without a full redesign.

    Review Performance Against Business Goals

    Compare organic traffic, enquiries, sales, bookings, conversions, landing pages, content, paid campaigns and mobile usage with the previous year. Use findings to set priorities for the next year.

    Problems That Need Immediate Attention

    Some issues should not wait for the scheduled review.

    The Website Becomes Unavailable

    Confirm whether the outage affects everyone, then check the hosting account, uptime monitor and provider status. Avoid several unrelated changes at once because they make the cause harder to identify.

    Browsers Display a Security Warning

    A warning may result from SSL problems, malware or unsafe content. Treat it seriously because visitors may leave and forms or payments may become unsafe.

    The Website Redirects Unexpectedly

    Redirects to advertisements, unfamiliar websites or downloads may indicate compromise. Preserve logs and backups, limit unnecessary changes and obtain technical help.

    Forms Stop Delivering Messages

    Check whether submissions are stored inside the website. Test notifications, spam folders and the sending service, and provide an alternative contact method during the fix.

    Checkout or Booking Stops Working

    Test the process as a customer, review recent changes and connected services, and use approved test modes rather than repeated live payments.

    Important Pages Disappear From Search

    Check noindex settings, canonical URLs, robots rules, server errors and manual actions in Google Search Console. Confirm the live page and sitemap entry.

    Unknown Administrator Accounts Appear

    Investigate immediately. Removing the account alone is not enough; review logs, passwords, connected accounts, vulnerabilities and modified files.

    How to Create a Website Maintenance Log

    A maintenance log records what was checked, what changed and what needs follow-up. It can live in Google Sheets, Excel or a project-management system.

    Useful fields include:

    • Date and website
    • Task and frequency
    • Person responsible
    • Result and changes made
    • Backup reference
    • Issue discovered
    • Follow-up required
    • Completion status

    Keep notes specific. “Updated plugins” is less useful than recording which plugins changed, whether a backup was created and which pages were tested.

    Keep passwords and recovery codes in an approved password manager, not the shared log. Add evidence such as scan results, screenshots, test confirmations and support tickets where it improves accountability. Give every unresolved issue an owner, urgency and expected completion date.

    What Small Businesses Can Manage Internally

    After basic training, internal teams can often review contact information, test forms and links, publish content, check analytics summaries, monitor backup notices, review uptime alerts, manage users and record maintenance work.

    A checklist should not encourage someone to make high-risk changes beyond their experience. Professional help may be appropriate for malware removal, failed updates, backup restoration, migration, database problems, custom code, checkout failures, serious speed issues, redirects and indexing problems.

    When to Hire Website Maintenance Support

    Consider support when nobody owns the website, updates are postponed, backups have not been tested, forms fail regularly, technical alerts are unclear, custom features need care or the team lacks time for regular reviews.

    Ask whether a provider creates backups, tests updates, uses staging, monitors uptime, scans security, tests forms, reviews performance, supplies reports, includes content time and offers emergency recovery.

    Clarify exclusions such as redesigns, custom features, migrations, licences, hosting, malware cleanup, after-hours work, SEO campaigns and legal writing. A useful report should state what was updated, tested, found and recommended rather than merely saying “website checked.”

    Common Website Maintenance Mistakes

    Updating Without a Backup

    Create a current backup before major updates. A backup produced after a problem begins may not provide a clean recovery point.

    Assuming Automated Backups Always Work

    Storage, account and connection problems can silently interrupt backups. Review reports and test restoration.

    Installing Every Update Immediately

    Security fixes deserve prompt attention, but several important updates installed together make troubleshooting harder. Use a controlled order and test afterward.

    Keeping Unused Plugins and Themes

    Unused software adds clutter and may create risk. Confirm dependencies, back up and remove it properly.

    Using One Administrator Account for Everyone

    Create individual accounts with suitable permissions and remove access promptly when no longer needed.

    Checking Only the Homepage

    Test customer journeys, service pages, forms, articles and checkout systems rather than only the first page.

    Relying Entirely on Automated Tools

    Automated tools cannot fully judge whether content and interactions are understandable. Combine them with manual review.

    Ignoring Form Notification Emails

    A success message does not prove that the business received the enquiry. Test delivery on both sides.

    Making Changes Without Documentation

    Record important maintenance work, tests and unresolved issues so later troubleshooting has context.

    Treating Maintenance as an Annual Event

    Annual review cannot replace routine backups, security checks and functionality testing.

    How to Build a Realistic Maintenance Schedule

    Begin with actions that generate revenue, forms that collect leads, services customers depend on, valuable pages, sensitive systems and accounts that control the website.

    Weekly: updates, backup confirmation, uptime, security alerts, critical forms and recent content.

    Monthly: full form and link testing, speed, scans, analytics, Search Console, content accuracy, images and user access.

    Quarterly: restore testing, plugin audit, mobile usability, navigation, calls to action, accessibility, privacy and content performance.

    Annually: domain, hosting, SSL, ownership, licences, business details, policies, full content review, design and strategy.

    Adapt the frequency when the website changes quickly or supports high-risk business processes.

    Frequently Asked Questions

    What Is Website Maintenance?

    Website maintenance is the ongoing process of checking, updating and improving a website so it remains secure, functional, accurate and useful.

    How Often Should a Small-Business Website Be Maintained?

    Backups, security alerts, uptime and critical forms should be checked weekly. Broader performance, analytics, content and SEO reviews can usually be completed monthly or quarterly.

    Does a Small Website Need Maintenance?

    Yes. A small site still depends on hosting, software, domain registration, security and working contact methods. One form failure can cost enquiries.

    Can I Maintain My Own Website?

    Many routine tasks can be managed internally. Malware removal, failed updates, database repair and complex code changes may require professional support.

    What Happens If a Website Is Not Maintained?

    It may develop security vulnerabilities, broken features, outdated content, slow loading and search problems that reduce customer trust and require expensive repairs.

    Are Website Backups Enough?

    No. Backups support recovery but do not prevent vulnerable software, broken forms or inaccurate content. They must also be monitored and tested.

    Should Plugins Be Updated Automatically?

    Automatic updates can help with low-risk software and urgent security fixes, but important components should be backed up, updated and tested through a controlled process.

    What Should a Maintenance Report Include?

    It should show updates, backup status, security results, functionality tests, performance checks, issues found and follow-up recommendations.

    Final Thoughts

    A website maintenance checklist for small businesses turns website management into a consistent process instead of a reaction to emergencies.

    Begin with the tasks that protect security, customer enquiries and revenue. Confirm backups, review updates, monitor uptime and test critical functions weekly. Use monthly and quarterly reviews to examine performance, content, SEO, accessibility and user experience.

    Annual checks should confirm ownership, renewals, policies and the website’s continued alignment with business goals. Keep a maintenance log, assign clear responsibility and seek technical help when a task carries more risk than the internal team can safely manage.

    A maintained website is more dependable, easier to improve and better prepared to support the business over time.

  • How to Update Old Blog Posts for SEO Without Losing Rankings

    How to Update Old Blog Posts for SEO Without Losing Rankings

    Learning how to update old blog posts for SEO can help you recover declining traffic, improve useful pages and get more value from content you have already published. The process needs care, however. An established article may already rank for several searches, attract backlinks and guide visitors to other pages. A careless rewrite can remove those strengths instead of improving them.

    A good content refresh is not simply a new date, a longer introduction or a few extra keywords. It begins with evidence. You identify posts that have a realistic opportunity, record what is already working and then improve the page without unnecessarily changing its purpose or URL.

    This guide explains how to choose the right posts, update their content and on-page elements, republish them safely and measure the results.

    Why Old Blog Posts Lose Search Visibility

    Organic performance can decline even when an article was useful at the time it was published. The information may become outdated, competing pages may answer the topic more clearly or searchers may begin expecting a different type of result.

    Common causes include:

    • Old facts, statistics, screenshots or instructions
    • Broken internal or external links
    • Search intent that has shifted over time
    • New competitors offering more complete guidance
    • Weak formatting on mobile devices
    • Titles and descriptions that no longer attract clicks
    • Several pages on the same website competing for the same query
    • Important subtopics that the article does not cover

    Not every decline is caused by the content itself. Seasonality, tracking changes, technical problems and search updates can also affect performance. Confirm the likely cause before rewriting the page. A structured on-page SEO audit can help you separate content weaknesses from issues involving metadata, indexing, internal links, images or other page-level factors.

    Why Updating Existing Content Can Be Valuable

    An existing article may have advantages that a new post does not. It can already have an indexed URL, search history, internal links, backlinks and some level of reader recognition. Improving that asset may be faster and safer than starting again.

    A useful refresh can:

    • Restore accuracy
    • Improve alignment with current search intent
    • Strengthen internal linking
    • Increase click-through rate
    • Make the article easier to scan
    • Add missing questions and examples
    • Improve conversions from existing traffic

    Refreshing content does not guarantee higher rankings. It creates a better chance when the page has genuine potential and the update solves real weaknesses.

    Which Old Posts Should You Update First?

    Do not begin with the oldest post simply because it has been online the longest. Prioritize pages where an improvement could produce a useful result.

    Good candidates often include posts that:

    • Previously received traffic but are now declining
    • Rank just below the strongest search results
    • Receive many impressions but relatively few clicks
    • Still support an important service or business goal
    • Contain outdated yet correctable information
    • Have backlinks or strong internal links
    • Already rank for relevant secondary queries
    • Can be improved without changing their main purpose

    Google Search Console is a practical starting point. Compare recent performance with an earlier period and look for pages that have lost clicks, impressions or average positions. Posts appearing around positions 10 to 30 may offer a realistic opportunity because Google already considers them relevant.

    Analytics data adds another layer. A post may receive traffic but contribute little because its call to action is weak. Another may attract fewer visitors but generate enquiries or lead readers to an important service page. Consider business value alongside rankings.

    Which Posts Should You Leave Alone?

    Some articles do not need a major refresh. A page that ranks strongly, remains accurate and continues to satisfy readers may only require routine checks.

    Be cautious when a post:

    • Holds stable top positions for valuable searches
    • Earns featured snippets or rich results
    • Receives consistent backlinks
    • Converts visitors effectively
    • Covers a historical event that should not be rewritten as current
    • Has a purpose that no longer fits the website

    A weak page with no traffic, links or business relevance may be better consolidated, redirected or removed than expanded. The question is not whether the post is old. The question is whether readers would benefit from a meaningful improvement.

    Record Existing Performance Before Editing

    Before changing an old post, create a simple record of how it performs today. This gives you a baseline for measuring the update and helps you avoid removing something that already contributes to its rankings.

    Open the page in Google Search Console and review a meaningful period, such as the previous three to six months. Record:

    • Total clicks
    • Total impressions
    • Average click-through rate
    • Average position
    • Queries generating impressions or clicks
    • Countries and devices producing traffic
    • Pages linking internally to the post
    • Conversions, leads or other business outcomes

    Do not look only at the post’s main target keyword. An established article may attract visitors through dozens of related searches. Some of those queries may reveal why Google continues to rank the page.

    It is also worth recording the current URL, SEO title, meta description, heading structure, backlinks, indexed status and publication dates. Save a copy of the original article before editing. WordPress revisions can help, but a separate copy makes comparison and recovery easier.

    Your baseline does not need to become an elaborate report. A spreadsheet containing the URL, measurement date and main performance figures is usually enough.

    Recheck the Search Intent

    A post can lose rankings even when its information remains technically accurate. The problem may be that the search results have changed around it.

    Search intent describes what people expect to find after entering a query. Google may once have favored long explanatory guides for a topic but now prefer checklists, templates, videos or concise tutorials.

    Search the main query and examine the current first page. Ask:

    • Are the leading pages tutorials, lists, comparisons or templates?
    • Do they answer the question immediately?
    • Are they written for beginners or experienced readers?
    • Do they include screenshots, examples or downloadable resources?
    • Are most results broad guides or narrowly focused answers?
    • Which related questions appear in the results?

    Use this review to understand reader expectations, then provide a clearer answer based on your own experience. Competitor research should guide the format, not turn your article into a copy of pages that already rank.

    Review What Is Already Working

    Refreshing content does not mean rewriting every sentence. Some sections may already be responsible for the post’s visibility, backlinks or conversions.

    A section may deserve to remain if it:

    • Ranks for a useful search query
    • Earns impressions in Google Search Console
    • Attracts external links
    • Provides an original example or observation
    • Answers a question clearly
    • Supports a featured snippet
    • Leads readers to an important service page

    Pay particular attention to passages that match queries already bringing visitors to the page. You can improve their clarity, but avoid removing them without a reason.

    How to Update Old Blog Posts for SEO

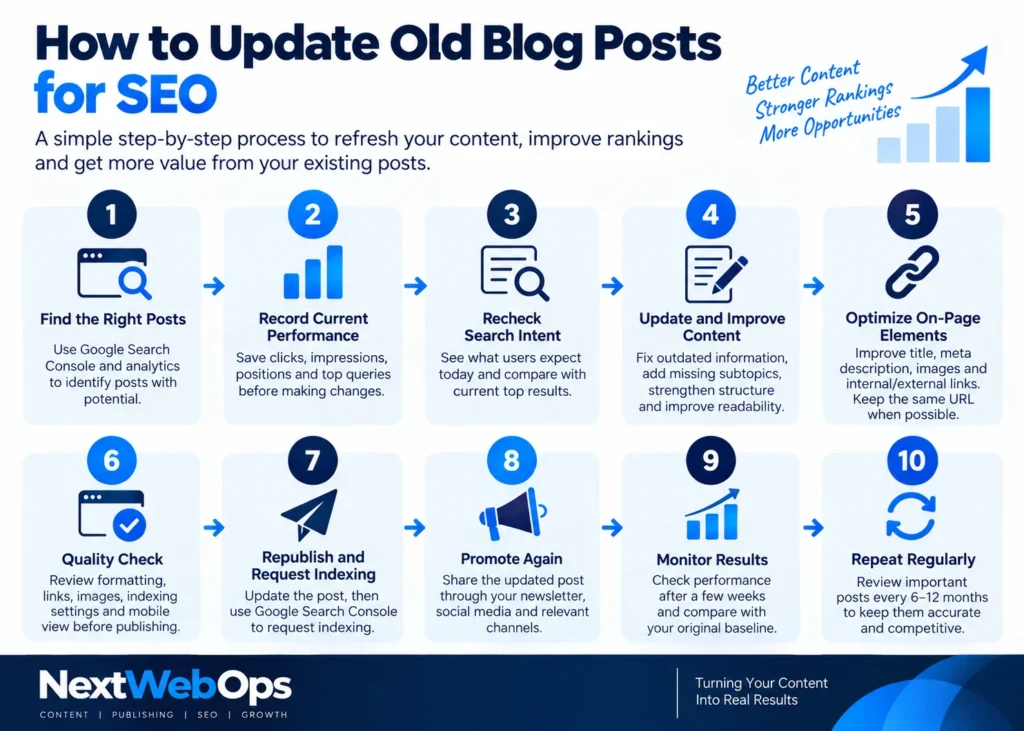
    A step by step guide on how to update old blog posts for SEO

    Once you have recorded the baseline, checked search intent and identified the strongest material, you can begin the content update.

    Work through the article methodically. Start with accuracy, then improve completeness, structure and readability. This keeps the focus on what readers need before minor keyword adjustments.

    Correct Outdated Facts and Examples

    Look for old statistics, expired offers, discontinued products, outdated screenshots, changed interface instructions, old prices and broken resources. Replace outdated claims with current, verifiable information. If you cannot confirm a fact, remove it or rewrite the passage so it does not depend on that claim.

    Check every external link while you work. Replace broken links with relevant, trustworthy sources. If the source no longer supports the statement, find a better reference instead of linking to a loosely related page.

    Avoid changing a date in the title while leaving old information throughout the article. A current year may attract clicks, but readers will quickly notice if the content has not received a genuine review.

    Improve the Answer to the Main Question

    Readers should not have to search through several introductory paragraphs to find the answer they came for.

    Review the opening and confirm that it explains what the article helps the reader accomplish, who the advice is for, why the process matters and what to do first. A concise answer near the beginning can improve usability and make the page easier to understand.

    Remove introductions that repeat the title or spend too long describing why the topic is important. Replace them with useful context.

    Add Missing Relevant Subtopics

    Use Search Console queries, related searches, customer questions, competitor headings and your own experience to identify meaningful gaps. Only add sections that help the reader. A longer article is not automatically a better article.

    For a guide about refreshing old content, helpful additions could include selecting posts, preserving URLs, managing links, changing dates, requesting indexing and monitoring results. If a subtopic requires a separate detailed explanation, mention it briefly and link to a dedicated article.

    Improve the Heading Structure

    Use one H1 for the page title. Organize major topics under H2 headings and supporting details under H3 headings. Do not select a heading level only because of its visual size.

    Avoid vague headings such as “Other Things to Consider.” A reader scanning the page should understand what each section covers without reading the paragraph beneath it.

    Improve Readability

    Break long paragraphs into shorter units and use one main idea per paragraph. Use bullet lists when readers need to scan requirements or warning signs. Use tables when they make a comparison clearer.

    Read revised sections aloud. Awkward phrasing is often easier to notice when spoken. Check the article on a mobile screen as well because a reasonable desktop paragraph can become heavy in a narrow column.

    Update Keywords Naturally

    Start with the queries already associated with the page in Google Search Console. Preserve useful phrases that generate visibility and add close variations where they fit naturally.

    Related language might include “refresh old content,” “content decay,” “SEO content refresh,” “declining organic traffic” and “republish blog posts.” You do not need to repeat every variation several times.

    Include the primary focus keyword in important locations where it reads naturally, such as the title, opening paragraph, an appropriate heading, URL slug and SEO description. Then concentrate on answering the topic thoroughly.

    Improve the SEO Title and Meta Description

    Before changing the title, check its current click-through rate. A low rate combined with strong impressions may indicate that the search listing needs improvement.

    A useful SEO title should clearly describe the page, include the focus keyword naturally, match search intent and give readers a reason to click. Avoid adding the current year unless the article will be reviewed regularly.

    The meta description should summarize what the reader will learn and show the practical benefit of reading. It does not directly guarantee better rankings, but a clear description may improve clicks from relevant searches.

    Keep the Existing URL Whenever Possible

    Changing the URL of an established article creates unnecessary risk. The current address may already have backlinks, internal links, search history and authority attached to it.

    Keep the original URL when the post still covers the same topic and the address remains understandable. A clean but imperfect URL is usually better than changing an established address simply to include an exact keyword.

    If a change is necessary, create a permanent 301 redirect from the old URL to the new one. Update all internal links and test that the redirect leads directly to the correct page.

    Strengthen Internal Links

    Review links inside the old post and remove any that lead to deleted, redirected or irrelevant pages. Add useful links to related guides, service pages, supporting tutorials, templates or case studies.

    Use descriptive anchor text that tells the reader what they will find. The refreshed article should also receive links from other relevant pages, particularly pages that already attract visitors or share a close topical connection. For a more detailed process, follow these internal linking best practices when choosing destinations and anchor text.

    Avoid forcing identical anchor text across the website. Natural variations are easier to read and reflect the context of each link.

    Review External Links and Sources

    Test every external link. Remove or replace links that return an error, lead to outdated information or no longer support the statement.

    Whenever possible, link to the original source of a statistic or recommendation. Do not select a statistic only because it has a recent date; consider the reliability, sample and context as well.

    Check for Keyword Cannibalization

    Sometimes an old post declines because another page on the same website targets the same topic. Compare pages appearing under the same important queries and decide whether they serve distinct purposes.

    You may keep both pages when they answer different intentions, adjust their focus, combine overlapping information into the stronger page or redirect a weaker duplicate. Do not merge pages based on similar wording alone; compare actual intent and performance.

    Improve Images and Other Media

    Review each image and ask whether it helps explain the content. Keep useful visuals, replace outdated screenshots and remove decorative files that slow the page without helping readers.

    Use descriptive filenames, compress the files, choose a suitable format and add useful alt text. Alt text should describe an image’s content or purpose rather than repeat the focus keyword.

    Review Calls to Action

    A post may generate traffic without supporting business goals because its calls to action are outdated, poorly placed or unrelated to the reader’s needs.

    Choose a logical next step, such as reading a related guide, downloading a checklist, requesting an audit or viewing a relevant service. Avoid interrupting every section with a sales message. A contextual link and a clear final call to action are often enough.

    Decide Whether to Change the Publication Date

    Change the publication or modified date only after a substantial update. Correcting outdated information, adding important sections, reviewing sources and improving the structure can justify a new modified date. Fixing a spelling error cannot.

    Displaying both the original publication date and latest modified date is often the most transparent option. Use a consistent policy across the website.

    Complete a Final Quality Check

    Before republishing, preview the post on desktop and mobile. Check:

    • Title and heading hierarchy
    • Paragraph and list formatting
    • Internal and external links
    • Images and alt text
    • Buttons, tables and forms
    • Author information, category and tags
    • SEO title and meta description
    • Canonical URL and indexing settings

    Make sure the page is not accidentally marked noindex. If the URL changed, test the redirect and confirm that social sharing displays the correct title, description and featured image. For a broader pre-publication review, use this WordPress publishing checklist to check formatting, metadata, links, images and the live page before considering the refresh complete.

    Republish and Request Reindexing

    After publishing the changes, open the live URL in a private browser window. Confirm that the updated content is visible, images load correctly, links work and the page remains indexable.

    Use the URL Inspection tool in Google Search Console and request indexing. Google’s official Search Console documentation explains how URL Inspection can be used to review a page’s indexing status, test a live URL and ask Google to crawl a specific page. Requesting indexing can alert Google to the update, but it does not guarantee immediate crawling or higher rankings. Confirm that the URL also appears in the XML sitemap.

    Promote the Updated Article Again

    Share the refreshed post through relevant channels such as your email newsletter, LinkedIn, Facebook, client communication and related articles. Present it as an updated resource and mention the practical improvements.

    If another website already links to the article, you may notify its owner when the refresh adds meaningful value. Personalized outreach is more useful than generic link-building messages.

    Monitor Performance After the Update

    Do not judge the refresh after a day or two. Review it after the first week, around one month and again after two or three months.

    Compare organic clicks, impressions, positions, click-through rate, queries, conversions and indexed status with the baseline. Look at trends rather than isolated daily changes.

    A successful refresh may begin appearing for more relevant queries or generate better conversions before its main keyword improves. Keep notes about the publication date and changes made so later performance shifts are easier to interpret.

    What to Do If Rankings Drop

    A temporary decline after a major update does not automatically mean the refresh failed. Start by checking whether the URL changed, the page became noindex, the canonical is incorrect, important content was removed or links were lost.

    Compare the updated version with the saved original. Search Console can show which queries lost impressions or positions. If a valuable section was removed, restore the information in an improved form.

    Do not reverse every change because of a few days of movement. Give the page reasonable time unless you find a clear technical problem or serious content loss.

    Common Content-Refresh Mistakes

    Changing the URL Without a Strong Reason

    A shorter slug may look cleaner, but changing an established URL can create broken links and lost signals.

    Rewriting Content That Already Performs Well

    Strong sections do not need replacement simply because they are old. Improve their accuracy while preserving the information that satisfies readers.

    Adding Words Without Adding Value

    Expanding an article does not automatically make it more complete. New sections should answer relevant questions or explain difficult steps.

    Forcing the Focus Keyword

    Repeated exact phrases can make writing unnatural. Include the keyword in important places, then use related language where it helps.

    Updating the Date Only

    A new date should represent a genuine review, not a cosmetic change.

    Removing Useful Search Coverage

    An old post may rank for queries you did not originally target. Check Search Console before deleting sections.

    Copying Competing Articles

    Competitor research should reveal expectations and gaps, not produce a rearranged copy.

    Ignoring Mobile Formatting

    Always inspect tables, paragraphs and images on a smaller screen.

    Forgetting Conversion Goals

    Traffic is not the only measure of value. Guide readers toward a useful and relevant next step.

    How Often Should You Update Old Blog Posts?

    There is no fixed schedule for every article. Time-sensitive topics may require frequent reviews, while evergreen content can remain useful for years.

    Consider reviewing a post when traffic declines, facts become outdated, search intent changes, links stop working, new questions emerge or the page approaches a valuable ranking position.

    A general review every six to twelve months can uncover opportunities, but it does not mean every page needs rewriting. Prioritize updates based on accuracy, opportunity and potential business impact.

    Frequently Asked Questions

    Does Updating Old Blog Posts Improve SEO?

    It can when the changes make the page more accurate, useful and aligned with search intent. Changing a few words or replacing the date alone is unlikely to create lasting improvement.

    Should You Change the URL When Updating a Post?

    Keep the existing URL in most cases. If it must change, add a permanent 301 redirect and update internal links.

    Should You Change the Original Publication Date?

    You may update the date after substantial improvements. Displaying the original and modified dates is often the clearest approach.

    How Long Does a Content Refresh Take to Affect Rankings?

    There is no guaranteed timeline. Some updates are processed quickly, while others take several weeks or months.

    Should You Rewrite the Entire Article?

    Only when the existing article is inaccurate, poorly structured or no longer satisfies intent. In many cases, preserving strong sections is safer and more efficient.

    Can You Update a Post That Already Ranks Well?

    Yes, but make careful changes. Record its performance first and preserve the sections and terms already working.

    Final Thoughts

    Learning how to update old blog posts for SEO is not about making every article longer or changing its date. It is about protecting what already works while improving accuracy, usefulness and alignment with what readers need today.

    Begin with pages that have clear potential. Record their performance, study current search intent and preserve the sections already earning visibility. Then correct outdated information, improve the structure, strengthen links and complete a careful technical review.

    After republishing, request indexing and monitor the page against its original baseline. A thoughtful content-refresh process can turn existing posts into useful assets again without discarding the rankings, links and authority they have already earned.


  • How to Create an SEO Content Brief Writers Can Actually Use

    How to Create an SEO Content Brief Writers Can Actually Use

    Learning how to create an SEO content brief is not about filling a document with keywords, competitor headings and vague instructions to “make it SEO-friendly.” A useful brief helps the writer understand the reader, search intent, required coverage and purpose of the page before drafting begins.

    Without that direction, even a capable writer can produce an article that is well written but unsuitable for the website. It may target the wrong audience, miss important questions or fail to support the business goal. Editors then have to request major revisions that could have been avoided.

    The opposite approach can be equally unhelpful. Some briefs contain so many keywords, rules and suggested headings that the writer has little room to think. Instead of supporting the writing process, the brief becomes another complicated document that needs to be interpreted.

    The best SEO content briefs sit between these extremes. They establish clear boundaries while allowing writers to use their knowledge, research and judgment.

    What Is an SEO Content Brief?

    An SEO content brief is a working document that explains what a piece of content needs to accomplish. It connects keyword research and search intent with the practical requirements of writing, editing and publishing the page.

    A typical brief identifies the target reader, primary keyword, purpose of the page, important subjects to cover and desired action. It may also include suggested headings, internal links, source requirements, image instructions and draft metadata.

    However, a content brief should not attempt to write the entire article in advance. Its purpose is to establish a shared understanding between everyone involved in the project.

    Depending on the workflow, that may include:

    • The SEO strategist researching the opportunity
    • The content manager assigning the article
    • The writer creating the first draft
    • The subject-matter expert reviewing technical claims
    • The editor improving clarity and accuracy
    • The publishing specialist formatting and optimizing the page

    When these contributors work from the same clear instructions, fewer details are lost between research and publication.

    How an SEO Brief Differs From a General Writing Brief

    A general writing brief may explain the topic, audience, tone and approximate length. That can be enough for a newsletter, social media post or opinion piece.

    An SEO content brief goes further. It considers how people search for the subject and what they expect to find after clicking a result. It also connects the article to the wider website through internal links, categories, metadata and calls to action.

    A useful SEO brief commonly addresses:

    • The primary search phrase
    • The reason behind the search
    • The type of page Google currently rewards
    • Questions the reader expects the page to answer
    • Related concepts that provide necessary context
    • Existing website pages that should be linked
    • On-page requirements needed during publishing
    • The business outcome supported by the content

    These details should strengthen the article rather than make it sound as though it was written for a search engine.

    What a Good SEO Content Brief Should Accomplish

    A brief is successful when it helps the writer produce a strong first draft. It should remove uncertainty about the assignment while avoiding unnecessary restrictions.

    Clarify the Purpose of the Page

    Every article needs a clear reason to exist. “We need more blog content” is not a useful objective because it does not explain what the new page should contribute.

    A better objective states what the reader should understand or do after reading. The article might help someone complete a task, compare solutions, avoid a mistake or decide whether professional assistance is needed.

    For example, the objective of this article is not simply to define a content brief. It is to help content managers create instructions that writers can follow without repeated clarification or unnecessary revisions.

    Match the Reader’s Search Intent

    The primary keyword tells you what the reader typed. Search intent helps explain why they typed it.

    Someone searching for an SEO content brief may want a definition, but a person searching for how to create one expects a process they can apply. They are likely to value practical examples, field-by-field guidance and a reusable template.

    If the article provides only a general explanation, it may contain relevant words while still failing to satisfy the search.

    Define Who the Writer Is Addressing

    The audience description should be precise enough to influence the writing. “Business owners” is too broad. A local service provider managing a small website has different concerns from a marketing director coordinating writers across several brands.

    A more useful description might be: content managers at small agencies who assign SEO articles to freelance writers and want to reduce revisions.

    A helpful reader profile may include:

    • The person’s role
    • Their level of experience
    • The problem they are trying to solve
    • What they may already know
    • What could prevent them from acting

    The writer does not need a fictional biography containing someone’s favourite coffee and weekend habits. They need details that affect the content.

    Reduce Avoidable Revisions

    Revisions are a normal part of good editorial work. The problem is not revision itself but having to rebuild an article because the original assignment was unclear.

    A writer should not reach the end of a draft before discovering that:

    • The article targeted the wrong audience
    • A required product or service was not mentioned
    • The tone does not match the brand
    • Important sections are missing
    • The page was supposed to support a particular conversion
    • Approved sources were available but never shared
    • The article duplicates an existing page
    • Essential internal links were overlooked

    A practical brief brings these requirements forward. Writers can make better decisions from the beginning, while editors can focus on improving the work rather than correcting the assignment.

    Create Consistency Without Removing Originality

    Businesses understandably want consistency across their content. Headings should be organized properly, claims should be supported and the tone should feel appropriate for the brand.

    Consistency does not require every writer to use the same sentences or follow an outline that cannot be improved. A brief should distinguish between firm requirements and helpful suggestions.

    Firm requirements may include:

    • The primary audience
    • Search intent
    • Essential subjects
    • Approved facts
    • Required internal links
    • Brand restrictions
    • The main call to action

    Suggestions may include:

    • Possible examples
    • Supporting keyword variations
    • Optional questions
    • Alternative headings
    • Additional sources
    • Related points worth exploring

    This distinction gives the writer room to contribute expertise without accidentally ignoring something essential.

    What Makes a Brief Useful Rather Than Overwhelming?

    More information does not automatically produce a better brief. Every field should help the writer understand, research, structure or complete the assignment.

    A useful brief offers one clear primary keyword instead of presenting several phrases as equally important. It explains the audience and desired outcome rather than supplying a broad persona. It provides a flexible heading structure instead of prescribing every paragraph.

    It also avoids instructions that sound precise but offer little practical value, such as requiring an exact keyword density. Writers often respond to those rules by repeating phrases where they do not belong, weakening clarity and making the article feel unnatural.

    A useful brief should allow the writer to answer:

    • Who is this page for?
    • What brought that person to the page?
    • What should the page help them accomplish?
    • Which subjects must be covered?
    • What makes this article different from existing results?
    • Which requirements are mandatory?
    • What flexibility does the writer have?
    • How will the completed draft be reviewed?
    • What happens after the article is written?

    How to Create an SEO Content Brief

    A reliable brief begins with decisions about the reader and purpose of the page. Keywords, headings and metadata become useful only after those decisions are clear.

    Confirm the Content Objective

    Start by defining what the content should accomplish. The objective should describe a useful outcome rather than a general ambition such as generating traffic.

    A content objective might be to:

    • Explain an unfamiliar process
    • Help readers compare possible solutions
    • Answer questions before a purchase
    • Show how to complete a task
    • Correct a common misunderstanding
    • Support a service or product page
    • Encourage readers to request professional assistance

    Choose one primary outcome. Supporting goals can be included, but they should not compete with the main purpose.

    Define the Target Reader

    The writer needs to know who should find the article useful. Avoid audience descriptions that are so broad they could apply to almost anyone.

    A stronger description includes the reader’s role, experience and immediate problem. For example: content managers at small agencies who understand basic SEO but struggle to give freelance writers clear and consistent instructions.

    Identify the Search Intent

    Search intent describes what a person hopes to find after entering a query. The same topic can support different intentions.

    • Informational intent involves learning or solving a problem.
    • Commercial intent involves comparing products, services or approaches.
    • Transactional intent involves completing an action or purchase.
    • Navigational intent involves finding a particular website or page.

    These labels provide a starting point, but the brief should make the expected outcome more specific. For this topic, the reader wants a practical process, examples and a template they can reuse.

    Review the Search Results

    The search results reveal how Google currently interprets a query and what readers are likely to expect. Review recurring patterns rather than copying competing structures.

    Consider:

    • The types of websites ranking
    • The formats being used
    • Subjects covered repeatedly
    • Questions answered
    • Depth of explanation
    • Examples and templates included
    • Use of videos, images or tables
    • Weak or missing sections

    Also review People Also Ask questions, related searches, featured snippets and video results. These can expose supporting questions that standard keyword tools may miss.

    Competitive research should identify both baseline expectations and useful gaps. For this topic, valuable gaps include separating requirements from suggestions, preventing keyword overload, allowing writer flexibility, including publishing instructions and reviewing the finished draft against the brief.

    Choose One Primary Keyword

    Every brief should identify one primary keyword phrase that represents the central search opportunity. Treating several phrases as equal targets can confuse the writer and produce awkward repetition.

    A suitable primary keyword should:

    • Accurately represent the subject
    • Match the intended reader’s search
    • Align with the page format
    • Fit naturally into the title
    • Support the website’s wider content strategy
    • Be realistic for the website’s authority and competition level

    Search volume can inform the decision, but it should not be the only consideration. A lower-volume phrase with clear intent may produce a more useful page than a broad keyword attracting unfocused traffic.

    Add Supporting Keywords and Related Concepts

    Secondary keywords help the writer understand the wider language surrounding the topic. They are not phrases that must be inserted into every section.

    Choose a focused group of close variations and related concepts. Avoid sending a huge export from a keyword tool and expecting the writer to decide which terms matter.

    Select a Distinctive Content Angle

    The angle explains how the article will approach the subject differently from competing pages. Without one, writers often produce a safe summary of what already ranks.

    Possible angles include beginner-friendly instructions, professional experience, an industry-specific workflow, common mistakes, a practical checklist, a completed example or a downloadable template.

    The angle should remain closely connected to search intent. For this article, the angle is showing content managers how to create clear tactical guardrails without turning the brief into a restrictive script.

    Build a Flexible Heading Structure

    A content brief should show which major subjects need to be covered. It should not dictate every sentence or prevent the structure from improving during research.

    Use one H1 for the title, H2 headings for major sections and H3 headings for supporting subjects. Headings should describe what readers will learn rather than use vague labels such as “Overview” or “Other Information.”

    The writer should be allowed to recommend structural changes. Research may reveal that two sections overlap or that an important question is missing.

    Separate Requirements From Recommendations

    Label what must be followed and what is optional. When every keyword, example and heading appears in one long list, writers may assume that all of it is mandatory.

    Requirements can include the primary keyword, search intent, target reader, page objective, essential subjects, approved facts, internal links, restrictions and main call to action.

    Recommendations can include supporting variations, possible examples, alternative headings, optional questions, additional sources and visual ideas.

    Explain the Required Depth

    Word count can establish the scale of an assignment, but it should not become the main measure of quality. Recommend a realistic range based on complexity, reader knowledge, questions, competitive depth, evidence and page purpose.

    An article should be long enough to satisfy the reader without expanding simple ideas merely to reach a target.

    Add Questions the Article Must Answer

    Questions help the writer understand the reader’s concerns and confirm that the article provides complete coverage. They may come from People Also Ask results, related searches, customer conversations, Search Console data or community discussions.

    Do not automatically turn every question into a heading. Some can be answered naturally within relevant sections, while the most important ones may belong in the FAQ.

    Provide Evidence and Source Requirements

    Writers should know what level of evidence the article requires. A general instruction to “include reputable sources” leaves several decisions unanswered.

    Specify which claims require citations, preferred primary sources, acceptable publication dates, industry standards, approved company information and sources that should not be used.

    Competitor articles may help identify subjects, but they should not automatically be treated as factual authorities. Writers should trace important claims back to original sources whenever possible.

    Name the Internal Links

    Internal-link instructions should be specific. Naming the destination and suggesting anchor text is more useful than asking the writer to add links wherever relevant.

    For this article, useful links include the NextWebOps WordPress publishing checklist and small business website redesign checklist. A link to content implementation support can also be included once the relevant service page is available.

    Internal links should help readers continue their journey. They should not be added simply to meet a quota.

    Include External-Link Guidance

    External links can support claims and direct readers to authoritative information. Explain when they are appropriate and which source types are preferred.

    Avoid forcing an external link into every section. A link should have a clear purpose, and a primary source is normally better than a competing summary.

    Add Formatting and Readability Expectations

    Good writing can lose much of its value during implementation if the page is difficult to scan. A brief should address presentation as well as wording.

    Useful expectations include:

    • Keep most paragraphs relatively short.
    • Use descriptive headings in a logical order.
    • Break complicated information into bullet points when helpful.
    • Use numbered lists only when sequence truly matters.
    • Avoid excessive bold formatting.
    • Use tables only for genuine comparisons.
    • Provide descriptive link text.
    • Place examples close to the advice they demonstrate.
    • Review the finished page on mobile devices.

    These instructions should guide readability without forcing every paragraph into the same length.

    Include Image and Media Instructions

    “Add images” is too vague to guide a writer or publisher. State whether the page needs a featured image, screenshots, diagrams or in-content visuals.

    Include the intended dimensions, purpose, placement and licensing requirements. Ask for descriptive filenames and alt text that explains meaningful images without stuffing keywords.

    If the publishing specialist will source the final visuals, the brief should say so. This prevents duplicated effort and makes responsibility clear.

    Draft the On-Page SEO Information

    Do not leave metadata until the final upload. A draft SEO title, meta description and URL slug help confirm the topic and keep the page aligned with its intended search.

    The brief may also identify the primary category, suggested tags, schema type and featured-image information. Clarify whether the writer, editor or publishing specialist is responsible for finalizing these fields.

    Define the Call to Action

    The call to action should match the reader’s stage and the purpose of the page. An educational article may invite the reader to download a template, explore a related guide or discuss professional support.

    Avoid adding aggressive sales language to every section. One well-placed contextual CTA is usually more useful than several interruptions.

    What Should Not Be Included in an SEO Content Brief?

    A brief can become less useful when it includes information without a clear purpose. Common problems include:

    • Dozens of loosely related keywords
    • Arbitrary keyword-density requirements
    • Every heading copied from competing pages
    • Instructions that conflict with search intent
    • Unverified facts
    • Repeated information
    • An unrealistic word count
    • A complete article disguised as an outline

    The brief should guide the work, not force the writer to decode another long and confusing document.

    Short Brief or Detailed Brief: Which Should You Use?

    The depth of a brief should reflect the risk and complexity of the assignment. The longest brief is not automatically the best one.

    A shorter brief may be enough when the topic is simple, the writer already knows the brand, the page follows an established format or the content carries limited business risk.

    A detailed brief becomes more valuable when several contributors are involved, the subject needs expert review, competition is strong, the page supports important conversions or factual accuracy is especially important.

    A Practical SEO Content Brief Example

    Consider an article aimed at content managers who assign SEO work to freelance writers.

    The primary keyword is “how to create an SEO content brief.” The intent is informational, and the reader wants a repeatable process with a usable example. The article’s angle is to provide clear guardrails without limiting the writer’s judgment.

    The required coverage includes search intent, reader definition, keywords, structure, sources, internal links, formatting, metadata and editorial review. The content should conclude with a reusable template and a natural invitation to discuss content strategy or implementation support.

    This compact example gives a writer useful direction without prescribing the finished wording.

    Copy-and-Paste SEO Content Brief Template

    Use the following fields as a starting point. Remove anything that does not help the assignment and add project-specific requirements where needed.

    Assignment Details

    • Article title
    • Writer
    • Editor
    • Draft deadline
    • Publication date
    • Content type
    • Primary category

    Search Strategy

    • Primary keyword
    • Supporting keywords
    • Search intent
    • Target reader
    • Page objective
    • Distinctive angle

    Content Requirements

    • Required subjects
    • Suggested headings
    • Questions to answer
    • Important entities or terms
    • Evidence requirements
    • Topics to exclude

    Publishing Requirements

    • Recommended length
    • Internal links and anchor text
    • External-source guidance
    • Featured-image requirements
    • In-content visuals
    • Call to action
    • SEO title
    • Meta description
    • URL slug
    • Schema type
    • Final reviewer

    How to Review a Draft Against the Brief

    Review the finished draft by returning to the original purpose rather than checking only whether every suggested phrase appears.

    Confirm that the draft:

    • Satisfies the identified search intent
    • Answers the reader’s main question
    • Covers required subjects
    • Supports factual claims appropriately
    • Uses the primary keyword naturally
    • Maintains a logical heading hierarchy
    • Includes the required links
    • Follows image and metadata instructions
    • Uses a suitable call to action
    • Reads well on mobile and desktop

    An editor should not reject a useful improvement simply because it differs slightly from the suggested outline. The brief is a guide to the intended result, not a barrier to better judgment.

    Common SEO Content Brief Mistakes

    Starting With Keywords Instead of the Reader

    Keywords are useful only when connected to a real need. Define the reader, problem and desired outcome before building the keyword list.

    Confusing a Brief With an Article Draft

    A brief should establish direction. If it contains every sentence and transition, the writer has been reduced to rewriting someone else’s draft.

    Providing No Distinctive Angle

    An outline built only from competing headings often produces an article that resembles everything already ranking. Give the writer a clear reason the page deserves to exist.

    Treating Every Suggestion as Mandatory

    Separate requirements from optional ideas. This protects essential elements without creating unnecessary rigidity.

    Ignoring Publishing Requirements

    The work is not complete when the draft is approved. Images, links, metadata, formatting and final page checks affect how readers experience the article.

    Using an Arbitrary Word Count

    Do not stretch a straightforward subject to reach a round number. Base the recommended range on the depth needed to answer the query properly.

    Failing to Review the Published Page

    A document can look correct while the live page contains broken links, awkward spacing, poor image crops or an incorrect heading hierarchy. Review the published result, not only the manuscript.

    Frequently Asked Questions

    What Should an SEO Content Brief Include?

    It should include the primary keyword, search intent, reader, page objective, angle, required coverage, source guidance, internal links, formatting expectations, metadata and call to action. The exact fields should reflect the complexity of the assignment.

    How Long Should an SEO Content Brief Be?

    There is no fixed length. Many routine assignments can be covered in one to three pages, while complex or high-risk pages may require more detail. Include what the writer needs and remove what they do not.

    How Many Keywords Should Be Included?

    Use one clear primary keyword and a small group of closely related supporting terms. Avoid a large keyword dump that forces the writer to decide which phrases matter.

    Should Writers Follow the Brief Exactly?

    They should follow firm requirements, but they should be allowed to improve wording, examples and structure when doing so benefits the reader. A brief should encourage sound judgment.

    Who Should Create the SEO Content Brief?

    The brief is normally prepared by an SEO strategist, content manager or editor who understands the search results, audience and business objective. Subject experts and publishing specialists may contribute requirements relevant to their roles.

    Is a Content Brief the Same as an Outline?

    No. An outline describes structure. A complete brief also explains the audience, intent, objective, keywords, evidence, links, formatting, metadata and publishing expectations.

    Can AI Create an SEO Content Brief?

    AI can help organize research and suggest a structure, but a knowledgeable person should verify search intent, keywords, factual requirements, competitive gaps and business priorities before assigning the article.

    A Better Brief Creates Better Collaboration

    A strong content brief creates shared understanding between the strategist, writer, editor and publishing team. It gives each contributor the context needed to make good decisions without replacing their judgment.

    When learning how to create an SEO content brief, focus on usefulness rather than length. Define the reader, intent and outcome; separate firm requirements from suggestions; and include the information needed to carry the article through writing, editing and publication.

    If your team needs help turning content plans into clean, optimized and properly published pages, NextWebOps can support the workflow from brief development through final WordPress implementation.

  • Small Business Website Redesign Checklist: Before, During and After Launch

    Small Business Website Redesign Checklist: Before, During and After Launch

    A small business website redesign checklist helps you improve an outdated site without overlooking the content, SEO, usability and technical details that already support your business. A website redesign often begins with a simple complaint: the site looks old. That may be true, but appearance is rarely the only problem worth solving.

    The website may also be difficult to use on a phone, slow to load, unclear about what the business offers or ineffective at turning visitors into enquiries. Redesigning without understanding these problems can produce a more attractive website that performs no better than the old one. It can also remove useful content, break existing links and make pages that already rank in search results harder to find.

    This checklist covers what to review before development begins, what to check while the new site is being built and what to monitor after it goes live. The objective is not simply to give your website a different appearance. It is to create a website that represents your business accurately, helps visitors find what they need and supports measurable goals.

    Does Your Website Need a Refresh or a Full Redesign?

    Before planning new pages or choosing colours, decide how much of the current website actually needs to change. A complete redesign is not always necessary.

    A website refresh makes focused improvements while retaining most of the existing structure. It may involve updating colours, fonts, photographs, page copy or calls to action. You might also improve selected pages, simplify the navigation or correct mobile layout problems without rebuilding the entire website.

    A full redesign goes further. It may introduce a new page structure, different navigation, redesigned templates, rewritten content or a new content management system. It is usually appropriate when the existing website’s structure or technology prevents meaningful improvement.

    A refresh may be enough when

    • The website structure still matches your services.
    • Most pages remain accurate and useful.
    • The site works properly on mobile devices.
    • Your team can update the content without difficulty.
    • Only the branding, copy or selected layouts feel outdated.
    • Search traffic and enquiries remain reasonably stable.

    A complete redesign may be required when

    • Visitors struggle to understand what your business offers.
    • The navigation has become confusing.
    • Important services do not have dedicated pages.
    • The website performs poorly on mobile devices.
    • Pages load slowly because of an outdated or overloaded setup.
    • Your brand, services or target audience have changed significantly.
    • The website is difficult for your team to update.
    • Contact forms and important features frequently fail.
    • Organic traffic or enquiries have declined.
    • The existing platform can no longer support the features you need.

    Do not rebuild the website simply because a competitor launched a new one. Start with the problems affecting your own customers and business. A focused refresh can sometimes correct those problems faster and with less risk.

    Define the Purpose of the Redesign

    A redesign becomes difficult to manage when its goal is simply to “make the website better.” Everyone involved may have a different interpretation of what better means.

    Choose one primary outcome before discussing layouts or visual styles. Your main goal may be to:

    • Generate more qualified enquiries.
    • Increase online purchases or bookings.
    • Present your services more clearly.
    • Improve mobile usability.
    • Support a new brand position.
    • Reach a different type of customer.
    • Make the website easier to maintain.
    • Improve organic search visibility.
    • Replace an outdated website platform.

    You can have supporting goals, but one primary objective helps guide decisions. If generating enquiries is the priority, the page structure, copy, trust signals and calls to action should all support that outcome. A design element that looks impressive but distracts visitors from contacting the business may not be a useful addition.

    Turn broad goals into results you can evaluate. “Improve the contact page” is vague. “Increase completed contact forms while reducing irrelevant enquiries” gives you something more meaningful to measure.

    It is also useful to define what is outside the project. Agreeing on the required pages, features, content and integrations early helps prevent delays and unexpected costs.

    Before moving forward, write down:

    • The main reason for the redesign.
    • The audience the website needs to serve.
    • The most important action visitors should take.
    • The services or products that need greater visibility.
    • The problems customers currently experience.
    • The results that will indicate improvement.
    • The pages and features included in the project.

    This short document becomes a reference point when opinions differ later. Instead of asking whether someone personally likes a design, you can ask whether it supports the agreed goal.

    Record Current Performance Before Making Changes

    You cannot judge whether the redesign improved the website if you do not know how the existing site performs.

    Record a practical baseline before changing pages, URLs or tracking settings. Focus on information that shows how visitors find the website and what they do after arriving. Review the previous six to twelve months where possible to reduce the effect of short-term or seasonal changes.

    Record:

    • Overall website traffic.
    • Organic search traffic.
    • Most-visited landing pages.
    • Pages generating enquiries or sales.
    • Current search queries and rankings.
    • Contact-form submissions.
    • Phone calls or bookings attributed to the website.
    • Conversion rates for important pages.
    • Mobile and desktop traffic.
    • Page-loading performance.
    • Indexed pages.
    • Pages receiving external links.
    • Common 404 errors.
    • Current engagement patterns.

    Google Analytics can help you understand how people use the website, while Google Search Console shows which pages and search queries bring visitors from Google. Your form, booking or ecommerce system may contain additional conversion information.

    Pay particular attention to pages that already perform well. A service page may look outdated but still attract valuable search traffic and enquiries. Removing it, rewriting it without a clear reason or changing its URL carelessly can damage an asset the business has built over time.

    Save copies of your current sitemap, important metadata and existing URLs. Take screenshots of essential pages if helpful. Performance data should guide the project, but it should not make every decision automatically. A low-traffic legal page may still be necessary, while a high-traffic article may attract visitors who never become customers.

    By the end of this first stage, you should know whether the website needs a refresh or full redesign, what the project is expected to achieve and which parts of the existing site must be protected.

    Audit Every Existing Page and Content Asset

    Once you understand what the redesign should achieve, examine what already exists. Many projects run into trouble because the visible navigation is mistaken for the complete website.

    A menu may contain only ten pages, while the website actually has hundreds of blog posts, campaign pages, old service pages, images and downloadable files. If these are discovered late, the project can require more time and content work than expected.

    Create a content inventory using sources such as:

    • Your XML sitemap.
    • Google Search Console.
    • Google Analytics.
    • The WordPress page and post lists.
    • Landing-page software.
    • Ecommerce product collections.
    • Server or website crawl reports.
    • Files linked from emails or advertising campaigns.

    Include blog posts, category archives, landing pages, downloadable PDFs, videos and images that receive traffic or have links pointing to them. A basic inventory can contain the current URL, page title, page type, purpose, organic traffic, conversions, external links, last update date, recommended action and proposed new URL.

    Assign one action to each page:

    • Keep: The page is accurate, useful and should remain mostly unchanged.
    • Update: The subject remains valuable, but the content, design or information needs improvement.
    • Combine: Two or more pages cover the same subject and would be more useful as one stronger page.
    • Redirect: The page will no longer exist, but visitors should be sent to a closely related replacement.
    • Remove: The content is outdated, unnecessary and has no suitable replacement.

    Traffic should inform these decisions, but it should not make them automatically. Consider each page’s business value alongside its numbers. Pay special attention to old prices, former employees, discontinued services, closed locations and expired offers.

    Review Competitors Without Copying Them

    Competitor research can reveal what visitors expect from websites in your market. Select three to five businesses that compete for the same customers, not simply websites whose visual design you admire.

    Review:

    • How quickly the homepage explains what the business does.
    • How services are organized.
    • What appears in the main menu.
    • Where calls to action are placed.
    • Which questions are answered.
    • How testimonials and case studies are presented.
    • Whether prices or service processes are explained.
    • How the website works on a phone.
    • How easy it is to contact the business.
    • What information appears to be missing.

    Record both effective and frustrating elements. The purpose is not to reproduce another business’s layout, wording or brand. Use the research to identify what customers expect, which questions you can answer more clearly and how your website can provide something competitors do not.

    Plan the New Website Structure

    The website structure determines how pages are organized and how visitors move between them. It should be planned before individual pages are designed.

    Begin with the pages most businesses need:

    • About page.
    • Main services page.
    • Individual service pages.
    • Case studies or portfolio.
    • Blog or resource section.
    • Contact page.
    • Privacy policy and other required legal pages.

    Additional pages depend on the business. A local service company may need separate location pages. A consultant may need industry-specific pages. An ecommerce business will require product, category, delivery and returns information.

    Keep the main navigation focused. Adding every page to the menu does not make the website easier to use. Group related content under clear labels and place less important links in the footer or within relevant pages.

    Plan at least one clear journey for each important audience, such as homepage to service page to case study to contact form, or blog article to related service to consultation request. Ask someone unfamiliar with the project to review the planned navigation.

    The blog also needs a manageable category structure. Categories should represent subjects you expect to publish about regularly. Avoid creating a separate category for every article.

    Create a Page-by-Page Content Plan

    A sitemap shows which pages will exist. A content plan explains what each page must accomplish.

    For every important page, record:

    • The intended audience.
    • The primary subject.
    • The main customer question.
    • The desired visitor action.
    • Required sections.
    • Existing content that can be reused.
    • New content that must be written.
    • Images or videos needed.
    • Relevant testimonials or case studies.
    • Internal links.
    • The person responsible for review and approval.

    This prevents designers from building sections around placeholder text that later proves too short or too long. Decide who will write, review and approve each page so content does not delay the project.

    Map Every Old URL to Its New Destination

    URL planning is one of the most important parts of a redesign, particularly when the existing website receives search traffic.

    A URL is the address of a page, such as example.com/services/website-design. If the address changes, visitors and search engines using the old address need to be sent to the correct new page through a permanent redirect.

    Keep existing URLs when they remain accurate and useful. Unnecessary URL changes create additional work and risk. When a change is necessary, send each old page to the most relevant replacement. Do not redirect every removed page to the homepage.

    Google recommends preparing an old-to-new URL map, updating internal links and using permanent server-side redirects when addresses change. See: Move a site with URL changes.

    Use the URL map to configure redirects, update internal links and canonical addresses, build the new sitemap, test old links after launch and identify pages that were omitted. Include important images, PDFs and other files as well as standard pages.

    Prepare Content Before Development Begins

    Website content is often treated as something that can be added after the design is finished. In practice, design and content depend on each other.

    A page built around two short paragraphs will not work well if the final copy requires detailed service information, testimonials and FAQs. Prepare as much content as possible before the main development work begins so layouts can be built around real information.

    Gather:

    • Final service and product descriptions.
    • Company background and history.
    • Team biographies.
    • Customer testimonials.
    • Case studies and project examples.
    • Certifications, memberships and awards.
    • Service areas and business locations.
    • Contact information and opening hours.
    • Frequently asked questions.
    • Pricing information, where appropriate.
    • Calls to action.
    • Privacy and other required legal information.
    • Photographs, videos and brand graphics.

    Review every item for outdated services, former employees or incorrect contact information. Organize approved content by page and decide who will write missing sections, check accuracy and provide final approval.

    Build Every Page Around a Clear Purpose

    Each page should have one primary job. The homepage introduces the business and directs visitors to suitable next steps. A service page explains one offering and encourages an enquiry. A case study demonstrates results. A contact page makes starting a conversation simple.

    Before writing or designing a page, answer four questions:

    1. Who is expected to visit this page?
    2. What do they need to understand?
    3. What concerns could prevent them from acting?
    4. What should they do next?

    A useful service page might explain the service, the problem it solves, what is included, how the process works, relevant experience, FAQs and a clear next step.

    Place the most important information near the beginning. Use one clear main heading followed by descriptive subheadings. Short paragraphs, lists and highlighted details make content easier to scan, especially on mobile devices.

    Calls to action should match the visitor’s likely level of interest. Avoid placing several competing actions beside each other; when every button is equally important, visitors may struggle to choose.

    Design for Mobile Visitors from the Beginning

    Mobile design is not the desktop version squeezed into a smaller screen. It requires decisions about what visitors need first and how they will interact using their fingers rather than a mouse.

    Review the redesigned website on real mobile devices, not only inside the website editor. Check that:

    • Text is readable without zooming.
    • Buttons are large enough to tap comfortably.
    • Links are not packed too closely together.
    • The navigation opens and closes correctly.
    • Phone numbers can be tapped to call.
    • Forms are short and easy to complete.
    • Images fit without horizontal scrolling.
    • Tables remain readable.
    • Pop-ups do not cover important content.
    • Important calls to action appear at suitable points.
    • Headings do not break awkwardly.
    • The page remains usable in portrait and landscape views.

    Think carefully about content order when side-by-side desktop sections stack vertically. Crop background images intentionally and remove decorative elements when they make content harder to read.

    Google recommends responsive design because it allows the same URL and content to work across screen sizes and is easier to maintain. See: Mobile site and mobile first indexing

    Do not assume that a responsive theme makes every page mobile-friendly. Content length, image dimensions, custom sections and third-party tools can still create problems.

    Include Accessibility from the Start

    An accessible website allows more people to understand and use its content, including visitors who rely on keyboards, screen readers or other assistive tools. Accessibility is easier to include during the redesign than to repair later.

    Start with these checks:

    • Use sufficient contrast between text and its background.
    • Keep body text comfortably readable.
    • Maintain a logical heading order.
    • Add descriptive alt text to meaningful images.
    • Label every form field clearly.
    • Make links understandable outside the surrounding sentence.
    • Ensure menus and forms can be used with a keyboard.
    • Show which element currently has keyboard focus.
    • Provide captions or transcripts for important video content.
    • Do not rely only on colour to communicate meaning.
    • Use buttons for actions and links for destinations.
    • Write clear error messages for incomplete forms.

    Alt text should describe the purpose of an image in context. Avoid generic links such as “click here” when more useful wording is possible. Forms should keep instructions visible and explain how to correct errors.

    The W3C Web Accessibility Initiative provides practical guidance. Automated tests can identify some problems, but manual keyboard testing and task-based reviews remain valuable.

    Control Images, Fonts and Extra Features

    Modern designs can become unnecessarily heavy when every available visual effect is used. Large photographs, video backgrounds, animations, multiple font families and third-party tools all add work for the browser.

    Use visuals with a clear purpose. Before uploading images:

    • Resize them to the largest dimensions actually needed.
    • Compress the files.
    • Choose a suitable file format.
    • Use descriptive filenames.
    • Add appropriate alt text.
    • Check how they crop on different screens.
    • Avoid uploading several nearly identical copies.

    Keep typography simple. One font for headings and another for body text is usually enough. Animations should support understanding rather than delay it.

    Review plugins, embedded tools and tracking scripts with the same care. Keep those that provide a necessary business function and remove those that duplicate features or are no longer used.

    Build the New Website on a Private Staging Version

    A redesign should normally be developed away from the live website. This private copy is often called a staging website. It allows the team to build pages, test features and review content without disrupting the website customers currently use.

    Before major work begins, create a complete backup containing website files, the database, images, downloads, theme and plugin settings, custom code, redirect rules and important server settings. Confirm that the backup can be restored.

    The staging website should not appear in search results. Password protection is generally safer than relying on one setting inside the content management system. Keep a record of every restriction applied so accidental noindex settings or blocked robots rules are removed from the live site at launch.

    Keep the existing website available during development. If the live site receives new posts, products or customer information, plan how those updates will be transferred.

    Use staging for task-based reviews. Ask reviewers to find a service, submit the contact form, locate the phone number, read an article or complete a booking. These tasks reveal problems that general feedback may miss.

    Transfer Existing SEO Elements Carefully

    A redesigned page should not lose useful search information simply because its layout changed.

    For each important page, review the existing:

    • Page title.
    • Meta description.
    •  
    • Main and supporting headings.
    • Core content.
    • Internal links.
    • Image alt text.
    • Canonical URL.
    • Structured data.
    • Indexing settings.

    Preserve elements that already perform well, but do not copy every item automatically. Keep what remains useful and improve what is weak or outdated.

    Every indexable page should have one clear primary topic. Update internal links to point directly to final new addresses rather than relying on redirects. Review links in the main content, menus, buttons, footers, blog posts, reusable sections and downloadable documents.

    If URLs change, each new page should contain the correct canonical address. The XML sitemap should list only final indexable URLs and should not contain staging pages, redirects or broken addresses. Check structured data instead of assuming it transferred correctly.

    Before launch, compare the old and new versions of high-value pages side by side. Confirm that important information has not been shortened, removed or hidden merely to create a cleaner design.

    Complete a Page-by-Page Quality Check

    Quality assurance should be a planned stage, not a quick review on launch day. Create a checklist and record the problem, device, browser, person responsible and status of the fix.

    Check Content and Formatting

    Review page titles, headings, spelling, paragraph spacing, lists, tables, images, captions, alt text, contact details, prices, button wording, downloads, dates and author information. Look for placeholder text, duplicate sections and unfinished buttons.

    Test Navigation and Links

    Click menu items, dropdowns, footer links, buttons, text links, logo links, breadcrumbs, social icons, email addresses and telephone numbers. Confirm that internal links do not point to staging addresses.

    Test the custom 404 page by visiting an address that does not exist. It should explain what happened and provide a useful route back into the website.

    Test Forms and Notifications

    Submitting a form successfully on the page does not guarantee that the message reaches the business. Test every form from beginning to end:

    • Complete all fields correctly.
    • Leave required fields empty.
    • Enter an invalid email address.
    • Submit from a mobile device.
    • Confirm the success message.
    • Check the recipient inbox and spam folder.
    • Verify any automatic reply.
    • Confirm the submission is stored where expected.
    • Test email or customer-management integrations.

    Use a real external email address for testing. Check that forms collect only information the business genuinely needs.

    Test Across Devices and Browsers

    Review the website on a desktop, laptop, tablet and at least two mobile screen sizes. Use browsers relevant to the audience and test at widths between standard device presets.

    Test Important Business Functions

    Depending on the website, test product search, cart, checkout, discount codes, payment processing, shipping calculations, booking, registration, password reset, memberships, downloads, live chat, language selection and maps. Use test transactions and confirm that both customer and business notifications arrive.

    Verify Analytics and Conversion Tracking

    Check that contact-form submissions, phone clicks, email clicks, quote requests, purchases, bookings, downloads and newsletter sign-ups are recorded. Avoid duplicate tracking codes that can make reports unreliable.

    Confirm Website Ownership and Account Access

    A small business should retain control of the accounts that keep its website operating. Confirm who owns and can access:

    • Domain registration.
    • Website hosting.
    • WordPress administration.
    • Business email.
    • Google Analytics and Search Console.
    • Google Business Profile.
    • Payment processor.
    • Form and email services.
    • Premium themes and plugins.
    • Image and font licences.
    • Backup storage.
    • Security and performance services.

    Where possible, accounts should use an email address controlled by the business rather than a developer’s personal address. Give each person only the access needed for their role and remove accounts that are no longer required.

    Store account ownership, renewal dates, licence details, support contacts, backup locations and recovery methods securely. Enable additional login protection for the domain, hosting, website administration and payment accounts.

    Complete the Final Launch Checklist

    The launch should be treated as a controlled process rather than the moment someone presses a publish button. Choose a lower-traffic time and ensure the people responsible for development, content and enquiries are available.

    Create one final backup of the live website immediately before replacing it. Before launch, confirm:

    • All approved pages are present.
    • Placeholder content has been removed.
    • Contact information is correct.
    • Forms send messages to the right recipients.
    • Analytics and conversion tracking are active.
    • The website uses a valid SSL certificate.
    • Staging URLs do not appear in links or images.
    • Temporary noindex settings have been removed.
    • Search engines are not blocked from the live website.
    • Canonical URLs use the live domain.
    • The sitemap contains the final URLs.
    • Permanent redirects are ready.
    • Navigation and footer links work.
    • Legal pages are accessible.
    • Backups are running.
    • The site works on mobile devices.
    • Important pages load without an administrator login.

    If URLs change, activate redirects as the new site goes live and test a sample immediately. Google recommends keeping permanent redirects for at least one year. After launch, clear relevant caches, review the website in a private browser window and complete a test enquiry, purchase or booking.

    Monitor the Website After Launch

    A successful launch does not mean the project is finished. Some problems appear only after real visitors and search engines begin using the new website.

    During the First 24 Hours

    Check the homepage, important service pages, mobile navigation, forms, checkout or booking functions, SSL, analytics, server errors, images, downloads, redirects and accidental staging links. Ask someone who was not involved in the build to complete a typical customer journey.

    During the First Week

    Review Search Console indexing reports, the sitemap, 404 errors, redirects, organic landing pages, submissions, phone and email clicks, website speed, mobile usability and customer feedback. Avoid drawing firm conclusions from only a few days of data.

    During the First 30 to 90 Days

    Compare the redesigned website with the original baseline. Review organic traffic, search impressions and clicks, important keyword positions, enquiries, sales, conversion rates, engagement, mobile performance, page speed and index coverage.

    Some search fluctuations can occur while Google recrawls substantial changes. Investigate clear errors instead of reacting to every daily movement. Use business results alongside traffic numbers and keep a record of improvements made after launch.

    Treat the Website as an Ongoing Business Asset

    A redesigned website will gradually become outdated if no one is responsible for maintaining it. Assign ownership and a monthly or quarterly review schedule for:

    • Software and security updates.
    •  
    • Form testing.
    • Website access reviews.
    • Service and price updates.
    • Fresh content.
    • Team information.
    • Broken links.
    • Image optimization.
    • Analytics and conversion reviews.
    • Mobile testing.
    • Licence, hosting and domain renewals.
    • Removal of unused users, themes and plugins.

    Review high-value pages first, including the homepage, main services, contact page, popular articles and pages responsible for enquiries or sales. Do not wait for another full redesign; small improvements based on customer questions and performance data are easier to manage.

    Final Small Business Website Redesign Checklist

    Use this condensed small business website redesign checklist to confirm that the essential work has been completed.

    Strategy and Planning

    • Decide between a focused refresh and complete redesign.
    • Define the primary business goal and audience.
    • Record current traffic, rankings and conversions.
    • Confirm the scope, budget and responsibilities.

    Content and Structure

    • Create an inventory of pages, posts and files.
    • Mark content to keep, update, combine, redirect or remove.
    • Review competitor websites.
    • Plan the sitemap, navigation and customer journeys.
    • Prepare a page-by-page content plan.
    • Assign writing and approval responsibilities.
    • Gather testimonials, images and brand assets.

    URLs and SEO

    • Record every important existing URL.
    • Map old URLs to relevant new destinations.
    • Preserve high-performing content.
    • Review titles and meta descriptions.
    • Transfer headings, internal links and image alt text.
    • Update canonical URLs and structured data.
    • Prepare permanent redirects and the XML sitemap.
    • Remove accidental search-engine blocks.

    Design and Development

    • Create a complete backup.
    • Build the new website on staging.
    • Use approved content in the layouts.
    • Check mobile navigation and content order.
    • Review accessibility.
    • Resize and compress images.
    • Limit unnecessary plugins, scripts and animations.
    • Confirm important integrations work.

    Testing and Launch

    • Proofread every important page.
    • Test menus, buttons, links and forms.
    • Confirm email notifications arrive.
    • Test relevant browsers and devices.
    • Complete test purchases or bookings.
    • Verify analytics and conversion tracking.
    • Confirm business ownership of important accounts.
    • Create a final pre-launch backup.
    • Test redirects and submit the sitemap.
    • Check the website as a logged-out visitor.

    Post-Launch

    • Monitor errors during the first 24 hours.
    • Review Search Console during the first week.
    • Compare results with the original baseline.
    • Check leads, sales and form submissions.
    • Review mobile performance and redirect errors.
    • Schedule ongoing website and content maintenance.

    Frequently Asked Questions

    How often should a small business redesign its website?

    There is no fixed schedule that suits every business. Consider a redesign when the website no longer represents your services, performs poorly on mobile devices, is difficult to maintain or consistently fails to support enquiries and sales. Do not redesign solely because a certain number of years has passed.

    What is the difference between a website refresh and a redesign?

    A refresh improves selected visual or content elements while keeping most of the existing structure. A redesign may change the navigation, templates, content, technology and customer journeys. A refresh is often suitable when the website works but looks or feels outdated.

    Can a website redesign hurt SEO?

    Yes, particularly when useful content is removed, URLs change without redirects, internal links are broken or the live website accidentally blocks search engines. Careful auditing, URL mapping, SEO transfer and post-launch monitoring can reduce these risks.

    How long does a small-business website redesign take?

    The timeline depends on the number of pages, features, content readiness and speed of feedback. A small website using approved content may take several weeks, while a larger project involving ecommerce, new content or a platform change can take several months.

    Should the current website stay live during the redesign?

    In most cases, yes. The new version can be prepared on a private staging website while the existing site continues serving customers. Replace the live website only after the redesigned version has been reviewed and tested.

    What should I prepare before hiring a website designer?

    Prepare your redesign goals, website access, page inventory, brand assets, service information, examples you like, required features and approximate budget. Identify who will provide content and who has final approval.

    Plan the Redesign Around What Your Business Needs

    A successful redesign is not measured by how different the website looks. It is measured by whether customers can understand the business, find useful information and complete important actions more easily.

    The strongest projects begin with an honest review of the existing website. They protect pages and content that already provide value, improve areas that create friction and test the complete customer journey before launch.

    Following a structured small business website redesign checklist gives designers, developers, writers and business owners a shared process. It reduces missed details and helps the new website launch with clearer content, safer URL changes and more reliable tracking.

    Need Help Redesigning Your Business Website?

    NextWebOps can help organize your website structure, WordPress setup, content implementation, on-page SEO and final quality checks. The goal is a website that is easier for visitors to use and easier for your business to manage after launch.

  • WordPress Publishing Checklist: From Draft to Live

    WordPress Publishing Checklist: From Draft to Live

    A practical workflow for formatting, reviewing, approving, publishing, and checking WordPress posts.

    Publishing a WordPress post involves more than pasting a draft into the editor and clicking Publish. The words may be finished, but the page still needs structure, clean formatting, optimized images, accurate links, metadata, approval, and a final check on the live site.

    That work is content implementation: turning an approved draft into a reliable webpage. A repeatable WordPress publishing checklist makes the process easier to manage and much less dependent on memory. It also prevents the small mistakes that make an otherwise strong article feel unfinished.

    This guide covers the full workflow, from receiving the draft to checking the published page.

    What WordPress Content Implementation Covers

    Content writing and content implementation are related, but they are not the same job. Writing determines what the article says. Implementation determines how the article functions on the website.

    A content implementer typically:

    • Cleans text imported from Word or Google Docs
    • Creates a logical heading structure
    • Formats paragraphs, lists, quotes, tables, and buttons
    • Prepares featured and in-content images
    • Adds and tests internal and external links
    • Completes the slug, excerpt, category, author, and SEO fields
    • Checks the post against brand and website standards
    • Shares a preview for approval
    • Reviews the page on desktop and mobile
    • Schedules or publishes the approved version
    • Checks the live page after publication

    These details matter. A well-written article can still create a poor experience if it contains two H1 headings, an oversized image, a broken button, or a call to action that leads to the wrong page.

    Before You Open WordPress

    A quick handoff check prevents most avoidable rework. Before building the post, confirm that you have the latest draft and the information needed to finish it.

    At minimum, establish:

    • The final article title and approved draft
    • The correct website and post type
    • The author or byline
    • The primary category and any approved tags
    • The featured image and any in-content images
    • The intended call to action and destination URL
    • The publication date, time, and timezone
    • The person responsible for final approval

    Review any claims that represent the business, including services, locations, prices, guarantees, availability, processes, and timelines. If a required asset or decision is missing, flag it now. It is faster to resolve a gap before implementation than to rebuild the post later.

    The WordPress Publishing Checklist

    1. Create the Post and Clean the Draft

    Create a new post in the correct website, language, and post type. Put the approved title in the WordPress title field rather than repeating it inside the body.

    Text copied from Word, Google Docs, an AI tool, or another website can bring unwanted formatting with it. The editor may look acceptable while the markup contains inconsistent fonts, inline styles, empty paragraphs, or broken lists.

    Review the imported draft from top to bottom. Remove:

    • A duplicate title or H1 inside the article body
    • Empty paragraphs and unnecessary spacer blocks
    • Double spaces and accidental line breaks
    • Drafting notes, prompts, or unresolved comments
    • Bold or italic formatting applied to the wrong text
    • Strange font sizes, colors, or pasted styles

    Use the correct WordPress block for each element. Lists should be List blocks, quotations should be Quote blocks, and buttons should be Button blocks. Let the theme control the general typography instead of manually styling every paragraph.

    2. Build a Clear Heading Structure

    The post title normally serves as the page’s H1. Use H2 headings for the main sections and H3 headings for useful subdivisions within those sections.

    Do not choose heading levels because of their visual size. Headings describe the relationship between sections for readers, search engines, screen readers, and future editors.

    Read the headings by themselves. They should form a clear outline of the article. Replace vague labels such as “More Information” with headings that tell the reader what the section contains. If two headings make essentially the same promise, combine them or make the difference clearer.

    3. Format for Comfortable Reading

    Break dense text into focused paragraphs, but do not turn every sentence into its own paragraph. Use formatting to support meaning rather than decorate the page.

    • Use bullets for related points that do not need an order.
    • Use numbered lists for steps that should be followed in sequence.
    • Use tables only when readers need to compare structured information.
    • Use bold text sparingly to highlight a term or key instruction.
    • Use buttons for actions, not ordinary informational links.

    Check the rhythm of the page in Preview. Headings should not sit too close to the previous paragraph, images should stay near the text they support, and empty blocks should not create oversized gaps.

    4. Prepare and Optimize Images

    Images influence page speed, accessibility, blog archives, and social sharing. Prepare them before upload whenever possible. For filenames, formats, compression, and alt text in more depth, use the full image SEO guide.

    For each image:

    • Crop it to the required aspect ratio.
    • Resize it close to its displayed dimensions.
    • Compress it without obvious quality loss.
    • Use WebP, JPEG, or PNG according to the image type.
    • Give the file a short, descriptive name.
    • Confirm that the website has permission to use it.

    A 1200 x 630 px featured image is a practical choice for many articles and social previews, although the site’s own template should decide the final dimensions.

    Google’s image SEO best practices cover descriptive filenames, useful alt text, and placing images near relevant content. For a workflow graphic, for example: “WordPress publishing workflow showing draft cleanup, formatting, review, publishing, and live-page checks.” Do not use the article title as the alt text for every image. Decorative images that convey no information may use an empty alt attribute.

    After upload, verify the image’s placement, displayed size, caption, credit, and link. Check screenshots and diagrams on mobile, where small text can become unreadable even when the image technically scales.

    5. Add and Test the Links

    Internal links help readers find related articles, services, and useful next steps. Add them where the destination naturally supports the current section. For cluster structure, orphan pages, and anchor-text choices, follow internal linking best practices. For crawlable links and clear anchors, see Google’s link best practices.

    External links should support a claim or provide a genuinely useful source. When possible, link to the original organization, official documentation, or primary source.

    Test every link in Preview. Confirm that it:

    • Opens the intended page
    • Uses the correct and secure URL
    • Does not point to a staging site or draft
    • Does not lead through an unnecessary redirect
    • Follows the site’s policy for new tabs and link attributes

    If a destination is not ready, record it as pending rather than publishing a broken link.

    6. Complete the SEO and Post Settings

    Finish the URL before publication. A clean slug is readable, descriptive, and stable. For this article, a suitable option is:

    /wordpress-publishing-checklist/

    Avoid changing the slug after the post is live unless you also create an appropriate redirect.

    Complete the SEO title and meta description. They should accurately summarize the page, not repeat keywords mechanically. SEO plugins such as Yoast and Rank Math are useful for finding missing fields, but their colored scores are not editorial goals. Natural writing and a useful page matter more than turning every indicator green. That approach matches Google’s guidance in the SEO Starter Guide: optimize for people first, with clear titles, structure, and useful content.

    Pair this publishing workflow with the on-page SEO checklist so titles, headings, keyword use, and indexing settings get a dedicated pass. When you write the snippet, how to write meta descriptions covers search intent, length, and uniqueness.

    Then review the WordPress post details:

    • Excerpt: Write a short summary rather than relying on an awkward automatic cut-off.
    • Category: Choose one primary category that reflects the article’s main purpose.
    • Tags: Add only established, useful tags; do not create near-duplicates for every post.
    • Author: Confirm the correct byline and author profile.
    • Date and timezone: Check the site’s timezone before scheduling.
    • Comments: Follow the site’s policy rather than relying on the default setting.
    • Canonical and indexing: Leave these at the approved site defaults unless the post has a specific SEO requirement.
    • Social preview and schema: Verify the title, description, image, and article type when the SEO setup provides these controls.

    7. Check the Call to Action

    Every call to action should give the reader a sensible next step. It may lead to a related guide, a service page, a contact form, or a consultation page.

    Check the CTA’s wording, destination, and placement. It should match the article’s subject and the reader’s likely intent. Avoid adding several competing CTAs simply because there is space for them. One clear action is usually stronger than a row of unrelated buttons.

    8. Share the Draft for Approval

    Do not ask a client or stakeholder to approve the source document if the final page contains layout, links, images, and website-specific settings they have not seen. Share a working preview of the WordPress post.

    Send the reviewer:

    • The preview link
    • A short note explaining what has been implemented
    • A list of any unresolved items
    • A clear deadline for feedback
    • The planned publication date and timezone

    Keep feedback in one place and record the final approval. Once the post is approved, avoid making untracked editorial changes. If a significant change is still required, return it for confirmation.

    9. Review the Front End on Desktop and Mobile

    The WordPress editor is not the finished page. Open the preview on the front end and review it as a visitor would.

    Start with the first screen. Confirm that the title, author, date, category, and featured image appear correctly and that the introduction is easy to read. Then review the entire desktop layout for:

    • Consistent heading sizes and spacing
    • Readable paragraph width and line length
    • Correct list indentation
    • Images that are sharp and properly aligned
    • Tables, quotes, embeds, and buttons that fit the layout
    • Links and CTAs that work
    • No leftover notes, placeholders, or empty blocks

    Repeat the review at tablet and mobile widths. Watch for horizontal scrolling, clipped buttons, oversized headings, broken columns, crowded metadata, and graphics whose text is too small to read.

    Complete a basic accessibility pass as well. Check meaningful alt text, descriptive links, logical headings, sufficient color contrast, visible keyboard focus, and captions or transcripts for media when required.

    Finally, read the article once more on the front end. This often reveals duplicated words, missing punctuation, and awkward breaks that are easy to overlook in the editor.

    10. Schedule or Publish Carefully

    Before changing the post’s status, confirm that approval has been recorded and that no required field remains incomplete.

    For a scheduled post, check the date, time, timezone, and whether WordPress shows the expected status. For an immediate publication, verify that Publish immediately is intentional. Also confirm that the correct post—not a duplicate or earlier draft—is being released.

    When several people work on the site, note who is responsible for the live-page check. Publishing should have a clear owner rather than ending with the assumption that someone else will review it.

    11. Check the Live Page

    Open the public URL immediately after publication. Do not treat the preview as the final check; caching, sharing tools, templates, and production settings can behave differently on the live site.

    Confirm that:

    • The URL is correct and the page loads normally
    • The title, author, date, category, and featured image are correct
    • The post appears on the intended blog and category pages
    • Images load and links work
    • The CTA reaches the right destination
    • The mobile layout remains usable
    • No draft notes, admin-only links, or placeholders are visible
    • The SEO title, description, canonical URL, and social image are correct

    Update the team’s tracker with the live URL, publication date, approver, and any follow-up task. That small record makes future audits and updates much easier.

    Quick WordPress Publishing Checklist

    Content and Structure

    ✓ Publishing check
    ☐ Latest approved draft used
    ☐ Title added once in the WordPress title field
    ☐ Pasted formatting, notes, and empty blocks removed
    ☐ H2 and H3 hierarchy checked
    ☐ Paragraphs, lists, quotes, and buttons formatted consistently


    Images, Links, and SEO

    ✓ Publishing check
    ☐ Featured and in-content images resized and compressed
    ☐ Filenames, alt text, captions, and credits reviewed
    ☐ Internal, external, and CTA links tested
    ☐ Slug, SEO title, and meta description completed
    ☐ Excerpt, category, tags, author, and publication details confirmed
    ☐ Social preview, canonical URL, and indexing settings reviewed


    Approval and Publication

    ✓ Publishing check
    ☐ Front-end preview shared with the approver
    ☐ Final approval recorded
    ☐ Desktop, tablet, and mobile layouts checked
    ☐ Accessibility and final proofreading passes completed
    ☐ Date, time, and timezone confirmed
    ☐ Live page, archives, links, images, CTA, and metadata checked
    ☐ Live URL and completion details recorded


    Common Mistakes to Avoid

    • Repeating the title as an H1. The WordPress title already handles the page’s main heading on most themes.
    • Trusting pasted formatting. Clean markup is easier to maintain and less likely to fight the theme.
    • Publishing without a featured image or excerpt. Both may affect blog archives, category pages, and social previews.
    • Creating a new category or tag for every post. A smaller, intentional taxonomy is more useful to readers.
    • Writing alt text for search engines instead of people. Describe the image’s useful meaning in context.
    • Testing only inside the editor. The front-end page is the experience readers will actually receive.
    • Publishing before approval is recorded. A clear record protects both the client and the implementer.
    • Skipping the live-page check. Preview mode cannot reveal every production issue.

    For important posts, use Google Search Console’s URL Inspection tool to confirm the live URL is crawlable and request indexing when needed. If an older post is underperforming after launch, run an on-page SEO audit to prioritize fixes.

    Frequently Asked Questions

    What should I check before publishing a WordPress post?

    Check the approved content, title, headings, formatting, images, links, CTA, slug, excerpt, category, author, SEO fields, social preview, and responsive layout. Confirm approval and scheduling details, then inspect the public page after it goes live.

    What is the difference between Draft and Pending Review?

    Draft usually means the post is still being prepared. Pending Review signals that implementation is complete enough for an editor or approver to review it. Teams may adapt these statuses, but everyone should use them consistently.

    How can a client preview a draft without a WordPress login?

    Use the site’s approved private-preview method, such as a secure preview-link plugin or a staging environment. Do not make an unfinished post public simply to collect feedback.

    How many categories should a post have?

    One primary category is usually enough. Add another only when it genuinely helps readers navigate the site and matches the established taxonomy.

    What should I check immediately after publishing?

    Open the live URL and verify the page layout, images, links, CTA, metadata, blog archive, category archive, and mobile view. Record the live URL and any follow-up action.

    Need Reliable WordPress Content Implementation?

    NextWebOps helps businesses and agencies turn approved drafts into accurate, organized, SEO-ready WordPress posts. From formatting and media preparation to approval support and live-page checks, the process is handled from draft to publication.