Category: Website Management

Website management services that keep business websites updated, secure, organized, and running smoothly. This includes content updates, plugin and theme maintenance, backups, performance checks, broken link fixes, publishing support, basic SEO updates, and routine quality checks to help maintain a reliable, professional, and easy-to-use website.

  • Webflow to WordPress Migration: A Step-by-Step Guide

    Webflow to WordPress Migration: A Step-by-Step Guide

    A Webflow to WordPress migration involves more than copying text from one platform to another. Depending on the website, you may need to move static pages, CMS collections, images, SEO metadata, URLs, internal links, forms, and other site elements while rebuilding the design and protecting existing search visibility.

    Some Webflow content can be exported and imported into WordPress, but the process is rarely completely automatic. CMS fields need to be mapped, images need to be verified, templates need to be recreated, and any changed URLs need proper redirects.

    A practical migration workflow looks like this:

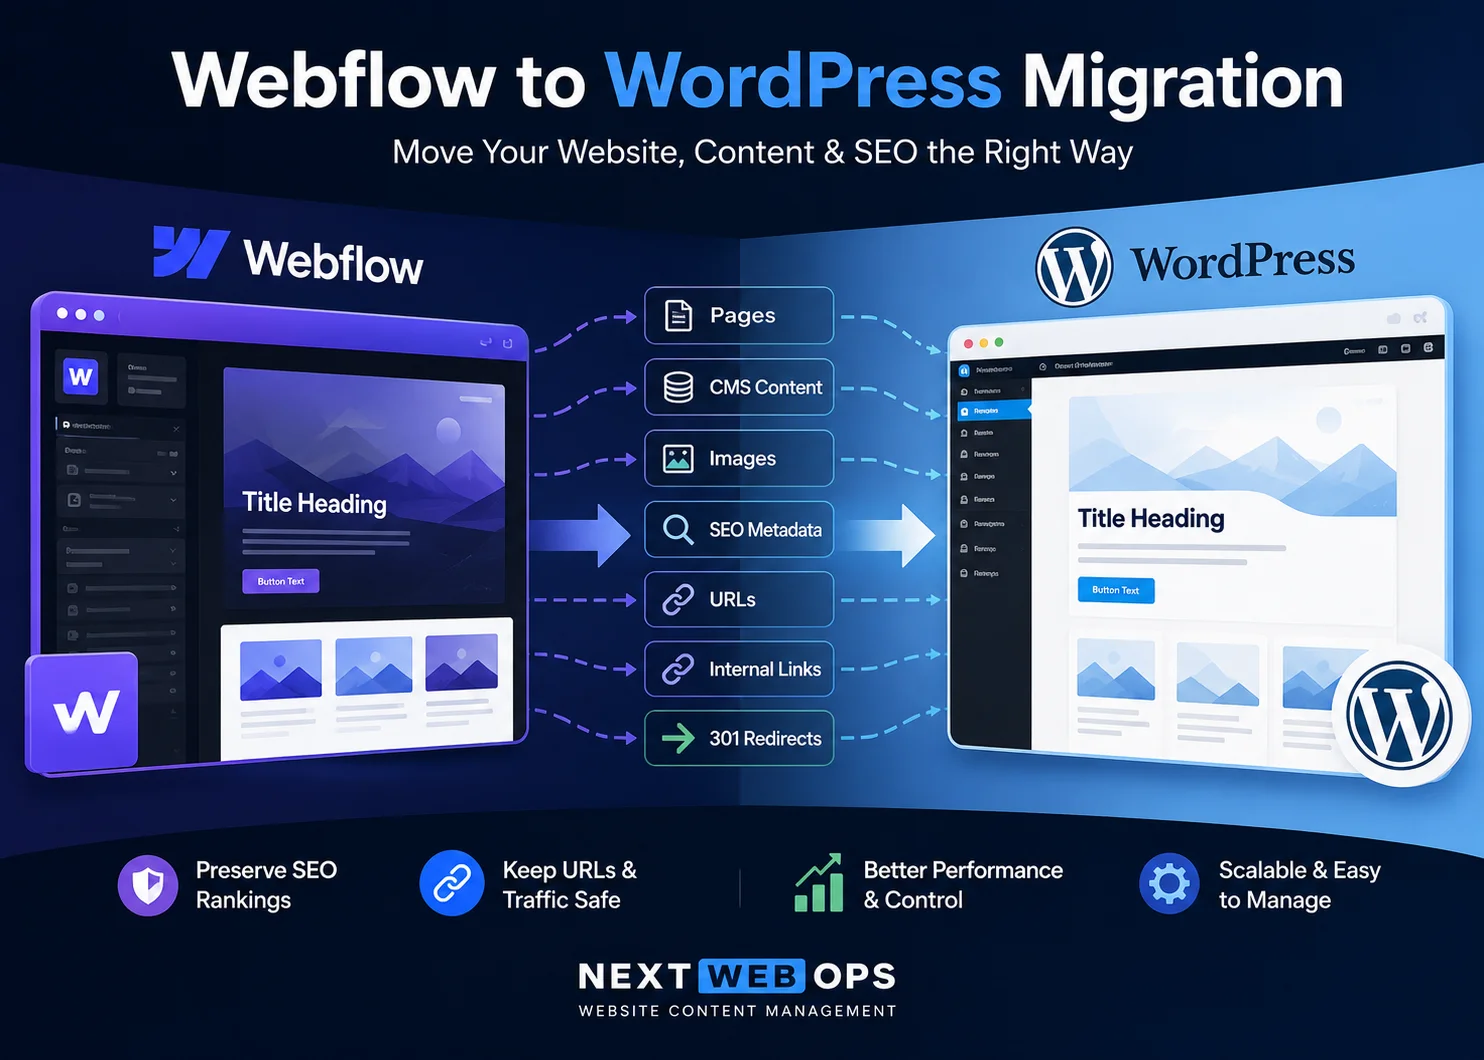
    Inventory → Export → Map → Import → Rebuild → Preserve URLs → Restore SEO → QA → Launch.

    This guide explains each step and highlights the areas that deserve extra attention when organic traffic, content quality, and publishing consistency matter.

    Can You Migrate Webflow to WordPress?

    Yes. You can migrate a Webflow website to WordPress, but the method depends on the size and complexity of the site.

    There are three common approaches.

    Manual Migration

    With a manual migration, content is exported or copied from Webflow and then rebuilt or imported into WordPress.

    This approach can work well when:

    • The site is relatively small
    • You want close control over page structure
    • SEO preservation is important
    • The WordPress design will differ from the original Webflow site

    Migration or Conversion Tools

    Some tools can help convert Webflow designs or import exported content into WordPress.

    These can reduce repetitive work, but they do not remove the need for QA.

    You still need to check:

    • Formatting
    • Images
    • CMS fields
    • Metadata
    • URLs
    • Links
    • Responsive layouts

    Professional Migration

    Migration support becomes more valuable when the Webflow site contains hundreds of CMS items, important rankings, complex page templates, or a large number of URLs that must be mapped carefully.

    The more content and SEO value the site has, the more important the planning stage becomes.

    What Can Be Migrated From Webflow to WordPress?

    A Webflow website is made up of several different layers. Some transfer more easily than others.

    Static Page Content

    Static pages may include:

    • Homepage
    • About page
    • Service pages
    • Landing pages
    • Contact page

    The content can be recreated in WordPress, but the original Webflow layout generally needs to be rebuilt using your chosen WordPress theme, blocks, page builder, or custom templates.

    Webflow CMS Collections

    Webflow CMS collections can often be exported as CSV files.

    Examples include:

    • Blog posts
    • Case studies
    • Resources
    • Team members
    • Projects

    Those fields can then be mapped to WordPress posts, pages, custom post types, taxonomies, or custom fields.

    Images and Media

    Images usually need separate attention during the migration.

    Do not assume that every image referenced in exported content will automatically become a properly hosted WordPress media item.

    Review:

    • Featured images
    • Inline images
    • Background images
    • Image URLs
    • Alt text
    • File dimensions
    • File size

    SEO Metadata

    Important metadata should be documented before migration.

    This may include:

    • SEO titles
    • Meta descriptions
    • Page slugs
    • Canonical settings where relevant
    • Indexing controls
    • Open Graph information where needed

    Do not assume those fields will automatically transfer to the correct WordPress SEO fields.

    Design and Layout

    Exporting Webflow content does not automatically recreate the same editable WordPress website.

    The design may need to be:

    • Rebuilt with a WordPress theme
    • Recreated with blocks
    • Built with a page builder
    • Converted into a custom WordPress theme
    • Adapted into a new design system

    This is why content migration and design migration should be planned as related but separate tasks.

    What Does Not Automatically Transfer?

    Several Webflow-specific elements may require manual recreation or additional configuration in WordPress.

    Depending on the original site, this can include:

    • Interactions and animations
    • Dynamic CMS relationships
    • Forms
    • Custom scripts
    • Third-party integrations
    • Complex layout logic
    • SEO settings
    • 301 redirects
    • Collection templates
    • Some styling behavior

    The exact migration requirements depend heavily on how the Webflow site was originally built.

    This is why the first stage should be an audit rather than immediately exporting files.

    How to Migrate Webflow to WordPress Step by Step

    1. Audit the Existing Webflow Website

    Before migrating anything, create an inventory of the existing website.

    Document:

    • All indexable URLs
    • Static pages
    • CMS collections
    • Blog posts
    • Images
    • SEO titles
    • Meta descriptions
    • Internal links
    • Redirects
    • Forms
    • Integrations

    If the existing Webflow site receives organic search traffic, this inventory becomes particularly important.

    You should know which URLs exist before deciding which ones will remain, change, merge, or disappear.

    It can also be useful to review your existing Webflow SEO optimization before migration so important page-level SEO elements are not overlooked.

    2. Back Up Your Webflow Content

    Preserve copies of the site data before making major changes.

    At minimum, save:

    • CMS exports
    • Page content
    • Images
    • Current URL list
    • Metadata
    • Important settings

    The goal is to avoid discovering after launch that an important field, image, publication date, or piece of metadata was never captured.

    3. Set Up WordPress on a Staging Environment

    Build the new WordPress website on staging before replacing the live Webflow site.

    A staging environment lets your team:

    • Test content imports
    • Rebuild layouts
    • Configure templates
    • Review images
    • Set up SEO
    • Test redirects
    • Fix formatting
    • Perform mobile QA

    Make sure staging pages are not accidentally indexed by search engines while the site is still under development.

    4. Decide How WordPress Will Be Built

    Before importing a large amount of content, define the new WordPress structure.

    Possible approaches include:

    • A standard WordPress theme
    • A block theme
    • A custom theme
    • A page builder
    • A converted Webflow design

    The best option depends on:

    • Design complexity
    • Editing requirements
    • Performance goals
    • Internal team skills
    • Long-term maintenance

    Do not choose purely based on how closely the new site can copy the existing design. The WordPress editing and maintenance experience matters too.

    5. Export Webflow CMS Collections

    Export each Webflow CMS collection separately and document what each field represents.

    For example, a blog collection might contain:

    • Name
    • Slug
    • Publish date
    • Author
    • Category
    • Featured image
    • Body content
    • SEO title
    • Meta description

    A case study collection may have very different fields.

    Keeping these exports organized makes WordPress mapping much easier.

    6. Map Webflow Fields to WordPress

    Field mapping is one of the most important stages of a content-heavy migration.

    Webflow Field WordPress Destination
    Name Post title
    Slug Post slug
    Body Post content
    Featured image Featured image
    Publish date Post date
    Category Category or taxonomy
    SEO title SEO metadata field
    Meta description SEO metadata field

    A field that is mapped incorrectly can create hundreds of cleanup tasks after import.

    Test your mapping on a small group of records before importing an entire collection.

    Migrating CMS content is where formatting, metadata, images, categories, and field mapping can become time-consuming. Contact NextWebOps for hands-on Webflow to WordPress content migration support.

    7. Import Content Into WordPress

    Once the WordPress structure is ready, import your content.

    WordPress import tools and specialized plugins can help automate parts of this process, particularly for structured CSV data.

    After the import, review samples from every content type.

    Check:

    • Titles
    • Paragraphs
    • Headings
    • Lists
    • Links
    • Images
    • Categories
    • Dates
    • Authors
    • Special formatting

    Do not assume that a technically successful import means the published content is ready.

    8. Migrate and Optimize Images

    Images often create one of the largest cleanup workloads during a CMS migration.

    Make sure important images are hosted properly inside the new WordPress environment rather than unintentionally depending on old external URLs.

    Review:

    • Image filenames
    • Dimensions
    • Compression
    • Format
    • Alt text
    • Featured-image assignments
    • Inline image placement

    Where appropriate, optimize images using formats such as WebP and resize unnecessarily large files.

    For more guidance, see these image SEO best practices.

    9. Rebuild Static Pages and Templates

    Static Webflow pages commonly need to be recreated separately from CMS imports.

    These may include:

    • Homepage
    • Service pages
    • About page
    • Contact page
    • Campaign landing pages

    You will also need WordPress templates for repeatable content such as blog posts and case studies.

    Check that the new templates preserve logical:

    • Heading hierarchy
    • Content spacing
    • Image placement
    • Navigation
    • Calls to action

    10. Preserve URLs Wherever Possible

    URL preservation is one of the most important SEO decisions in a Webflow to WordPress migration.

    If an existing URL is:

    • Indexed
    • Receiving organic traffic
    • Linked internally
    • Linked from other websites
    • Still serving the same page purpose

    keep it unchanged where practical.

    Changing URLs simply because WordPress uses a different default structure can introduce unnecessary migration risk.

    11. Create 301 Redirects for Changed URLs

    When an old Webflow URL cannot be preserved, map it to the most relevant new WordPress URL.

    Create a redirect sheet using this format:

    Old Webflow URL → New WordPress URL

    For example:

    /webflow-old-service//content-publishing-service/

    Avoid redirecting every old URL to the homepage.

    The replacement page should satisfy roughly the same intent whenever possible.

    Also avoid unnecessary redirect chains.

    Instead of:

    Page A → Page B → Page C

    configure:

    Page A → Page C

    12. Restore SEO Titles and Meta Descriptions

    SEO metadata should be restored or intentionally rewritten during migration.

    Review:

    • SEO titles
    • Meta descriptions
    • Canonical settings where applicable
    • Indexing settings
    • Schema where relevant

    If a page is performing well, avoid rewriting its SEO positioning without a clear reason.

    Migration already introduces technical change. Unnecessary content and metadata changes can make it harder to diagnose performance shifts after launch.

    13. Rebuild Internal Links

    Migrated content may still contain links pointing to old Webflow URLs.

    Although redirects can catch some of those requests, it is better to update important internal links directly.

    Review links between:

    • Blog posts
    • Service pages
    • Case studies
    • Resources
    • Landing pages

    Use descriptive anchors and preserve useful relationships between pages.

    See these internal linking best practices for a broader framework.

    14. Perform WordPress Publishing QA

    Before launch, review the site as a visitor and as a search engine would encounter it.

    Check:

    • Page content
    • Formatting
    • Heading hierarchy
    • Images
    • Alt text
    • SEO titles
    • Meta descriptions
    • Internal links
    • External links
    • Buttons
    • Forms
    • Categories
    • Authors
    • Publication dates
    • Mobile layouts
    • 301 redirects
    • Canonical URLs
    • Indexing settings

    Use the NextWebOps on-page SEO checklist as an additional page-level review before launch.

    How to Preserve SEO During a Webflow to WordPress Migration

    A platform migration can affect organic performance if important search signals are changed or lost.

    The following safeguards reduce unnecessary risk.

    Keep Important URLs the Same

    Preserve existing URLs where the same content will continue to exist in WordPress.

    Map Every Important Changed URL

    Any important Webflow URL that changes should have an appropriate redirect.

    Preserve Search Intent

    A migration is not automatically the best time to rewrite every page.

    If an existing page already satisfies its search intent and performs well, maintain its core purpose unless there is a separate optimization reason to change it.

    Transfer Metadata

    Restore page titles and meta descriptions instead of relying on generic WordPress defaults.

    Preserve Internal Links

    Update important internal links so they point directly to their new destinations.

    Check Images and Alt Text

    Verify that important images load from the new site and retain appropriate alt text.

    Avoid Accidental Noindex Settings

    Staging WordPress sites are often intentionally blocked from search engines.

    Before launch, confirm that your production pages are not accidentally carrying over settings that prevent indexing.

    Verify the Sitemap After Launch

    Check the WordPress XML sitemap and make sure important indexable pages are represented.

    Then review it through Google Search Console and inspect priority URLs after the new site launches.

    Have your migration plan ready but need help transferring pages, rebuilding internal links, adding redirects, restoring metadata, or QA-checking WordPress content? Talk to NextWebOps about Webflow to WordPress migration implementation.

    Webflow CMS to WordPress Migration
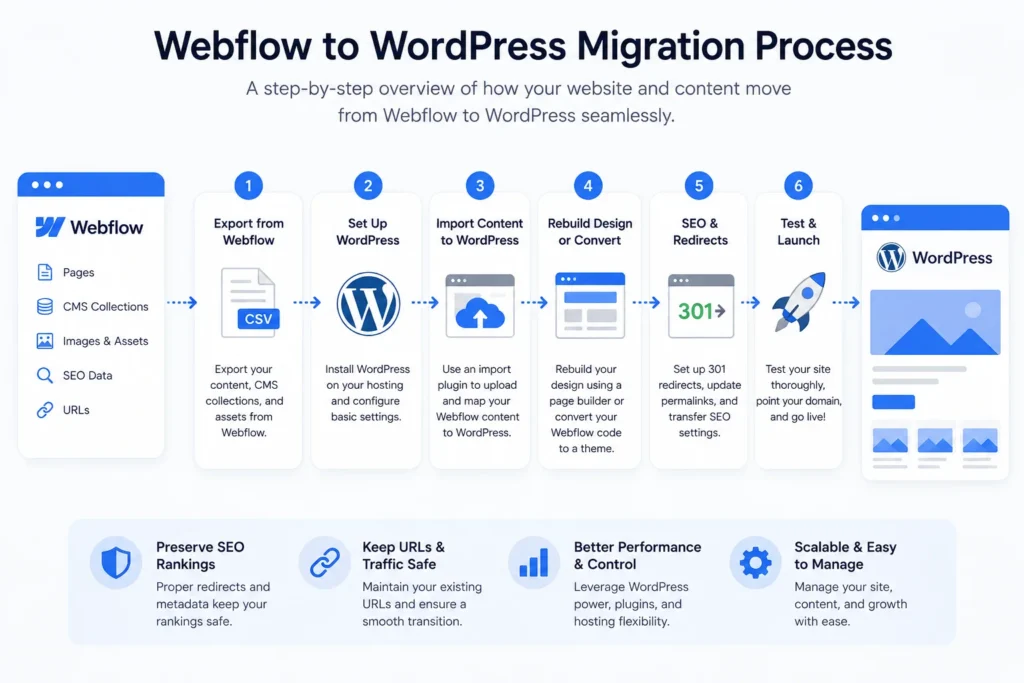
    Webflow CMS to WordPress content migration and field mapping process

    Webflow CMS content does not have to become standard WordPress blog posts.

    Different Webflow collections can map to different WordPress structures.

    For example:

    • Webflow Blog → WordPress Posts
    • Webflow Case Studies → Case Study custom post type
    • Webflow Team → Team custom post type
    • Webflow Resources → Resource custom post type

    Categories, tags, and reference fields may map to WordPress taxonomies or custom fields depending on the desired structure.

    A migration flow may look like:

    Webflow CMS → CSV Export → Field Mapping → WordPress Import → Formatting & SEO QA

    Relational fields deserve special attention.

    For example, if a Webflow case study references an industry, service, or team member, you need to decide how that relationship will work in WordPress.

    This may require custom taxonomies, custom fields, or manual cleanup after import.

    Should You Rebuild the Webflow Design or Convert It?

    There are two broad approaches to the visual side of the migration.

    Rebuild the Design in WordPress

    Rebuilding gives you the opportunity to create a WordPress-native structure designed around the new editing environment.

    Potential benefits include:

    • Cleaner WordPress templates
    • Better long-term maintainability
    • More intentional performance optimization
    • Easier editing for content teams

    The tradeoff is that rebuilding usually requires more design and development work.

    Convert the Existing Webflow Design

    Conversion tools may help retain more of the existing visual appearance or exported code.

    This can be useful in certain projects, but converted output should still be reviewed for:

    • Maintainability
    • Responsive behavior
    • WordPress editing experience
    • Performance
    • Code quality

    The best choice is not necessarily the one that reproduces Webflow most literally.

    Choose the method that creates a WordPress site your team can maintain comfortably after the migration is finished.

    Common Webflow to WordPress Migration Mistakes

    Migrating Without a URL Inventory

    If you do not know which URLs exist before migration, it becomes much harder to identify missing pages and redirects later.

    Changing URLs Unnecessarily

    Keep established URLs when possible.

    Forgetting 301 Redirects

    Changed URLs need relevant redirects rather than dead ends.

    Losing SEO Metadata

    Titles and descriptions should be preserved or intentionally replaced.

    Missing Images

    Verify featured and inline images after import.

    Leaving Broken Internal Links

    Do not rely on redirects to handle every outdated internal link.

    Importing Messy HTML

    Content may carry over unwanted formatting or structural markup that needs cleanup.

    Incorrect Category Mapping

    Make sure categories and taxonomies are planned before importing hundreds of posts.

    Losing Publication Dates or Authors

    These fields are easy to overlook during bulk migration.

    Forgetting Forms and Integrations

    Content migration does not automatically recreate functionality.

    Launching Without Mobile QA

    Check responsive layouts before switching the domain.

    Accidentally Blocking Indexing

    Confirm the live site is indexable after launch.

    Combining Migration, Redesign, and Content Rewrite Without a Plan

    Changing the CMS, design, URLs, and page copy simultaneously creates more variables and makes problems harder to diagnose.

    If content also needs optimization, consider using a separate content optimization strategy rather than rewriting every page automatically during migration.

    Webflow to WordPress Migration Checklist

    Before Migration

    • Crawl or export existing URLs
    • Inventory static pages
    • Inventory CMS collections
    • Export CMS content
    • Back up images
    • Document SEO metadata
    • Document internal links
    • Document forms and integrations
    • Plan the WordPress content structure

    During Migration

    • Configure WordPress staging
    • Create posts, pages, and custom post types
    • Map CMS fields
    • Test a small import first
    • Import content
    • Transfer images
    • Rebuild static pages
    • Preserve URLs where possible
    • Create redirect mapping
    • Restore metadata
    • Update internal links

    Before Launch

    • Test important redirects
    • Check SEO titles and descriptions
    • Check images and alt text
    • Test internal links
    • Test forms
    • Review mobile layouts
    • Check publication dates and authors
    • Verify canonical URLs
    • Confirm indexability
    • Verify XML sitemap
    • Complete live-site QA

    How Long Does a Webflow to WordPress Migration Take?

    There is no useful universal timeframe because migration scope varies significantly.

    A relatively small marketing website with 20 pages is very different from a site with:

    • Hundreds of blog posts
    • Multiple CMS collections
    • Complex reference fields
    • Custom integrations
    • Thousands of images
    • Large redirect maps
    • Important organic search traffic

    The main factors affecting migration complexity include:

    • Number of URLs
    • Number of CMS items
    • Custom fields
    • Design complexity
    • Image volume
    • Integrations
    • SEO requirements
    • Amount of manual content cleanup

    Planning the structure before importing content usually reduces cleanup later.

    When Should You Use Professional Migration Support?

    A DIY migration may be reasonable when the site is small, the design is simple, and there is little existing organic traffic to protect.

    Professional or implementation support becomes more useful when:

    • Hundreds of pages or posts need migration
    • Organic traffic is commercially important
    • Multiple Webflow CMS collections exist
    • WordPress custom post types are required
    • A large redirect map needs implementation
    • Images need migration and optimization
    • Imported formatting needs cleanup
    • Internal links need systematic updating
    • SEO metadata needs restoration
    • Your internal team has a publishing backlog

    Migration work can also be divided between specialists.

    A developer may handle hosting, templates, and technical configuration, while a content implementation team handles CMS mapping, WordPress publishing, formatting, images, metadata, internal links, redirects, and QA.

    Final Thoughts

    A successful Webflow to WordPress migration is not simply an export-and-import task.

    It requires careful handling of:

    Content + CMS structure + images + design + URLs + metadata + internal links + redirects + publishing QA.

    The most important rule is to understand the existing Webflow site before changing it.

    Inventory the URLs, preserve strong page structures, map CMS data carefully, keep important URLs wherever possible, redirect changed pages, restore metadata, rebuild internal links, and test the WordPress site thoroughly before launch.

    That process helps you move platforms without leaving valuable content or SEO details behind.

    Need help moving content from Webflow to WordPress without broken pages, missing images, outdated links, or lost metadata? Get in touch with NextWebOps for hands-on content migration, WordPress publishing, SEO implementation, and migration QA support.

    Frequently Asked Questions

    Can you migrate Webflow to WordPress?

    Yes. Webflow content can be migrated to WordPress using a combination of CMS exports, imports, manual page rebuilding, image migration, field mapping, and design recreation. The exact workflow depends on the size and complexity of the site.

    Can Webflow CMS content be exported to WordPress?

    Webflow CMS collections can be exported as CSV files and then mapped to WordPress posts, pages, custom post types, taxonomies, or custom fields. The exported fields should be reviewed carefully before importing them at scale.

    Will I lose SEO when moving from Webflow to WordPress?

    A migration can affect SEO if URLs, content, metadata, internal links, or indexing settings are changed incorrectly. Preserving important URLs, creating 301 redirects, restoring metadata, maintaining search intent, and completing post-migration QA can reduce unnecessary risk.

    Can I keep the same URLs after migrating?

    In many cases, yes. Keeping existing URLs is often the preferred approach when those pages remain relevant and already receive search traffic or backlinks. When a URL must change, create a 301 redirect to the most relevant new page.

    Can I transfer the Webflow design to WordPress?

    The design can be recreated or converted, but Webflow content export does not automatically produce a fully editable WordPress version of the same site. You may need to rebuild the design using a WordPress theme, blocks, a page builder, custom templates, or a conversion workflow.

    What happens to Webflow images during migration?

    Images need to be verified and often re-imported into the WordPress media library. Check featured images, inline images, file dimensions, filenames, compression, alt text, and any image URLs referenced in migrated content.

    Do I need 301 redirects when moving from Webflow to WordPress?

    You need 301 redirects when important URLs change. If a Webflow URL remains exactly the same in WordPress, a redirect is not required for that page.

    Can Webflow CMS collections become WordPress custom post types?

    Yes. A Webflow collection such as Case Studies, Resources, Projects, or Team Members can be mapped to a WordPress custom post type when that structure makes sense for the new site.

    Is there an automatic Webflow to WordPress converter?

    Tools can automate parts of design or content conversion, but a complete migration still requires review of formatting, CMS fields, images, URLs, metadata, redirects, integrations, and WordPress publishing quality.
  • WordPress Content Management: A Practical Guide for Businesses

    WordPress Content Management: A Practical Guide for Businesses

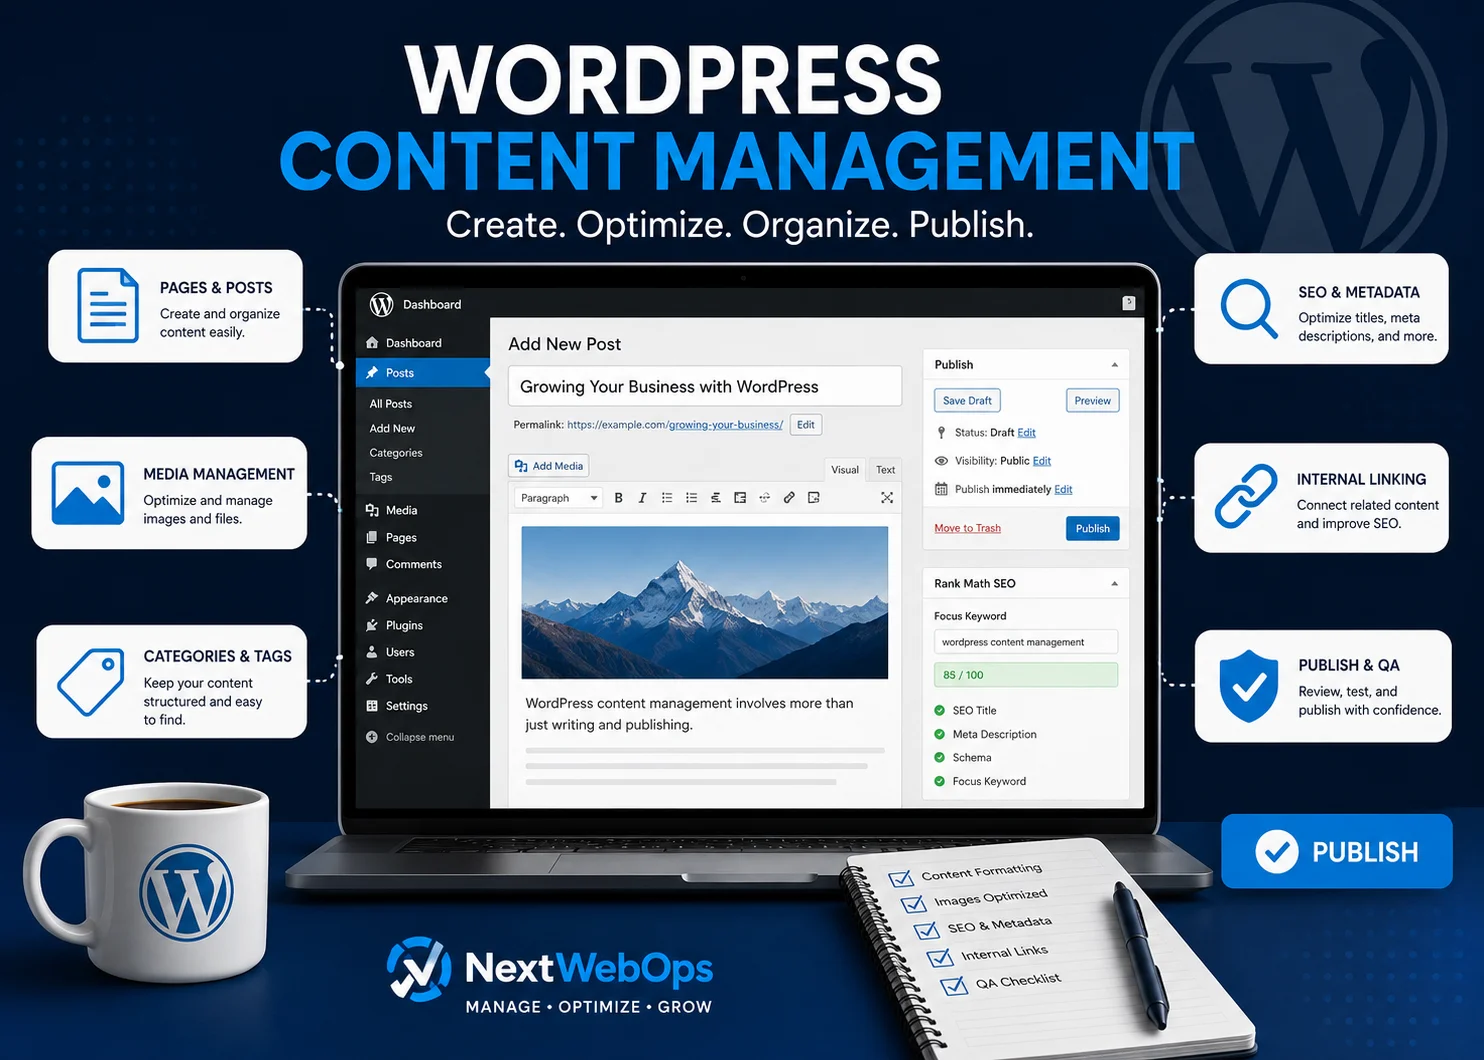
    WordPress content management is more than adding text to a website and clicking Publish. For businesses, agencies, and marketing teams, it includes organizing content, formatting pages, managing images, adding internal links, configuring metadata, updating older content, and checking every page before it goes live.

    WordPress makes it relatively easy to create and edit website content, but maintaining a consistent publishing process becomes more important as your website grows. Without clear standards, websites can quickly accumulate inconsistent formatting, oversized images, weak internal linking, outdated information, missing metadata, and publishing errors.

    This guide explains what WordPress content management involves, what you can manage inside WordPress, and the practical processes businesses can use to keep their websites organized, optimized, and ready for visitors.

    What Is WordPress Content Management?

    WordPress content management is the ongoing process of creating, organizing, editing, optimizing, publishing, and maintaining content on a WordPress website.

    That content can include:

    • Blog posts
    • Service pages
    • Landing pages
    • Images and other media
    • Categories and tags
    • Internal links
    • SEO titles and meta descriptions
    • Calls to action
    • Navigation content
    • Older pages that need updating

    WordPress provides the content management system, but the quality of the final website still depends on the workflow used by the people managing it.

    For example, two businesses can use the same WordPress setup and still produce very different results. One may follow a standardized process for formatting, image optimization, SEO, internal links, and publishing QA. Another may simply paste content into WordPress and publish it without reviewing the page.

    The technology is the same. The content management process is not.

    WordPress.com vs. WordPress.org

    WordPress.com and WordPress.org both use WordPress, but they are different approaches to running a website.

    WordPress.com provides a hosted service with various plans and built-in website management features. WordPress.org provides the open-source WordPress software that can be installed with a hosting provider.

    For content teams, many of the day-to-day publishing concepts are similar: creating posts and pages, uploading images, organizing content, editing text, managing users, and publishing updates.

    What Can You Manage in WordPress?

    A WordPress website usually contains many different types of content. Good content management means handling each type consistently instead of treating publishing as a simple copy-and-paste task.

    Posts and Pages

    Posts are commonly used for blog articles, news, updates, and other chronological content. Pages are generally used for more permanent content such as service pages, About pages, landing pages, and contact information.

    Businesses should define when each content type should be used. A consistent structure makes the site easier to maintain and reduces confusion for future editors.

    Images and Media

    Images can improve a page, but poorly managed media can create unnecessary problems.

    Before uploading an image to WordPress, it is usually better to resize and compress it first. Descriptive filenames and appropriate alt text can also make the media library easier to manage while supporting accessibility and image SEO.

    For a deeper look at this process, see the NextWebOps guide to image SEO best practices.

    Categories and Tags

    Categories and tags help organize WordPress content, especially on larger blogs.

    The problem is that teams often create new categories or tags without checking what already exists. Over time, this can lead to duplicate, overlapping, or nearly empty archive pages.

    A controlled taxonomy is easier for users, editors, and search engines to understand.

    Internal Links

    Internal links connect related pages on the same website. They help visitors discover additional information and help search engines understand relationships between pages.

    Internal linking should be part of the publishing workflow rather than something added randomly months later.

    Use descriptive anchor text and link only where another page genuinely helps the reader. The NextWebOps guide to internal linking best practices explains how to approach this more systematically.

    Metadata and SEO Settings

    Depending on the SEO plugin and website setup, content editors may also manage:

    • SEO titles
    • Meta descriptions
    • Canonical URLs
    • Social sharing metadata
    • Schema settings
    • Indexing controls

    These fields should be checked before publishing because they influence how pages can appear in search results and how search engines interpret them.

    10 WordPress Content Management Best Practices

    A reliable WordPress content management process helps reduce publishing mistakes and keeps the website consistent as more content is added.

    1. Create a Consistent Publishing Workflow

    Do not rely on every editor remembering every task.

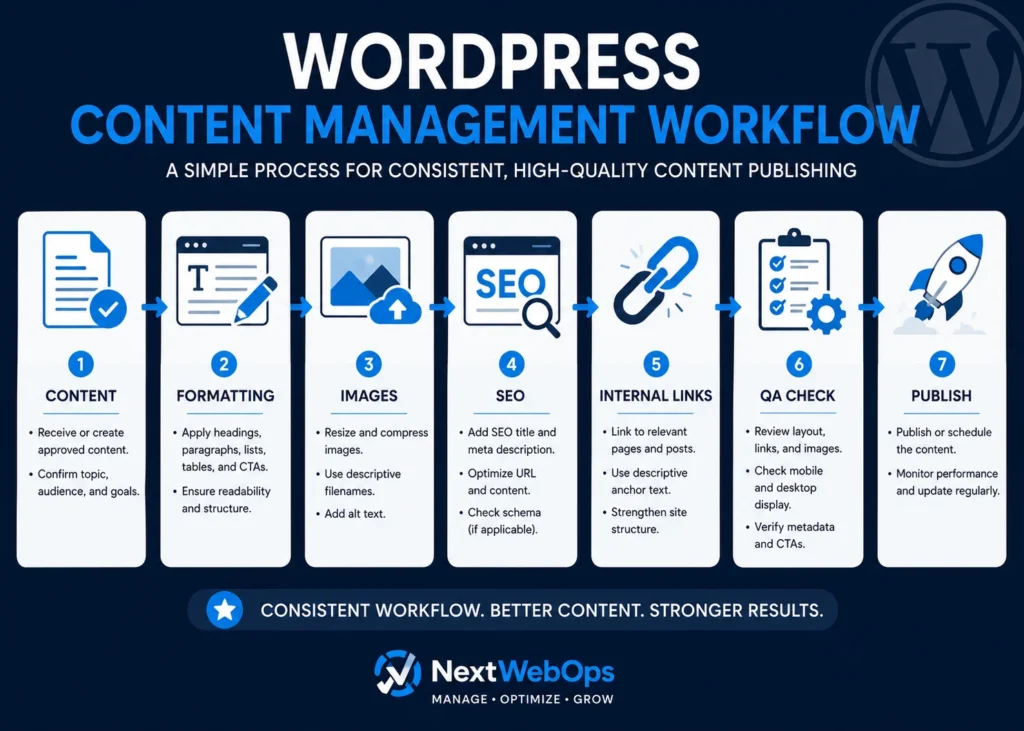
    Define a publishing workflow that can be followed each time new content is added. A typical process may include:

    1. Receive or approve the content.
    2. Create the WordPress draft.
    3. Apply the correct heading structure.
    4. Format paragraphs, lists, tables, and other elements.
    5. Prepare and upload images.
    6. Add relevant internal links.
    7. Configure metadata.
    8. Preview the page.
    9. Complete publishing QA.
    10. Publish or schedule the content.

    A documented process becomes especially useful when several writers, editors, SEO specialists, or external partners work on the same site.

    2. Format Content for Readability

    Good content can become difficult to read when it is poorly formatted.

    Large blocks of text, inconsistent headings, excessive bolding, and irregular spacing make pages harder to scan.

    A practical formatting standard should cover:

    • Short paragraphs
    • Logical H2 and H3 headings
    • Bulleted or numbered lists when useful
    • Consistent bold text
    • Appropriate tables
    • Clear calls to action
    • Consistent spacing

    The goal is not to decorate the article. The goal is to make the content easier to understand.

    3. Optimize Every Page Before Publishing

    Content publishing and on-page SEO should not be treated as completely separate jobs.

    Before a page goes live, review elements such as:

    • Page title
    • URL
    • SEO title
    • Meta description
    • Heading hierarchy
    • Keyword usage
    • Internal links
    • Image alt text
    • Relevant schema settings

    A practical on-page SEO checklist can help teams avoid missing important elements during routine publishing.

    4. Optimize Images Before Uploading

    Uploading large original image files directly from a camera, stock library, or design tool can unnecessarily increase page weight.

    Prepare images before they enter the WordPress media library.

    A simple process includes:

    • Resize images to appropriate display dimensions.
    • Compress them.
    • Use an efficient format such as WebP when suitable.
    • Rename files descriptively.
    • Add useful alt text.
    • Check how images display on the finished page.

    Image optimization is one of the easiest publishing tasks to standardize because the same process can be followed on every new page.

    5. Add Relevant Internal Links

    Every new article creates opportunities to connect related content.

    Before publishing, look for pages that can provide additional context to the reader. Also consider whether older articles should later be updated to link back to the new page.

    A good internal link should feel like a natural next step rather than an SEO insertion.

    6. Maintain Consistent Categories and Tags

    Do not create a new WordPress category every time a new variation of a topic appears.

    Before adding a taxonomy term, check whether an appropriate category or tag already exists.

    Businesses should periodically review their taxonomy and remove unnecessary complexity where appropriate. A smaller, deliberate structure is often easier to maintain than dozens of overlapping labels.

    7. Use WordPress User Roles Properly

    Not everyone who works on website content needs full administrative access.

    WordPress includes different user roles that can provide varying levels of permission. Depending on the site’s workflow, writers may only need content-level access while technical administrators retain broader control.

    Using appropriate permissions can make editorial workflows easier to manage and reduce unnecessary access.

    8. Perform Publishing QA

    Publishing QA is the final review between “the content is entered” and “the page is ready for visitors.”

    This step can catch problems that are easy to miss while editing.

    Check items such as:

    • Heading order
    • Broken links
    • Missing images
    • Incorrect image sizes
    • Missing alt text
    • Spacing problems
    • Buttons and calls to action
    • Metadata
    • Desktop display
    • Mobile display
    • Published URL

    The NextWebOps WordPress publishing checklist provides a more detailed publishing review process.

    9. Update Existing Content Regularly

    WordPress content management does not stop when a page is published.

    Older articles may eventually contain:

    • Outdated information
    • Old screenshots
    • Broken external links
    • Weak internal linking
    • Old calls to action
    • Incomplete information
    • References to services or products that have changed

    Periodic content reviews help keep the site useful instead of allowing old pages to slowly lose accuracy.

    If content refreshing is part of your SEO strategy, see the guide on how to update old blog posts for SEO.

    10. Document Your Content Standards

    A website becomes harder to manage when publishing knowledge exists only in one person’s head.

    Create basic documentation covering your preferred:

    • Heading structure
    • Image dimensions
    • Image naming conventions
    • Alt text approach
    • Internal linking process
    • Category usage
    • SEO fields
    • CTA placement
    • QA checklist
    • Publishing approval process

    This is especially useful when content production grows or work is shared between internal and external teams.

    A Simple WordPress Content Management Workflow

    A practical content workflow does not need to be complicated. It simply needs to make the important publishing steps repeatable.

    A Simple WordPress Content Management Workflow

    Step 1: Receive Approved Content

    Start with a final or clearly identified draft. Publishing unfinished or unapproved versions can create unnecessary rework.

    Step 2: Create the WordPress Draft

    Add the content to the correct post or page type and confirm the intended URL, author, category, and other relevant settings.

    Step 3: Apply Formatting

    Format headings, paragraphs, lists, tables, quotations, calls to action, and other content elements according to the site’s standards.

    Step 4: Prepare Images

    Resize, compress, rename, and upload images. Add appropriate alt text and verify that each image appears in the correct location.

    Step 5: Add Internal Links

    Connect the new page to useful related resources on the website.

    Step 6: Configure SEO Metadata

    Add the SEO title, meta description, focus keyword if your workflow uses one, and other relevant plugin settings.

    Step 7: Preview the Page

    Do not evaluate the article only inside the editor. Preview the actual page and look at how the content appears to visitors.

    Step 8: Complete Publishing QA

    Check layout, links, images, headings, metadata, calls to action, and responsive presentation.

    Step 9: Publish or Schedule

    Once the page passes review, publish it immediately or schedule it for the appropriate date.

    Step 10: Maintain the Content

    Revisit important pages periodically to make sure they remain useful and accurate.

    WordPress Content Management vs. Website Maintenance

    WordPress content management and website maintenance overlap, but they are not exactly the same.

    WordPress content management typically focuses on the information visitors see and interact with, such as:

    • Publishing pages and posts
    • Formatting content
    • Updating text
    • Managing images
    • Adding internal links
    • Managing categories and tags
    • Updating metadata
    • Performing publishing QA

    Website maintenance often includes broader technical tasks such as:

    • Updating WordPress
    • Updating themes and plugins
    • Managing backups
    • Monitoring security
    • Troubleshooting technical problems
    • Reviewing site performance

    Some businesses combine these responsibilities under one website management process. Others assign them to different people or service providers.

    The important point is to make sure both areas have clear ownership.

    Common WordPress Content Management Problems

    Many content problems do not come from WordPress itself. They come from inconsistent publishing processes.

    Inconsistent Formatting

    One article uses short paragraphs while another contains large text blocks. One editor uses H2s correctly while another uses bold text instead of headings.

    Without standards, the site begins to look inconsistent.

    Missing Metadata

    Pages may be published without reviewing SEO titles, meta descriptions, or social settings.

    This is especially common when publishing responsibilities are separated from SEO responsibilities without a clear handoff.

    Oversized Images

    Large image files can enter the media library when contributors upload files without resizing or compression.

    Weak Internal Linking

    New content may be published as an isolated page instead of being connected to related resources.

    Outdated Content

    Teams often focus on publishing new articles while older content remains untouched for years.

    Duplicate Categories and Tags

    Multiple editors may create similar taxonomy terms because no one checks the existing structure first.

    Incorrect Heading Structure

    Headings may be selected because of their visual size rather than their structural meaning.

    Publishing Without QA

    Typos, broken links, missing images, layout problems, or incorrect URLs can make it to the live website when there is no final review.

    Should You Manage WordPress Content In-House or Outsource It?

    There is no single answer for every business.

    Managing content internally can work well when publishing volume is low and someone on the team has enough time and WordPress knowledge to handle the process consistently.

    An in-house workflow may be appropriate when:

    • You publish only occasionally.
    • Your team is comfortable using WordPress.
    • Someone is responsible for SEO implementation.
    • Someone reviews pages before publication.
    • Website updates do not distract the team from higher-priority work.

    Outsourcing becomes more useful when content production grows or publishing starts taking significant time away from writers, marketers, or business owners.

    It can make sense to outsource WordPress content management when:

    • You publish frequently.
    • Your marketing team has a backlog of approved content.
    • Formatting varies between articles.
    • Images are not consistently optimized.
    • Metadata is regularly missed.
    • Internal linking is inconsistent.
    • Content updates are delayed.
    • Publishing QA is becoming a bottleneck.
    • You manage content across multiple websites.

    The goal of outsourcing is not simply to transfer the task of clicking Publish. A good publishing process should reduce operational work while maintaining consistent standards across the site.

    How NextWebOps Supports WordPress Content Management

    NextWebOps helps businesses and agencies handle the implementation work that comes between finished content and a properly published WordPress page.

    Depending on the project, that can include:

    • WordPress content publishing
    • Content formatting
    • Image preparation and optimization
    • Metadata implementation
    • On-page SEO execution
    • Internal linking
    • Content updates
    • Content migration
    • Publishing QA

    This type of support can be useful when writers and marketing teams want to focus on strategy and content creation without spending additional time handling repetitive website publishing tasks.

    If your team has content ready but needs help getting it properly formatted, optimized, and published, contact NextWebOps to discuss your WordPress content management needs.

    Frequently Asked Questions About WordPress Content Management

    What is WordPress content management?

    WordPress content management is the process of creating, organizing, editing, formatting, optimizing, publishing, and maintaining content on a WordPress website. It can include posts, pages, images, metadata, internal links, categories, tags, and ongoing content updates.

    Is WordPress a content management system?

    Yes. WordPress is a content management system that allows users to create, edit, organize, and publish website content through an administrative interface.

    What is the difference between WordPress content management and website maintenance?

    Content management primarily focuses on website content, including publishing, formatting, images, links, metadata, and updates. Website maintenance often includes technical tasks such as software updates, backups, security, plugin maintenance, and troubleshooting.

    What should a WordPress publishing workflow include?

    A practical workflow should include content preparation, formatting, image optimization, internal linking, metadata configuration, page previewing, publishing QA, publication, and periodic content updates.

    Can WordPress content management be outsourced?

    Yes. Businesses and agencies can outsource tasks such as WordPress publishing, formatting, image optimization, metadata implementation, internal linking, content migration, updates, and publishing QA when they do not want internal marketing teams handling those tasks manually.

    Build a More Consistent WordPress Publishing Process

    Effective WordPress content management is less about knowing where the Publish button is and more about creating a repeatable process around everything that happens before and after publication.

    Formatting, images, metadata, internal links, content organization, updates, and QA all affect the quality of the finished website.

    Businesses that document these processes can publish more consistently, reduce avoidable mistakes, and make it easier for multiple people to contribute to the same website.

    And when maintaining that workflow becomes too time-consuming internally, WordPress content management can be delegated so writers and marketers can spend more of their time creating and improving content rather than implementing it.

  • Website Maintenance Checklist for Small Businesses: What to Check and When

    Website Maintenance Checklist for Small Businesses: What to Check and When

    A website maintenance checklist for small businesses helps owners keep their sites secure, accurate and dependable without waiting for something to break. It creates a routine for checking updates, backups, forms, speed, content and search performance throughout the year.

    A business website may continue to look normal even when problems are developing behind the scenes. A contact form can stop delivering messages. A plugin can become outdated. A page can disappear from search results. A backup can fail silently for months.

    Regular maintenance makes these problems easier to find before they result in lost enquiries, security incidents or expensive emergency work. Some tasks deserve weekly attention, while others only need a monthly, quarterly or annual review. This guide organizes those responsibilities into a practical schedule.

    Why Website Maintenance Matters

    A website is not a finished product that can be published and forgotten. It depends on software, hosting, third-party services, domain settings, content and integrations that continue changing after launch.

    Routine website maintenance helps protect:

    • Website security
    • Customer information
    • Search visibility
    • Page speed
    • Lead generation and online sales
    • Brand credibility
    • Accessibility
    • Business continuity

    Maintenance also makes costs more predictable. A small problem discovered during a routine review is usually easier to resolve than an issue found after the website becomes unavailable. Testing a contact form may take only a few minutes. Discovering months later that messages were never delivered can mean lost leads that cannot be recovered.

    What Website Maintenance Includes

    Website maintenance is often treated as another name for installing software updates. Updates are important, but they represent only one part of the work.

    Software and Hosting

    This includes the website platform, theme, plugins, applications, server environment and connected services. Updates should be installed carefully and tested afterward.

    Backups and Recovery

    Automated backups should run regularly and be stored somewhere separate from the live website. A backup becomes dependable only when you know it can be restored.

    Security

    Security maintenance includes malware scans, user-access reviews, password practices, SSL checks and monitoring for unusual activity.

    Website Functionality

    Forms, buttons, menus, search tools, checkout processes, booking systems and email notifications should be tested as real visitors would use them.

    Speed and Mobile Usability

    A website should continue loading efficiently and working properly across common screen sizes. New images, plugins and tracking scripts can gradually reduce performance.

    Content and Business Information

    Service descriptions, prices, addresses, contact details, team information and policy notices should remain accurate.

    SEO and Analytics

    Maintenance should include checking indexing problems, broken links, redirects, search performance and conversion tracking.

    The exact schedule depends on the website. A small brochure site may require less frequent attention than an online store processing orders every day.

    What to Check Before Starting

    Before changing anything, document the current website setup. Record:

    • Website platform and version
    • Hosting provider and domain registrar
    • SSL certificate status
    • Active theme or template
    • Important plugins and applications
    • Backup location and schedule
    • Analytics and Search Console access
    • Main contact and conversion forms
    • Payment or booking integrations
    • Users with administrator access
    • Renewal dates for critical services

    Store this information securely. Do not place passwords or recovery codes inside a maintenance spreadsheet that several people can access.

    Decide who is responsible for software updates, backups, security alerts, content changes, analytics reviews, renewals and technical support. A checklist is not useful when everyone assumes someone else is monitoring the website.

    Create a Backup Before Making Changes

    Create a current backup before installing updates or making important changes. The backup should include the website files and database.

    Confirm when it was created, what it contains, where it is stored, how long it is retained, who can access it and how the website would be restored.

    Keeping every backup on the same hosting account creates unnecessary risk. Store at least one recent copy separately from the live server through secure cloud storage, a managed backup service or another approved location.

    Use a Staging Site for Risky Changes

    A staging site is a private copy of the website where changes can be tested before reaching visitors. Use it when installing major platform updates, changing themes, modifying checkout or booking features, adding custom code, changing navigation or removing an important integration.

    Not every text correction needs staging. The level of testing should match the risk. After deploying a tested change, confirm that the live website still works because caching, hosting settings and third-party services can behave differently.

    Weekly Website Maintenance Tasks

    Weekly maintenance should focus on issues that could quickly affect security, leads or sales.

    Review Available Updates

    Check the content-management system, theme, plugins and applications for updates. Review what each update changes, whether it is compatible with the setup and whether a current backup exists.

    After updating, check the homepage, navigation, important service pages, forms, mobile layout, checkout or booking process and administration area. Document problems and use the backup or rollback option when appropriate.

    Confirm That Backups Are Running

    Look for a recent successful backup, failed-job notices, available storage, correct retention settings, off-site copies and confirmation that files and database are included. A dashboard saying “backup enabled” is not proof that usable backup files exist.

    Check Website Uptime

    Uptime monitoring can alert you when the website becomes unavailable outside working hours. Investigate repeated downtime, which may result from hosting problems, expired services, traffic spikes, software conflicts or security incidents.

    Review Security Alerts

    Pay attention to failed administrator logins, unknown accounts, modified files, malware warnings, unexpected redirects, suspicious traffic and disabled security features. Do not ignore repeated alerts simply because the website still looks normal.

    Test Critical Customer Actions

    Complete the actions that matter most to the business. Submit the enquiry form, test the route to checkout or confirm that appointment availability displays correctly. Verify both sides: the visitor sees confirmation and the business receives the message, order or booking.

    Check Recently Published Content

    Review new pages and posts for incorrect formatting, missing images, broken links, wrong categories, spelling errors, poor mobile display, missing metadata and incorrect calls to action.

    Monthly Website Maintenance Tasks

    Monthly maintenance examines slower changes that may affect performance, search visibility and conversions.

    Test Every Important Form

    Test contact, quote, newsletter, application, registration, booking, account, checkout and upload forms. Confirm required fields, useful error messages, successful submission, saved entries and delivery of notifications to both the customer and business.

    If messages are regularly treated as spam, review the email-delivery setup. A transactional email service may be more reliable than sending messages directly through the web server.

    Review Buttons and Important Links

    Test navigation, calls to action, footer links and buttons leading to contact pages, services, checkout, booking, portals, downloads and social profiles. Automated tools find many broken links, but manual testing can reveal links that work while leading to the wrong page.

    Check Page Speed

    Test the homepage, main service pages, popular articles and conversion pages with a tool such as Google PageSpeed Insights. Compare results with earlier tests rather than chasing a perfect score.

    Common causes of slower loading include large images, unnecessary plugins, excessive scripts, weak caching, video embeds, database growth, slow hosting, font files and third-party tracking. Test mobile as well as desktop.

    Scan for Security Problems

    Run a security scan and confirm that SSL, HTTPS, security software, administrator accounts, file permissions, spam controls and login protection are working. A valid SSL certificate protects data in transit but does not prevent weak passwords, vulnerable plugins or malicious files.

    Review User Accounts and Permissions

    Remove accounts belonging to former employees, freelancers and agencies. Give each user only the access needed for their role. Check administrator accounts, recent users, dormant accounts, shared usernames, password practices, two-factor authentication and connected applications.

    Review Analytics and Conversions

    Review popular pages, traffic sources, enquiries, sales, devices and exits from important processes. Investigate large unexpected changes. Test tracked actions rather than assuming analytics tags still work, and document the test date and outcome.

    Check Google Search Console

    Review indexing errors, manual actions, security warnings, mobile performance, Core Web Vitals, sitemap status, declining pages and broken URLs. Not every excluded page is a problem; focus on valuable pages that should appear in search.

    Review 404 Errors and Redirects

    For important missing pages, decide whether to restore the page, correct the link, redirect it to a relevant replacement or leave a genuine 404. Do not redirect every missing page to the homepage. Remove redirect chains by linking directly to the final destination.

    Review Website Content for Accuracy

    Check business hours, phone numbers, addresses, team members, service descriptions, prices, delivery details, guarantees, certifications and policy information. Start with the homepage, contact page and high-value service pages.

    Optimize Newly Uploaded Images

    Confirm that new images have suitable dimensions, reasonable file sizes, descriptive filenames, helpful alt text, correct orientation and no unnecessary duplicates. Alt text should describe the image rather than repeat keywords.

    Clean Up Spam and Unnecessary Data

    Remove spam comments, abandoned drafts, expired submissions, temporary files, duplicates and test data in line with legal and record-retention requirements. Create a backup before using database-cleaning tools.

    Quarterly Website Maintenance Tasks

    Quarterly reviews ask whether the website still supports users and business goals effectively.

    Test a Backup Restoration

    Restore a backup in a safe environment and confirm that it includes pages, images, database content, users, settings, forms, orders or bookings, and theme or plugin configurations. Record how long recovery takes and who can complete it.

    Audit Plugins, Themes and Applications

    For each component, confirm that it is used, maintained, secure, licensed appropriately and not duplicating another feature. Remove unnecessary software after checking dependencies. Document the purpose of essential components.

    Review Mobile Usability

    Test on real phones and tablets. Check menus, text, buttons, forms, images, tables, popups, sticky elements, checkout, booking steps and content order. Complete important customer journeys from beginning to end.

    Review Navigation and Site Structure

    Confirm that visitors can find services, pricing, business information, contact details, policies and support. Remove outdated items and use labels that describe destinations clearly.

    Audit Calls to Action

    Ensure calls to action match the page, use clear language, lead to the correct destination, work on mobile and support current goals. Avoid presenting too many competing actions together.

    Review Accessibility

    Check heading hierarchy, keyboard navigation, form labels, alt text, colour contrast, link descriptions, button labels, video captions, focus visibility and error instructions. Combine automated scans with manual review.

    Review Privacy and Consent Features

    Check privacy information, cookie choices, form disclosures, data retention, third-party tracking and marketing subscriptions. Seek qualified advice when legal interpretation is required.

    Conduct a Content Performance Review

    Identify pages with declining traffic, low click-through rates, outdated information, competing topics, weak internal links or no useful next action. Decide whether to update, consolidate, redirect or remove each page based on evidence.

    Annual Website Maintenance Tasks

    Annual maintenance focuses on ownership, services, policies and strategic decisions.

    Review Domain and Hosting Renewals

    Confirm the registrar, registered owner, renewal date, payment method, administrative email, hosting provider and nameserver settings. The domain should be controlled by the business, not permanently held in a former employee or supplier account.

    Review whether hosting still meets requirements for storage, traffic, backups, security, performance and support. Compare renewal prices and included services rather than introductory offers alone.

    Check SSL Certificate Status

    Confirm that the certificate is valid, renews automatically, covers required domain versions and produces no browser warnings. HTTP addresses should redirect correctly to HTTPS.

    Review Ownership of Important Accounts

    Confirm business control of the domain, hosting, website, Analytics, Search Console, email, payments, booking tools, advertising, social accounts, backups and security services. Update recovery details and remove former team members.

    Review Licences and Subscriptions

    For every paid theme, plugin or service, record its purpose, renewal date, price, owner and cancellation effect. Do not cancel an unfamiliar service before confirming whether it supports forms, email, security or backups.

    Update Copyright and Business Information

    Check the copyright year, legal business name, address, phone, email, hours, social links, awards, certifications, staff profiles and service areas across templates and repeated elements.

    Review Legal and Policy Pages

    Confirm that privacy, terms, refunds, accessibility and cookie information reflect current business practices, tools, payments, marketing and customer regions. Obtain suitable professional guidance where needed.

    Conduct a Full Content Review

    Decide whether each important page should be kept, corrected, improved, combined, redirected, removed or supported with new content. Check traffic, backlinks and search visibility before deletion.

    Review Website Design and User Experience

    Ask whether the homepage explains the business, services are easy to find, the design represents the brand, calls to action remain relevant and important customer journeys are simple. Small improvements may solve problems without a full redesign.

    Review Performance Against Business Goals

    Compare organic traffic, enquiries, sales, bookings, conversions, landing pages, content, paid campaigns and mobile usage with the previous year. Use findings to set priorities for the next year.

    Problems That Need Immediate Attention

    Some issues should not wait for the scheduled review.

    The Website Becomes Unavailable

    Confirm whether the outage affects everyone, then check the hosting account, uptime monitor and provider status. Avoid several unrelated changes at once because they make the cause harder to identify.

    Browsers Display a Security Warning

    A warning may result from SSL problems, malware or unsafe content. Treat it seriously because visitors may leave and forms or payments may become unsafe.

    The Website Redirects Unexpectedly

    Redirects to advertisements, unfamiliar websites or downloads may indicate compromise. Preserve logs and backups, limit unnecessary changes and obtain technical help.

    Forms Stop Delivering Messages

    Check whether submissions are stored inside the website. Test notifications, spam folders and the sending service, and provide an alternative contact method during the fix.

    Checkout or Booking Stops Working

    Test the process as a customer, review recent changes and connected services, and use approved test modes rather than repeated live payments.

    Important Pages Disappear From Search

    Check noindex settings, canonical URLs, robots rules, server errors and manual actions in Google Search Console. Confirm the live page and sitemap entry.

    Unknown Administrator Accounts Appear

    Investigate immediately. Removing the account alone is not enough; review logs, passwords, connected accounts, vulnerabilities and modified files.

    How to Create a Website Maintenance Log

    A maintenance log records what was checked, what changed and what needs follow-up. It can live in Google Sheets, Excel or a project-management system.

    Useful fields include:

    • Date and website
    • Task and frequency
    • Person responsible
    • Result and changes made
    • Backup reference
    • Issue discovered
    • Follow-up required
    • Completion status

    Keep notes specific. “Updated plugins” is less useful than recording which plugins changed, whether a backup was created and which pages were tested.

    Keep passwords and recovery codes in an approved password manager, not the shared log. Add evidence such as scan results, screenshots, test confirmations and support tickets where it improves accountability. Give every unresolved issue an owner, urgency and expected completion date.

    What Small Businesses Can Manage Internally

    After basic training, internal teams can often review contact information, test forms and links, publish content, check analytics summaries, monitor backup notices, review uptime alerts, manage users and record maintenance work.

    A checklist should not encourage someone to make high-risk changes beyond their experience. Professional help may be appropriate for malware removal, failed updates, backup restoration, migration, database problems, custom code, checkout failures, serious speed issues, redirects and indexing problems.

    When to Hire Website Maintenance Support

    Consider support when nobody owns the website, updates are postponed, backups have not been tested, forms fail regularly, technical alerts are unclear, custom features need care or the team lacks time for regular reviews.

    Ask whether a provider creates backups, tests updates, uses staging, monitors uptime, scans security, tests forms, reviews performance, supplies reports, includes content time and offers emergency recovery.

    Clarify exclusions such as redesigns, custom features, migrations, licences, hosting, malware cleanup, after-hours work, SEO campaigns and legal writing. A useful report should state what was updated, tested, found and recommended rather than merely saying “website checked.”

    Common Website Maintenance Mistakes

    Updating Without a Backup

    Create a current backup before major updates. A backup produced after a problem begins may not provide a clean recovery point.

    Assuming Automated Backups Always Work

    Storage, account and connection problems can silently interrupt backups. Review reports and test restoration.

    Installing Every Update Immediately

    Security fixes deserve prompt attention, but several important updates installed together make troubleshooting harder. Use a controlled order and test afterward.

    Keeping Unused Plugins and Themes

    Unused software adds clutter and may create risk. Confirm dependencies, back up and remove it properly.

    Using One Administrator Account for Everyone

    Create individual accounts with suitable permissions and remove access promptly when no longer needed.

    Checking Only the Homepage

    Test customer journeys, service pages, forms, articles and checkout systems rather than only the first page.

    Relying Entirely on Automated Tools

    Automated tools cannot fully judge whether content and interactions are understandable. Combine them with manual review.

    Ignoring Form Notification Emails

    A success message does not prove that the business received the enquiry. Test delivery on both sides.

    Making Changes Without Documentation

    Record important maintenance work, tests and unresolved issues so later troubleshooting has context.

    Treating Maintenance as an Annual Event

    Annual review cannot replace routine backups, security checks and functionality testing.

    How to Build a Realistic Maintenance Schedule

    Begin with actions that generate revenue, forms that collect leads, services customers depend on, valuable pages, sensitive systems and accounts that control the website.

    Weekly: updates, backup confirmation, uptime, security alerts, critical forms and recent content.

    Monthly: full form and link testing, speed, scans, analytics, Search Console, content accuracy, images and user access.

    Quarterly: restore testing, plugin audit, mobile usability, navigation, calls to action, accessibility, privacy and content performance.

    Annually: domain, hosting, SSL, ownership, licences, business details, policies, full content review, design and strategy.

    Adapt the frequency when the website changes quickly or supports high-risk business processes.

    Frequently Asked Questions

    What Is Website Maintenance?

    Website maintenance is the ongoing process of checking, updating and improving a website so it remains secure, functional, accurate and useful.

    How Often Should a Small-Business Website Be Maintained?

    Backups, security alerts, uptime and critical forms should be checked weekly. Broader performance, analytics, content and SEO reviews can usually be completed monthly or quarterly.

    Does a Small Website Need Maintenance?

    Yes. A small site still depends on hosting, software, domain registration, security and working contact methods. One form failure can cost enquiries.

    Can I Maintain My Own Website?

    Many routine tasks can be managed internally. Malware removal, failed updates, database repair and complex code changes may require professional support.

    What Happens If a Website Is Not Maintained?

    It may develop security vulnerabilities, broken features, outdated content, slow loading and search problems that reduce customer trust and require expensive repairs.

    Are Website Backups Enough?

    No. Backups support recovery but do not prevent vulnerable software, broken forms or inaccurate content. They must also be monitored and tested.

    Should Plugins Be Updated Automatically?

    Automatic updates can help with low-risk software and urgent security fixes, but important components should be backed up, updated and tested through a controlled process.

    What Should a Maintenance Report Include?

    It should show updates, backup status, security results, functionality tests, performance checks, issues found and follow-up recommendations.

    Final Thoughts

    A website maintenance checklist for small businesses turns website management into a consistent process instead of a reaction to emergencies.

    Begin with the tasks that protect security, customer enquiries and revenue. Confirm backups, review updates, monitor uptime and test critical functions weekly. Use monthly and quarterly reviews to examine performance, content, SEO, accessibility and user experience.

    Annual checks should confirm ownership, renewals, policies and the website’s continued alignment with business goals. Keep a maintenance log, assign clear responsibility and seek technical help when a task carries more risk than the internal team can safely manage.

    A maintained website is more dependable, easier to improve and better prepared to support the business over time.